
Related Manuals for LEXIBOOK TAB102


Summary of Contents for LEXIBOOK TAB102
- Page 1 ® Contents and Index page:...
- Page 2 This instruction manual is designed to ensure that you get the most out of the unit and enjoy the best use of all the features and functions it will provide you with. Please read it carefully and keep it in a safe place for future reference.
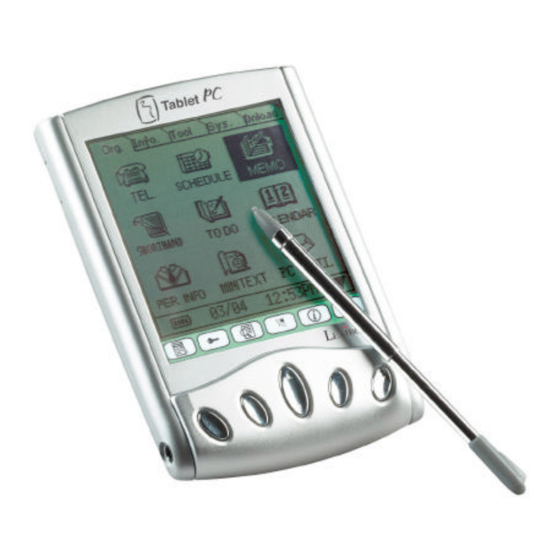
- Page 3 Hotkeys There are 4 Hot Keys on the front of the unit, just below the Shortcut Bar. These are called the Hot Keys. Hot Keys can be configured to perform one touch actions. Such as run the calculator feature without having to use the desktop area.
- Page 4 System, SIM Card, Memory, Date & Time, Password, SyncMan®, Hotkey and My Text Download Downloaded functions and files 1. From the desktop, tap the tab of the folder at the top of the screen to toggle between the 5 menus (see below). Folder icons Highlighted...
- Page 5 After entering a character you can edit it easily. In the top row of the display make sure the cursor is flashing just after the character you have just entered. In the candidate row select the correct character, if it is there.
- Page 6 4. Enter correct login password to go to Main Menu. Note: The unit will take up to 1 minute to re-boot as it has to process data in the memory of the unit. Please wait whilst this process takes place and do not be tempted to keep pressing the ON/OFF button...
- Page 7 Drawpad – allows you to draw pictures and save them. To do – stores a list of “To Do’s”, which can be prioritized and have alarms linked to them. Calendar – will display a month to a view calendar and show and schedules at a glance.
- Page 8 Scroll Bar If the display screen is more than one page a scroll bar will appear on the right hand side of the screen. You may scroll up or down by tapping the up/down arrow or by dragging the scroll box.
- Page 9 Sort by City This allows you to search all the people who are in a particular city. Tap the City name to display a list of cities. Then, select the city to list the names of people who are in this city.
- Page 10 , web site address, Company name, Department, Address, City, State, Zip and Country will be copied into the new record. This reduces the time to input the same data from a group of persons who are from same company or department.
- Page 11 Tap Alarm box to activate Alarm reminder. Then input the time when you want the alarm go on before the appointment time. Repeat: if it is a repeating event, tap the repeat box to set the repeat format. There are 5 repeat types: None, day, week, month or year.
- Page 12 Keyword Search: This allows you to search the keyword across the Notes records. Tap the Search icon in the shortcut bar and then input the keyword you want to search. to start searching. If the record matches with they keyword, the matched wording will be highlighted and displayed.
- Page 13 Note. Editing and record saving is the same as the Shorthand function. 2. Tap to select the desired tool at the bottom of the screen to write or draw; tap the icon at the top right of the screen to turn or change pages.
- Page 14 Organizer folder. Owner information This function allows you to store your own personal information as a reminder or to identify the device as yours. You can also have the device show your name/owner details at start up or device switch on.
- Page 15 It is also possible to turn on the Today function so it automatically appears after you switch on your device. (refer to the set up for this in the Settings folder)
- Page 16 1 is Low, 2 is Normal, and 3 is High priority. Email categories: Tap on the symbol at the furthest top right of the display, next and to the right of the words Move To.
- Page 17 Trash – where, by default, emails that have been deleted are saved, pending a hard deletion. At the bottom of the display, to the left, is shown how many emails are unread and to the right how many total emails exist.
- Page 18 3.If you want to read a certain part of the file, from a certain point, you can tap at the lower right corner to pull down a percentage menu. Tap on a percentage and the file will jump to the relevant point in the E-Book.
- Page 19 At the top right of the display are two arrows . Tapping on these you can cursor either up or down the word list from the home language. The left arrow = up and the right arrow = down. To return to the word entry screen tap on In the word entry screen the editing functions are the same as the other main applications.
- Page 20 Other calculator functions and systems are the same as a standard calculator. You can calculate percentages, retrieve amounts form the memory and add them to results already on the display and so to leave the application.
- Page 21 To save power, your handheld will switch off automatically if there is no activity after a certain period. The auto-off period is set to a default of 3 minutes. Use the drop down list to change this. 3. EL Auto-off period To save power, EL backlight will be switched off automatically, if there is no activity after a certain period.
- Page 22 1 minute whilst the unit re-initialises and turns on. Tap on the SIM card icon If your sim is protected with a pin number you will first have to enter this. From the following display tap in the pin number:- There will be a pause whilst the unit reads the data on the SIM card.
- Page 23 In this application you can also delete files and data. File deletion: Tap on the “delete file” button. This will take you to the file list screen. At the top right of this screen is a category selection icon Tap the category box to select the type of file you wish to delete Highlight the file you want to delete and tap the “Delete file”...
- Page 24 There are two password setting available in this device to protect your records (as illustrated): 1. Login password This activates the login password. Every time you start the unit or turn it on you will need to input your password. 2. Record password This activates the record password.
- Page 25 Synchronising and Transferring Files. Connect the PC to your device with the PC Link cable provided. Plug the small round jack into the port on the TAB100 series and the “D” shaped 9 pin plug into a free and available COM port on the PC.
- Page 26 The icon is animated and shows that a transfer is taking place. If the icon locks up or the animation stops this could indicate a lack of communication between the device and the PC. You can press the cancel button on the display to stop the transfer and then start again.
- Page 27 You will be taken back to the file listing screen. The editing functions are the same as the other applications discussed earlier. to leave the Hot Key application and return to the Settings folder.
- Page 28 You may re-position the downloaded applications into different folders according to your needs. This is done by tapping on an icon in the folder and holding the stylus on the icon. Then drag the icon onto the tab of the folder you wish to place the application in.
- Page 29 TabletPC is a registered trademark of Lexibook Group SA and will be protected at all times from unauthorised usage. Lexibook is a registered brand name of Lexibook Group SA. SyncMan is a registered trade mark of Lexibook Group SA.
- Page 30 General Chapter 6..........28 Batteries ..........28 Conversion Battery care ........28, 29 Entering amounts........20 Care and safety of the TAB100 ....28 Select category ........20 Country of manufacture......29 Electrostatic shocks........ 29 damage.......... 29 Specifications ......... 29 Date Indicator ..........
- Page 31 Log file ..........16 Login password ........24 Reading a text file ........16 Password activation........ 24 Transferring text files from the PC ... 16 Password deletion ........25 My Text Password hints........25 Creating and editing files ......26 Password types ........
- Page 32 19 SIM card access ........22 Unit Conversion application ..... 20 Transfer additional data only ....23 Translator Transferring data form the TAB100 to a SIM Input language ........19 card ............23 Input words ..........19 Soft Reset ...........
- Page 33 Virtual Keyboard .........4 Virtual Keyboard Picture .......4...
Need help?
Do you have a question about the TAB102 and is the answer not in the manual?
Questions and answers