Table of Contents
Advertisement
Available languages
Available languages
Quick Links
Advertisement
Table of Contents

Related Manuals for Baumatic BMEDW12I


Summary of Contents for Baumatic BMEDW12I
- Page 1 Dishwasher / User Manual BMEDW12I...
- Page 2 You can find your local distributor on our website at www.baumatic-mea.com and click on ‘where to buy’ from the menu. For customers within the U.A.E, your Baumatic appliance is covered by a 2 year parts and labor warranty. Baumatic Middle East General Trading LLC P.O BOX 393720...
-
Page 3: Table Of Contents
CONTENTS 1.SAFETY INSTRUCTIONS ....................1 1.1. General Safety Warnings ....................1 1.2. Installation Warnings .....................1 1.3. During Use........................2 2.INSTALLATION ......................... 6 2.1. Machine Positioning .....................6 2.2. Water Connection ......................6 2.3. Water Inlet Hose ......................6 2.4. Drain Hose........................6 2.5. Electrical Connection ....................7 3.TECHNICAL SPECIFICATIONS .................. - Page 4 8.CLEANING AND MAINTENANCE ................. 17 8.1. Cleaning the Machine and Filters ................17 8.2. Spray Arms ........................17 9.TROUBLESHOOTING ....................18 10.PRACTICAL INFORMATION ..................20 11.THE PRODUCT FICHE ....................21...
-
Page 5: Safety Instructions
1. SAFETY INSTRUCTIONS 1.1. General Safety Warnings • Read these instructions carefully before using your appliance and keep this manual for future reference. Please check the packaging of your machine before installation and the outer surface of the machine once the packaging has been removed. Do not operate the machine if it appears damaged or if the packaging has been opened. -
Page 6: Installation Warnings
1.2. Installation Warnings • Choose a suitable and safe place to install your machine. • Only original spare parts should be used with the machine. Unplug the machine before installation. Your machine must only be installed by an authorised service agent. Installation by anyone other than an authorised agent may cause your warranty to be void. - Page 7 • it for other purposes. Commercial use will void the guarantee. Do not stand, sit or place loads on the open door of the dishwasher. Only use detergents and rinse aids produced specifically for dishwashers. Our company is not responsible for any damage that may occur due to misuse.
- Page 8 be performed by an authorised service company, otherwise the warranty will be void. Before repair work, the machine should be disconnected from the mains. Do not pull the cable to unplug the machine. Switch off the water tap. Operation at a low voltage will cause a decline in performance levels.
- Page 9 CE Declaration of Conformity We declare that our products meet the applicable European Directives, Decisions and Regulations and the requirements listed in the standards referenced. Disposal of your old machine The symbol on the product or on its packaging indicates that this product may not be treated as household waste.
-
Page 10: Installation
2. INSTALLATION new hose before connecting. 2.1. Machine positioning WARNING: Connect the hose directly to the water inlet tap. The pressure When positioning the machine, place it in supplied by the tap should be a minimum an area where dishes can be easily loaded of 0.03 MPa and a maximum of 1 MPa. -
Page 11: Electrical Connection
2.5. Electrical connection WARNING: Your machine is set operates at 220-240 V. If the mains voltage supply to your machine is 110 V, connect a transformer of 110/220 V and 3000 W between the electrical connection. The earthed plug of the machine must be connected to an earthed outlet supplied by suitable voltage and current. -
Page 12: Technical Specifications
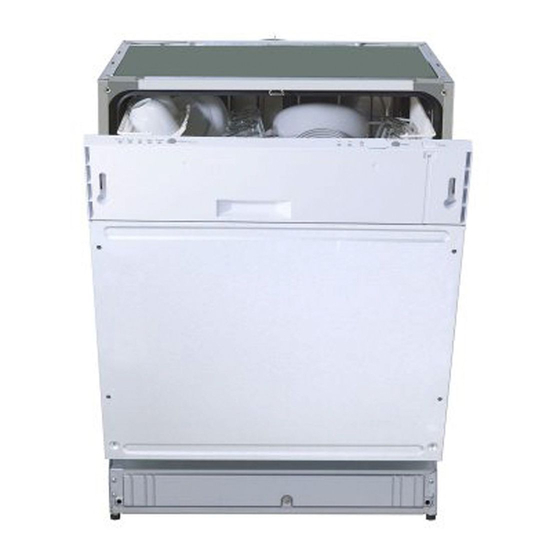
3. TECHNICAL SPECIFICATIONS 3.2. Technical specifications 12 place Capacity settings Dimensions Height 820-870(mm) Width 598(mm) Depth 570(mm Net weight 38 kg Operating 230-240V 50 voltage / frequency Total 10(A) current (A) Total power 1900(W) 3.1. General appearance 1. Upper basket with racks Maximum: 2. -
Page 13: Before Using The Appliance
4. BEFORE USING a short washing program to protect your machine against corrosion. THE APPLIANCE 4.1. Preparing your Dishwasher for first use • Check whether the electricity and supply water specifications match the values indicated in the installation instructions for the machine. •... -
Page 14: Test Strip
4.3. Test Strip Run water Keep the Shake the Wait Set the hardness level of through tap strip in strip. (1min.) your machine. (1min.) water (1sec) NOTE: Level is set 3 as default. If the water is well water or has a hardness level above 90 dF, we recommend that you use filter and refinement devices. -
Page 15: Filling The Detergent
4.8. Filling the detergent In order to change the rinse aid level, follow the below steps before turning on Push the latch to open the dispenser and the machine: pour in the detergent. • Push the programme button and hold it Close the lid and press it until it locks in down. -
Page 16: Loading Your Dishwasher
Top basket 5. LOADING YOUR DISHWASHER Fixed Rack Upper basket racks have two positions: For best results, follow these loading open (a) and closed (b). You can place guidelines. cups on the racks to be washed. You can We recommend that you place large items also place long forks, knives and spoons on (pots, pans, lids, plates and bowls) which the racks laterally. -
Page 17: Alternative Basket Loads
5.2. Alternative basket loads • Forks, spoons and knives with wooden, bone, ivory or nacrecoated handles; Lower basket glued items, items soiled with abrasive, acidic or base chemicals. • Temperature-sensitive plastics, copper or tincoated containers. • Aluminium and silver objects. •... -
Page 18: Programme Table
6. PROGRAMME TABLE Detergent A: 5cm³ Duration Programme Description B1: 15cm³ (min) B2: 25cm³ Intensive A+B2 For heavily soiled dishes. Super 50’ A+B2 For normally soiled, daily-used dishes with a faster programme. A+B2 Standard programme for normally soiled, daily-used dishes. (Reference) Prewash To rinse dishes that you plan to wash later. -
Page 19: The Control Panel
7. THE CONTROL PANEL Open the door and press the Programme Selection button to select a new programme. After closing the door, the new programme will resume the Press the Power On/Off button (1), the End course of the old programme. Of Programme Indicator (3) will illuminate. - Page 20 NOTE: If the door of the machine is opened or the power is cut during operation, the programme will continue when the door is closed or the power returns. NOTE: If the power is cut or the machine door is opened during drying, the program will terminate.
-
Page 21: Cleaning And Maintenance
8. CLEANING AND the filters. Replace the filter insert, and MAINTENANCE rotate it clockwise (4). • Never use your Dishwasher without a Cleaning your Dishwasher is important filter. to maintain the machine’s service life. • Incorrect fitting of the filter will reduce Oil and lime may build up in your the washing effectiveness. -
Page 22: Troubleshooting
9. TROUBLESHOOTING FAULT POSSIBLE CAUSE TROUBLESHOOTING Your Dishwasher is not plugged in. Plug your Dishwasher in. Switch your Dishwasher on by pressing the Your Dishwasher is not switched on. On/Off button. Fuse blown. Check your indoor fuses. The programme does not start. - Page 23 FAULT POSSIBLE CAUSE TROUBLESHOOTING Use the correct amount of detergent, as Not enough detergent used. instructed in the programme table. Rinse aid dosage and/or water Increase rinse aid and/or water softener softener setting set too low. level. Whitish stains remains on dishes.
-
Page 24: Practical Information
AUTOMATIC FAULT WARNINGS AND WHAT TO DO TROUBLE CODE POSSIBLE FAULT WHAT TO DO Make sure the water inlet tap is open and water is flowing. Insufficient water Separate the inlet hose from the tap and clean the filter of the hose. Contact for service if the error continues. -
Page 25: The Product Fiche
11. THE PRODUCT FICHE Supplier's trade mark BAUMATIC Supplier's model D E F 4 1 1 3 Capacity of dishwasher The energy efficiency class Annual energy consumption in kWh per year (AEc) ( 280 Cycle )* Energy consumption (Et) (kWh per cycle) - Page 26 52231190 R24...
- Page 27 أ ق ت ا د...
- Page 28 ت ا ......................• ................... • ت ﻡ وا ﻡ ﻡ ت ا ....................• ..................• ................... • ..................... • ا ﺕ آ ........................
- Page 29 .ﻧﺷﻛرك ﻟﺷراﺋك اﻟﻣﻧﺗﺞ اﻟﻣﻧزﻟﻲ ﺑوﻣﺎﺗك ﻋﺎﻟﻲ اﻟﺟودة. ﻧﺣن ﻧﻌﺗز ﺑﺗﻘدﯾم ﻣﻧﺗﺟﺎت ذات ﺟودة ﻋﺎﻟﯾﺔ ﻣﻊ ﻣﺳﺗوى ﻋﺎل ﻣن ﺧدﻣﺔ اﻟﻌﻣﻼء .ﻟﻌﻣﻼء ﺧﺎرج دوﻟﺔ اﻹﻣﺎرات اﻟﻌرﺑﯾﺔ اﻟﻣﺗﺣدة, اﻟرﺟﺎء اﻹﺗﺻﺎل ﻋﻠﻰ اﻟﻣوزع اﻟﻣﺣﻠﻲ ﻷﺟﮭزة ﺑوﻣﺎﺗك . .ﻓﻘط اﻧﻘر ﻋﻠﻰ 'ﻣﻛﺎن اﻟﺷراء "ﻣن اﻟﻘﺎﺋﻣﺔwww.baumatic-mea.comﯾﻣﻛﻧك اﻟﻌﺛور ﻋﻠﻰ اﻟﻣوزع اﻟﻣﺣﻠﻲ اﻟﺧﺎص ﺑك ﻋﻠﻰ ﻣوﻗﻌﻧﺎ اﻹﻟﻛﺗروﻧﻲ...
- Page 30 وحدة التجفيف: يوفر هذا النظام .أداء تجفيف أفضل ألطباقك...
- Page 31 المواصفات الفنية 21 طقم من أدوات المائدة السعة 028-078 ملم االرتفاع 895 ملم العرض ملم العمق 83 كجم الوزن الصافي 042-022 فولت، 05 هرتز مدخل الكهرباء 0091 واط الطاقة الكلية 0081 واط طاقة التسخين 001 وات طاقة الضخ 03 واط طاقة...
- Page 32 معلومات السالمة والتوصيات التدوير .• بعض مكونات الغسالة وغالفها م ُ صنع من مواد قابلة إلعادة التدوير • يوجد على األجزاء البالستيكية عالمات باالختصارات ،PS ، بولي سترينPE الدولية التالية: بولي إيثلين .PP، بولي بروبلينPOM بولي أوكسي ميثلين • األجزاء الكرتونية م ُ صنعة من ورق م ُ عاد تدويره ويجب التخلص .منها...
- Page 33 .وفق ا ً لإلرشادات أم ال • يجب أن تطابق جميع التوصيالت الكهربائية .القيم الم ُ شار إليها ببطاقة التصنيف • أحترس وتأكد من أن عدم وضع الغسالة فوق الكابل .الذي يمد الغسالة بالكهرباء • ال تستخدم مطلق ا ً سلك للتطويل أو مقبس متعدد الوصالت لصنع...
- Page 34 علم بتعليمات استخدام الغسالة بطريقة آمنة ويفهمون .األخطار التي قد تنتج عنها. ال يجب لألطفال اللعب بالغسالة .ال يجب لألطفال تنظيف وصيانة الغسالة بدون إشراف • ال تضع في الغسالة أشياء ال تتناسب مع عملية غسيل األطباق. وأيض ا ً ال تمأل السلة فوق طاقتها.الشركة غير مسئولة عن...
- Page 35 :لسالمة األطفال • بعد نزع تغليف الغسالة، تأكد من أن مواد .التغليف بعيدة عن متناول األطفال .• ال تسمح لألطفال باللعب أو تشغيل الغسالة .• ت ُ حفظ المنظفات ومواد الشطف بعيد ا ً عن متناول األطفال • ال تجعل األطفال يقتربون من الغسالة أثناء فتحها فقد .يكون...
- Page 36 الملمعة أو الدهانات أو المواد الكيميائية .أو المواد المخلوطة بالحديد • األشواك والمالعق والسكاكين ذات المقابض الخشبية أو ،العظمية أو العاجية أو الصدفية؛ أو العناصر الملصقة بالغراء .أو العناصر المتسخة بمواد كاشطة أو حمضية أو قلوية • األشياء البالستيكية غير المقاومة للحرارة .والحاويات...
- Page 37 .الموجودة على الغالف إلخراج الغسالة من تغليفها ضع الغسالة بالقرب من صنبور مياه و مصرف مياه. عند اختيار مكان .الغسالة ضع في اعتبارك بأنه لن يتم تغير أي توصيالت يتم تنفيذها .ال تقم بشد باب الغسالة أو لوحتها لتحريكها أحرص على ترك مساحة خالية حول جميع جوانب الغسالة .لتتمكن...
- Page 38 خرطوم اإلمداد بالمياه ال تستخدم خرطوم اإلمداد بالمياه الموجود بغسالتك القديمة إن وجد. واستخدم خرطوم اإلمداد بالمياه الجديد المرفق مع غسالتك الجديدة بد ال ً منه. عند توصيل خرطوم مياه جديد أو خرطوم لم ي ُ ستخدم منذ فترة طويلة بغسالتك،...
- Page 39 خرطوم تصريف المياه يمكن توصيل خرطوم تصريف المياه إما بفتحة صرف المياه مباشرة أو بمنفذ تصريف الحوض. باستخدام أنبوبة مقوسة خاصة (إذا توفرت)، يمكن تصريف المياه مباشرة من خالل تعليق األنبوبة المقوسة على حافة الحوض. يجب أن يكون ارتفاع هذه الوصلة 05 سم على األقل وبحد .أقصى...
- Page 40 التوصيل الكهربائي يجب توصيل القابس األرضي بمنفذ أرضي لإلمداد بالكهرباء .)مناسب من حيث الجهد (الفولت) وشدة التيار (األمبير إذ لم يكن لديك وصلة أرضية، أحضر كهربائي متخصص لتركيب وصلة أرضية. في حالة االستخدام بدون وصلة .أرضية، الشركة غير مسئولة عن أي خسارة قد تحدث .يجب...
- Page 41 و ة ا ام ا اﺱ • • • • • ام ﺱ إ اد ا ﻡ ا ء إزا ا أه ا ق ﻡ ء ا ام ول ا ﺱ ء ق ﺏ وق ا أﻡ ء ﻡ ة...
- Page 42 ﺷﺮﻳﻂ اﻻﺧﺘﺒﺎر وﻟﻬﺬا اﻟﺴﺒﺐ، ﺗﻢ ﺗﺠﻬﻴﺰ ﺟﻬﺎزك ﺗﻌﺘﻤﺪ ﻓﻌﺎﻟﻴﺔ اﻟﻐﺴﻴﻞ ﺑﺠﻬﺎزك ﻋﻠﻰ درﺟﺔ اﻧﺴﻴﺎﺑﻴﺔ ﻣﻴﺎﻩ اﻟﺼﻨﺒﻮر وﺗﺰﻳﺪ ﻓﻌﺎﻟﻴﺔ اﻟﻐﺴﻴﻞ ﻋﻨﺪﻣﺎ ﻳﺘﻢ ﺿﺒﻂ اﻟﻨﻈﺎم ﺑﻨﻈﺎم ﻳﻘﻠﻞ درﺟﺔ اﻟﺘﻌﺴﺮ ﻓﻲ ﻣﻮرد اﻟﻤﻴﺎﻩ اﻟﺮﺋﻴﺴﻲ ﻣﻨﻄﻘﺘﻚ، اﺗﺼﻞ ﺑﻬﻴﺌﺔ اﻟﻤﻴﺎﻩ اﻟﻤﺤﻠﻴﺔ وﻟﻠﺘﺤﻘﻖ ﻣﻦ ﻣﺴﺘﻮى ﺗﻌﺴﺮ اﻟﻤﻴﺎﻩ ﻓﻲ ﺑﺎﻟﺼﻮرة...
- Page 43 ضبط معدل استھالك الملح اضبط منعم المياه وفقا لمستوى صالبة مياه الصنبور بعد إعادة ضبط الغسالة، اضغط على زر اختيار البرنامج واستمر في الضغط عليه إيقاف التشغيل قم بتشغيل الغسالة بالضغط على زر التشغيل مؤشر نھاية البرنامج احتفظ بز اختيار البرنامج مضغوطا إلى أن يتم تشغيل وإطفاء المتوالية "...
- Page 44 ام ا اﺱ وق ا ﻡ ء ا آ ا ت ام ه ا ا ع ﻡ ا اﺱ ﻡ ا ﺕ ط ا ا • • • • • • •...
- Page 45 ﺏ ام ا ا ﺱ ﺕ ت ا آ ام ا اﺱ ا • • • • 11.4. ملء مادة الشطف المساعدة وضبط اإلعدادات لملء صندوق مادة الشطف المساعدة، افتح غطاء الصندوق المخصص لها. وامأل الصندوق بمادة الشطف المساعدة إلى أقصى .) ثم...
- Page 46 المؤشر جرعة مادة التبييض المستوى . على الشاشةr1 يظهر المؤشر ال يتم توزيع مادة الشطف المساعدة . على الشاشةr2 يظهر المؤشر يتم توزيع جرعة واحدة . على الشاشةr3 يظهر المؤشر يتم توزيع جرعتين . على الشاشةr4 يظهر المؤشر يتم توزيع 3 جرعات ....
- Page 47 ا ت ا ﺡ ا ا ا ا...
- Page 48 ت ﺥ ﺡ مالحظة ھامة لمختبرات الفحص في بريدك التالي بالعنوان االتصال يرجى ،األداء اختبارات عن مفصلة لمعلومات “ dishwasher@standardtest.info ” . ." الموجود على باب الجھاز رقم اإللكتروني، نرجو تزويد رقم الموديل والرقم المتسلسل...
- Page 49 مواصفات البرنامج بنود البرنامج المرجع رقم البرنامج الغسيل التحضيري Eco (P3) (P2) دقيقة Super 50 درجة (P1 ) 65 مكثف أسماء البرامج ودرجة بدون حرارة درجة مئوية مئوية الحرارة غسيل تحضيري لشطف قھوة ولبن وشاي ووجبات قھوة ولبن وشاي ووجبات حساء...
- Page 51 تشغيل الغسالة واختيار البرامج عندما تقوم باختيار برنامج ما بواسطة زر اختيار البرنامج، فسوف يعمل تشغيل الغسالة ضوء البرنامج المختار وينطفيء مؤشر نھاية البرنامج إيقاف عند الضغط على زر التشغيل التشغيل، فإن مؤشر نھاية البرنامج يضيء إيقاف التشغيل اضغط على مفتاح التشغيل اختر...
- Page 52 تغير البرامج مع إعادة الضبط غاء برنامج أثناء استئناف برنامج غسيل إذا أردت إل سوف يضيء ضوء آخر افتح باب الغسالة برنامج تم اختياره مؤشر ثوان احتفظ بزر اختيار البرنامج مضغوطا لمدة نھاية البرنامج يومض وينطفيء ضوء البرنامج تقوم تبدأ عملية التصريف بعد أن يتم غلق باب الغسالة عند...
- Page 53 وا ا اﺽ ه ا ات دور ﻡ ا ﺕ ه ا ا اآ ﺡ ء ا داﺥ وا اآ ا ا ازل داﺥ ﺏ ب ا ﺕ ا ﺕ ا ﺵ ت • • •...
- Page 54 أذرع ا ﺵ ش م ﻡ ﺵ ا...
- Page 55 رموز المشكالت وماذا تفعل في حالة المشكالت الحل وصف الخطأ رمز الخطأ تأكد من أن منفذ المياه مفتوحا بالكامل وعدم وجود انقطاع مياه إمداد المياه غير مالئم • أغلق صنبور منفذ المياه، وافصل خرطوم منفذ المياه من الصنبور • اية توصيل الخرطوم ونظف...
- Page 56 أ ا إذا ا آ • ات ا ا ا ا • ح ا ر أن آ • ق ﺏ ب ا إ آ • إی ف ا زر ا ﺏ ا إی ف آ • ودة و ﺵ ت ا ا...
- Page 57 ق ا ی ﺕ إذا • • • ق ا إذا آ ن ه ك ﺏ ﺹ أ • • • • • ؛ ﺹ ﺏ ﻡ ﻡ ح ا ب ا ب زن ء و • • • • ط...
- Page 58 خصائص المنتج العالمة التجارية الموديل سعة غسالة األواني فئة فعالية الطاقة االستهالك السنوي للطاقة بالكيلواط 0,90 كيلو واط لكل دورة استهالك الطاقة استهالك الطاقة في وضع ايقاف بالواط 0.50 بالواط تشغيل استهالك الطاقة في وضع 1.00 دورة استهالك السنوي للماء بالتر لكل سنة 3360 فئة...
Need help?
Do you have a question about the BMEDW12I and is the answer not in the manual?
Questions and answers