Advertisement
Advertisement
Table of Contents

Subscribe to Our Youtube Channel
Related Manuals for Brandt BT813HQA


Summary of Contents for Brandt BT813HQA
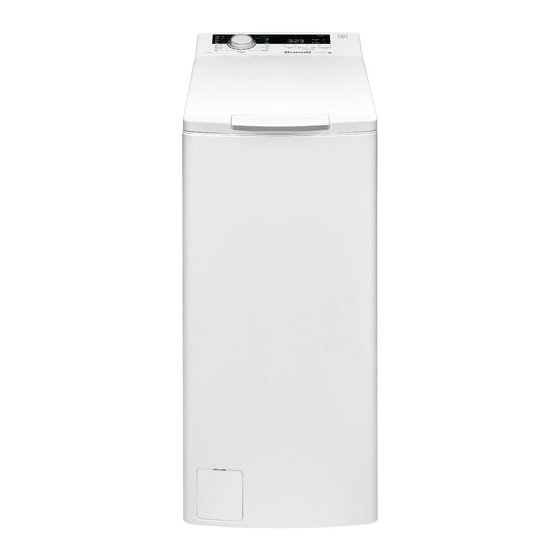
- Page 1 GUIDE TO INSTALLATION AND USE Washing Machine BT813HQA...
-
Page 2: Table Of Contents
CONTENTS Safety instructions ..................2 Installation ..................... 5 Operation ....................12 Maintenance operations ................22 Troubleshooting ..................25 Availability of spare parts ................27... -
Page 3: Safety Instructions
Safety instructions This appliance is designed to be used for domestic and similar applications such as: kitchen areas for staff in shops, offices and other professional premises, farms, use by hotel, motel and other residential clients, B&B type environments. The appliance must be connected to the mains water ... - Page 4 Maximum water supply pressure: 1 MPa Minimum water supply pressure: 0.1MPa Warning! Product installation This washing machine is intended for indoor use only. It is not designed for built-in installation. Never obstruct the openings. This washing machine must not be installed in bathrooms, ...
- Page 5 Do not close the door using excessive force. If the door is hard to close, make sure that the drum is not overloaded and that the laundry is properly distributed. Do not wash carpets. Operation of the appliance Use of inflammable and explosive solvents is prohibited.
-
Page 6: Installation
Installation Description of the product Power cord Door Detergent compartment Drum Control panel Drain hose Filter Note! The illustration of the accessories is provided for reference purposes only. Please refer to the actual product. - Page 7 Accessories Transit bolt Cold water Drain hose User guide hole covers supply hose holder Installation location Warning! It is important that the product is stabilised to prevent it from moving! Ensure that the appliance is not resting on the power cord. ...
- Page 8 Unpacking the washing machine Warning! Packaging materials (e.g. plastic film, polystyrene) can be hazardous to children. There is a suffocation hazard! Keep all packaging materials away from children. Remove the cardboard box and the polystyrene wrapping. Lift the washing machine and remove the packaging under it.
- Page 9 Fit the acoustic foam Note! Fitting acoustic foam helps to reduce noise when the washing machine is in use. Place your washing machine on one of its sides, making sure you protect the floor. Affix the foam as shown on the diagram, using the correct dimensions.
- Page 10 Proceed as follows to remove the transit bolts: Use a spanner to loosen the four transit bolts then pull them out. Push the four transit bolt cover caps provided for this purpose into the holes. Keep the transit bolts in a safe place for future reuse.
- Page 11 Connecting the Water Supply Hose Warning! Follow the instructions in this section to avoid water leaks or water damage. Don't twist, squash, modify or cut the water supply hose. Connecting the water supply hose to a threaded tap Threaded tap and water supply hose Connect the other end of the water supply hose to the water supply valve located on the back of the washing...
- Page 12 Drain hose Warning! Do not twist or extend the drain hose. Position the drain hose correctly. If you do not perform this operation correctly a water leak may occur. Note! If the washing machine is provided with a drain hose holder, install it as follows:...
-
Page 13: Operation
Warning! When you install a drain hose, attach it properly using a cord. If the drain hose is too long, never attempt to insert part of it into the washing machine by forcing it as this will cause unusual noises. - Page 14 Warning! Make sure that the hook on the drum door is engaged to ensure that the door closes properly. Check the bearings under the hook before each wash. They must run freely. Washing 3. Start the 1. Select the 2.
- Page 15 Before every wash Always read the washing labels on garments and the explanations on how to use the detergent before washing. Choose detergent that produces little or no foam for optimum washing and to avoid any overflowing. Refer to the instructions provided by the detergent maker as shown on the detergent packaging.
- Page 16 Type of fabric Programme Detergent White cotton Detergent with whitening product Cotton temp. ≤ 90°C Colours made of linen or Colours without whitening product Cotton temp. ≤ 60°C cotton Mixed fibres Colour wash Mixed temp. ≤ 60°C Synthetics Colour/delicate wash Synthetics temp.
- Page 17 Programme Programme Hygiene Spin Cotton Rinse and Spin 20°C Baby care Mixed Sport Wool Duvet Synthetics Rapid 45’ Eco 40-60 Flash 15’ Drum clean Must Do Optional Washing products Use washing products designed specially for washing machines: • Powdered detergents for all kinds of textiles except delicate ones. For these detergents, we recommend first diluting them with some water to avoid clogging the detergent pipe causing water to overflow when washing starts.
- Page 18 The control panel 1 Programme dial You can select the programme of your choice to match your washing requirements. 2 Spin By default, a spinning speed associated with the programme is proposed. You can modify it by pressing the Spin button. 3 Temperature / Delayed start.
- Page 19 Warning! • To change a setting after starting the washing cycle, turn the programme dial to the OFF position. Select the programme, the spin speed and the options again, then press the Start / Pause button. (Ensure that the child safety function is disabled or the initially selected programme will continue to run.) •...
- Page 20 Child Lock This function locks the buttons so that the current programme cannot be changed especially if a child plays with the keys. Press Temp / and Options at the same time for 3 seconds, until the icon appears. The display alternately shows CL and the time remaining. Warning! ...
- Page 21 Programmes The programmes are adapted to the kind of laundry. This programme is used to very quickly wash a small load of laundry Quick 15’ that is not very dirty. This programme is used to quickly wash a usual load of laundry that Rapid 45’...
- Page 22 Options table • The product is tested in accordance with the Hong Kong Code of Practice on Energy Labeling of Products 2020; IEC 60456:2010 standards. • Half load for 8.0kg machine is 4.0kg.
-
Page 23: Maintenance Operations
Maintenance operations Cleaning and Care Warning! Always switch off the appliance and turn off the water tap before any maintenance operations. Cleaning the Exterior of your Washing Machine Suitable maintenance will optimise the service life of your washing machine. Appliance surfaces can be cleaned with neutral non-abrasive detergents diluted where necessary. - Page 24 Cleaning the water supply hose filter Note! If there is hardly any water in the appliance and the tap is open, then the water supply hose filter needs to be cleaned. Close the tap Remove the Water Inlet Hose from the tap. Clean the filter.
- Page 25 Cleaning the detergent compartment If you observe any dirtying of the detergent drawer, clean it. To do this: Remove the detergent drawer by pressing the arrow on the softener compartment (shown as A below). Clean with water. Put the compartment back. Note! Do not use alcohol, solvents or chemicals to clean the ...
- Page 26 Cleaning the drain pump filter Warning! Beware of hot water! Disconnect the appliance to avoid any electric shock hazard. The drain pump filter filters out lint and other small debris present in the laundry. Clean the filter regularly to ensure proper washing machine operation.
-
Page 27: Troubleshooting
Troubleshooting The washing machine cannot start up or stops during operation. First attempt to solve the problem. If you cannot, then contact the service centre. -
Page 28: Availability Of Spare Parts
Note! Once this check is complete, start the appliance. If the problem occurs again or if the error codes are displayed again, contact your after-sales service. Any attempt made by the user or a non professional to repair the appliance may affect user safety and void the appliance warranty. - Page 29 Rated power capacity (I * d * h mm) 8.0kg 400*610*875 BT813HQA 56kg 2000W SERVICING AND REPAIRS Any repairs that are made to your appliance must be handled by a qualified professional authorised to work on the brand. When calling, please provide the full references of your appliance [commercial reference, service reference, serial number), so that we can handle your call more efficiently.
- Page 30 This symbol on the product or in the instructions means that your electrical and electronic equipment should be disposed at the end of its life separately from your household waste. There are separate collection systems for recycling in the European Union. For more information, please contact the local authority or your retailer where you purchased the product.
Need help?
Do you have a question about the BT813HQA and is the answer not in the manual?
Questions and answers