
Subscribe to Our Youtube Channel
Related Manuals for CO-Z ADSW4


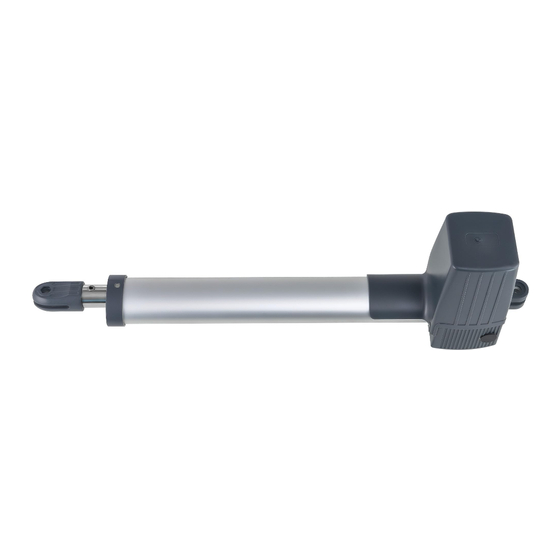
Summary of Contents for CO-Z ADSW4
- Page 1 V20231205 Swing Gate Opener User Manual Read Carefully Before Use Keep for Future Reference...
-
Page 2: Safety Information
1. Safety Information General Safety • Read these instructions completely before installation and use. Provide them to any technician used to install, maintain, or repair this device and provide them with the device if it is ever given or sold to a third party. •... -
Page 3: Specifications
• Provide robust protection for the control box power cable. Use PVC conduit or other similarly sturdy material. • NEVER allow children to play on or around this device or its attached gate. Keep controls away from children and out of their reach at all times and warn them of the gate’s danger. •... - Page 4 2.1 Package List (Standard) Illustrations Items Qty. Actuators Manual Release Key Remote Controls Control Box with Casing Post Brackets Gate Brackets Post Pivot Brackets Actuator Tip Bolts (short) Actuator End Bolts (long) Screw M8×25 Nut M8 Limit Stop Wired Photocells...
-
Page 5: Installation
3. Installation Overview Push-to-Open Refer to the diagram above for where things should be. Note that there are too ways to install the actuators: push-to-open and pull-to-open. Each way only works properly with the limit stop properly installed (L). 1 Control Box Property Outside 2 Actuator 3 Gate... - Page 6 Installation Preparation Required Tools • Power Drill/Hammer Drill • M8 Drill Bits • M8 Bolts & Nuts× 4 • M8 Expansion Bolts & Nuts× 8 • Tape Measure • Adjustable Wrenches • Wire Strippers • Spirit Level • Hacksaw or Heavy-Duty Bolt Cutters •...
- Page 7 Referring to the diagram above, check that: • Both your gate leaves have a horizontal beam sturdy enough to bear the push and pull of the actuator. Ideally the beam should be metal or solid wood at least. • The post on which the gate is mounted has a sturdy structure and provides drillable surface facing the inside of your property.
- Page 8 2. Determine the mounting positions and for the post brackets and gates bracket referring to the diagrams below, which show the maximum opening angle for a given horizontal (B) and vertical (A) distance between bracket joints and gates in millimeters. Note: Limit stop must be installed...
- Page 9 This limit stop is not included. Purchase one that can handle the weight of your gate. Note: Limit stop must be installed Note that the post pivot bracket can be installed in the following fashion. Choose one that works with your specific gates and post.
- Page 10 3. Mark the positions of the post brackets and gate brackets on the post and gate beam using your marker (not included). 4. Repeat Step 2–3 for the other actuator. Positioning the Brackets 1. Press the gate brackets on the beam and the post brackets referring to the marks you have made above.
- Page 11 M8 Bolts 4. Drill a hole through each mark that you made for the gate bracket using a power drill. 5. Bolt the gate bracket to the gate using your regular M8 bolts and adjustable wrench. 6. Repeat Step 1–5 for the other gate bracket and post brackets.
- Page 12 Installing the Limit Stops For Push-to-Open installation, refer to the diagram below for where the limit stop should be installed. This limit stop is not included. Purchase one that can handle the weight of your gate. Limit Stop For Pull-to-Open installation, refer to the diagram below for where the limit stop should be installed. Limit Stop...
- Page 13 Mounting the Control Box Pre-Mounting Check Check that: • The gate will not enter or obstruct ANY public area once its movement is automated. If this is impossible for your location, get specific approval from the relevant authority. Post clear warnings and take every protective measure necessary so the gate will not risk accidents or block any public right of way. • The location for your control box is within sight of the gate but at least 6 feet (2 m) from any moving part.
- Page 14 Wiring Circuit Board Diagram NEVER make electrical connections while your power supply is active. Turn off your AC power or disconnect your battery terminal(s) during any wiring adjustment. Adjustment Signal Buttons Terminal Alarm X6 Terminal Digital Display X5 Terminal Adjustment Knobs X4 Terminal X2 Terminal X1 Terminal X3 Terminal...
- Page 15 Terminals Pins Descriptions X1 Terminal AC24VIN 24V AC input +SOLAR- Solar battery input and output X2 Terminal +BATT- 24V DC input and output FORCE Obstruction sensitivity adjustment Adjustment Knobs SLOW DOWN Stop distance adjustment SPEED Speed adjustment MOTOR1 Motor 1 input and output MOTOR2 Motor 2 input and output X3 Terminal...
- Page 16 Power Options • If you will be using AC power, connect the provided cord or your extension to the main power terminal. This small white box runs to a 10A fuse and 24V transformer which should be prewired to the part of the circuit board's X1 terminal marked AC24VIN.
- Page 17 Secondary Operator Main Operator Optional Keypad • Double check that the wire from the remote control antenna is securely connected to the ANT pin on the X6 terminal. Wiring a Keypad • If your gate will have a separate keypad entry system, follow its separate instructions for installation and connect its wiring to the X5 terminal.
- Page 18 Initial Testing Setting Dual Actuators • Your system should come correctly preprogrammed to work as a single operator for a single gate or as paired operators for two separate gate leaves. 1. To confirm this before testing the gate, press the PROG button until the digital display changes from “--”...
- Page 19 Travel Setting • By default, the actuator works under such a mode: it runs at full speed for 15 seconds after receiving a signal to open the door and only slows down when coming into contact with a limit stop or a wall. This default mode is customizable, but it is restored EVERY TIME the SPEED adjustment knob is turned. • ALWAYS retrain the circuit board about the limit stop once the SPEED adjustment knob is turned.
- Page 20 Setting the Speed & Obstruction Sensitivity • If the gate starts up too slow or too fast, use the SLOW DOWN knob on the circuit board to adjust the speed. If the door stops abruptly due to wind or the friction of the gate itself or if the gate does not react appropriately to the end stops or closes you are using, turn FORCE knob to adjust the operator’s...
-
Page 21: Remote Pairing
4. Remote Pairing The top button of each included remote should come already paired with your gate opener. Up to 30 additional remotes or wireless control buttons can be paired to the gate’s circuit board. Be sure that they use the 433.92 MHz (LPD433 Channel 35) radio band or can be configured to do so. NEVER pair the same button to 2 different gates or devices at the same time. -
Page 22: Parameter Adjustment
5. Parameter Adjustment Aside from the three settings controlled by the adjustment knobs, all other parameters are controlled using the adjustment buttons and the digital display. There are two separate menus, one for basic settings and another for advanced settings. In each case, use PROG to enter the main menus;... - Page 23 Advanced Setting Menu Submenu Name Options Sets the time in seconds that the master operator will slow at each end of its movement Sets the time in seconds that the secondary operator will slow at each end of its movement Resistance Limit Time Adds a value in 1/100ths of a second to the r1 value for fine tuning the master operator’s movement...
-
Page 24: Maintenance
6. Maintenance • Always supervise children and pets near the gate, the operators, and their controls to prevent accidents. • Always fully disconnect the control box from its power supply before removing its cover or making any adjustments to its wiring, except as specifically directed elsewhere in this manual. Use trained and licensed electricians for rewiring or electrical repair work. - Page 25 Possible Problems Typical Solution(s) The system does not have Repeat the steps in Initial Testing above, teaching the system or has forgotten its route about its route again. (Remember that this is necessary after any adjustment of the SPEED knob.) information (“E8”).
- Page 26 Contact Us Thank you for choosing our products! If you have any questions or comments, contact us at contact@b2csupportpro.com and we'll resolve your issue ASAP! For a .pdf copy of the latest version of these instructions, use the appropriate app on your smartphone to scan the QR code to the right. S G O - 0 3 0 1 - 0 2 Rev.
Need help?
Do you have a question about the ADSW4 and is the answer not in the manual?
Questions and answers
I am having a problem with a gate controller it will run through the set-up cycle completely and I can open it with the remote and stop it when i need to but it will not close with the remote or the auto close cycle i turned the force all the way down and still nothing please help me
Possible issues with the CO-Z ADSW4 gate controller that prevent it from closing with the remote or the auto close cycle include:
1. The remote’s battery may be dead—replace it.
2. The receiver antenna may not be connected to the ANT pin—check the wiring.
3. An obstacle might be in the gate’s path—remove any obstructions.
4. IR sensors or their wiring may be faulty—inspect and adjust as needed.
5. The gate’s obstruction sensitivity may be too high—reduce it using the FORCE knob.
6. The auto close function may not be activated—enable and test it.
Check each of these components systematically to identify the issue.
This answer is automatically generated