Table of Contents
Advertisement
Available languages
Available languages
Quick Links
PNI SafeHome PT901JL
WiFi Smart Motor
for blinds with pull cords
» WiFi мотор за щори
» WiFi-Motor für Jalousien
» Motor WiFi para persianas
» Moteur WiFi pour stores
» WiFi motor redőnyökhöz
» Motore WiFi per tapparelle
» WiFi-motor voor zonwering
» Silnik WiFi do rolet
» Motor inteligent pentru jaluzele
Advertisement
Table of Contents

Related Manuals for PNI SafeHome PT901JL


Summary of Contents for PNI SafeHome PT901JL
- Page 1 PNI SafeHome PT901JL WiFi Smart Motor for blinds with pull cords » WiFi мотор за щори » WiFi-Motor für Jalousien » Motor WiFi para persianas » Moteur WiFi pour stores » WiFi motor redőnyökhöz » Motore WiFi per tapparelle » WiFi-motor voor zonwering »...
- Page 2 Contents English ......Български Deutsch ..... Español ..... Français ..... Magyar ..... Italiano ..... Nederlands ..... Polski ..... Romana .....
-
Page 3: Basic Specifications
Basic specifications • It does not require changing the existing blinds • Remote control via Wi-Fi through the Tuya Smart application and Amazon Alexa and Google Home • Automatic closing and opening (programmed) of the blinds • Easy installation. Installation takes about 3-5 minutes •... - Page 4 With the included needle, move the small button to the left or to the right according to the chain position. Remote control via Tuya Smart application • Download the Tuya Smart application. Create an account and log in • On the phone, activate Location and Bluetooth •...
- Page 5 Compatible chain types Compatible blind types...
-
Page 6: Installation
Installation Pull down the blinds and fix the chain as in the attached image, tightening the chain well Depending on the position of the chain (on the left or on the right of the blinds), mark the hole L (left) or R (right) through the mounting card Position the mounting bracket in place of the card, with the two screw... - Page 7 Fix the motor in the bracket previously mounted on the wall Note: adjust the tension of the chain. If the chain is too loose, raising or lowering the blinds could be noisy. Setting the up/down limit • Press the Up or Down button on the motor until you reach the desired upper limit for the blinds.
-
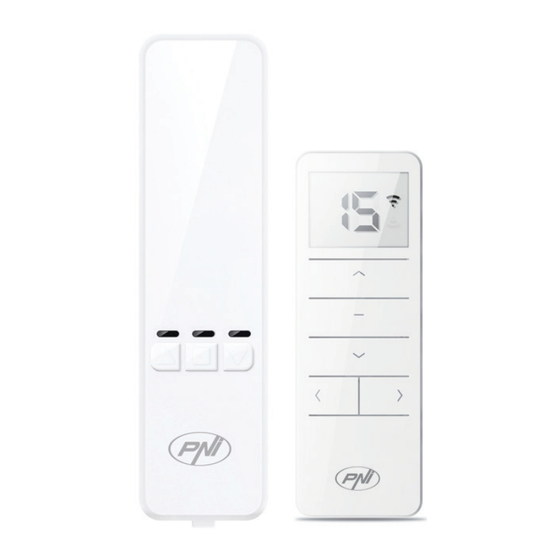
Page 8: Pairing The Remote Control
Reset To reset the motor, press the Up and Down buttons on the motor simultaneously for about 8 seconds. Pairing the remote control Note: the motor and the remote control come paired from the factory. If necessary, pair the remote by following the steps below: •... -
Page 9: Simplified Eu Declaration Of Conformity
Operating temperature -26°C ~ +80°C Simplified EU declaration of conformity ONLINESHOP SRL declares that the PNI SafeHome PT901JL WiFi motor for blinds with chain is compliant with RED Directive 2014/53/EU. The full text of the EU declaration of conformity is available at the following internet address: h t t p s : // w w w . - Page 10 Основни спецификации • Не изисква смяна на съществуващите щори • Дистанционно управление чрез Wi-Fi чрез приложението Tuya Smart и Amazon Alexa и Google Home • Автоматично затваряне и отваряне (програмирано) на щорите • Лесен монтаж. Инсталацията отнема около 3-5 минути •...
- Page 11 С включената игла преместете малкия бутон наляво или надясно според позицията на веригата. Забележка: посоката на щорите може да се зададе и от приложението. Дистанционно управление чрез приложението Tuya Smart • Изтеглете приложението Tuya Smart. Създайте акаунт и влезте • На...
- Page 12 мига бързо • Изчакайте приложението да идентифицира вашето устройство. Натиснете бутона „Готово“, след като се покаже съобщението „Добавено успешно“ Съвместими видове вериги Съвместими видове щори...
- Page 13 Инсталация Спуснете щорите и фиксирайте веригата, както е на приложеното изображение, като затегнете веригата добре В зависимост от позицията на веригата (отляво или отдясно на щорите), маркирайте отвора L (вляво) или R (вдясно) през монтажната карта Поставете монтажната скоба на мястото...
- Page 14 Фиксирайте двигателя в скобата, предварително монтирана на стената Забележка: регулирайте напрежението на веригата. Ако веригата е твърде разхлабена, вдигането или спускането на щорите може да е шумно. Задаване на лимита за вдигане/спускане на щорите • Натиснете бутона нагоре или надолу на мотора, докато...
- Page 15 • Сега горната и долната граница са определени. • Ако искате да промените настройките, нулирайте двигателя. Нулиране За да нулирате двигателя, натиснете едновременно бутоните за нагоре и надолу на двигателя за около 8 секунди. Сдвояване на дистанционното управление Забележка: моторът и дистанционното управление идват...
-
Page 16: Технически Спецификации
RF честота 433MHz (10mW) Опростена ЕС декларация за съответствие ONLINESHOP SRL декларира, че PNI SafeHome PT901JL WiFi мотор за щори с верига е в съответствие с RED Directive 2014/53/EU. Пълният текст на ЕС декларацията за съответствие е достъпен на следния интернет... - Page 17 Grundlegende Spezifikationen • Es ist kein Austausch der vorhandenen Jalousien erforderlich • Fernbedienung über WLAN über die Tuya Smart- Anwendung sowie Amazon Alexa und Google Home • Automatisches Schließen und Öffnen (programmiert) der Jalousien • Einfache Installation. Die Installation dauert etwa 3-5 Minuten •...
- Page 18 Bewegen mitgelieferten Nadel den kleinen Knopf nach Kettenposition nach links oder rechts. Hinweis: Die Richtung der Jalousien kann auch über die Anwendung eingestellt werden. Fernbedienung über die Tuya Smart-Anwendung • Laden Sie die Tuya Smart-Anwendung herunter. Erstellen Sie ein Konto und melden Sie sich an •...
- Page 19 Kompatible Kettentypen Kompatible Jalousientypen...
-
Page 20: Installation
Installation Ziehen Sie die Jalousien herunter und befestigen Sie die Kette wie im beigefügten Bild. Ziehen Sie die Kette dabei gut fest Markieren Sie je nach Position der Kette (links oder rechts der Jalousien) das Loch L (links) oder R (rechts) durch die Montagekarte Positionieren Montagehalterung an der Stelle... - Page 21 Befestigen Sie den Motor in der zuvor an der Wand montierten Halterung Hinweis: Passen Sie die Spannung der Kette an. Wenn die Kette zu locker ist, kann es beim Hoch- und Herunterfahren der Jalousien zu Geräuschen kommen. Einstellen der Grenze für das Anheben/ Absenken der Jalousien •...
-
Page 22: Technische Spezifikationen
Zurücksetzen Um den Motor zurückzusetzen, drücken Sie gleichzeitig etwa 8 Sekunden lang die Auf- und Ab-Tasten am Motor. Koppeln der Fernbedienung Hinweis: Der Motor und die Fernbedienung sind ab Werk gekoppelt. Koppeln Sie die Fernbedienung bei Bedarf, indem Sie die folgenden Schritte ausführen: Drücken Sie lange die Stopp-Taste am Motor, bis die rote LED blinkt. -
Page 23: Vereinfachte Eu-Konformitätserklärung
30 m im freien Kommunikationsentfernung Feld Betriebstemperatur -26°C ~ +80°C Vereinfachte EU-Konformitätserklärung ONLINESHOP SRL erklärt, dass der WiFi-Motor PNI SafeHome PT901JL für Jalousien mit Kette der RED- Richtlinie 2014/53/EU entspricht. Der vollständige Text der EU-Konformitätserklärung ist unter der folgenden Internetadresse verfügbar: https://www.mypni.eu/ products/7271/download/certifications... -
Page 24: Especificaciones Básicas
Especificaciones básicas • No requiere cambiar las persianas existentes. • Control remoto vía Wi-Fi a través de la aplicación Tuya Smart y Amazon Alexa y Google Home • Cierre y apertura automáticos (programados) de las persianas. • Fácil instalación. La instalación tarda entre 3 y 5 minutos. - Page 25 Con la aguja incluida, mueve el pequeño botón hacia la izquierda o hacia la derecha según la posición de la cadena. Nota: dirección las persianas también se puede configurar desde la aplicación. Control remoto a través de la aplicación Tuya Smart •...
- Page 26 Tipos de cadenas compatibles Tipos de persianas compatibles...
-
Page 27: Instalación
Instalación Bajar las persianas y fijar la cadena como imagen adjunta, apretando bien la cadena. Dependiendo de la posición de la cadena (a la izquierda o a la derecha de las persianas), marque el orificio L (izquierda) o R (derecha) a través de la tarjeta de montaje. - Page 28 Fijar el motor en el soporte previamente montado en la pared. Nota: ajuste la tensión de la cadena. Si la cadena está demasiado floja, subir o bajar las persianas podría hacer ruido. Configuración del límite de subida/bajada de persianas • Presione el botón Arriba o Abajo en el motor hasta alcanzar el límite superior deseado para las persianas.
-
Page 29: Especificaciones Técnicas
Reinicializar Para restablecer el motor, presione los botones Arriba y Abajo del motor simultáneamente durante aproximadamente 8 segundos. Emparejamiento del control remoto Nota: el motor y el mando a distancia vienen emparejados de fábrica. Si es necesario, empareje el control remoto siguiendo los pasos a continuación: Mantenga presionado el botón Detener en el motor hasta que el LED rojo parpadee. -
Page 30: Declaración Ue De Conformidad Simplificada
Declaración UE de conformidad simplificada ONLINESHOP SRL declara que el motor WiFi para persianas con cadena PNI SafeHome PT901JL cumple con la Directiva RED 2014/53/UE. El texto completo de la declaración UE de conformidad está disponible en la siguiente dirección de Internet:... - Page 31 Spécifications de base • Il ne nécessite pas de changer les stores existants • Contrôle à distance via Wi-Fi via l’application Tuya Smart et Amazon Alexa et Google Home • Fermeture et ouverture automatique (programmée) des stores • Installation facile. L’installation prend environ 3 à 5 minutes •...
- Page 32 Avec l’aiguille fournie, déplacez le petit bouton vers la gauche ou vers la droite selon la position de la chaîne. A noter : la direction des stores peut également être paramétrée depuis l’application. Contrôle à distance via l’application Tuya Smart •...
- Page 33 Types de chaînes compatibles Types de stores compatibles...
- Page 34 Installation Abaissez les stores et fixez la chaîne comme sur l’image ci-jointe en serrant bien la chaîne En fonction de la position de la chaîne (à gauche ou à droite du store), marquez le trou L (gauche) ou R (droite) à travers la carte de montage Positionnez le support de montage à...
- Page 35 Fixer le moteur dans le support préalablement monté au mur Remarque : ajustez la tension de la chaîne. Si la chaîne est trop lâche, la montée ou la descente des stores pourrait être bruyante. Définir la limite de montée/descente des blinds •...
-
Page 36: Spécifications Techniques
Réinitialiser Pour réinitialiser le moteur, appuyez simultanément sur les boutons Haut et Bas du moteur pendant environ 8 secondes. Appairage de la télécommande Remarque : le moteur et la télécommande sont couplés en usine. Si nécessaire, associez la télécommande en suivant les étapes ci-dessous : Appuyez longuement sur le bouton Stop du moteur jusqu’à... - Page 37 Déclaration UE simplifiée de conformité ONLINESHOP SRL déclare que le moteur WiFi PNI SafeHome PT901JL pour stores avec chaîne est conforme à la directive RED 2014/53/UE. Le texte intégral de la déclaration UE de conformité est disponible à l’adresse...
- Page 38 Alapvető előírások • Ez nem igényli a meglévő redőnyök cseréjét • Távirányító Wi-Fi-n keresztül Tuya Smart alkalmazáson, valamint az Amazon Alexán és a Google Home-on keresztül • redőnyök automatikus zárása és nyitása (programozott). • Könnyű telepítés. A telepítés körülbelül 3-5 percet vesz igénybe •...
- Page 39 A mellékelt tűvel mozgassa a kis gombot balra vagy jobbra a lánc helyzetének megfelelően. Megjegyzés: redőnyök iránya az alkalmazásból is beállítható. Távirányító a Tuya Smart alkalmazáson keresztül • Töltse le a Tuya Smart alkalmazást. Hozzon létre egy fiókot és jelentkezzen be •...
- Page 40 Kompatibilis lánctípusok Kompatibilis árnyékoló típusok...
- Page 41 Telepítés Húzza le a redőnyöket és rögzítse a láncot a mellékelt képen látható módon, jól meghúzva a láncot A lánc helyzetétől függően (a redőnyök bal vagy jobb oldalán) jelölje be az L (bal) vagy R (jobb) lyukat a rögzítőkártyán keresztül Helyezze a tartókonzolt a kártya helyére úgy, hogy a két csavarlyuk a korábban megjelölt pontok felé...
- Page 42 Rögzítse a motort az előzőleg falra szerelt konzolba Megjegyzés: állítsa be a lánc feszességét. Ha a lánc túl laza, a redőnyök felemelése vagy leengedése zajos lehet. A redőnyök emelési/süllyesztési határának beállítása • Nyomja meg a Fel vagy Le gombot a motoron, amíg el nem éri a redőnyök kívánt felső...
-
Page 43: Műszaki Adatok
Visszaállítás A motor alaphelyzetbe állításához nyomja le egyszerre a fel és le gombokat a motoron körülbelül 8 másodpercig. A távirányító párosítása Megjegyzés: a motor és a távirányító gyárilag párosítva érkezik. Ha szükséges, párosítsa a távirányítót az alábbi lépések szerint: Tartsa lenyomva a Stop gombot a motoron, amíg a piros LED villogni nem kezd. - Page 44 30 m-ig nyílt terepen Üzemi hőmérséklet -26°C ~ +80°C Egyszerűsített EU megfelelőségi nyilatkozat Az ONLINESHOP SRL kijelenti, hogy a PNI SafeHome PT901JL WiFi motor láncos redőnyökhöz megfelel a 2014/53/EU RED irányelvnek. Az EU-megfelelőségi nyilatkozat teljes szövege az alábbi internetcímen érhető el: h t t p s : // w w w .
- Page 45 Specifiche di base • Non è necessario cambiare le tende esistenti • Controllo remoto tramite Wi-Fi tramite l’applicazione Tuya Smart e Amazon Alexa e Google Home • Chiusura e apertura automatica (programmata) delle tapparelle • Installazione facile. L’installazione richiede circa 3-5 minuti •...
- Page 46 l’ago dotazione, spostare il bottoncino verso sinistra o verso destra a seconda della posizione della catenella. Nota: direzione delle tapparelle può essere impostata anche dall’applicazione. Controllo remoto tramite Tuya Smart • Scarica l’applicazione Tuya Smart. Crea un account e accedi •...
- Page 47 Tipi di catena compatibili Tipi di tende compatibili...
-
Page 48: Installazione
Installazione Abbassare la tenda e fissare la catena come nell’immagine allegata, tendendo bene la catena A seconda della posizione della catena (a sinistra o a destra della tenda), segnare il foro L (sinistra) o R (destra) tramite la scheda di montaggio Posizionare la staffa di montaggio al posto della scheda, con i due... - Page 49 Fissare motore nella staffa precedentemente montata a muro Nota: regolare la tensione della catena. Se la catena è troppo lenta, alzare o abbassare la tenda potrebbe risultare rumoroso. Impostazione del limite di salita/discesa delle tapparelle • Premere il pulsante Salita o Discesa del motore fino a raggiungere il limite superiore desiderato per le tende.
-
Page 50: Specifiche Tecniche
Ripristino Per ripristinare il motore, premere contemporaneamente i pulsanti Su e Giù sul motore per circa 8 secondi. Associazione del telecomando Nota: il motore e il telecomando vengono forniti accoppiati dalla fabbrica. Se necessario, associare il telecomando seguendo i passaggi seguenti: •... - Page 51 -26°C ~ +80°C Dichiarazione di conformità UE semplificata ONLINESHOP SRL dichiara che il motore WiFi per tende con catenella PNI SafeHome PT901JL è conforme alla Direttiva RED 2014/53/UE. Il testo completo della dichiarazione di conformità UE è disponibile al seguente...
- Page 52 Basisspecificaties • Het is niet nodig om de bestaande jaloezieën te vervangen • Afstandsbediening via Wi-Fi via de Tuya Smart- applicatie en Amazon Alexa en Google Home • Automatisch sluiten en openen (geprogrammeerd) van de jaloezieën • Makkelijke installatie. De installatie duurt ongeveer 3-5 minuten •...
- Page 53 meegeleverde naald beweegt u het kleine knoopje naar links of naar rechts, afhankelijk van de kettingpositie. Let op: de richting van de jaloezieën kan ook vanuit de applicatie worden ingesteld. Afstandsbediening via Tuya Smart-applicatie • Download de Tuya Smart-applicatie. Maak een account aan en log in •...
- Page 54 Compatibele kettingtypen Compatibele jaloezietypes...
- Page 55 Installatie Trek de jaloezieën naar beneden en bevestig de ketting zoals op de bijgevoegde afbeelding, waarbij u de ketting goed strak trekt Markeer, afhankelijk van de positie van de ketting (links of rechts van de jaloezieën), het gat L (links) of R (rechts) via de montagekaart Plaats de montagebeugel op de plaats van de kaart, met de twee...
- Page 56 Bevestig de motor in de beugel die eerder aan de muur is gemonteerd Let op: pas de spanning van de ketting aan. Als de ketting te los zit, kan het omhoog of omlaag bewegen van de jaloezieën luidruchtig zijn. Instellen van de limiet voor het omhoog/omlaag gaan van de jaloezieën •...
-
Page 57: Technische Specificaties
Reset Om de motor te resetten, drukt u tegelijkertijd op de knoppen Omhoog en Omlaag op de motor gedurende ongeveer 8 seconden. De afstandsbediening koppelen Opmerking: de motor en de afstandsbediening zijn in de fabriek gekoppeld. Koppel indien nodig de afstandsbediening door de onderstaande stappen te volgen: Druk lang op de Stop-knop op de motor totdat de rode LED knippert. -
Page 58: Vereenvoudigde Eu-Conformiteitsverklaring
30 m in open veld Bedrijfstemperatuur -26°C ~ +80°C Vereenvoudigde EU-conformiteitsverklaring ONLINESHOP SRL verklaart dat de PNI SafeHome PT901JL WiFi-motor voor jaloezieën met ketting voldoet aan de RED-richtlijn 2014/53/EU. De volledige tekst van de EU-conformiteitsverklaring is beschikbaar op het volgende internetadres:https://www.mypni.eu/products/ 7271/... - Page 59 Podstawowe specyfikacje • Nie wymaga wymiany istniejących rolet • Zdalne sterowanie poprzez Wi-Fi poprzez aplikację Tuya Smart oraz Amazon Alexa i Google Home • Automatyczne zamykanie i otwieranie (programowane) rolet • Łatwa instalacja. Instalacja trwa około 3-5 minut • Sterowanie z pilota •...
- Page 60 Za pomocą dołączonej igły przesuń mały przycisk w lewo lub w prawo, w zależności od pozycji łańcuszka. Uwaga: kierunek żaluzji można również ustawić z poziomu aplikacji. Zdalne sterowanie poprzez aplikację Tuya Smart • Pobierz aplikację Tuya Smart. Utwórz konto i zaloguj się •...
- Page 61 Kompatybilne typy łańcuchów Kompatybilne typy rolet...
- Page 62 Instalacja Opuść żaluzje i zamocuj łańcuch jak na załączonym obrazku, dobrze napinając łańcuch W zależności od położenia łańcuszka (po lewej lub po prawej stronie żaluzji) zaznacz otwór L (po lewej) lub R (po prawej) przez kartę montażową Umieść wspornik montażowy w miejscu karty, tak aby dwa otwory na śruby były skierowane w stronę...
- Page 63 Zamocuj silnik wsporniku zamontowanym wcześniej na ścianie Uwaga: wyreguluj napięcie łańcucha. Jeśli łańcuch jest zbyt luźny, podnoszenie lub opuszczanie żaluzji może powodować hałas. Ustawianie limitu podnoszenia/opuszczania żaluzji • Naciskaj przycisk Góra lub Dół na silniku, aż osiągniesz żądany górny limit żaluzji. •...
-
Page 64: Specyfikacja Techniczna
Reset Aby zresetować silnik, naciśnij jednocześnie przyciski Góra i Dół na silniku przez około 8 sekund. Parowanie pilota Uwaga: silnik i pilot są fabrycznie sparowane. W razie potrzeby sparuj pilota, wykonując poniższe czynności: • Naciśnij i przytrzymaj przycisk Stop na silniku, aż zacznie migać... - Page 65 -26°C ~ +80°C Simplified EU declaration of conformity ONLINESHOP SRL oświadcza, że silnik WiFi PNI SafeHome PT901JL do żaluzji z łańcuszkiem jest zgodny z Dyrektywą RED 2014/53/UE. Pełny tekst deklaracji zgodności UE dostępny jest pod następującym adresem internetow ym:https://www.mypni.eu/products/ 7271/...
- Page 66 Specificatii de baza • Nu necesita schimbarea jaluzelelor existente • Control de la distanta prin Wi-Fi prin aplicatia Tuya Smart si prin Amazon Alexa si Google Home • Inchidere si deschidere automata (programata) a jaluzelelor • Instalare usoara. Instalarea necesita aproximativ 3-5 minute •...
- Page 67 Cu ajutorul cheitei incluse, mutati butonul spre stanga daca jaluzelele sunt stanga sau spre dreapta daca jaluzelele sunt de dreapta. Control din aplicatia Tuya Smart • Descarcati aplicatia Tuya Smart. Creati cont si autentificati-va • In telefon, activati Locatia si Bluetooth •...
- Page 68 Tipuri de lant compatibile Tipuri de jaluzele compatibile...
- Page 69 Instalare • Trageti jaluzelele in jos si fixati lantul ca in imaginea alaturata, tragand bine lantul in jos. • In functie de pozitia lantului (pe stanga sau pe dreapta) marcati gaura L (stanga) sau R (dreapta) prin cardul de montaj. •...
- Page 70 Setare limita de ridicare/coborare jaluzele • Apasati butonul Sus sau Jos de pe motor pana ajungeti la limita superioara dorita de deschidere a jaluzelelor. • Apasati lung timp de 5 secunde butonul Stop de pe motor pana cand LED-ul rosu clipeste. •...
-
Page 71: Specificatii Tehnice
de mai jos: • Apasati lung butonul Stop de pe motor pana cand LED- ul rosu clipeste. • Apasati pe telecomanda butonul Sus sau Jos. • LED-urile verde si albastru vor clipi de doua ori pe butoanele Sus si Jos de pe motor. Acum telecomanda a fost imperecheata cu motorul. - Page 72 -26°C ~ +80°C Declaratie UE de conformitate simplificata ONLINESHOP SRL declara ca Motor inteligent pentru jaluzele cu lant PNI SafeHome PT901JL este in conformitate cu Directiva RED 2014/53/UE. Textul integral al declaratiei UE de conformitate este disponibil la urmatoarea adresa de internet: h t t p s : // w w w .
Need help?
Do you have a question about the SafeHome PT901JL and is the answer not in the manual?
Questions and answers