Table of Contents
Advertisement
Available languages
Available languages
Quick Links
Advertisement
Chapters
Table of Contents

Related Manuals for LEVELFIX METOFIX SC600


Summary of Contents for LEVELFIX METOFIX SC600
- Page 1 METOFIX SC600 GEBRUIKSAANWIJZING USER MANUAL MANUEL D’UTILISATION...
-
Page 2: Table Of Contents
GEBRUIK VAN HET INSTRUMENT ----------------------------------------- 8 FOUTOPSPORING & TIPS ---------------------------------------------------- 14 GARANTIE EN AANSPRAKELIJKHEID -------------------------------------- 15 Wij danken u voor de aankoop van een LEVELFIX product. Lees aandachtig deze gebruiksaanwijzing, zodat u het instrument op de best mogelijke manier kunt gebruiken. -
Page 3: Voordat U Start
VOORDAT U START Houd rekening met het volgende, voordat u gaat werken met de SC600: • De SC600 werkt door een verschil in dichtheid achter muren te detecteren. Ook andere objecten kunnen worden gedetecteerd, vooral als deze zich dicht onder het oppervlak bevinden. Ga er dus niet vanuit dat alles wat gedetecteerd is, een stijl is. -
Page 4: Wirewarning Detectie
• Normaal gesproken liggen stijlen op 40 of 60 cm van elkaar af, zijn ze 38 mm breed en kunnen ze gesc- heiden zijn door een brandwerende doorvoering. Alles wat dichter bij elkaar ligt, of een verschillende breedte heeft, hoeft geen stijl te zijn. BELANGRIJK: ‘Trust but Verify’... -
Page 5: Identificatie
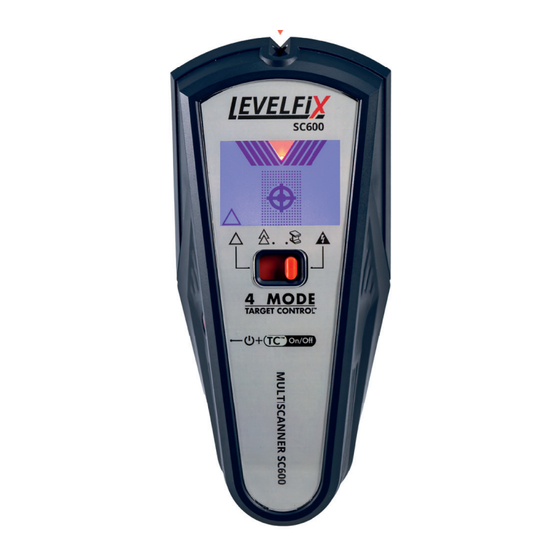
IDENTIFICATIE SpotLite Pointer Modus keuzeschakelaar Aan/uit-knop Ergonomische rubberen handgreep ColorTrip Display Instellingen (v.l.n.r.): Target Control/StudScan DeepScan Metal Scan AC Scan Batterijklepje Target Spotlight Doelindicatie streepjes LoLevel indicator/Signaalsterkte indicator Scanmodus Batterijspanning indicator ACT (automatische correctie technologie) Metal Scan/MetalliWaring indicator Dradenkruis AC Scan/WireWarning Detectie indicator Rand indicatoren... -
Page 6: Onderhoud En Specificaties
ONDERHOUD Reinig het instrument met een zachte, eventueel vochtige niet pluizende doek. Er mag absoluut geen vocht in de behuizing komen. Geen sprays, oplosmiddelen, schuur- middelen of andere agressieve schoonmaakmiddelen gebruiken. Gebruik alleen schoon water om de doek te bevochtigen. SPECIFICATIES Max. -
Page 7: Batterij Vervangen
• StudScan lokaliseert het midden, de randen en de richting van zowel houten als metalen stijlen tot 19 mm diep. Het LCD-scherm wordt in deze stand niet verlicht. In de StudScan stand gebruikt de signaalsterkte indicator hetzelfde pictogram als de LoLevel™ indicator. -
Page 8: Gebruik Van Het Instrument
GEBRUIK VAN HET INSTRUMENT Selecteer stand / inschakelen • Verplaats de modus keuzeschakelaar naar de gewenste stand: Target Control™/StudScan, Deep- Scan™, Metal Scan of AC Scan. • Houdt de aan-uitknop ingedrukt om het apparaat aan te zetten. • Het apparaat wordt 1 tot 2 seconden nadat de aan-uitknop is losgelaten, uitgeschakeld. - Page 9 Ga verder met schuiven. Wanneer het apparaat het midden van een stijl vindt, komt het dradenkruis in beeld en licht SpotLite™ op. (Afbeelding B) Markeer de plek waar de balk is gevonden. De scanner herkalibreert Afb. B automatisch wanneer het in gebruik is. Als de twee ACT™-pijlen op het LCD- scherm verschijnen, is het apparaat gekalibreerd over...
- Page 10 Terwijl u de aan/uit-knop ingedrukt houdt, schuift u het apparaat langzaam langs de muur. Wanneer de scanner de rand van een stijl vindt, wordt de randindicator weergegeven. Blijf over het oppervlak glijden. Wanneer het apparaat het midden van een stijl vindt, komt het dradenkruis in beeld, SpotLite™ licht op en klinkt er een pieptoon.
- Page 11 Terwijl u de aan-uitknop ingedrukt houdt, schuift u de scanner langzaam tegen de muur. Bij een sterke lezing licht SpotLite™ op en klinkt er een korte pieptoon. Markeer de plek waar het grootste aantal doelindicatie streepjes Afb. D wordt weergegeven. (Afbeelding D) Blijf in dezelfde richting schuiven totdat de streepjes minder worden en schuif vervolgens in de tegenovergestelde richting.
- Page 12 AC SCAN STAND Gebruik de AC Scan stand om onder spanning staande, niet-afgeschermde elektrische bedrading te vinden. SCHAKEL DE VOEDING ALTIJD UIT ALS U IN DE BUURT VAN ELEKTRISCHE DRADEN WERKT (BEHALVE TIJDENS HET SCANNEN). Stel de stand in op AC Scan. Houd de scanner plat tegen de muur en houd vervolgens de aan/uit-knop ingedrukt.
- Page 13 WAARSCHUWING: Ga er niet van uit dat er geen elektri- sche kabels onder stroom in de muur zitten. Onderneem niets dat gevaarlijk kan zijn indien er kabels onder stroom in de muur zitten. Schakel altijd de elektrische, gas- en watertoevoer uit voordat u in een oppervlak gaat boren.
-
Page 14: Foutopsporing & Tips
FOUTOPSPORING & TIPS Waarschijnlijke Situatie Oplossing oorzaak Het apparaat Scan het gebied in de Metal Scan detecteert stand om te bepalen of er metaal Elektrische andere aanwezig is. bedrading en objecten dan Controleer of er andere stijlen zijn op metalen of stijlen in de gelijke afstand van beide zijden op 40 plastic leidingen... -
Page 15: Garantie En Aansprakelijkheid
Het LCD- Het apparaat Schakel over naar de TC™ of StudScan scherm flik- ervaart over- stand om de gevoeligheid voor kert continu verzadiging van metaal te verminderen. als u de stijl blootstelling aan NB: Het apparaat mag hierbij niet probeert te metaal. - Page 16 USE OF THE INSTRUMENT --------------------------------------------------- 22 TROUBLESHOOTING & TIPS ------------------------------------------------ 28 WARRANTY AND LIABILITY -------------------------------------------------- 29 Thank you for purchasing a LEVELFIX instrument. To make full use of all of your instruments functions, please read this user manual carefully. INTRODUCTION The SC600 is a digital wall scanner suitable for locating wood- en and metal studs, non-ferrous metal and live wires in walls.
- Page 17 BEFORE YOU START Please note the following before working with the SC600: • The SC600 works by detecting a difference in density behind walls. Other objects can also be detected, especially if they are close to the surface. So don’t assume that everything detected is a style.
- Page 18 IMPORTANT: ‘Trust but Verify’ is a technique that can help designate ‘safe to drill’ areas to minimise hitting existing metals on a style, such as nails, screws and protective plates. When the crosshair appears in TC™ mode, run the scanner vertically up and down the style.
- Page 19 IDENTIFICATION SpotLite Pointer Mode selector switch On/off button Ergonomic rubber handle ColorTrip Display Settings (from left to right): Target Control/StudScan DeepScan Metal Scan AC Scan Battery cover Target Spotlight Target indicator dashes LoLevel indicator/Signal strength indicator Scan mode Battery voltage indicator ACT (automatic correction technology) Metal Scan/MetalliWaring indicator Wire cross...
- Page 20 MAINTENANCE Clean the instrument with a soft, possibly damp, lint- free cloth. There must be absolutely no moisture in the housing. Do not use sprays, solvents, abrasives or other aggressive cleaning agents. Only use clean water to mois- ten the cloth. SPECIFICATIONS Max search depth 3.8 cm...
- Page 21 • StudScan locates the centre, edges and direction of both wooden and metal studs up to 19 mm deep. The LCD is not illuminated in this mode. In StudScan mode, the signal strength indicator uses the same icon as the LoLevel™ indicator. When TC™ is switched off, the signal strength dashes indicate a strong signal.
- Page 22 USE OF THE INSTRUMENT Select mode / power on • Move the mode selector switch to the desired mode: Target Control™/StudScan, DeepScan™, Metal Scan or AC Scan. • Press and hold the power button to turn the device • The device turns off 1 to 2 seconds after the power button is released.
- Page 23 Continue sliding. When the device fi nds the centre of a style, the crosshair comes into view and SpotLite™ lights up. (Figure B) Mark the spot where the bar is found. The scanner recalibrates automatically when in use. Fig. B When the two ACT™...
- Page 24 While holding down the power button, slowly slide the device along the wall. When the scanner finds the edge of a strut, the edge indicator is displayed. Continue sliding along the surface. When the device finds the centre of a strut, the crosshair appears, SpotLite™...
- Page 25 While holding down the power button, slowly slide the scanner against the wall. On a strong reading, SpotLite™ lights up and a short beep sounds. Mark the spot with the largest number of target indication dashes. (Figure D) Fig. D Keep sliding in the same direction until the dashes diminish and then slide in the opposite direction.
- Page 26 AC SCAN MODE Use AC Scan mode to find live,unshielded electrical wires. ALWAYS SWITCH OFF THE POWER SUPPLY WHEN WORK- ING NEAR ELECTRICAL WIRES (EXCEPT DURING SCANNING). Set the mode to AC Scan. Hold the scanner flat against the wall, then press and hold the power button.
- Page 27 VARIOUS MATERIALS Wallpaper The unit normally works on walls covered with wallpaper or dust, unless the materials are metal foil, contain metal fibres or are still wet after application. The wallpaper may need to dry for several weeks after application. Freshly painted walls After application, it may take a week or more to dry.
- Page 28 TROUBLESHOOTING & TIPS Situation Probable cause Solution The device Scan the area in the Metal Scan mode detects to determine if metal is present. objects other Check for other struts equidistant Electrical wiring than struts from both sides at 40 or 60 cm, and and metal or in StudScan check for the same strut in spots...
- Page 29 Low battery Low battery notification voltage. is on. Replace the battery with a new 9 V The battery alkaline battery. icon flickers and the Empty battery. device does not work. WARRANTY AND LIABILITY The warranty period is 1 year. The guarantee does not apply to faults or defects due to: •...
-
Page 30: Introduction Et Consignes De Sécurité
REMPLACEMENT DE LA BATTERIE ---------------------------------------- 7 UTILISATION DE L’INSTRUMENT ----------------------------------------- DÉPANNAGE ET CONSEILS -------------------------------------------------- 14 GARANTIE ET RESPONSABILITÉ -------------------------------------- nous vous remercions de votre achat du instrument LEVELFIX afi n d’utiliser au mieux les possibilités de votre instrument, lisez attentivement ce manuel d’utilisation. INTRODUCTION Le SC600 est un scanner mural numérique qui permet de... -
Page 31: Avant De Commencer
AVANT DE COMMENCER Tenez compte des points suivants avant de travailler avec le SC600 : • Le SC600 fonctionne en détectant une différence de densité derrière les murs. D’autres objets peuvent également être détectés, surtout s’ils sont proches de la surface. Ne supposez donc pas que tout ce qui est détecté... -
Page 32: Détection Wirewarning
• Normalement, les poteau sont espacés de 40 ou 60 cm, ont une largeur de 38 mm et peuvent être séparés par une pénétration ignifugée. Tout ce qui est plus proche, ou d’une largeur différente, n’est pas nécessairement un poteau. IMPORTANT: ‘Faire confiance mais vérifier’... -
Page 33: Identification
IDENTIFICATION Pointeur SpotLite Sélecteur de mode Bouton marche/arrêt Poignée ergonomique en caoutchouc Écran ColorTrip Réglages (de gauche à droite) : Target Control/StudScan DeepScan Scan métal AC Scan Couvercle de la batterie Projecteur de cible Indicateur de cible tirets Indicateur LoLevelIndicateur de force du signal Mode de balayage Indicateur de puissance de la batterie ACT (technologie de correction automatique) -
Page 34: Entretien Et Spécifications
ENTRETIEN Nettoyer l’appareil de temps en temps avec un chiffon légèrement humide Aucun aérosols, solvants ou des pro- duits abrasifs ou autres produits de nettoyage agressifs. Utiliser uniquement de l’eau propre. SPECIFICATIONS Profondeur de recherche max. 3,8 cm Fonction de tri des câbles Pour la recherche de bois Pour la recherche de métal Pour la localisation de plastique... -
Page 35: Remplacement De La Batterie
• StudScan localise le centre, les bords et la direction des montants en bois et en métal jusqu’à 19 mm de profondeur. L’écran à cristaux liquides n’est pas éclairé dans ce mode. En mode StudScan, l’indicateur d’intensité du signal utilise la même icône que l’indicateur LoLevel™. -
Page 36: Utilisation De L'instrument
UTILISATION DE L’INSTRUMENT Sélectionner le mode / activer • Placez le sélecteur de mode sur la position sou- haitée : Target Control™/StudScan, DeepScan™, Metal Scan ou AC Scan. • Appuyez sur le bouton d’alimentation et mainten- ez-le enfoncé pour mettre l’appareil sous tension. •... - Page 37 Continuez à glisser. Lorsque l’appareil trouve le centre d’un style, le réticule apparaît et SpotLite™ s’al- lume. (Figure B) Marquez l’endroit où se trouve la barre. Le scanner se recalibre automatiquement lorsqu’il Fig. B est utilisé. Lorsque les deux fl èches ACT™ apparaissent sur l’écran LCD, l’appareil a été...
- Page 38 Tout en maintenant le bouton d’alimentation enfoncé, faites glisser lentement l’appareil le long du mur. Lorsque le scanner trouve le bord d’un poteau, l’indicateur de bord s’affiche. Continuez à faire glisser l’appareil le long de la sur- face. Lorsque l’appareil trouve le centre d’un poteau, le réticule s’affiche, SpotLite™...
- Page 39 Tout en maintenant le bouton d’alimentation enfoncé, faites glisser len- tement le scanner contre le mur. Lors d’une lecture forte, SpotLite™ s’allume et un court signal sonore retentit. Marquez le point présentant le plus grand Afb. D nombre de tirets d’indica- tion de cible.
- Page 40 MODE AC SCAN Utilisez le mode de balayage AC pour trouver des fils élec- triques sous tension, non blindés sous tension. COUPEZ TOUJOURS L’ALIMENTATION ÉLECTRIQUE LOR- SQUE VOUS TRAVAILLEZ À PROXIMITÉ DE FILS ÉLECTRI- QUES (SAUF PENDANT LE SCAN). Réglez le mode sur AC Scan (balayage en courant alternatif).
- Page 41 ATTENTION: Ne pas supposer qu’il n’y a pas de câbles électriques sous tension dans le mur.Ne rien entreprendre qui puisse être dangereux s’il y a des câbles sous tension dans le mur.Toujours couper l’alimentation en électricité, en gaz et en eau avant de percer une surface.Ignorer ces instructions peut entraîner une électrocution, un incendie et/ou des blessures graves ou des dommages matériels.
-
Page 42: Dépannage Et Conseils
DÉPANNAGE ET CONSEILS Cause Situation Solution probable L’appareil Vérifiez la présence d’autres modèles détecte des à égale distance des deux côtés, à 40 objets autres Les câbles ou 60 cm, et vérifiez la présence du que des sty- électriques et les même modèle à... -
Page 43: Garantie Et Responsabilité
L’écran LCD Passez en mode TC™ ou StudScan clignote L’appareil subit pour réduire la sensibilité au métal. continuelle- une sursatu- NOTE: L’appareil ne doit pas émettre ment lorsque ration due à de bip sur les styles d’une profondeur l’on essaie l’exposition au supérieure à... - Page 44 FOR MORE INFORMATION: LEVELFIXINSTRUMENTS.COM VERSION 2024.8.1...
Need help?
Do you have a question about the METOFIX SC600 and is the answer not in the manual?
Questions and answers