Pioneer CT-W404R Operating Instructions Manual
Stereo double cassette deck
Hide thumbs
Also See for CT-W404R:
- Service manual (20 pages) ,
- Operating instructions manual (20 pages)
Advertisement
Table of Contents
- 1 Maintenance
- 2 Installation
- 3 Handling Cassette Tapes
- 4 Connecting the Power Cord
- 5 Front Panel Facilities
- 6 Power Standby/On
- 7 Rewind Autoplay
- 8 Adjusting the Recording Level
- 9 Troubleshooting
- 10 Poor Sound Quality
- 11 Power Cord Caution
- 12 Specifications
- Download this manual
See also:
Service Manual
STEREO
DOUBLE
CASSE'n'E
DECK
CT- /504R
CT-W404R
CT-W204
)_
_==m=_====
CT-WSO4_II
U
_i
._..=,---._.
i_ll
l======_==J
.......
AUTON_ _tS_ld_4
I. I°l. Ii. Ioi. II
...........
..,
o
c3 zD_®.: o ...
-=.
!
!
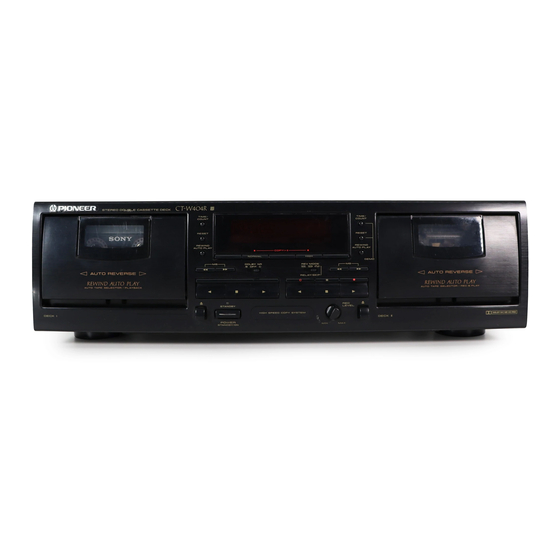
• The above illustration shows CT-W504R.
•
For the demo function,
refer to back cover of these operating
instructions.
Thank you forbwing this Pioneer product.
Please read through these operating instructions so you will
know how to operate your unit properly. After you have fin-
ished reading the instructions, keep the manual in a safe
place for future reference.
In some countries or regions, the shape of the power plug
and power outlet may sometimes differ from that shown in
the explanatory drawings. However, the method of connect-
ing and operating the unit is the same.
WARNING:To
PREVENT FIRE OR SHOCK HAZARD,
DO NOT EXPOSE THIS APPLIANCE TO RAIN OR MOIS-
TURE.
IMPORTANT
NOTICE
The serial number for this equipment is located on the rear
panel. Please write this serial number on your enclosed war-
ranty card and keep it in a secure area. This is for your secu-
rity.
I
THE POWER SWITCH
IS SECONDARY
CONNECTED
I
AND THEREFORE
DOES NOT SEPARATE THE UNIT
I
FROM MAINS POWER IN STANDBY POSITION.
[For Canadian
model]
CAUTION:
TO PREVENT ELECTRIC SHOCK DO NOT
USE THIS (POLARIZED)
PLUG WITH AN EXTENSION
CORD, RECEPTACLE OR OTHER OUTLET UNLESS THE
BLADES CAN BE FUM.Y INSERTED TO PREVENT BLADE
EXPOSURE.
ATTENTION:
POUR
PREVENIR
LES
CHOCS
ELECTRIQUES
NE
PAS
UTILISER
CETTE
FICHE
POLARISEE AVEC UN PROLONGATEUR
UNE PRISE DE
COURANT OU UNE AUTRE SORTIE DE COUP,ANT, SAUF
Sl LES LAMES PEUVENT ETRE INSEREES A FOND SANS
EN LAISSER AUCUNE PARTIE A DECOUVERT.
J "This product complies with the Radiointerference requirements I
of the EC (European Community) Directive 87/308/EEC."
I
CAUTION
This product satisfies
FCC regulations
when shielded
cables and connectors are used to connect the unit to
other equipment. To prevent electromagnetic interference
with electric appliances such as radios and televisions,
use shielded cables and connectors for connections.
IMPORTANT
1
The
lightning
flash
with
arrowhead,
within
an
equilateral triangle, is intended
to alert the user to the
presence of uninsulated "dangerous voltage" within the
product's
enclosure
that
may
be of sufficient
magnitude
to constitute
a risk of electric
shock to
persons.
CAUTION
CAUTION:
TO PREVENT
THE RISK OF ELECTRIC
SHOCK,
DO
NOT
REMOVE
COVER
(OR BACK).
NO USER-SER-
VICEABLE
PARTS
INSIDE.
REFER
SERVICING
TO
QUALIFIED
SERVICE PERSONNEL.
The exclamation
point within an equilateral triangle is
intended to alert the user to the presence of important
operating and maintenance
(servicing) instructions
in
the literature accompanying the applia nce.
PlOI IlEEIR
°
The Art of _nmem
Advertisement
Table of Contents

Related Manuals for Pioneer CT-W404R


Summary of Contents for Pioneer CT-W404R
- Page 1 J "This product complies with the Radiointerference requirements I of the EC (European Community) Directive 87/308/EEC." panel. Please write this serial number on your enclosed war- ranty card and keep it in a secure area. This is for your secu- rity. CAUTION...
- Page 2 13 amp socket as this can result in electric shock. The plug or adaptor or the distribution panel should NOTE be provided with 5 amp fuse. As the colours of the wires in FOR USE IN THE UNITED the mains lead of this appliance may not correspond with...
- Page 3 When the unit is brought into a warm room from previously cold conditionsor when the room temperature is suddenlyincreased,condensa- tion may from inside and the unit may not be able to attain its full performance. If this occurs, allow the unit to stand for about an hour or raise the room temperature gradually.
-
Page 4: Maintenance
2. Press the eject button to open the cassette door. sively humid or dusty location. Avoid installing the deck next to 3. Dip a cleaning swab in cleaning fluid and use it to wipe the heads, kitchen counters or other locations subject to oily smoke or hu- capstans and pinch rollers. -
Page 5: Handling Cassette Tapes
Tab for When using TYPE IV (Metal) or TYPE fl (High/CrO2) tapes, be careful Side B not to block the sensor holes with the tape (Fig. D, Fig. E). If the holes are blocked, the automatic tape selector mechanism will not operate correctly. -
Page 6: Connecting The Power Cord
Intermediary jack which outputs signals from the CONTROL IN jack Left channel -- White plug of this unit to the input jack of another unit. Connect this jack to the Right channel -- Red plug CONTROL IN jack of another component... -
Page 7: Front Panel Facilities
If the power is turned off while the tape is moving, the cassette door may remain locked. In this case, turn the power on before... -
Page 8: Rewind Autoplay
C._ position (RELAY/SKIP) tem; when the Dolby NR for the A and B sides of a tape is different; When the switch is set to this position for playback, both sides of or when the Dolby NR for the DECK I and II is different. - Page 9 FRONT PANEL FACILITIES • When the FLEX system is engaged, each music selection When you press the FLEX button to turn the FLEX system on and start playback, the FLEX indicator flash and compensation automatically adjusted during playback. System operation status adjustment begins.
- Page 10 REC ._ standby Counter reset button (RESET) Recording mute Press this button to reset the tape counter to nuuun n 0, or to reset the time counter to un u.un'n Q. [CT-W204] For both DECKI and II Counter indicator during music search _i',ii"...
- Page 11 When the type of Dolby NR system (B/C)used during recording of a begins playback. tape is not clear, or if the Dolby NR system was not used during re- • To cancel relay playback, press the stop (11) b utton.
- Page 12 DECK I ( II ) is rewound automatically while DECK II ( I ) is playing so however, a sign of a malfunction with the unit. that relay playback continues smoothly.
-
Page 13: Adjusting The Recording Level
If the level is set too low for fear of sound distortion, irritating tape hiss will mar the recording. The characteristics of tapes differ depending on the manufacturer and the type of tape. - Page 14 CD players equipped with the CD • DECK SYNCHRO function. 3. Set the REV MODE switch. • Be sure to connect the deck and the CD player with the CD • DECK SYNCHRO control cord. • To record on one side only, set the switch to the --" position.
- Page 15 Press the stop (i) button of either deck. Both decks will stop. 4'42 NOTES: • The tape in DECK II will be copied in the same type of the DOLBY NR switch as DECK rs tape, regardless of its own _--,-_ _=====_m- ,-._--_...
-
Page 16: Troubleshooting
Sometimes the trouble may lie in another component. Investigate the other components and electrical appliances being used. If the trouble cannot be rectified even after exercising the checks listed below, ask your nearest PIONEER authorized service center or your dealer to carry out repair work. Symptom Cause... -
Page 17: Poor Sound Quality
Never make a knot in the cord or tie it with other cords. The power shoud be routed in such a way that they are not likely to be stepped on. A dam- aged power cord can cause fire or give you an electrical shock.Check... -
Page 18: Specifications
X 1 U.S. and Canadian mode ........AC 120 V, 60 Hz "'Ferrite" erasing head X 1 U.K. and Australian model ..... AC 230-240 V, 50/60 Hz Motor ............... DC servo motor X 2 Power Consumption Wow and Flutter ............. - Page 20 ELECTRONICS AUSTRALIA PTY. LTD. 178-184 Boundary Road, Braeside, Victoria 3195, Australia, TEL: [03] 580-9911 PIONEER FI I:Iff.TRONIOS DE MEXICO S.A. DE C.M. Augusto Rodin No. 128 PB Col. San Juan Mixcoac Mexico D.F. CP.03730 TEL:52-5-598-3950 <94100ZYOAO0> Printed in Malaysia <RRB1155-A>...
Need help?
Do you have a question about the CT-W404R and is the answer not in the manual?
Questions and answers