Pioneer CT-W205R Operating Instructions Manual
Stereo double cassete deck
Hide thumbs
Also See for CT-W205R:
- Service manual (27 pages) ,
- Operating instructions manual (24 pages) ,
- Service manual (26 pages)
Table of Contents
Advertisement
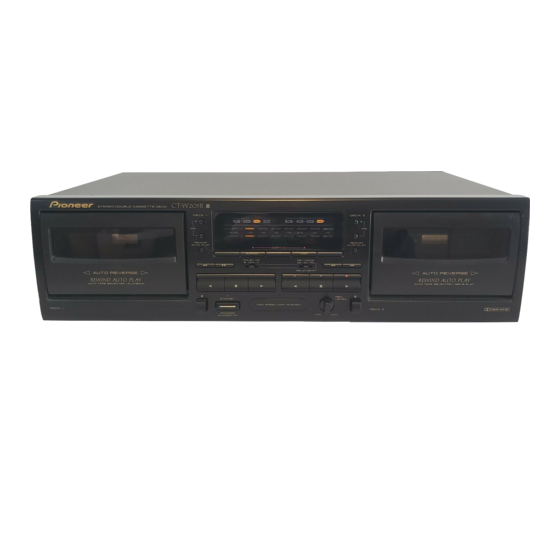
STEREO DOUBLE CASSETrE
DECK
CT-W205R
Ill_ I -
_,c] w
m
_,,-
I-jol-li:i:i:i
•
Illustration shows U.K. model
Thank you for buying this Pioneer product.
Please read through these operating instructions
so you will
know how to operate your unit properly. After you have fin-
ished reading the instructions, keep them in a safe place for
future reference.
In some countries or regions, the shape of the power plug
and power outlet may sometimes differ from that shown in
the explanato_ drawings. However, the method of connect-
ing and operating the unit is the same.
WARNING:To
PREVENT FIRE OR SHOCK HAZARD,
DO NOT EXPOSE THIS APPLIANCE
TO RAIN OR MOIS-
TURE.
THE POWER SWITCH
IS SECONDARY
CONNECTED
I
AND THEREFORE
DOES NOT SEPARATE THE UNIT
FROM MA NS POWER
N THE STANDBY POS T ON.
product
I
This
complies with the Low Voltage Directive {73/23/I
EEC),EMC Directives(89/336/EEC,92/31/EEC}and CE Marking
Directive(93/68/EEC).
CAUTION:
TO PREVENT ELECTRIC SHOCK DO NOT
USE THIS (POLARIZED)
PLUG WITH
AN EXTENSION
CORD, RECEPTACLE OR OTHER OUTLET UNLESS ]'HE
BLADES CAN BE FULLY INSERTED TO PREVENT BLADE
EXPOSURE.
IMPORTANT
NOTICE
The serial number for this equipment is located on the rear
panel. Please write this serial number on your enclosed war-
rent,/card and keep it in a secure area. This is for your secu-
rity.
ATTENTION:
POUR
PREVENIR
LES CHOCS
ELECTRIOUES NE PAS UTILISER CETTE FICHE POLARISEE
AVEC UN PROLONGATEUR, UNE PRISE DE COURANT OU
UNE AUTRE SORTIE DE COURANT, SAUF SI LES LAMES
PEUVENT ETRE INSEREES A FOND SANS EN LAISSER
AUCUNE PARTIE A DECOUVERT.
IMPORTANT 1
The lightning
flash
with
arrowhead,
within
an
_:uil=tml
triangle, is intended
to _
the user to
presence o,f uninsuiated =dangerous _ltage'
with_ the
product's
enclosure
thal
may be of sufficient
magnitude
to constitute
a r_$k Of electric
shock to
ponmn$.
CAUTION
CALI'nON:
TO PREVENT
THE RISK OF ELECTRIC
SHOCK,
DO
NOT REMOVE
COVER
(OR SACK),
NO USER-SER-
VICEABLE
PARTS
INSIOE.
REFER SESVICING
TO
QUALIFIED
SERVICE PESSONNEL
PlONEE/ "
The Art of Entettainme
The exclamation
point within an equilateral triangle is
intended to alerl the user to the i_esence of important
operating and maintenance
Ise _icing_,'_t
ructions in
the literature
aCCOmpanying the appliance,.
Advertisement
Table of Contents

Related Manuals for Pioneer CT-W205R


Summary of Contents for Pioneer CT-W205R
- Page 1 Please write this serial number on your enclosed war- AVEC UN PROLONGATEUR, UNE PRISE DE COURANT OU rent,/card and keep it in a secure area. This is for your secu- UNE AUTRE SORTIE DE COURANT, SAUF SI LES LAMES rity.
- Page 2 =be_ The piug o( edagex o_tbe _ pane should NOTE be proVdedwid_ 5 amp fuse. As the €oloum of tho vv_s ld FOR USE IN THE UNITED the rnainskind of this ed_isnce may not cowespoodwith After replecldg o_chenging a fuee. the fuse cov_ in tbe KINGDOM coioured markingsldentifvtog the terminals in your plug.
- Page 3 This equipment has been tested and found to comply with the limits for a Class B digital device, pursuant to Part 15 of the FCC Rules. These limits are designed to provide reasonable protection against harmful interference in a residential installation.
-
Page 4: Table Of Contents
3, Dipa cleaningswab in cleaningfluidanduse it to wipe the heads. midity. capstans andpinchmilers. • If the deck is placed directly on top of an amplifier, it may pick up NOTE: humming o_ other noise. Also, if the amplifier generates a large amount of heat, the deck may malfunction. -
Page 5: Handling Cassette Tapes
B When using lYPE IV (Metal) or TYPE II (H;gWCrO2) tapes, be careful not to block the sensor holes with the tape (Fig. D, Fig, E), If the holes ere blocked, the automatic tape selector mechanism will not operate correctly. -
Page 6: Connections
(indicating that it is equipped with PIONEER System Remote Con- • Make surethat allof the connectionplugsare insertedsecure_, trol). You will then be able to operate this unit using the Pioneer sys- as improper connectionsmay generate noise. tem remote control unit. If the remote control unit does not have separate buttons for deck I and deck II, or a selection button choose deck ( or deck II, the buttons will only operate deck I1. -
Page 7: Front Panel Facilities
Even when the switch is in the STANDBY position, there will be <1 Reverse playback a power flow to the deck's circuits as long as the power cord is Forward playback connected to a power outlet. The indicator lights when the unit <_... - Page 8 When the switch is set to this position for recording, both sides are recorded and then the tape stops, as described above for the two way mode. RELAY PLAY/BLANK SKIP If Deck I and II are loaded with tapes, each tape will be played using relay pal/back. --,.,_---- Naae maim...
- Page 9 INDICATOR,S Forward mode Reverse mode _ayboc_._se <_, r_-;I•E_ Recording r'm-I. _'_]" The indicators shown below indicatethe currenttape transport sta- tus of DECK I or DECKI1. Recording standby r_-'l" For both DECK i and ii :- Flashing rapidly mute _ Forward mode...
-
Page 10: Playback
When the play button (forward) is pressed during fast forward, the press the playback (1_ or <1)button. unit will play back in the reverse direction, and then play back in the forward direction. (vice versa for reverse) To stop playback Example: When I_ is pressed during fast forward: Pressthe stop (ll) burtonof the operatingdeck. -
Page 11: Music Search
PLAYBACK Selecting songs during skip operations MUSIC SEARCH To change songs to be skipped, press the MS + and MS - buttons (Skipping forward or backward to playback a desired selection) during skip operations. Example: When selecting the 5th song by pressing the MS + button... -
Page 12: Recording
A high level provides a good signak to-nolse ratio and dynamlc range, but an excessively high level dis- torts the sound. If the level is set too low for fear of sound distortion, irritating tape hiss will mar the recording. The characteristics of tapes differ depending on the manufacturer and the type of tape. -
Page 13: Tape Copying
Therefore when making more than one copy, always record from the original tape (do not make a copy of a copy). 1. Load a tape for playback into DECK I and a tape for re- • The recording level adjustment is not necessary during tape copy- cording into Deck II, 2. -
Page 14: Troubleshooting
TROUBLESHOOTING Incorrect operations are often mistaken for trouble and malfunctions. If you think that there is something wrong with this component, check the points below. Sometimes the trouble may lie in another component. Investigate the other components and electrical appliances being used. If the trouble cannot be rectified even after exemising the checks listed below, ask your nearest PIONEER authodzed service center or your dealer to carry out repair work. - Page 15 Abnormal functioning of this unit may be caused by static electricity, or other external interference. To restore norms/operation, turn the power off and then on again, or unplug the AC power cord and then plug it in again. <RRB1169>...
-
Page 16: Specifications
Dimensions ..:.._ ......420 (W) x 125 (H) x 250 (D) mm ==0.19% (DIN) Fast Winding Time ..... Approximately 100 seconds (C-60 tape) Weight (without pecl_age) 16 - 9/16 (W) x 4 - 7/8 (H) x 9 - 13116 (D) Frequency Response U.K. and Australian models ... _........3.9 kg...
Need help?
Do you have a question about the CT-W205R and is the answer not in the manual?
Questions and answers