Advertisement
Quick Links
Advertisement

Related Manuals for Expedition One MULE-UR-XT-NC


Summary of Contents for Expedition One MULE-UR-XT-NC
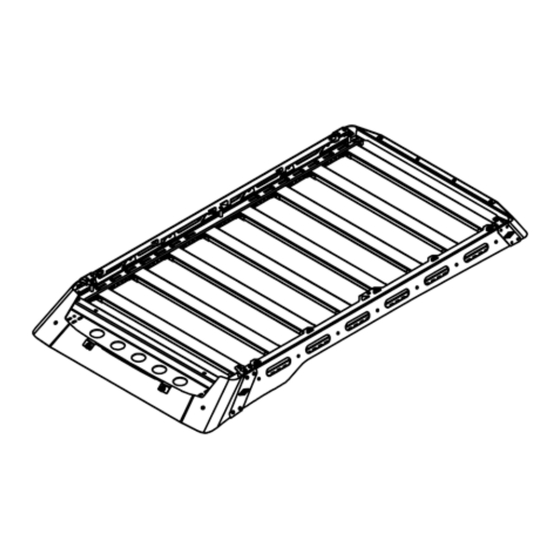
- Page 1 INSTALLATION GUIDE Nissan Xterra Mule Roof Rack...
- Page 2 5 STARS EXPERT - Professional installation recommended. DISCLAIMER Expedition One is not responsible for any damages to vehicle or injury. We always recommend professional assistance when installing our vehicle products. Always follow safety procautions including the use safety gear and devices.
- Page 4 HARDWARE HARDWARE ITEM Nissan Xterra Mule Ultra Roof Rack Front Brace Left Rail Right Rail Rear Brace Front - Cutout or No Cutout Left Side Right Side Rear Front Left Seam Joiner Front Right Seam Joiner Rear Left Seam Joiner Rear Right Seam Joiner Spreader Spreader Bracket...
- Page 5 RACK ASSEMBLY ATTENTION When assembling the Mule Ultra Rack, remember to hand-tighten all bolts relatively loose until the very end of the install. This allows everything to fit into place before everything is tightened down. FRONT AND SIDE BRACES MOUNTING Lay out the front and side braces as shown.
- Page 6 REAR BRACE AND SIDE FASCIA MOUNTING Attach the rear brace and side fascias shown using 1/4” and 5/16” bolts on both sides as shown below.
- Page 7 SIDE FASCIA CONTINUED REAR FASCIA MOUNTING Attach rear fascia as shown with 5/16” bolts and nuts.
- Page 8 FRONT FASCIA MOUNTING Attach the front fascia using 1/4” bolts. Use the provided round spacers to adjust the front fascia to match the curve of the roof when test fitting the roof rack during mounting. NOTE: IF YOU HAVE A FASCIA WITH A LIGHT BAR CUTOUT, WE RECOMMEND INSTALLING THE LIGHT BAR PRIOR TO MOUNTING THE ROOF RACK.
- Page 9 SEAM JOINERS Mount both front and rear seam joiners with 5/16” hardware as shown top and bottom.
- Page 10 REINFORCEMENT SPACERS Attach reinforcement spacers as shown on all 6 hole locations (3 each side) with the provided hardware.
- Page 11 LOAD BAR ASSEMBLY Assemble the load bars with the provided mounts using 1/4” bolts and nuts. Repeat for all load bars. LOAD BAR INSTALLATION Flip roof rack over and attach load bars as shown. Using provided nuts and bolts, you may begin tightening down each load bar with two bolts and nylocs for each side.
-
Page 12: Mount Installation
ROOF RACK INSTALLATION OEM ROOF RACK REMOVAL Remove the OEM roof rack. Start by undoing all the hardware at the mount locations and front fascia using the proper trox head. If equiped the front basket my require removal to access hardware. Finally disconnect the roof wiring loom before removing the rack from the vehicle MOUNT INSTALLATION With the provided foam piece, trace each roof mount to create padding for the roof. - Page 13 ROOF RACK INSTALLATION ROOF RACK MOUNTING Place the roof rack onto vehicle with help of a friend and align with each bracket. Use provided 5/16” bolts and washers for each mount hole location and tighten down roof rack to each bracket as shown below.
Need help?
Do you have a question about the MULE-UR-XT-NC and is the answer not in the manual?
Questions and answers