Table of Contents

Subscribe to Our Youtube Channel
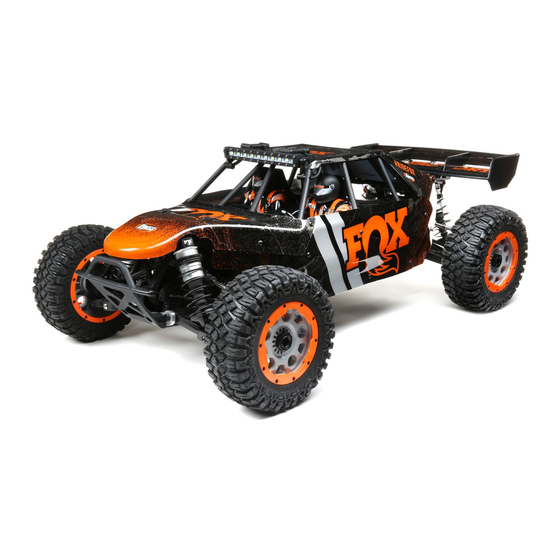
Related Manuals for Team Losi Desert Buggy XL-E 2.0


Summary of Contents for Team Losi Desert Buggy XL-E 2.0
- Page 1 INSTRUCTION MANUAL BEDIENUNGSANLEITUNG MANUEL D’UTILISATION MANUALE DI ISTRUZIONI Before operating this vehicle, please read all printed materials thoroughly. Horizon Hobby is not responsible for inadvertent errors in this manual.
-
Page 2: Table Of Contents
NOTICE All instructions, warranties and other collateral documents are subject to change at the sole discretion of Horizon Hobby, LLC. For up-to-date product literature, visit www.horizonhobby.com or www.towerhobbies.com and click on the support or resources tab for this product. MEANING OF SPECIAL LANGUAGE The following terms are used throughout the product literature to indicate various levels of potential harm when operating this product: WARNING: Procedures, which if not properly followed, create the probability of property damage, collateral damage, and serious injury OR create a high probability of superficial injury. -
Page 3: Box Contents
BOX CONTENTS COMPONENTS • Losi DBXL-E 2.0 RTR, AVC : 1/5-Scale 4WD Desert Buggy (LOS05020) ® ® • Spektrum 2.4GHz Transmitter (SPMR2340) ™ ™ • Spektrum SR6100AT 6 Channel AVC Telemetry Surface Receiver (SPMSR6100AT) • Spektrum S906 1/5 Waterproof Servo (SPMS906) •... -
Page 4: Quick Start
QUICK START Please read the entire manual to gain a full understanding of the DBXL-E 2.0 RTR vehicle, fine-tuning the setup and performing maintenance. 1. Read the safety precautions found in this manual. Always power the transmitter ON before the vehicle and power it OFF after the vehicle has been powered OFF. -
Page 5: Transmitter Functions
TRANSMITTER FUNCTIONS A/B. Channel 3 Button Throttle/Brake Steering Wheel Steering Rate Adjusts the end point of the steering Brake Rate Adjusts the braking end point. Steering Trim Adjusts the steering center point. Normally, the steering trim is adjusted until the vehicle tracks straight. Throttle Trim Adjusts the throttle neutral point SMART Battery Level Indicator... -
Page 6: Binding And Calibrating The Receiver
BINDING AND CALIBRATING THE RECEIVER Binding is the process of linking the SR6100AT receiver to your Spektrum transmit- ter. The AVC features on the receiver can be enabled or disabled during the binding CAUTION: When the bind process is complete, the throttle and steering process. -
Page 7: Avc ® Sensitivity
SENSITIVITY RUN TIME ® The ST RATE dial on the DX3 adjusts the sensitivity, or stability, value in the receiver. The largest factor in run time is the capacity of the battery pack. A larger mAh rat- If you increase the sensitivity, the AVC system becomes more sensitive to the ing increases the amount of run time experienced. -
Page 8: Camber
CAMBER Camber Links Characteristics Front Increases off-power steering and makes the vehicle more responsive. Handling consistency may decrease as off-power steering increases Lowering the Link Rear Increases off-power chassis rotation and makes the vehicle more responsive Front Reduces off-power steering and provides greater handling consistency Raising the Link Rear Reduces off-power chassis rotation and provides greater handling consistency... -
Page 9: Shock Mounting Positions
SHOCK MOUNTING POSITIONS Moving the shocks in on the tower makes the vehicle more forgiving. Moving the shocks out on the tower makes the vehicle more responsive and better for technical tracks. FRONT REAR FRONT TOE Never run front toe-in which can cause limited steeering response. Toe-Out FACTORY SETTING 33mm... -
Page 10: Spektrum Firma 780Kv Brushless Motor
SPEKTRUM FIRMA 780KV BRUSHLESS MOTOR ™ ™ PRECAUTIONS SETTING THE GEAR MESH • Never touch moving parts. The gear mesh has already been set at • Never disassemble while the batteries are installed. the factory. Setting it is only necessary •... - Page 11 ESC FUNCTIONS AND MODES The ESC includes programming options so you can adjust the way your vehicle performs. Refer to the included programming table to adjust the ESC for your driving conditions. ESC PROGRAMMING PROCEDURE Programming is accomplished using the SET button on the ON/OFF switch*. 6.
-
Page 12: Vehicle Maintenance
VEHICLE MAINTENANCE The following items require semi-frequent maintenance. Always clean screw threads and apply removeable thread locking compound when threading machine screws into metal parts. SHOCK DISASSEMBLY/CLEANING Remove the shocks and service as needed. Replace worn parts. 40 WT 40 WT FRONT REAR 1. - Page 13 REFILLING/BLEEDING SHOCKS 1. Fill the shock body 5mm (0.2 in) from the top with 40wt silicone shock oil (TLR74025). 2. Slowly move the piston up and down 5 times, allowing air to rise to the top. Let the shock sit for 5 minutes. 3.
- Page 14 REAR DIFFERENTIAL 1. Remove the rear clip. 2. Remove the cover and differential. 30,000 3. Check the differential fluid and refill or replace as needed with DYN2656 (30,000CS) fluid. The fluid level should be about 0.12 in (3.0mm) from the top surface of the case.
- Page 15 CENTER DIFFERENTIAL 1. Inspect the spur gear. Replace if worn or damaged. 2. Check the differential fluid and refill or replace as needed with DYN2657 (50,000CS) fluid. The fluid level should be about 0.12 in (3.0mm) from the top 50,000 surface of the case.
-
Page 16: Troubleshooting Guide
TROUBLESHOOTING GUIDE PROBLEM POSSIBLE CAUSE SOLUTION Battery not charged or plugged in Charge battery/plug in Vehicle does not operate ESC switch not "On" Turn on ESC switch Transmitter not "On" or low battery Turn on/replace batteries Pinion not meshing with spur gear Adjust pinion/spur mesh Pinion spinning on motor shaft Tighten pinion gear setscrew on motor shaft flat spot... -
Page 17: Fcc And Canada Compliance Information
retail purchase cost. By submitting the item for service you are agreeing to pay- ATTENTION: Horizon service is limited to Product compliant in the country of use ment of the service without notification. Service estimates are available upon request. and ownership. If received, a non-compliant Product will not be serviced. Further, You must include this request with your item submitted for service. -
Page 18: Replacement Parts
REPLACEMENT PARTS // TEILELISTE // LISTE DES PIÈCES DE RECHANGE // ELENCO DEI RICAMBI Part # English Deutsch Français Italiano LOS250019 LED Light Bar Set LED-Leuchtbalken-Set Ensemble de rampe d’éclairage à DEL Set barra a LED LOS250020 Roll Cage Screw Set Überrollkäfig-Schraubensatz Ensemble de vis de cage de retournement Set viti scocca di sicurezza... -
Page 19: Recommended Parts
REPLACEMENT PARTS // TEILELISTE // LISTE DES PIÈCES DE RECHANGE // ELENCO DEI RICAMBI Part # English Deutsch Français Italiano LOS256000 Locknut Set (15) Kontermuttern-Satz (15) Ensemble de contre-écrous (15) Set controdadi (15) LOS256001 Washer/Shim, Set (20) Satz aus Unterlegscheibe/Dichtscheibe (20) Rondelle/cale, ensemble (20) Set rondelle/distanziali (20) LOS256003... -
Page 20: Optional Parts
OPTIONAL PARTS // OPTIONALE TEILE // PIÈCES OPTIONNELLES // PARTI OPZIONALI Part # English Deutsch Français Italiano Ensemble carrosserie avec feuille d’autocollants, LOS250018 Body Set w/ Sticker Sheet, Clear Karosseriesatz mit Stickerbogen, transparent Carrozzeria con adesivi, trasparente transparent LOS252038 Pinion Gear, 15T, 1.5M, 8mm Shaft Zahnradgetriebe, 15T, 1,5M, 8 mm Welle Engrenage à... -
Page 21: Hardware
HARDWARE // HARDWARE // HARDWARE // HARDWARE M3 x 10mm (LOS255005) 8 x 19 x 6mm (LOS257000) M3 x 22mm (LOS255001) 10 x 22 x 6mm (LOS257001) M5 x 30mm (LOS255001) M5 x 35mm (LOS255001) 12 x 24 x 6mm (LOSB5972) M5 x 45mm (LOS255001) M6 x 30mm (LOS255001) 7 x 10 x 4mm (LOS257002) - Page 22 LOS05020V2T1/T2 DBXL-E 2.0 RTR, AVC ™ 1:5 4WD DESERT BUGGY EXPLODED VIEW // EXPLOSIONSZEICHNUNG // VUE ÉCLATÉE DES PIÈCES // VISTA ESPLOSA DELLE PARTI TLR255018 LOS251095 LOS251011 LOS251092 TLR255019 LOS251097 TLR5932 TLR255009 LOS251094 LOS251093 TLR255009 LOS255014 LOS251094 LOS251094 LOS251094 LOS255014 LOS251097 LOS251094 TLR255009...
- Page 23 LOS05020V2T1/T2 DBXL-E 2.0 RTR, AVC ™ 1:5 4WD DESERT BUGGY EXPLODED VIEW // EXPLOSIONSZEICHNUNG // VUE ÉCLATÉE DES PIÈCES // VISTA ESPLOSA DELLE PARTI TLR255018 LOS252059 TLR255018 ARA723412 SPMXSM1100 TLR255009 LOS252058 LOS252064 TLR255007 LOS252058 LOS252066 LOS252118 LOSB5972 LOS252067 LOS352002 LOS252066 LOSB5972 TLR5903 LOS252118...
- Page 24 LOS05020V2T1/T2 DBXL-E 2.0 RTR, AVC ™ 1:5 4WD DESERT BUGGY EXPLODED VIEW // EXPLOSIONSZEICHNUNG // VUE ÉCLATÉE DES PIÈCES // VISTA ESPLOSA DELLE PARTI LOS255014 TLR255030 TLR255019 LOS254064 LOS251046 TLR255030 TLR255018 LOS251045 TLR255031 TLR256005 LOS251046 LOS256001 TLR255009 LOS251053 TLR255006 TLR255009 TLR255006 LOS251045 TLR255031...
- Page 25 LOS05020V2T1/T2 DBXL-E 2.0 RTR, AVC ™ 1:5 4WD DESERT BUGGY EXPLODED VIEW // EXPLOSIONSZEICHNUNG // VUE ÉCLATÉE DES PIÈCES // VISTA ESPLOSA DELLE PARTI LOS250043 (Body Set, Clear // Gehäuse-Set, transparent // Ensemble de carrosserie, transparent // Carrozzeria, trasparente) LOS250044 (Body Set, FOX // Gehäuse-Set, FOX // Ensemble de carrosserie, FOX // Carrozzeria, FOX) LOS250018 (Body Set, LOSI // Gehäuse-Set, LOSI // Ensemble de carrosserie, LOSI // Carrozzeria, LOSI) LOS250021 LOS250043...
- Page 26 Setup Sheet-Stock Date: Event: Name: Track: City: State: Smooth Hard Packed Blue Groove Grass Low Bite High Bite Track Tight Indoor Outdoor Open Rough Loose/Loamy Dusty Astro Turf Med Bite Other Conditions Front Suspension Notes: Out -1° Black Spring: Toe: Arms Level 161mm Overall Shock Length:...
- Page 27 Setup Sheet Event: Date: Name: Track: City: State: Blue Groove High Bite Smooth Hard Packed Grass Low Bite Track Indoor Tight Loose/Loamy Conditions Outdoor Open Rough Dusty Astro Turf Med Bite Other Front Suspension Notes: Spring: Toe: Ride Height: Overall Shock Length: Camber: Camber Link: Caster:...
- Page 28 Setup Sheet Date: Event: Name: Track: City: State: Smooth Hard Packed Blue Groove Grass Low Bite High Bite Track Tight Indoor Outdoor Open Rough Loose/Loamy Dusty Astro Turf Med Bite Other Conditions Front Suspension Notes: Toe: Spring: Overall Shock Length: Ride Height: Camber Link: Camber:...
- Page 29 Setup Sheet Date: Event: Name: Track: City: State: Smooth Hard Packed Blue Groove Grass Low Bite High Bite Track Tight Indoor Outdoor Open Rough Loose/Loamy Dusty Astro Turf Med Bite Other Conditions Front Suspension Notes: Toe: Spring: Overall Shock Length: Ride Height: Camber Link: Camber:...
- Page 30 Setup Sheet Date: Event: Name: Track: City: State: Smooth Hard Packed Blue Groove Grass Low Bite High Bite Track Tight Indoor Outdoor Open Rough Loose/Loamy Dusty Astro Turf Med Bite Other Conditions Front Suspension Notes: Toe: Spring: Overall Shock Length: Ride Height: Camber Link: Camber:...
- Page 31 WWW.LOSI.COM ©2021 Horizon Hobby, LLC. Losi, Desert Buggy XL, Firma, DSM, DSM2, DSMR, AVC, Active Vehicle Control, Active, IC5, DX3, and the Horizon Hobby logo are trademarks or registered trademarks of Horizon Hobby, LLC. The Spektrum trademark is used with permission of Bachmann Industries, Inc. Fox, the Fox logo, and Maxxis are property of their respective owners and are used under license.
Need help?
Do you have a question about the Desert Buggy XL-E 2.0 and is the answer not in the manual?
Questions and answers