Table of Contents
Advertisement
Quick Links
Enjoy Your
USE AND CARE GUIDE
Assembly, Care And Use Instructions
Read Carefully Important:Retain These
Instructions For Future Reference.
quality products designed to enhance your home. Visit us online to see our full line of products available for your home improvement needs.
E02GR009
Questions, problems, missing parts? Before returning to the store,
please contact our Customer Service
service@alphamarts.com
Thank you for choosing Captiva Desings!
This appliance is for Household use only.
This is not a commercial appliance.
THANK YOU
inually create
Advertisement
Table of Contents

Related Manuals for Captiva Designs E02GR009


Summary of Contents for Captiva Designs E02GR009
- Page 1 Enjoy Your USE AND CARE GUIDE E02GR009 This appliance is for Household use only. Assembly, Care And Use Instructions This is not a commercial appliance. Read Carefully Important:Retain These Instructions For Future Reference. Questions, problems, missing parts? Before returning to the store, please contact our Customer Service service@alphamarts.com...
-
Page 2: Table Of Contents
Table of Contents Safety Information Troubleshooting First-time Operation Warnings Care and Maintenance 22-23 Package Contents Product Specifications Preparation Assembly Instructions Warranty 8-16 Operation Instructions 17-19 Safety Information Assembler/Installer This instruction manual contains important information necessary for the proper assembly and safe use of this appliance. -
Page 3: Warnings
IMPORTANT SAFETY Please read this manual carefully and before installing or using your Captiva Designs gas grill to ensure proper operation, installation, and servicing, and to reduce the risk of fire, burn hazard, and/or other injury. This manual should be retained for your information. - Page 4 Never use charcoal or any other solid fuel in the grill. PROPER USE This Captiva Designs grill in NOT intended for commercial use. Do not operate the grill in a building, garage, or any other enclosed areas. This could result in carbon monoxide buildup, which may cause injury or death.
- Page 5 Warnings The self-contained LP system appliance is design-certified to be used with a standard 20-lb., 12 1/4”-diameter, 18”-tall cylinder with right-handed connection threads. This is the maximum size LP tank to be used with this grill. The cylinder must be marked in accordance with the latest U.S. Department of Transportation specifications for LP gas cylinders.
-
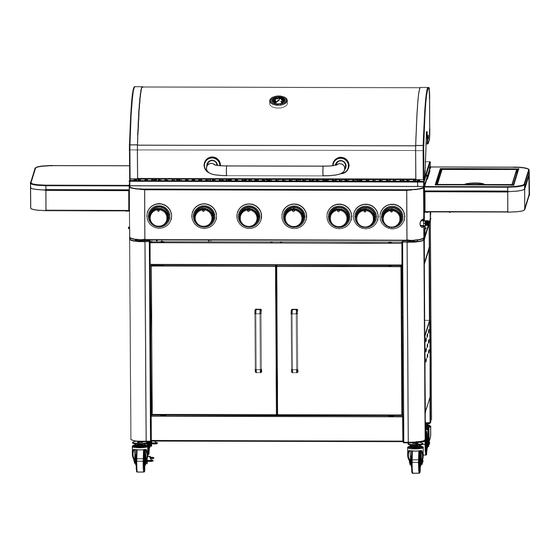
Page 6: Package Contents
Package Contents... - Page 7 Package Contents Name Name Warming rack Door handle Cooking grills Door Flame tamer Bottom plate Grease box Right leg(back) Lid & Body assembly Right leg(front) Left side table Bottom front panel Cart frame Locking caster Magnet base Gas cylinder adjustment bar Left leg(back) Side burner table Left leg(front)
-
Page 8: Preparation
Preparation Before beginning assembly of product, make sure all parts are present. Compare parts with package contents list on previous page and hardware contents below. If any part is missing or damaged, do not attempt to assemble the product. Contact customer service for replacement parts. Tools Required for Assembly and Leak Testing (not included): Phillips screwdriver, Spray bottle, Pliers, Adjustable Wrench... - Page 9 Assembly Instructions A M6 x 12 4 pcs A M6 x 12 12 pcs...
- Page 10 Assembly Instructions A M6 x 12 8 pcs...
- Page 11 Assembly Instructions A M6 x 12 2 pcs B M4 x 15 4 pcs C Door bolt 2 pcs...
- Page 12 Assembly Instructions D M4 x 6 4 pcs Please remove bottom and two sides shipping protective metal bracket before assembly.
- Page 13 Assembly Instructions A M6 x 12 2 pcs A M6 x 12 4 pcs...
- Page 14 Assembly Instructions A M6 x 12 6 pcs A M6 x 12 4 pcs...
- Page 15 Assembly Instructions Step1: Take out the corrugated pipe connect Step3: Connect the gas tube to side burner. ignition wire. Step2: Insert the corrugated pipe into side burner and fix by E. The hole here between pipe and side burner is correct for mix Oxygen. E Burner clamp 1 pc Finished...
- Page 16 Assembly Instructions...
-
Page 17: Operation Instructions
Operation Instructions CHECKING FOR LEAKS After all connection are made, check all connections and ttings on the LP gas tank valve, gas hose and regulator for leaks with a water and soap solution. To prevent re or explosion while testing for a leak: •... - Page 18 Operation Instructions CONNECTING GAS CYLINDER The propane gas supply cylinder to be used must be constructed and marked in accordance with the specifications for LP gas Cylinders of the U.S. Department of Transportation(D.O.T) or the National Standard of Canada, CAN/CSA-B339, Cylinders, Spheres and Tubes for Transportation of Dangerous Goods;...
- Page 19 Operation Instructions Other cylinders may be acceptable for use with this appliance if they are compatible NOTE: with the appliance nesting hole and retention means. Refer to Page 19 of the Assembly Instructions for correct cylinder to cylinder holder connection. WARNING: ALL INSTRUCTIONS AND SAFEGUARDS ON THIS PAGE MUST BE FOLLOWED TO PREVENT FIRE, DAMAGE AND/OR INJURY.
-
Page 20: Troubleshooting
Troubleshooting Problem Solution Possible Cause 1. Carefully follow the lighting procedures outlined on Pages 21. Remember, all gas grill valves must be in the OFF position when the tank valve Low heat or low ame 1. For propane: improper is turned on. Slowly turn the tank on to allow when valve is turned lighting procedure. -
Page 21: First-Time Operation
First-time Operation Prior to using your Captiva Designs gas grill, verify that all of the following is true: • The burner tube is free of any debris or obstruction. • The proper gas type, gas connection, and regulator settings have been installed. -
Page 22: Care And Maintenance
Care and Maintenance Cooking Grates The best time to ‘burn-off’ the cooking grates is after every use (approx. 15 minutes). The grill is already hot from cooking thus requiring less fuel to obtain necessary temperature for ‘burn-off’. To ‘burn off’ or heat clean your grill, turn the burners to highest position and run for 15 minutes with the lid closed. - Page 23 Care and Maintenance Burner Assembly Removing The Burner Assembly 1. Make sure all control knobs are in the OFF position, the LP gas supply valve has been closed, and the gas hose is disconnected from the gas supply. 2. Open lid and remove warming rack, cooking grates, heat tents, clip for burner, ignition chain and main burners.
-
Page 24: Product Specifications
Installation, repair, and maintenance work should be performed by an authorized service technician. Work by unqualified persons could be dangerous and will void the warranty. All Captiva Designs gas grills must have a qualified installer complete the installation for the warranty to be in effect. Incorrect installation of the grill will void the warranty.
Need help?
Do you have a question about the E02GR009 and is the answer not in the manual?
Questions and answers
Which knob is the controll knob. How do i light this BBQ
The control knob on the Captiva Designs BBQ model E02GR009 is used to regulate the gas flow to the burners. To light the grill:
1. Read all instructions before lighting.
2. Open the lid before starting.
3. Turn the control knob to the "Max" position and push it in.
4. If ignition does not occur within 5 seconds, turn the knob to "Off," wait 5 minutes for gas to clear, and try again.
5. For manual lighting, ensure the knob is in the "Off" position, allow gas to dissipate if previously attempted, stand back, then push in and turn the knob to "Max."
6. If the burner still does not light after several attempts, turn off all gas valves and contact an authorized technician.
This answer is automatically generated