
Related Manuals for PowerFlex PF-JT80


Summary of Contents for PowerFlex PF-JT80
- Page 1 PF-JT80 Charger Installation Guide Copyright © 2022 PowerFlex Systems, Inc. All Rights Reserved.
-
Page 2: Getting Technical Assistance
This manual contains important instructions that should be followed for the safe installation, operation, and maintenance of PF-JT80 chargers. This guide contains important instructions for the PF-JT80 that must be followed during installation and maintenance. Special symbols are used throughout the guide: Warning: Indicates a hazardous situation that could result in injury or death. - Page 3 Caution: Changes or modifications to this unit not expressly approved by the party responsible for compliance could void the equipment's warranty. Copyright © 2022-2023 PowerFlex Systems, Inc. All Rights Reserved.
-
Page 4: Table Of Contents
Step 2: Installation Mounting the PF-JT80 on a wall Mounting the PF-JT80 on a pedestal Finishing up with cable management Step 3: Inspection Step 4: Validation Installation checklist Appendix A: Technical Specifications Index Copyright © 2022-2023 PowerFlex Systems, Inc. All Rights Reserved. -
Page 5: Getting Started
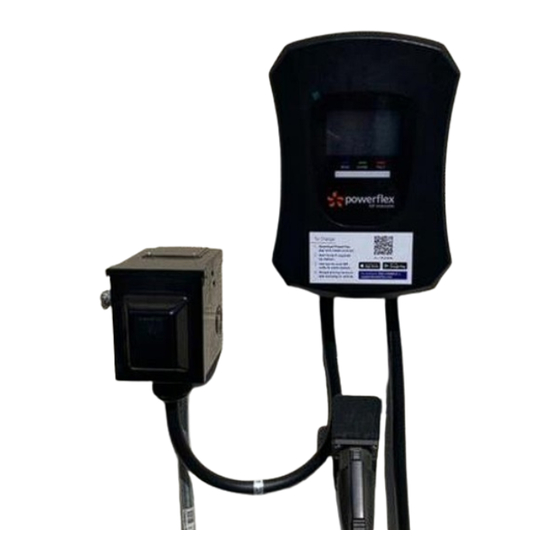
This guide instructs how to install the PF-JT80 in preparation of energizing and commissioning with the PowerFlex system. An overview of the PowerFlex PF-JT80 PF-JT80 is an EV charger designed and manufactured by PowerFlex. It has a LCD display and two preinstalled cables: a connection cable... -
Page 6: How To Use This Guide
How to use this guide To complete the installation of a PF-JT80 EV charger to a wall or pedestal, there are four steps: 1. Planning: Inspect the PF-JT80 box contents and gather the tools necessary to install the EV charger. -
Page 7: Setting Up The Pf-Jt80
What you’ll need You can install the PF-JT80 charger to a wall or pedestal. Check your site plan and before installing the wall-mounted charger, gather the following tools and equipment: Phillips screwdriver ▪ Drill and drill-bit (¼") for expansion anchor screws for wall installation ▪... -
Page 8: Step 2: Installation
Wrench (or wrench socket) that can work with 3/8" bolt (for cable retractor) ▪ Step 2: Installation To install the PF-JT80, you’ll do the following: Mount the EV charger to a concrete wall ▪ Mount the EV charger to a pedestal ▪... - Page 9 Identify where the charger is to be installed on the wall. Installation notes: PowerFlex recommends that the base of the station should be between 48" and 58" (1.219 m ▪ to 1.473 m) from the ground. For ADA compliance, the station’s QR code should be no higher than 48" (1.2 m), which means ▪...
- Page 10 Remove the two screws on the side of the charger. Carefully slide the charger onto the mounting bracket (L) and lock it into place with the screws (R). Verify that the charger is securely fastened on the wall. Copyright © 2022-2023 PowerFlex Systems, Inc. All Rights Reserved.
-
Page 11: Mounting The Pf-Jt80 On A Pedestal
PF-JT80 chargers. For safety reasons, make sure that the front opening of the junction box is covered. The PF-JT80 is now mounted on the wall. To complete the installation, you’ll need to spend a few more minutes doing cable management. - Page 12 If no wire management hole exists in the pedestal, use a 1 1/8" (29 mm) drill-bit to drill a hole between 6-12 inches under the location of the charger, directly under the left cable. Use a 1" cable gland to waterproof the cable opening: Copyright © 2022-2023 PowerFlex Systems, Inc. All Rights Reserved.
-
Page 13: Finishing Up With Cable Management
At the end of a charging cable is a charging connector that is inserted into a vehicle for charging. For safety reasons, the charging connector should be hung up when not in use. Two holsters are offered: Direct holster Z holster Copyright © 2022-2023 PowerFlex Systems, Inc. All Rights Reserved. - Page 14 A cable retractor can be installed for either wall or pedestal installations with two simple steps: Mount the retractor to the wall or pedestal Mount the charging cable to the cable retractor The cable retractor provided by PowerFlex has the following components: Item Description...
- Page 15 Insert the charging cable in the cable clamp Put the cable clamp pieces back together and (both front and back view shown): then reinsert the nuts and bolts (back view shown): Copyright © 2022-2023 PowerFlex Systems, Inc. All Rights Reserved.
- Page 16 Place the cable clamp along the charging cable, at least 2 feet to the top of the charger. Also, ▪ Give the cable slack to the bottom of the charger as shown in the picture: Ensure the cable is not twisted between the charger and the cable clamp. Copyright © 2022-2023 PowerFlex Systems, Inc. All Rights Reserved.
- Page 17 PowerFlex. This simple assembly can be mounted on a wall or onto a pedestal. Using a ¾" metal cable clamp with rubberized cushions, route the charging cable 2-3 FT above the charger.
-
Page 18: Step 3: Inspection
Inspection is where installation information is recorded and a request for commissioning with PowerFlex is initiated. PowerFlex uses a customized mobile app, available from either the Google Play store or the Apple Store, called FastField Forms (FFF). This app enables installers to gather important installation information and photographs for each PF-JT80 charger being installed: More about using the FFF app …... -
Page 19: Step 4: Validation
Step 4: Validation Once the PF-JT80 charger information is entered and the rest of the PowerFlex stations are recorded in the app, the installer submits the forms to PowerFlex for review and commissioning. After the go-ahead from PowerFlex, the final validation step is performed. -
Page 20: Installation Checklist
Done Task Step 1: Planning Identify the location where the PF-JT80 EV charger will be installed at the site Unbox the PF-JT80 and verify everything is included Gather all the required tools before going onsite for the installation Step 2: Installation ... -
Page 21: Appendix A: Technical Specifications
Appendix A: Technical Specifications The PF-JT80 charger and mounting bracket have the following dimensions: PF-JT80 Charger Mounting bracket Copyright © 2022-2023 PowerFlex Systems, Inc. All Rights Reserved. - Page 22 UVP, OVP, RCD (CCID 20), SPD, Ground Fault Protection OCP, OTP, Control Pilot Fault Protection Connectivity User authentication RFID (ISO 14443) Communication protocol OCPP 1.6 J Networking LAN, Wi-Fi (802.11 b/g/n) Copyright © 2022-2023 PowerFlex Systems, Inc. All Rights Reserved.
-
Page 23: Index
(PF-JT48), 17 specifications, 17 FastField Forms (FFF), 14 technical support, ii FCC compliance, iii torpedo level, 4 high-point anchor, 13 validation step, 2, 14 holster wall mounting, 4 direct, 9 Copyright © 2022-2023 PowerFlex Systems, Inc. All Rights Reserved.
Need help?
Do you have a question about the PF-JT80 and is the answer not in the manual?
Questions and answers