
Related Manuals for Bedgear FLEX LSX XSF350MSA


Summary of Contents for Bedgear FLEX LSX XSF350MSA
- Page 1 FLEX LSX™ OWNER’S MANUAL FLEX LSX™ ADJUSTABLE BASE LPB14W4MSA Rev 1.0 07/2021 - 1 -...
-
Page 2: Safety & Warranty Warnings
NOTE: BEDGEAR DISCLAIMS ANY LIABILITY FOR DAMAGES OR INJURIES base. If the plug does not fit your outlet, contact a qualified Electrician to install a WHICH MAY OCCUR DUE TO FAILURE TO PROPERLY FOLLOW ASSEMBLY suitable outlet. -
Page 3: Accessories Box
Open the box lid. discarding the packing materials, ensure that all the parts are accounted for. Mattress Retainer Bar Accessories Box Flat Mattress Retainer Bar (Exclusively for BEDGEAR Mattresses) A R D D B O ×1(2 for K/CK) ×1 ×1... - Page 4 Remove the red plastic safety lock before unfolding your adjustable base. Remove the red plastic Turn the locking pin 90° in Remove the folding locking safety clip. counter clockwise direction. pin by pulling upwards. Red Plastic Safety Clip Locking Pin Locking Pin Install 4 legs;...
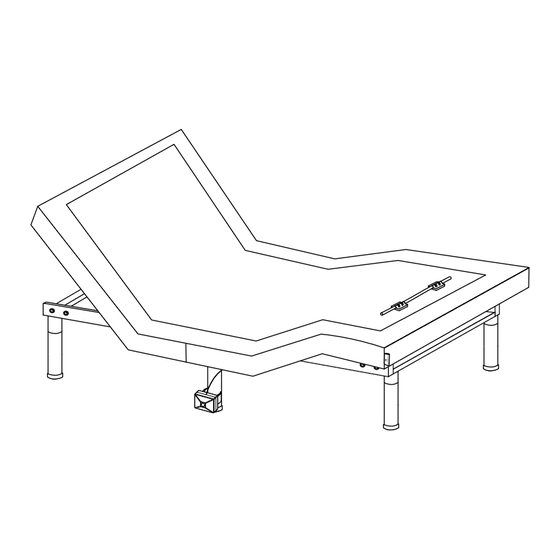
- Page 5 Install the remaining 2 legs on the foot end of the bed; make sure the legs are tight. Motion sensor installation Uncoil the DC power cord (connected to the control box) Motion Mounting and put it to the side of the bed. A R D Sensor Bracket...
- Page 6 Installation method 1: (Exclusively for BEDGEAR Mattresses) Make the bed completely flat. Insert the flat mattress retainer bar into the securing strap at the bottom of the BEDGEAR A R D mattress and then snap it into the mattress D B O retainer mounts.
- Page 7 Set up the adjustable base with the bed frame and slat base. Take the bed out of the box, put it on the slat base and do not Turn over the bed. Uncoil the DC power cord. install any legs. A R D A R D motion sensor...
- Page 8 Make the bed completely flat with a flipping motion. Insert the flat mattress retainer bar into the securing strap at the bottom of the BEDGEAR mattress and then snap it into the mattress retainer mounts.
-
Page 9: Control Box
Electronics Quick Reference Guide If simultaneous operation of two foundations is desired, please Remote Control follow the steps listed below. Note the sync cord is needed to control two foundations with mobile APP, follow the "Synchronizing Two Foundations with Sync Head Massage Neck Motor Lumbar Motor Cord"... -
Page 10: Battery Level
Remote Control Instructions Pairing Remote The original remote that comes in the box is already paired to the foundation. No further action is required. In the event when the remote is not paired with the foundation, follow the pairing instructions below. Make sure the batteries are good. -
Page 11: Headboard Bracket Installation Guide (Optional)
Slat Pack Installation Guide (Optional) Headboard Bracket Installation Guide (Optional) Headboard brackets are optional and not included. A 1/2” (13 mm) SLAT/ PLATFORM Leg Configuration Table LEGS socket and 1/2” (13 mm) wrench are required to complete the installation. (2) T-Brackets (8) M8*16 (4) Nuts (4) Washers... - Page 12 Head Massage (3 different intensities) Adjustable Base models. If you wish to disconnect from Before you start, switch on Bluetooth on your mobile device. Make sure your BEDGEAR Foot Massage (3 different intensities) the current paired Adjustable Base, Enter the Settings Adjustable Base is correctly connected and is power-on.
-
Page 13: Audio System
Spacing Connector for TXL/T/CKS (Optional) Audio System Install two spacing connectors to ensure the gap between the two Pairing Instruction adjustable bases is consistent. 1. Once power is supplied, the audio kit begins to search for a device to pair (2) SPACING CONNECTOR (TXL/T/CKS ONLY) with automatically.
Need help?
Do you have a question about the FLEX LSX XSF350MSA and is the answer not in the manual?
Questions and answers