Table of Contents
Advertisement
Quick Links
Manufacturer:
D.O.R.C. Dutch Ophthalmic Research Center (International) B.V.
Scheijdelveweg 2
3214 VN Zuidland
The Netherlands
Phone:
+31 (181) 45 8080
Fax.:
+31 (181) 45 8090
E-mail:
sales@dorc.eu
Doc. nr.: 30204400-B
Distributor in the USA:
Dutch Ophthalmic USA
10 Continental Drive, Bldg 1
Exeter, NH 03833
U.S.A.
Phone:
800-75-DUTCH or 603-778-6929
Fax.:
603-778-0911
E-mail:
sales@dutchophthalmicusa.com
Advertisement
Table of Contents

Related Manuals for DORC EVA

Summary of Contents for DORC EVA
- Page 1 Dutch Ophthalmic USA Scheijdelveweg 2 10 Continental Drive, Bldg 1 3214 VN Zuidland Exeter, NH 03833 The Netherlands U.S.A. Phone: +31 (181) 45 8080 Phone: 800-75-DUTCH or 603-778-6929 Fax.: +31 (181) 45 8090 Fax.: 603-778-0911 E-mail: sales@dorc.eu E-mail: sales@dutchophthalmicusa.com Doc. nr.: 30204400-B...
- Page 2 2 - Version date: Nov. 01, 2013 - N° doc.: 30204400-B...
-
Page 3: Table Of Contents
User or operator instructions for cleaning the EVA....... . . - Page 4 Service Manual Ophthalmic Surgical System Table of contents 2.7.2 Covers ..............15 2.7.3 Main board .
- Page 5 EVA Environmental Specifications ........
-
Page 6: Foreword
The purpose of this Service Manual is to provide the field engineer with the necessary infor- mation to maintain and repair the Ophthalmic Surgical System, EVA. For more detailed in- formation concerning the operation of the EVA, consult the Instruction Manual. -
Page 7: Symbols In This Document
Service Manual Ophthalmic Surgical System Foreword Symbols in this document Below, the symbols used in this document are explained. These symbols are used to alert the reader to specific warnings. Warning! A warning indicates a potentially harmful situation to yourself or others. Caution! A caution indicates a condition that may lead to equipment damage or malfunction Tip or suggestion. -
Page 8: Introduction
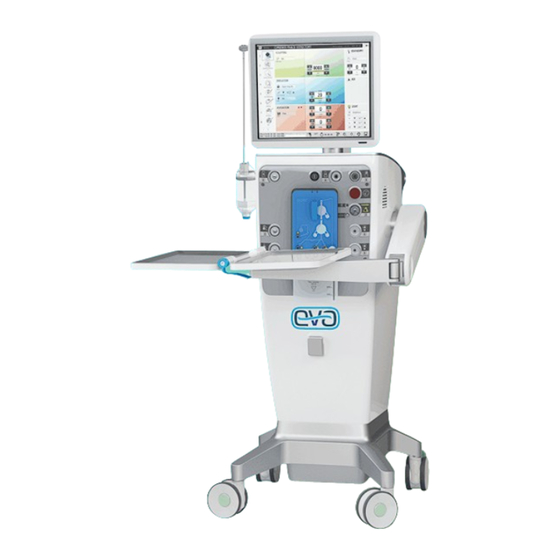
Scissors. Additional function: Ophthalmic Laser for coagulation. The EVA system is equipped with an advanced Irrigation and Aspiration system. It is provid- ed with an advanced pump system which makes Aspiration possible in two ways: vacuum controlled and flow controlled. -
Page 9: Guarantee
Service Manual Ophthalmic Surgical System Chapter 1 - Introduction • warnings or instructions as shown on the Ophthalmic Surgical System or contained in this Ser- vice Manual being ignored, • the Ophthalmic Surgical System being used for other applications or in other conditions than specified in this Service Manual, •... -
Page 10: Maintenance Instructions
Depending on the capabilities of the service facility, some repairs may not be possible; e.g. troubleshooting the main modules of the EVA without proper test equipment and qualified personnel. In such cases the defect parts or the complete EVA should be send to D.O.R.C. In- ternational. -
Page 11: Warnings
Do not touch any exposed wiring or conductive surface, while the cover is off and the unit is energized. When electric power is connected to the EVA, the voltages present can cause in- jury or death. Never wear a grounding wrist strap when working on an energized unit. The operator should not perform any servicing except as specifically stated in the Instruction Manual. -
Page 12: Nohd
Cautions Electrostatic discharge through the printed circuit boards will damage the components of the EVA. Handle all circuit boards (replacements and defective) by their non-conductive edg- es and use anti-static containers, when transporting them. Before servicing the equipment, ground yourself and the tool to discharge any accumulated static charge, by wearing a static tool wrist strap. -
Page 13: User Or Operator Instructions For Cleaning The Eva
Chapter 2 - Maintenance instructions 2.3 User or operator instructions for cleaning the EVA Before cleaning the EVA disconnect the power cord and let the EVA cool down first. The EVA should only be cleaned with a humid (clean or sterile water) towel. -
Page 14: Transport And Packaging The Eva
2.6.1 Transport and Packaging the EVA To transport the EVA please only use the original packaging or the dedicated flight case. 2.6.2 Transport and Packaging modules To transport a replaced EVA Module please only use the original packaging of the supplied EVA Module. -
Page 15: Covers
Service Manual Ophthalmic Surgical System Chapter 2 - Maintenance instructions 2.7.2 Covers This paragraph describes the disassembly of the 4 covers. Assembling is carried out in the opposite way. Use Threebond to fix the screws? Drawer Unscrew the 4 screws at the bottom side of the drawer. - Page 16 Unscrew the 2 screws of the top cover. Remove the top cover. Midhood Unscrew the 10 screws of the midhood. Inside the EVA unscrew the nut at the top side of the midhood. Remove the midhood 16 - Version date: Nov. 01, 2013 - N° doc.: 30204400-B...
-
Page 17: Main Board
Service Manual Ophthalmic Surgical System Chapter 2 - Maintenance instructions 2.7.3 Main board This paragraph describes the disassembly of the main board. Assembling is carried out in the opposite way. Remove the drawer as described in par. ’Drawer’, page 15). Remove the back cover as described in par. -
Page 18: Illumination
Service Manual Ophthalmic Surgical System Chapter 2 - Maintenance instructions 2.7.4 Illumination This paragraph describes the disassembly of the Illumination module. Assembling is carried out in the opposite way. Remove the drawer as described in par. ’Drawer’, page 15). Remove the back cover as described in par. ’Back Cover’, page 15). Remove the top cover as described in par. -
Page 19: Power Supply Module
Unscrew the 4 screws of the power sup- ply module. Lift the power supply module out of the foot of the EVA. Disconnect all cable at the bottom side of the power supply module (not visible in the picture). -
Page 20: Panel Pc
Service Manual Ophthalmic Surgical System Chapter 2 - Maintenance instructions 2.7.6 Panel PC This paragraph describes the disassembly of the panel PC. Assembling is carried out in the opposite way. Unscrew the 4 screws at the bottom site of the panel PC arm. Remove the cover plate. -
Page 21: Infusion Pole
Service Manual Ophthalmic Surgical System Chapter 2 - Maintenance instructions 2.7.7 Infusion Pole This paragraph describes the disassembly of the Infusion Pole. Assembling is carried out in the opposite way. Remove the drawer as described in par. ’Drawer’, page 15). Remove the back cover as described in par. - Page 22 Service Manual Ophthalmic Surgical System Chapter 2 - Maintenance instructions Remove the CAN cable. Unscrew the 4 self-locking nuts Remove the drive unit carefully. The drive unit is mounted on 4 vibration damp- ers in which set screws are mounted with lock- ing agent (Threebond normal 1374).
-
Page 23: Phaco/Diathermy
Service Manual Ophthalmic Surgical System Chapter 2 - Maintenance instructions 2.7.8 Phaco/Diathermy This paragraph describes the disassembly of the Phaco/Diathermy module. Assembling is carried out in the opposite way. Remove the drawer as described in par. ’Drawer’, page 15). Remove the back cover as described in par. ’Back Cover’, page 15). Remove the top cover as described in par. -
Page 24: Vitrectome Module
Service Manual Ophthalmic Surgical System Chapter 2 - Maintenance instructions 2.7.9 Vitrectome module This paragraph describes the disassembly of the Vitrectomy module. Assembling is carried out in the opposite way. Remove the drawer as described in par. ’Drawer’, page 15). Remove the back cover as described in par. -
Page 25: Posterior Module (Vfi/E, Air, Prop. Scissors)
Service Manual Ophthalmic Surgical System Chapter 2 - Maintenance instructions 2.7.10 Posterior module (VFI/E, Air, Prop. Scissors) This paragraph describes the disassembly of the Posterior module. Assembling is carried out in the opposite way. Remove the drawer as described in par. ’Drawer’, page 15). Remove the back cover as described in par. -
Page 26: Laser: Replacing Module
Remove the interface plate. Be careful! There is a the cable b etween the interface plate and the EVA located below the posterior module. Disconnect the cable connectors (not visi- ble in the picture). At assembling, first connect the cable connectors. - Page 27 Service Manual Ophthalmic Surgical System Chapter 2 - Maintenance instructions Unscrew the 4 screws of the laser con- nector plate. Move the laser interface plate carefully a little bit forwards. Be careful ! The laser fiber and CAN cable are still connected. Disconnect the laser fiber.
- Page 28 Service Manual Ophthalmic Surgical System Chapter 2 - Maintenance instructions Carefully remove the laser fiber through the EVA. Remove the CAN cable. Unscrew the screw of the laser module support. Support the laser module during unscrewing. Carefully move the laser module back- wards.
-
Page 29: Pump
Remove the interface plate. Be careful! There is a the cable b etween the interface plate and the EVA located below the posterior module. Disconnect the cable connectors (not visi- ble in the picture). At assembling, first connect the cable connectors. -
Page 30: Foot Pedal
There is no disassembly required for the Foot pedal. The foot pedal can be replaced only. In case of replacement: • Connect the new foot pedal to the EVA System; use the back-up cable for pairing the foot pedal to the System. •... -
Page 31: Replacing Other Parts
When the remote control is not used for a substantial period of time, please remove the batteries to prevent oxidation of the batteries.. Fig. 3: Remote control EVA N° doc.: 30204400-B - Version date: Nov. 01, 2013 - 31... -
Page 32: Mayo
Service Manual Ophthalmic Surgical System Chapter 2 - Maintenance instructions 2.10.3 Mayo This paragraph describes the disassembly of the mayo. Assembling is carried out in the op- posite way. Place the mayo in the position as shown in the picture. In this position the mayo fits in the pack- aging. -
Page 33: Maintenance Of The Compressed Air Filter
Service Manual Ophthalmic Surgical System Chapter 2 - Maintenance instructions Place the plastic cap. This is the same plastic cap as used on the mayo arm. 2.10.4 Maintenance of the compressed air filter Check the level of the reservoir of the air filter. If required empty the reservoir. N°... -
Page 34: Safety Scheme
Service Manual Ophthalmic Surgical System Chapter 3 - Safety Scheme 3 Safety Scheme 34 - Version date: Nov. 01, 2013 - N° doc.: 30204400-B... -
Page 35: Block Diagrams
Service Manual Ophthalmic Surgical System Chapter 4 - Block Diagrams 4 Block Diagrams 4.1 Block Diagram 8000.ANT01 N° doc.: 30204400-B - Version date: Nov. 01, 2013 - 35... -
Page 36: Block Diagram 8000.Com01
Service Manual Ophthalmic Surgical System Chapter 4 - Block Diagrams 4.2 Block Diagram 8000.COM01 36 - Version date: Nov. 01, 2013 - N° doc.: 30204400-B... -
Page 37: Block Diagram 8000.Com02
Service Manual Ophthalmic Surgical System Chapter 4 - Block Diagrams 4.3 Block Diagram 8000.COM02 N° doc.: 30204400-B - Version date: Nov. 01, 2013 - 37... -
Page 38: Modules
5 Modules 5.1 Modular system The EVA is a modular system. In case of a defect the defective module can be replaced by a new module. The defective module can be returned to D.O.R.C. International for repair. 5.2 Overview of Modules The electrical schemes of the modules are available upon request only. -
Page 39: Appendix 1 Specifications
Service Manual Ophthalmic Surgical System Appendix 1 - Specifications Appendix 1 Specifications This appendix describes the technical details of the EVA. A1.1 EVA Dimensions metric US units EVA Dimensions [cm] / [inch]: • Width: • 71.7 • 28.2 • Height: •... -
Page 40: A1.2 Eva Environmental Specifications
Service Manual Ophthalmic Surgical System Appendix 1 - Specifications A1.2 EVA Environmental Specifications Electrical Specifications Mains supply : 100 240VAC ~50/60 Hz 100 240 V T6.3AL/250V slow-blow or Fuses: T6.3AH/250V slow-blow 5 x 20 mm Power consumption: 650 VA Electrical Input Detachable international power cord... -
Page 41: A1.3 Foot Pedal
Service Manual Ophthalmic Surgical System Appendix 1 - Specifications A1.3 Foot Pedal EVA Foot pedal metric US units Dimensions [cm] / [inch]: • Width: • 29.5 • 11.6 • Height: • 14.3 • • Length: • 31.9 • 12.6 Weight [kg] / [pounds]: •... -
Page 42: A1.4 Eva Functions Specifications
Service Manual Ophthalmic Surgical System Appendix 1 - Specifications A1.4 EVA Functions Specifications Infusion/Irrigation Gravity Automatic Infusion pole; Range: [cm H2O] 30 - 140 (Hook 0 - 110) VGPC [mmHg]: 0 - 150 The maximum allowable weight on the infusion... -
Page 43: A1.6 Air Module
Service Manual Ophthalmic Surgical System Appendix 1 - Specifications Auto Backflush (Reflux) Pressure range [mmHg]: 0 to 50 Time of activation [ms]: 0 to 250 Manual Backflush (Reflux) Pressure range: see Infusion /Irrigation A1.6 Air module Pressure Range [mmHg]: 0 to 150 Pressure accuracy [mmHg]: <... -
Page 44: A1.9 Diathermy Module
Service Manual Ophthalmic Surgical System Appendix 1 - Specifications A1.9 Diathermy module Type: Bipolar Coagulation Shape of HF-voltage: Un-modulated square voltage Frequency [MHz]: 1 +/- 10% Ω HF Output [W]: 0 - 10 at 150 (linear and fixed) Maximum HF voltage: 200Vp -p max. -
Page 45: A1.13 Laser Module
Service Manual Ophthalmic Surgical System Appendix 1 - Specifications A1.13 Laser Module Aiming Beam Laser type: Diode Laser Laser class: Wavelength [nm Red]: 625 - 635 Attenuation [mW]: 0 - 1 Working Beam Frequency doubled, diode pumped Nd:YAG Laser Laser type: KTP-laser Laser class: Wavelength [nm]:... -
Page 46: A1.14
Screen size: 19" Languages: En/De/Fr/Es/It/Pt/Sv Max. number of surgeons programmed: Max. number of procedures programmed: A1.15 Audio Feedback Volume [dB]: 0 - 70 A1.16 Remote control EVA metric US units Dimensions [cm] / [inch]: • Length: • 12.6 • 4.96 •... -
Page 47: Register
Service Manual Ophthalmic Surgical System Register ..... calibration laser power ....... . cautions Register . - Page 48 ......foot pedal EVA ......
- Page 49 Service Manual Ophthalmic Surgical System Register ............. NOHD radiation .
- Page 50 Service Manual Ophthalmic Surgical System Register ......schemes electrical ......scissors .
Need help?
Do you have a question about the EVA and is the answer not in the manual?
Questions and answers