Table of Contents
Advertisement
Quick Links
Advertisement
Table of Contents

Related Manuals for Panasonic MC-V5268


Summary of Contents for Panasonic MC-V5268
- Page 1 This Owner's Manual is provided and hosted by Appliance Factory Parts. PANASONIC MC-V5268 Owner's Manual Shop genuine replacement parts for PANASONIC MC-V5268 Find Your PANASONIC Vacuum Cleaner Parts - Select From 605 Models -------- Manual continues below --------...
- Page 2 VACUUM CLEANER Aspiradora Aspirateur MC-V5268 Operating Instructions Instrucciones de operación Manuel d’utilisation Before operating your vacuum cleaner, please read these instructions completely. Antes de usar su aspiradora, lea completamente estas instrucciones por favor. Avant d’utiliser l’appareil, il est recommandé de lire attentivement ce manuel.
- Page 3 Read and understand all instructions. TO OUR VALUED CUSTOMER We are very pleased to welcome you to the Panasonic family of products. Thank you for purchasing this product. Our intent is that you become one of our many satisfied customers.
-
Page 4: Important Safety Instructions
THIS VACUUM CLEANER IS INTENDED FOR HOUSEHOLD USE ONLY Note: Before you plug in your Panasonic vacuum cleaner, make sure that the voltage indicated on the rating plate located at the back of the vacuum cleaner is the same as your local supply. -
Page 5: Table Of Contents
Automatic Self Adjusting Nozzle ..................16 Carry-in or mail-in service in the U.S.A. can be ob Edge Cleaning ........................16 Panasonic Services Company (PASC) Factory Se Thermal Protector ......................16 call, toll free, 1-800-211-PANA (7262) to locate a P Vac Gauge ..........................18... -
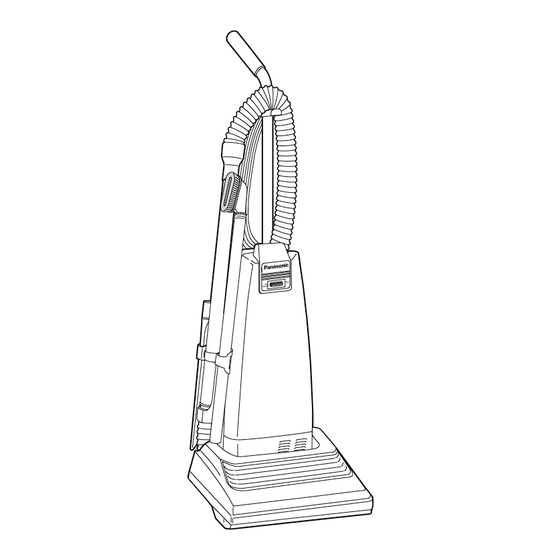
Page 6: Parts Identification
Antes de pe PARTS IDENTIFICATION Identificación de piezas Nomenclature ADVERTENCIA Desconecte la aspiradora antes de darle serv producirse un choque eléctrico o causar lesi Hose Holder Soporte para la Manguera Consulte este cuadro para encontrar Porte-tuyau realizar cuando tenga problemas men Hose servicio que necesita aparte de otros Manguera... -
Page 7: Feature Chart
FEATURE CHART Power Thermal Protector Cord Length Tools 9.1 m (30 Ft.) 120V AC(60Hz) Diagrama de características Protector termal Voltaje Extensión de cordón Herramientas 9,1 m (30 pi) 9.1 A / 9,1 A Tableau des caractéristiques Protecteur thermique Longueur du cordon Alimentation Accessoires 9,1 m (30 pi) -
Page 8: Assembly
Quitar de los residuos de basura en ASSEMBLY los conductos La manguera situada en la parte posterior Attaching Handle de la aspiradora lleva el polvo de la boquilla hasta la bolsa de polvo. Si hay residuos en la manguera: ➢ ➢ DO NOT plug in until assembly is ➢... -
Page 9: Using Cord Hook
Montaje de agitador / A Using Cord Hook Cord Hook ➢ ➢ Detach plug head from power cord. Sujetador del cordón Soporte del agitador Crochet de ➢ ➢ Rotate cord hook down to release Support de l’agitateur rangement cord. Filtro du cordon Filtre Tapas del extremo... -
Page 10: Features
➢ ➢ Cuando los cepillos del agitador estén Automatic Self Adjusting Nozzle gastados hasta que no pueden tocar una tarjeta tenida en la base inferior, se ➢ ➢ The nozzle of your Panasonic upright deben cambiar los cepillos. Shallow vacuum cleaner automatically... -
Page 11: Vac Gauge
Vac Gauge Cambio de la correa ➢ ➢ Reinstale el agitador en las ranuras del ➢ ➢ The vac gauge detects when dust compartimento de la boquilla. bag needs changing or the vacuum is ➢ ➢ Cierre la cubierta de la corea posterior clogged. -
Page 12: To Operate Cleaner
➢ ➢ Move vacuum to middle position for normal use. ➢ ➢ Limpie el agitador. ➢ ➢ Envuelva la correa nueva (Panasonic Type UB8 solamente) en el eje del motor y la polea de cepillo, véase el ➢ ➢ Use low position for cleaning under diagrama para envolver la correa. -
Page 13: Tool Usage
➢ ➢ Coloque el mango en la posición vertical y vuelque la aspiradora para exponer la Performing the following tasks will keep your new Panasonic vacuum cleaner operating at base inferior. peak performance levels and will ensure these high levels for years to come. Check the BEFORE REQUESTING SERVICE section in this manual for recommendations on performing ➢... -
Page 14: Changing Dust Bag
Changing Dust Bag Cambio de la bolsa para polvo Always operate vacuum with genuine Panasonic Type U3 Standard or U6 Electrostatic dust Siempre opere la aspiradora con las bolsas bags installed. Panasonic dust bags may be purchased through any authorized Panasonic Panasonic Type U3 Standard U6 Electrostatic dealer or ordered from service company. -
Page 15: Removing And Installing Lower Plate
Siguiendo las instrucciones dadas, se nueva trasera Couvercle de aspiradora Panasonic funcionará al nivel máximo la courroie y continuará funcionando por mucho años en el ➢ ➢ Release lower plate by pressing two Lower Plate futuro. -
Page 16: Replacing Headlight Bulb
➢ ➢ Remove worn or broken belt. ➢ ➢ Mueva la aspiradora a la posición mediana para el uso normal. ➢ ➢ Clean agitator. Motor Shaft ➢ ➢ Loop new belt (Panasonic Type UB8 Install Eje del motor New Belt only) around motor shaft and Arbre d’entraînement... -
Page 17: Replacing Belt
Replacing Belt Indicador de aspiración ➢ ➢ Reinstall agitator back into nozzle ➢ ➢ El indicador de aspiración detecta housing grooves. cuando se necesita cambiar la bolsa para polvo o hay residuos en la aspiradora. ➢ ➢ Close rear belt cover and reinstall felt packing. -
Page 18: Replacing Brushes
Tarjeta ➢ ➢ La boquilla de su aspiradora vertical Carte brushes should be replaced. Panasonic se ajusta automáticamente ➢ ➢ Remove lower plate and agitator. a la altura de cualquier pelo de alfombra. ➢ ➢ La característica permite que la boquilla flote fácilmente en las... -
Page 19: Agitator Assembly
Agitator Assembly Uso del sujetador del cordón Brushes ➢ ➢ Desconecte el clavija del cordón eléctrico. Agitator Filter Holder Filter ➢ ➢ Ruede hacia abajo el sujetador del cordón para librerarlo. End Cap End Cap Agitator Pulley Shaft E-Clip ➢ ➢ Devuelva el gancho del cordón a la posición vertical antes de tratar de rebobinar el cordón. -
Page 20: Removing Clogs
Montaje Removing Clogs The hose located on the back of the Colocación del mango vacuum cleaner carries the dirt from the Hose Manguera nozzle up to the dust bag. If the hose Tuyau should become clogged: ➢ No enchufe hasta que el montaje esté ➢... -
Page 21: Before Requesting Service
BEFORE REQUESTING SERVICE FEATUR Power Thermal Protector WARNING Electric Shock or Personal Injury Hazard. 120V AC(60Hz) Disconnect the electrical supply before servicing or cleaning the unit. Failure to do so could result in electric shock or personal injury from cleaner suddenly starting. Review this chart to find do-it-yourself solutions for minor performance Diagrama de c problems. -
Page 22: Warranty
Panasonic Services Company (PASC) Factory Servicenter listed in the Servicenter Directory. Or call, toll free, 1-800-211-PANA (7262) to locate a PASC Authorized Servicenter. Carry-in or mail-in service in Puerto Rico can be obtained during the warranty period by calling the local Panasonic Sales Company telephone number listed in the Servicenter Directory.
Need help?
Do you have a question about the MC-V5268 and is the answer not in the manual?
Questions and answers