
Subscribe to Our Youtube Channel
Related Manuals for Lionel VISION N8/CA-1 Caboose


Summary of Contents for Lionel VISION N8/CA-1 Caboose
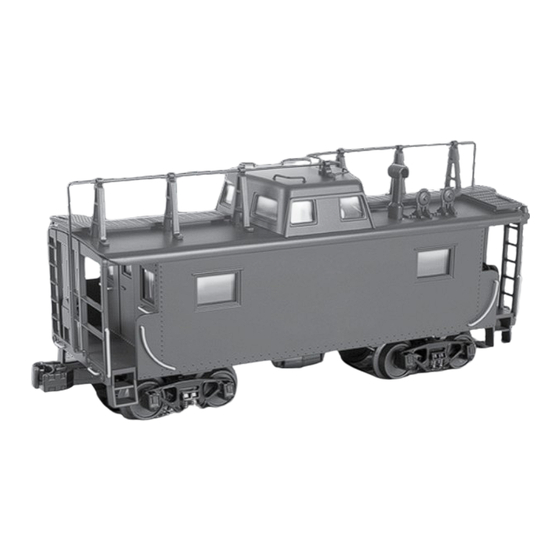
- Page 1 20326510250 8/23 Lionel VISION Lionel VISION N8/CA-1 Caboose N8/CA-1 Caboose Owner’s Manual Owner’s Manual Featuring...
-
Page 2: Table Of Contents
Sounds while in motion Rail Clatter Grind Bump Replacing the LED Lionel Limited Warranty Policy & Service The following Lionel marks are used throughout this Owner’s Manual and are protected under law. All rights reserved. Lionel , TMCC , LEGACY , TrainMaster... -
Page 3: Vision N8/Ca-1 Caboose Basics
The VISION caboose’s ID# has been set. Be sure to record the new ID# for your reference. Note! The TMCC ID of your VISION N8/CA-1 Caboose should be different than the TMCC ID of any locomotive used at the same time. - Page 4 To decrease the volume, turn the post counter-clockwise. Your CAB-remote can also adjust volume; the setting of this physical control will limit the maximum volume your VISION N8/CA-1 Caboose can produce. Lights ON / OFF Switch Used to turn both interior and marker lights ON and OFF.
-
Page 5: Legacy And Command Control Operations
If you have more than one VISION N8/CA-1 Caboose, for best results set them all to unique ID’s. You may also choose to set them all to the same ID. In this case, set one VISION N8/CA-1 Caboose’s min/max switch to the MAX position (see page 3) and all others to MIN. -
Page 6: Setting Up Your Vision N8/Ca-1 Caboose With Your Cab-2 Remote
Setting up your VISION N8/CA-1 Caboose in your CAB-2 remote or best operation, your VISION N8/CA-1 Caboose should be set to TYPE PAS (Passenger). This will display a special set of touch screen icons specifically designed for use with this type of car. - Page 7 LEGACY and Command Control Remote Operations Setting up your VISION N8/CA-1 Caboose in your CAB-2 remote continued Adding Your VISION N8/CA-1 Caboose to a Train Use the Train Builder and create a train including your head-end locomotive and the VISION N8/ CA-1 Caboose.
- Page 8 6. Enter the TMCC ID of the passenger car (#57 in this example). 7. Press SET and wait for the horn to sound on the head-end locomotive, a whistle sound to come from your VISION N8/CA-1 Caboose, and the "Ready to Run" message to appear on your CAB-2 screen.
- Page 9 Setting up your VISION N8/CA-1 Caboose in your CAB-2 remote continued Using Train Link To send a command specifically to your VISION N8/CA-1 Caboose, such as announcements or to trigger Pre-run/Post-run, press the Train Link button (see page 10 for button location). Notice that the keypad has changed.
-
Page 10: The Legacy Cab-2 Remote Controller
NEXT Select Button “light on” Re-start sounds following a NEXT NEXT Turns the light in the VISION N8/CA-1 Caboose ON. "shutdown." Select Button “sound” Select Button “light off” Sound while stopped. Turns the light in the VISION N8/CA-1 Caboose OFF. -
Page 11: Trainmaster Command Control (Tmcc) Operations
When using a CAB-1 or CAB-1L, you should primarily control your VISION N8/CA-1 Caboose via its TMCC engine ID. Assigning your VISION N8/CA-1 Caboose to the rear position of a Train via a CAB- 1-style remote will play BRAKE sounds from both the head-end locomotive and the VISION N8/CA-1 Caboose. -
Page 12: Creating A Train With The Cab-1 Or Cab-1L Remote
Cabooses. Assign the head-end locomotive to the Train: 1. Be sure the VISION N8/CA-1 Caboose and the locomotive are on the track, powered up and operational. 2. Press the TR button and press two digits (from 01-99). This two-digit number will be the ID of your new train. -
Page 13: Operating Your Vision N8/Ca-1 Caboose With Your Cab-1 Or Cab-1L Remote
LEGACY and Command Control Remote Operations Operating your VISION N8/CA-1 Caboose with your CAB-1 or CAB-1L remote Running the Train 1. Press TR 2. Enter the train ID 3. Use throttle, boost and brake to move the train. The Brake button will cause brake squealing sounds to emanate from the VISION N8/CA-1 Caboose. -
Page 14: Cab-1/Cab-1L Remote Controller Commands
Triggers emergency scene (moving). Select Button <1> Volume up Select Button <4> Volume down Select Button <0> Reset VISION N8/CA-1 Caboose to initial settings (stopped). Select Button <AUX 1> High metallic air release sound. Select Bell No Sound Activation. Select Button <5>... -
Page 15: Adjusting The Volume From Your Legacy Remote
Pressing the volume up or down buttons (see pages 10 or 14) adjusts the overall volume of your VISION N8/CA-1 Caboose. A single bell ring will be heard each time the volume is raised or lowered, except that no ring will be heard once the volume reaches the minimum or maximum levels. -
Page 16: Shut Down And Start Up Commands
LEGACY and Command Control Remote Operations Start-up and Shut Down commands Select the VISION N8/CA-1 Caboose as you would the engine (see page 5) and press the buttons shown to start-up or shut down the car. Figure 2. LEGACY start-up Figure 3. -
Page 17: Dialog While Stopped
LEGACY and Command Control Remote Operations Dialog while stopped our VISION N8/CA-1 Caboose will play scenes while stopped for the Conductor and/or Brakeman to discuss preparations for a run, starting a run, arriving from a run or to "sign out"... -
Page 18: Dialog While Moving
LEGACY and Command Control Remote Operations Dialog while moving hile in motion, a single press of the 2 Key (or Microphone Key on a Legacy remote) will play a number of randomly chosen scenes. These scenes feature the Condutor and/or Brakeman commenting during their run. -
Page 19: Sound System Operations
Sound System Operations Sounds while in motion hen your VISION N8/CA-1 Caboose is running on the track, you will hear 3 different types of sounds in the background. First, there are muffled bumping and banging sounds as the car starts, stops, or changes speed. Second, there are occasional sharp grinding metallic sounds of wheel flanges against the track. -
Page 20: Lionel Limited Warranty Policy & Service
Authorized Lionel Retailer*, will at the discretion of Lionel LLC, be repaired or replaced, without charge for parts or labor. In the event the defective product cannot be repaired, and a suitable replacement is not available, Lionel will offer to replace the product with a comparable model (determined by Lionel LLC), if available.
Need help?
Do you have a question about the VISION N8/CA-1 Caboose and is the answer not in the manual?
Questions and answers