Table of Contents
Advertisement
Quick Links
Advertisement
Table of Contents

Related Manuals for Bastl Instruments THYME+


Summary of Contents for Bastl Instruments THYME+
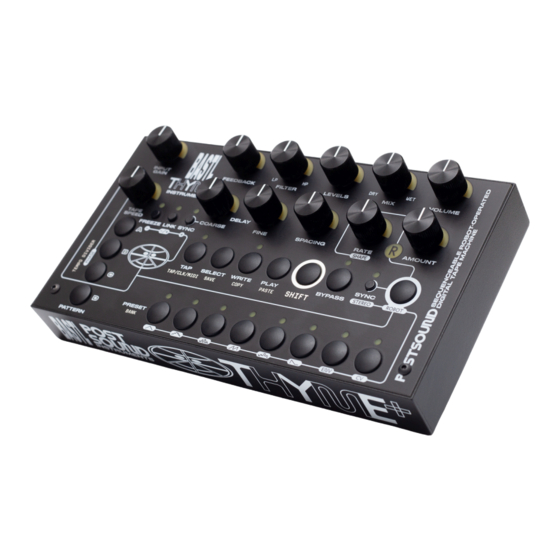
- Page 1 THYME+ Sequenceable Robot-Operated Digital Tape Machine BASTL INSTRUMENTS...
- Page 2 THYME+ Sequenceable robot-operated digital tape machine THYME+ is a versatile sound processing unit. Although a completely digital instrument, THYME+ operates like an analog tape delay machine with adjustable tape speed and adjustable positions of read heads. The audio signal is first written on the “virtual tape” using the write heads, to be read later with adjustable delay by the read heads.
- Page 3 FEATURES ● hi-fi audio quality ● analog Input Gain knob up to +20dB ● multiple tape read heads ● 9 adjustable parameters with LED signalization ● each parameter has a dedicated modulation source – a Robot ● each Robot is a powerful modulation source: LFO, envelope follower, ext.
- Page 4 INSTRUCTIONS This document serves as a complete reference manual for THYME+. Refer to it for explanations of specific features or if you prefer to read through manuals before using new equipment. If you're looking for just the essential basics to get you started, check out the Quickstart guide. There are some symbols in the text indicating di erent things: Follow these easy steps for hands-on guidance.
-
Page 5: Table Of Contents
TABLE OF CONTENTS POWER AUDIO INPUT AUDIO OUTPUT KNOB FREEZING SHIFT BUTTON DIGITAL TAPE MACHINE INPUT GAIN VOLUME DELAY COARSE DELAY SYNC FINE TAPE SPEED LINK FEEDBACK FILTER EXTRA READ HEADS LEVELS SPACING RANDOMIZE BYPASS FREEZE ROBOTS ROBOT SETUP AMOUNT RATE WAVEFORM SHAPE... - Page 6 MEMORY, PRESETS & BANKS PRESETS COPY & PASTE PRESETS BANKS PERSISTENT SETTINGS SEQUENCER LIVE MODE PATTERNS WRITE MODE TEMPORARY KNOB OVERWRITE CLOCK MANUAL RESYNC TEMPO DIVIDER MIDI MIDI CHANNELS KARPLUS-STRONG SYNTHESIS CONTROL CHANGE LIST OF COMMANDS REAL-TIME MESSAGES FIRMWARE UPDATES DETERMINE VERSION HOW TO UPDATE HARDWARE TESTS &...
- Page 7 1) POWER THYME+ turns on automatically when the power adapter is plugged in. The adapter shipped with THYME+ is the SMI6B-9-4-P5. Use the power adapter provided in the box or other compliant 9V, 400mA (or more), center-positive power adapter with a 5.5 mm x 2.1 mm barrel.
- Page 8 When using two TS mono jacks (left & right, which combined carry stereo signals), use both IN RIGHT and IN LEFT inputs. 3) AUDIO OUTPUT Similarly, as with the input, the output can be either a stereo signal through the STEREO OUT LEFT or a stereo signal through two mono outs. A mono signal can be used on the input, still resulting in stereo processing on the output.
- Page 9 4) KNOB FREEZING FUNCTION Before we begin turning any knobs, it is vital to understand the specific yet intuitive way the knobs on THYME+ work. Each knob features a dimmable LED light. This light always shows the current amount of the parameter value.
- Page 10 5) SHIFT BUTTON + LABELS IN SILVER Some of the buttons have dual functionality. You can access the second function indicated by the silver text printed next to its primary function by holding the SHIFT button. For example: The primary function of this button is the PRESET function.
- Page 11 6) DIGITAL TAPE MACHINE As mentioned at the outset, the primary core element of THYME+ is the digital tape machine. The picture below illustrates its signal path, with each parameter thoroughly explained in its dedicated subchapter. Follow the symbol for simple step-by-step explanations.
-
Page 12: Input Gain
INPUT GAIN The INPUT GAIN knob sets the level of the input signal. Begin by routing your audio signal to the input. Starting with repetitive rhythmic sounds will help you discern all the transformations more clearly. Then, adjust the INPUT GAIN until the green light saturates, avoiding the red light. -
Page 13: Mix
However, VOLUME can be modulated with Robots, so di erent volume modulations may apply in di erent presets. See the ROBOTS chapter for more information. The MIX knob mixes between the original unprocessed signal (dry) and the processed (wet) signal. It is advisable to set the MIX knob first to the middle position to hear a blend of both the original and processed signals. -
Page 14: Coarse
COARSE The COARSE knob sets the main delay time. The optimal delay time depends on the nature of your incoming signal. For a basic delay e ect, start with the knob set to around ± 9 o’clock. Experiment with this parameter to achieve the desired sound. To hear the delay e ect clearly, ensure that your MIX setting is balanced between the dry and wet signals. -
Page 15: Delay Sync
DELAY SYNC The DELAY SYNC function quantizes the delay time to rhythmical intervals. Activate DELAY SYNC by pressing the SYNC button next to the COARSE knob. To transform your THYME+ into a rhythmic powerhouse, experiment with the DELAY SYNC function. It synchronizes your delayed sounds to precise rhythm intervals. -
Page 16: Fine
FINE The FINE knob controls minor delay time adjustments. To better hear the e ect of the FINE knob, temporarily set your COARSE knob to zero. Then, start adjusting the FINE knob. You'll notice subtle micro-adjustments in your delay time. This can lead to intriguing outcomes, influencing not just the delay itself but also the timbral and spectral qualities of the sounds. - Page 17 Double/half the tape speed (and thereby change the pitch by one octave) ½ speed SHIFT + FREEZE 2x speed SHIFT + DELAY SYNC These adjustments cannot exceed the range achievable by the knob alone. The full tape speed and lowest tape speed are the limits. The TAPE SPEED parameter operates on a non-linear curve, meaning ��...
-
Page 18: Link
LINK The LINK function prevents TAPE SPEED from a ecting the final delay time. Activate the function by pressing the LINK button. Tweaking TAPE SPEED alters the time required for the tape to travel the distance between the write head and the read head, thereby producing varying delay times. -
Page 19: Feedback
FEEDBACK The FEEDBACK function gathers signals from all active read heads and feeds them back into the write head. Use the FEEDBACK knob to adjust the amount of echo (the number of repetitions) you desire. �� The FEEDBACK knob scales the sum of all the read heads' signals. When fully turned to the right, you gain exactly one additional full loop (if extra read heads are o ). - Page 20 EXTENDED SETTING �� Negative or positive feedback SHIFT + FEEDBACK wiggle Negative Feedback: FEEDBACK light turns Subtracts the fed-back signal from the input OFF temporarily signal, contributing to a stable and clearer sound (default) output. Positive Feedback: FEEDBACK light turns Adds the fed-back signal to the input, resulting in ON temporarily denser and denser sound output over time.
-
Page 21: Extra Read Heads
EXTRA READ HEADS THYME+ o ers three additional read heads that you can use, which get added to the main read head signal. Each extra read head has an individual contribution to the feedback and output signal. With the inclusion of extra read heads, you can achieve denser and richer-sounding e ects. -
Page 22: Spacing
SPACING The SPACING knob sets the distance of the read heads. Adjust the SPACING knob to manipulate the position of the three extra read heads. While the main read head’s position is fixed, the extra read heads always move together. By adjusting the SPACING knob, you can transition between various configurations, ranging from tonal (smallest distance) to dense (early reflections) to rhythmic multi-tap delay setups. - Page 23 RANDOMIZATION TAPE MACHINE PARAMETERS You can randomize all the settings for all the knobs as well as LINK, SYNC & FREEZE by pressing SHIFT + ROBOT + FREEZE 7) BYPASS Press the BYPASS button to circumvent all processing and listen to the unmodified signal. When the BYPASS light is on, the bypass function is active and the outgoing signal remains unprocessed.
- Page 24 8) FREEZE The FREEZE function samples (freezes) a short loop. Activate and deactivate the function by pressing the FREEZE button. Press FREEZE and adjust the COARSE knob. ● Generate drones by using longer time frames ● Create "lag" in the sound with shorter ones ●...
- Page 25 9) ROBOTS Robots can automate your parameters. Learn how below. There are nine knobs (parameters) that have the option to each use an independent modulation source called a ROBOT. These knobs are TAPE SPEED, COARSE, FINE, FEEDBACK, FILTER, LEVELS, SPACING, MIX, VOLUME.
-
Page 26: Robot Setup
ROBOT SETUP Hold down the ROBOT button and slightly wiggle the knob you wish to modulate to assign it a Robot. The light next to the button will illuminate at full brightness, indicating the knob is now assigned a robot. You can then release the ROBOT button. AMOUNT Determines the intensity of the Robot modulation. -
Page 27: Oscillator Modes
�� Essentially, the RATE knob adjusts the frequency of the Robot LFO in the oscillator modes. In the ENV mode, the knob controls the frequency range that the envelope generator follows. (It has no e ect in the CV mode.) When pressing the ROBOT button, all knobs with active Robots will briefly flash (Robots with AMOUNT set to zero are not active). - Page 28 SHAPE KNOB The SHAPE knob further modulates the di erent waveforms. Press and hold the ROBOT button, then adjust the RATE knob. The RATE knob now functions as the SHAPE knob. You can observe the modulation through the light intensity.
- Page 29 ROBOT OSCILLATOR MODES In all these oscillator modes, the RATE knob controls the frequency of the oscillators. However, for visual clarity, the following images show oscillation waveforms with identical fixed RATE and varying SHAPE settings. From a regular triangle wave to a smooth triangle and finally to a sine wave. Triangle oscillator resolution control: From a regular triangle, through stairs up and down, to a rectangle.
- Page 30 ROBOT NON-OSCILLATOR MODES Linear decay from full to o . Triggered when you activate the PRESET. This Robot tracks the amplitude of the input signal within a defined frequency range. You can specify the frequency range you wish to track with the RATE parameter.
- Page 31 ROBOT SYNC Sync your Robot’s modulation to rhythmical intervals. Press the SYNC button next to the ROBOT button. The frequency of the oscillator Robot modes can be quantized (synced) to the main clock tempo. Refer to the CLOCK chapter for more information. With the SYNC function on, the frequency of the Robots is adjusted automatically to the nearest available division/multiplication of the tempo.
- Page 32 ROBOT POLARITY Change the polarity of the Robot’s modulation. Determine how it responds to the knob’s value. Press ROBOT + FREEZE / LINK / DELAY SYNC. There are three polarity settings available: Negative, Bipolar, and Positive. Each Robot can modify a parameter in three directions: It can subtract from it, it can modulate around it, or it can add its output to the knob value.
- Page 33 ROBOT STEREO This function alters the nature of the Robot’s modulation. Determine how it responds to the knob’s value. Press ROBOT + ROBOT SYNC. By default, both stereo channels are processed identically. When you activate ROBOT STEREO (STEREO light on), it will a ect the left and right channels in opposite directions.
- Page 34 ROBOT PHASE Alters the phase (starting point) of the Robot’s LFO wave. Press ROBOT + (one of the four PATTERN buttons). You'll only hear the e ect each time the PRESET with this Robot is activated. This feature is useful, for instance, in sequencing (which you'll learn about later in the Sequencer chapter) if you prefer your LFO wave to start at...
- Page 35 RANDOMIZE BOTH ROBOTS & TAPE MACHINE You can randomize all the settings for all the Robots and the TAPE MACHINE by pressing SHIFT + ROBOT + DELAY SYNC. However, this only randomizes the values within a certain limited range around the current values. For more significant randomization of both Robots and the TAPE MACHINE, it's better to randomize the two separately.
- Page 36 10) MEMORY , PRESETS & BANKS THYME+ features memory storage for saving PRESETS, PATTERNS, BANKS, ROBOTS, PARAMETERS, and other general settings. There are 8 BANKS, each containing 8 PRESETS, providing a total of 64 PRESETS that can be saved and utilized. PRESETS All current settings and modifications are automatically stored (but not saved) as a PRESET.
- Page 37 COPY AND PASTE PRESETS To quickly create and edit PRESETS, you can copy and paste them between di erent PRESET slots. You can even copy and paste PRESETS across di erent BANKS. 1. Select the PRESET you want to copy. 2.
- Page 38 When transitioning between di erent BANKS, the current settings of the presets will not be retained unless you save the BANK. However, if you have extensively modified your presets, switching to another BANK and back can provide a quick and straightforward method to revert to the originally saved settings.
- Page 39 11) SEQUENCER THYME+ features a 32-step sequencer, allowing you to automate the switching between di erent sounding PRESETS. This enables the creation of intricate and dynamic sequences with a musical character. The sequencer o ers two modes suitable for both live performances and precise composition.
- Page 40 There are two operating modes of the sequencer: The LIVE mode and the WRITE mode. Press the WRITE button to switch between the two modes. WRITE mode WRITE light ON LIVE mode WRITE light OFF LIVE MODE The LIVE mode is the more intuitive and performative mode of the sequencer.
- Page 41 Hold WRITE + PRESET to start recording the selected PRESET into the sequence live at the moment when you press the buttons. The PRESET is recorded for as long as the buttons are pressed. Adjust the tempo of your sequence by tapping the TAP button (see the CLOCK chapter for more info).
- Page 42 PATTERNS Choose between four di erent sequencer patterns by pressing one of the PATTERN buttons. Press SAVE (SHIFT + SELECT) to save a PATTERN. Hold A/B/C/D PATTERN + BYPASS to erase a PATTERN A PATTERN is eight steps long, with steps divided into four substeps, resulting in a sequence length of 32 positions.
- Page 43 RECORDING A SEQUENCE IN WRITE MODE ● Turn on the WRITE mode by pressing the WRITE button; the corresponding light will turn on. ● Start the sequencer by pressing PLAY. ● The PRESET button lights now indicate the active step of the sequence.
- Page 44 In the example below, when holding the 1–8 button, the selected PRESET is written into only the first (A) and third (C) substep of the selected step. For the second (B) and fourth (D) substeps, the sound is set either to BYPASS or to another PRESET that has been written there previously.
- Page 45 TEMPORARY KNOB OVERWRITE THYME+ provides a powerful performative option to manually control one or multiple parameters while the sequencer is running in both LIVE and WRITE modes. This allows the parameters to be temporarily controlled directly by the respective knobs rather than by the PRESETS settings. 1.
- Page 46 12) CLOCK The tempo of the sequencer is defined by the clock. There are three di erent clock sources to choose from. Hold SHIFT and press TAP to cycle through the three options: TAP/CLK/MIDI. The FREEZE/LINK/SYNC lights will indicate which clock source is selected.
- Page 47 MANUAL RESYNC �� Hitting the TAP button once re-synchronizes manually the sequencer clock with the active clock source. The behavior varies slightly depending on the clock source: Sets both the internal clock and sequencer to the closest whole step. This action is also always triggered when tapping the TAP button.
- Page 48 The dividers are independent of each other. For example, you can have option B activated for Tap tempo and option D for MIDI clock. The selected clock source and clock dividers are persistently saved into memory and will not be reset by power cycling. ��...
- Page 49 MIDI CHANNELS THYME+ listens to MIDI voice messages on a single MIDI channel. To change the MIDI channel, hold the corresponding buttons while powering up the device: ● Channels 1–8: Hold the desired PRESET button. ● Channels 9–16: Hold SHIFT + the desired PRESET button. The selected channel will be indicated immediately by the PRESET button lights (see below).
- Page 50 KARPLUS-STRONG SYNTHESIS You can utilize MIDI Notes to adjust the pitch by adjusting the FINE DELAY time. By manipulating the FINE DELAY, FILTER, and FEEDBACK knob values, THYME+ can be set up for Karplus-Strong Synthesis, enabling separate control over pitch, timbre, and decay time. Karplus-Strong is a synthesis technique based on physical modeling of ��...
- Page 51 �� CONTROL CHANGE With Control Change (CC) Messages, you can manipulate all parameters of the currently selected PRESET. The data byte of any MIDI control message is interpreted based on the command in one of the following ways: SCALE Maps the received value to a set range, typically corresponding to the range set by the parameter knob.
- Page 52 REAL-TIME MESSAGES �� Active Behavior Clock Source Start, Stop, and Clock messages are generated based on the Tap Tempo and the Play status of the sequencer. However, this functionality is only active if THYME+ is the master device on the bus. If any other MIDI Real Time message is received, THYME+ detects a conflict and ceases to generate MIDI Real Time messages.
- Page 53 14) FIRMWARE UPDATES THYME+ incorporates multiple microcontrollers, and the firmware may undergo updates in the future. Firmware updates can be accomplished via MIDI, requiring only a computer, a MIDI adapter, and a MIDI cable as hardware components. There are two types (A & B) of DIN5 to 3.5 mm TRS jack adaptors. THYME+ uses a type A jack adaptor! Ensure that you are using the correct adapter.
- Page 54 BASTL INSTRUMENTS Updates page HOW TO UPDATE The firmware updates are packed into multiple SysEx messages, which are then unpacked by the device bootloader and written to the internal flash memory. Unfortunately, hardly any applications exist for this simple job, so we wrote one ourselves.
- Page 55 If anything goes wrong during the update, try restarting the unit and redoing the update process. �� HARDWARE TESTS & FACTORY RESET If you have a suspicion or notice that something in your instrument isn’t working as it should, you can perform a hardware test. ENTERING THE TEST MODE To run tests you have to boot your device into a dedicated Test mode by holding down all four...
- Page 56 THYME+ HARDWARE TESTS Name Description Manual Check Failure Indication Knobs During the test, adjust all knobs Verify that the knob None simultaneously to predetermined positions: lights indicate the o , center, and full. Once all knobs reach middle position only their respective target positions, the test will when the knobs are advance to the next set of positions.
- Page 57 17) TECHNICAL SPECIFICATIONS POWER input: 7–12 V, center positive, 5.5 mm/2.1 mm barrel, < 400 mA POWER consumption: <300 mA AUDIO input: mono & stereo 6.35 mm (¼”) jack, 10kΩ input impedance, -∞ to +20dB gain AUDIO output: mono & stereo 6.35 mm (¼”) jack, 100Ω impedance, capable of driving headphones FOOTSWITCH input: 3.5 mm mono jack, attach a passive switch that connects the sleeve and tip...
- Page 58 Klecl, Antonín Gazda, Jiří Březina, Jára Tarnovski MANAGEMENT: John Dinger MANUAL: David Žáček, František Hruška, Martin Vondřejc GRAPHIC DESIGN: Anymade Studio The idea turned into reality thanks to everyone at Bastl Instruments and thanks to the immense support of our fans.
- Page 59 BASTL more info and video tutorials www.bastl-instruments.com...
Need help?
Do you have a question about the THYME+ and is the answer not in the manual?
Questions and answers