Table of Contents
Advertisement
Quick Links
Please read this manual and save it with your original sales receipt.
Please read this manual and save it with your original sales receipt.
Please read this manual and save it with your original sales receipt.
Tools needed for assembly: Phillips Screwdriver,
Tools needed for assembly: Phillips Screwdriver,
Tools needed for assembly: Phillips Screwdriver,
Hammer, and Safety Scissors (all not included).
Hammer, and Safety Scissors (all not included).
Hammer, and Safety Scissors (all not included).
Use only with a Power Wheels
Use only with a Power Wheels
Use only with a Power Wheels
Battery with A-style Connector and Built-in Thermal Fuse and
Battery with A-style Connector and Built-in Thermal Fuse and
Battery with A-style Connector and Built-in Thermal Fuse and
®
®
a Power Wheels
a Power Wheels
a Power Wheels
Super 6 Volt Charger (both included).
Super 6 Volt Charger (both included).
Super 6 Volt Charger (both included).
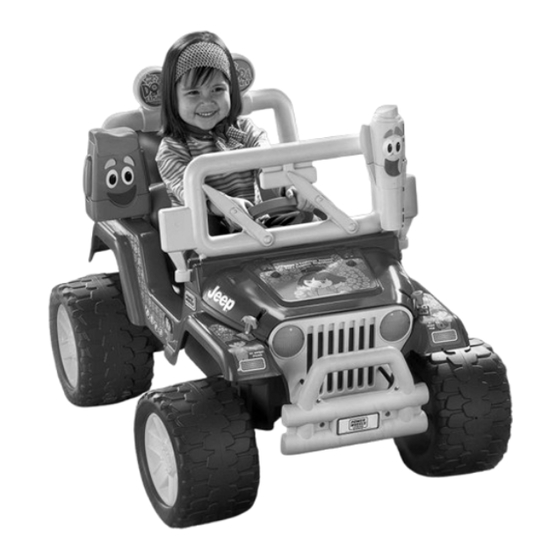
Product features may vary from the picture above.
Product features may vary from the picture above.
Product features may vary from the picture above.
Owner's Manual
Owner's Manual
Owner's Manual
with Assembly Instructions
with Assembly Instructions
with Assembly Instructions
For Model H4435
For Model H4435
For Model H4435
®
®
6 Volt Rechargeable
6 Volt Rechargeable
6 Volt Rechargeable
Advertisement
Table of Contents

Related Manuals for Fisher-Price Power Wheels Nick Jr. Dora the Explorer Jeep Wrangler


Summary of Contents for Fisher-Price Power Wheels Nick Jr. Dora the Explorer Jeep Wrangler
- Page 1 Please read this manual and save it with your original sales receipt. Please read this manual and save it with your original sales receipt. Please read this manual and save it with your original sales receipt. Tools needed for assembly: Phillips Screwdriver, Tools needed for assembly: Phillips Screwdriver, Tools needed for assembly: Phillips Screwdriver, Hammer, and Safety Scissors (all not included).
-
Page 2: Table Of Contents
• Use this vehicle ONLY outdoors. Most interior flooring can be or call 1-800-348-0751. damaged by riding this vehicle indoors. Fisher-Price will not be ® • To register your vehicle, please visit us on-line at responsible for damage to the floor if the vehicle is used indoors. -
Page 3: B Warnings And Cautions
WARNINGS AND CAUTIONS ELECTRICAL HAZARD WARNING • Battery can fall out and injure a child if vehicle tips over. Always use battery retainer. • PREVENT FIRE - Never modify the electrical system. Alterations could cause a fire resulting in serious injury and could also ruin the electrical system. -
Page 4: C Parts
PARTS • If you experience a problem with this product, or are missing a part, please call us at 1-800-348-0751, rather than return this product to the store. • Please identify all parts before assembly and save all packaging material until assembly is complete to ensure that no parts are discarded. •... - Page 5 TABLE OF CONTENTS PARTS Steering Wheel Cap Hood Latch - 2 Spacer - 2 #8 x 4" Screw - 2 Super 6 Volt Charger #8 x 1" Screw – 2 #10 x 1" Screw – 10 .437" 6 Volt Battery .437 Cap Nut –...
-
Page 6: D Parts Picture
TABLE OF CONTENTS PARTS PICTURE Vehicle Steering Column 6 Volt Battery Parts Not Shown #10 x 1" Screw - 10 Dashboard Steering Wheel Spacer - 2 #8 x 4" Screw - 2 Windshield Steering Wheel Cap Back Pack Holder #8 x 1" Screw - 2 Hood Roll Bar Back Pack... -
Page 7: E Battery Charging
BATTERY CHARGING ELECTRICAL HAZARD ELECTRICAL HAZARD WARNING CAUTION • Battery can fall out and injure a child Use the charger in dry locations only. if vehicle tips over. Always use battery retainer. About Thermal Fuses • PREVENT FIRE Your Power Wheels 6 volt battery with A-style connector - Never modify the electrical system. - Page 8 TABLE OF CONTENTS BATTERY CHARGING A-Style Charger Connector A-Style Battery Connector NO GAP Incorrect Correct • Plug the battery connector and charger connector together. Push • Plug the charger into a standard 120 volt wall outlet. firmly to make sure the two connectors are completely joined. Notes: - Use the charger only in a wall outlet.
-
Page 9: F Assembly
ASSEMBLY WARNING #10 x 1" Screw Children can be harmed by small parts, sharp edges and sharp points in the vehicle's unassembled state, or by electrical items. Care should be taken in unpacking and assembly of the vehicle. Children should not handle parts, including the battery, or help in assembly of the vehicle. - Page 10 ASSEMBLY .437 Cap Nut End of Steering Column Dashboard .437" • Fit a .437 cap nut on the end of the steering column. • Tap the cap nut with a hammer to attach the cap nut on the steering column. Pull on the cap nut to be sure it is secure. •...
- Page 11 ASSEMBLY Large Opening UP Windshield Large Large Large Hole in Dashboard Steering Column Slot Bend Up Slot • Turn the vehicle upright. • Position the windshield so that Map faces the front end of the vehicle. • Insert and "snap" both large tabs on the windshield into the large slots in the dashboard.
- Page 12 ASSEMBLY Dashboard Slots Hood Tabs Brush Guard • Insert the tabs on the rear edge of the hood into the slots in the • Fit the brush guard to the front end of the vehicle. front of the dashboard. Hint: Using the end of a Phillips screwdriver, poke a hole in the thin •...
- Page 13 ASSEMBLY Backpack Holder Holder Backpack Holder • Fit Backpack back into the holder. • Using safety scissors, cut the plastic tie holding Map in the holder. Note to Retailer: Do not remove the plastic tie. • Using safety scissors, cut the plastic tie holding Backpack in the holder.
-
Page 14: Gdecoration
DECORATION Proper label application will help to keep the labels looking their best! When applying labels, keep the following guidelines in mind: • Wash your hands before applying the labels. • Before applying the labels, wipe the surface of the vehicle with a clean, dry cloth to remove any dust or oils. •... - Page 15 DECORATION FRONT LEFT SIDE FRONT RIGHT SIDE H4435pr-0922 H4435pr-0922...
-
Page 16: H Battery Installation
BATTERY INSTALLATION IMPORTANT! Use only a Power Wheels ® 6 volt battery with A-style Battery connector and built-in thermal fuse. Use of any other battery will Connector damage your vehicle. Make sure that you charge the battery for at least 18 hours using the enclosed Power Wheels ®... -
Page 17: I Battery Care And Disposal
BATTERY CARE AND DISPOSAL Care Disposal If a battery leak develops, avoid contact with the leaking acid and • Your Power Wheels battery is a non-spillable sealed lead-acid ® place the damaged battery in a plastic bag. See information below battery. -
Page 18: J Safe Driving Rules
SAFE DRIVING RULES Teach Safety Rules to Children RIDING HAZARD While children can quickly develop the skill necessary to drive this vehicle, it is important to remember that their judgment skills are still WARNING very immature. Unsupervised driving by children can lead to serious injury. -
Page 19: Kvehicle Operation
• Check all screws, cap nuts and their protective coverings regularly IMPORTANT! Use this vehicle ONLY outdoors. Most interior floor- and tighten as required. Check plastic parts on a regular basis for ing can be damaged by riding this vehicle indoors. Fisher-Price ® cracks or broken pieces. -
Page 20: M Limited Warranty
BUMPER-TO-BUMPER* LIMITED WARRANTY *One year limited warranty from the date of purchase on the Power Wheels ® vehicle. Six month limited warranty on the 6 volt battery. For the original purchaser, this one year limited warranty covers the Power Wheels ®... -
Page 21: N Problems And Solutions Guide
PROBLEMS AND SOLUTIONS GUIDE IMPORTANT! If you experience a problem with your vehicle, first check the Problems and Solutions Guide below. If you still experience a problem, please contact Power Wheels ® Consumer Relations, toll-free at 1-800-348-0751 between 9 AM - 7 PM (EST) Monday through Friday and 11 AM - 7 PM (EST) Saturday. - Page 22 PROBLEMS AND SOLUTIONS GUIDE PROBLEM POSSIBLE CAUSE SOLUTION Vehicle was running but Loose wires or loose connectors Check all wires and connectors. Make sure the battery suddenly stopped connector is tightly plugged into the motor harness con- nector, and that there are no loose wires around the motors. Tripped thermal fuse The built-in thermal fuse may "trip"...
- Page 23 PROBLEMS AND SOLUTIONS GUIDE PROBLEM POSSIBLE CAUSE SOLUTION Vehicle runs sluggishly Undercharged battery Charge the battery. A new battery should have been charged for at least 18 hours before using the vehicle for the first time. After first-time use, recharge the battery for at least 14 hours after each use.
- Page 24 Jeep® and the Jeep® grille design are registered trademarks of DaimlerChrysler. Jeep® Wrangler® and its trade dress are used under license. ©DaimlerChrysler Corporation 2004. Fisher-Price, Inc., a subsidiary of Mattel, Inc., East Aurora, New York 14052 U.S.A. ©2005 Mattel, Inc. All Rights Reserved.
Need help?
Do you have a question about the Power Wheels Nick Jr. Dora the Explorer Jeep Wrangler and is the answer not in the manual?
Questions and answers