Table of Contents
Advertisement
Quick Links
SONY.
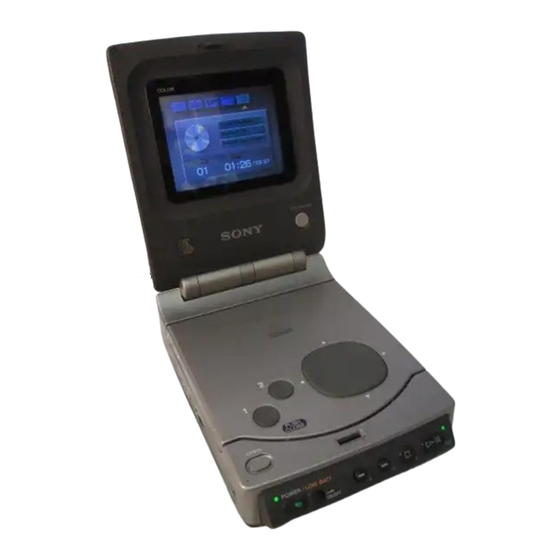
Portable CD-| Viewer
IVO-V11
Operating Instructions
Before operating this unit, please read this manual thoroughly and
retain it for future reference.
coA
SONY
CDI
Interactive
CD INTERACTIVE
© 1992 by Sony Corporation
COMPACT
3-756-192-22 (1)
Introduction
Page 5
CD-I
Page 14
CD
Page 16
Date and Time
Page 20
Control Panels
Page 26
Power Sources
and Connections
Page 36
Additional
Information
Page 42
Advertisement
Table of Contents

Related Manuals for Sony IVO-V11


Summary of Contents for Sony IVO-V11
- Page 1 Page 20 Before operating this unit, please read this manual thoroughly and retain it for future reference. Control Panels Page 26 Power Sources and Connections Page 36 Additional Information Page 42 SONY COMPACT Interactive CD INTERACTIVE © 1992 by Sony Corporation...
- Page 2 The model number and the serial number are located on the bottom. Record the serial number in the space provided below. Refer to these numbers whenever you call upon your Sony dealer regarding this product. Model No. IVO-V11 Serial No.
- Page 3 For the customers in Canada CAUTION This apparatus complies with the Class B limits for The use of optical instruments with this product radio noise emissions set out in Radio will increase eye hazard. Interference Regulations. As the laser beam used in this CD-I viewer is Pour les utilisateurs au Canada harmful to the eyes, do not attempt to Cet appareil est conforme aux normes Classe B...
-
Page 4: Table Of Contents
:Safety caution Additional notes or tips for better operation Features (page 5) Introduction What is CD-1? ..•..eeeeee.e. Discs the IVO-V11 CD-I Viewer Can Play... Identifying the Parts ..e.ee. .eeeeeo. Checking the Package Contents ..Before You Begin (page 8) Setup 1: Inserting the Lithium Battery.. -
Page 5: Features
Features The IVO-V11 CD-l viewer offers the folowing features. Be sure to read the "Before You Begin" section (page 8) before you operate it. cD- Discs (page 14) 8 Compact Discs ( page 16) The IVO-V11 provides a monitor speaker and a... -
Page 6: Identifying The Parts
AMS: Automatic Music Sensor, a function used for detecting the beginning of a selection. Checking the Package Contents Make sure the following accessories are also included in the package. If any of them is missing, call your local Sony service facility. AC-IV10 AC power adaptor (1 pc) CR2032 Lithium battery (1 pc) - Page 7 BRIGHT control (page 15, 41) COLOR control (page 41) -HUE control (page 41) a OPEN switch (page 10) Monitor speaker (page 14, 17) CONTROL R connector (mini DIN 8-pin jack) (page 42) Battery mounting LINE IN OUT switch (page 40, 41) surface (page 9, 36, 37) -Terminals (page 39)
-
Page 8: Before You Begin
• Do not hold the battery with metalic tweezers, time again. otherwise a short-circuit may occur. Replace the battery with a Sony CR2032 or Duracell WARNING DL-2032 lithium battery. Use of any other battery Battery may explode if mistreated. Do not recharge, may present a risk of fire orexplosion. -
Page 9: Setup 2: Connecting To An Ac Outlet
Setup 2: Connecting to an AC Outlet The viewer can work with AC power or a rechargeable battery pack (not supplied). The following de- scribes how to connect the supplied AC-IV10 AC power adaptor. If you want to use the battery pack, see page 37 for details. -
Page 10: Setup 3: Setting The Date And Time
Before You Begin Setup 3: Setting the Date and Time Set the date and time after you have completed Setup 1 and Setup 2 (page 8, 9). This is necessary as some CD- discs rely on the correct date and time to work properly. Valid range is from 1988to 2037. - Page 11 PressD or d until the desired zone appears Paris Zone (Paris in this example). Jan1 1993 12:00: AM (See page 13 for the time zone chart.) Initial Screen menu 12hou Clock Display Mode Calendar DisplayModeSunday start Exit Press button 1 or button 2. Paris Zone The desired zone is displayed in white on...
- Page 12 Before You Begin 10 Usingalocal time-of-the-day s ervice, Parīs Zone press button 1 or button 2 to set the time. Jul4 1993 11:17: AM The internal clock starts running. If there is Initial Screen menu any mistake, start from step 8 again. Clock Display Mode 12 hou Calendar Display Mode Sunday start.
- Page 13 Time zone chart JAnchorage SLondonMoscow Azores Parisl PSTokyo usmaTUSEST US.PST TCairo DubaiKarach Dacca HongKong Honolulu) Caracas Bangkok Fernando Solomon Samoa Rio DeJaneiro Sydney Wellington Adelaide AKabul Tehran New Dehli Zone name Countries or area London England, GMT (Greenwich Mean Time), Portugal Paris Austria, France, Germany, Italy, Netherlands, Spain, Sweden, Switzerland Cairo...
-
Page 14: Playing A Cd Disc
Playing a CD Disc Playing a CD-4 disc is simple: All you need is the cursor (4• A V•b) key, button 1 and button 2. You must, however, have completed the steps described in the "Before You Begin" section (page &-13). Also, if you want to connect the viewer to a TV for viewing, see page 40. - Page 15 Some CD-I discs may take a longer time to Adjusting the brightness start than others. Turn the BRIGHT control (on the right side of the The screen appears in blue when a CD- disc is LCD display) to adjust the brightness. (Note: the starting up.
-
Page 16: Playing A Compact Disc
Playing a Compact Disc Before you start, make sure the viewer The viewer can play reqular compact discs (i.e. 8-cm CD singles). is connected to a power source: AC or battery pack (page 36, 37). Slide the power switch (with the green roWERAoW BATT button pressed) to the right, then release it. - Page 17 6 Turn the VOLUME control to adjust the volume. VOLUME The monitor speaker can output sound in monaural only. Increase Decrease P Sound tracks and time To pause Lights up When a compact disc is inserted, the total number Press > once. of tracks (selections) and time will appear in a few Pressing it again seconds.
-
Page 18: Selecting A Play Mode
Playing a Compact Disc Selecting a Play Mode For your music enjoyment, you can change and repeat the order of selections on the compact disc to be played. Up to six ways are listed on the next page for your choice. Changing the order of selections Use A or V to move to Mode. - Page 19 Compact disc play mode Play mode Screen Set Mode to Set Repeat to Mode:Continue Play all selections in natural Continue order once. Repeat:OFF Mode:Continue Play all selections in natural Continue order repeatedly. Repeat:ON Play all selections in random Mode:Shufle Shuffle order once.
-
Page 20: How To Select A Date And Time Function
How to Select a Date and Time Function Across the top of the initial screen are a number of icons (graphic symbols) each representing a function you can select. For example, the following illustration contains the clock, calendar, world time clock, and menu icons. -
Page 21: Using The Clock
Using the Clock Selecting the Oicon displays the current time, date, and day of the week. This is also possible even when a compact disc is being played. orb tomoveA to 9. Press button 1 or button 2. The clock appears. Ja 4 a 11:1705A Time display format Removing the clock display... -
Page 22: Usingthe Calendar
Using the Calendar Selecting the u) icon brings up the calendar. This is also possible even when a compact disc played. Use orb tomoveAto in. Press button 1 or button 2. The calendar appears, showing the current month. 121814 15 16 Removing the calendar display Calendar display format 1 Used or>tomove Ato . - Page 23 Displaying other months When the current month appears, use the steps below to display other montns. Press Vonce andAwillbe pointing at or displays the previousmonth displays thefollowingmonth (If necessary, press <orb to move A.) To display the previous month To display the following month 89 10 A 15A6 Press button 1 or button 2.
-
Page 24: Using The World Time Clock
Using the World Time Clock Selecting the icon brings up the world time clock with the daylight saving (summer time) option. This is also possible even when a compact disc is being played. orb tomoveA to N. Press button 1 or button 2. The world map appears, showing the date, local time, and representative city of the current time zone (highlighted in yellow). - Page 25 DS THE=ON P Due to recent changes in the geography of Setting the DS TIME affects only the world time Eastern Europe, the time zones in the IVO-V11 clock, but not the clock. world time clock are different from the actual...
- Page 26 Changing the CD-1 Viewer Settings The CD-| viewer has been configured at the factory to certain preset values (page 28) so that you can enjoy CD-I programs as soon as possible. The only thing you must do whern you operate the viewer the first time is set the date and time (page 10).
- Page 27 Paris Zone Press 4, 4, V, or> to highlight the desired Jul4 1993 11:17: A M setting for change. menu Initiol Screen In this example, Calendar Display Mode : RG 12 hou Sunday start is highlighted. Clock Display Mode Mode Sunday start Calendar Display Exit P Paris...
-
Page 28: Changing The Cd- Viewer Settings
Changing the CD-| Viewer Settings Control panel settings The following table summarizes the 1st and 2nd control panel settings. Use the steps described in the "Making and Saving Changes" section (page 26) for changes. See page 29 for information on the 3rd control panel. -
Page 29: Clearing The Memory
Clearing the Memory about a disc played. - in the form of a file The viewer contains memory which can store information Only some discs such as games can use this function. When the memory is full, you need to remove some or all of the files;... - Page 30 Changing the CD- Viewer Settings Removing all files Press D until Clear alll is highlighted. O1002 CATALOG 07 1993 12:30 DICTIONARY 11 1993 19:2 Jul 24 1993 15:49 HIgh_Score Aug 02 1993 23:06 Clear Clear all Press button 1 or button 2. 1002 CATALOG The following message appears.
- Page 31 100% 5 PressAuntil ► ispointingat yes . CATALOG 07 1993 12:30 neTIONARY Erased files cannot be retrieved. Proceed? Erased files cannot 02 1993 23:06 be retrieved. Proceed? Clear Clear al 1002 Press button 1 or button 2. All the files are removed. If you have selected no in step 5, then the files are not removed and the viewer returns to where it was in step 1.
-
Page 32: Restoring To The Factory Preset Values
Restoring to the Factory Preset Values You can use the 1st control panel (page 26) to restore all the settings to their factory preset values (page 28). Note that this also changes the date and time. Therefore, when you operate the viewer again, you need to set them correctly (page 10). - Page 33 6 Press button 1 or button 2. Zone Paris The following message appears. Jul41993 11:17:AM Reset to initial values? Proceed? Reset to initial values? Calendar DisplayMode Honday starta Proceed? Exit 7 Make sure ► is pointing at yes, then press button 1 or button 2. If>...
-
Page 34: Canceling Changes
Canceling Changes If you decide not to save changes made to the control panel settings, you can cancel them from the tet control panel. Zone Paris 1 Use and V to highlight Exit. Ju4 199311:17: A M Initial Screen menu 12hour Clock Display Mode Calendar Display Mode Mondaystart... - Page 35 5 Make sure ► is pointing at yes], then press button 1 or button 2. if► is pointing at press A to move to yes. No disc inserted. All the control panel settings return to their previous values. Message disappears in few seconds.
-
Page 36: Choosing A Power Source
chooSing a Power Source TheCD. viewer er works ith AC power (house current) or a rechargeable battery pack. AC Power nnect the supplied AC power adaptor as below. to AC outlet AC-IV10 AC power adaptor Align the bottom of the connecting plate with the line on the viewer. While pressing the connecting plate, slide it as indicated. -
Page 37: Battery Pack
Battery Pack NP-77H battery pack The viewer can also work with a battery pack (not supplied). Two types of battery packs are available: NP-77H/77HD, and NP-77. A new battery pack must be charged. Also, If you use the BC-S10 battery charger or AC-S10 AC power adaptor, fully discharge the battery pack first, and then charge it completely. -
Page 38: Using A Battery Pack Effectively
Using a Battery Pack Effectively How to Prepare a Battery Pack Have sufficient battery pack power to do 2 or 3 times the amount of playing that you plan to do. "Battery life" as described in the instruction mânual or catalogue of the viewer is measured by the continuous uSe of the viewer, at room temperature, using a fuly charged battery. - Page 39 PHOW to care for battery pack Always Keep the Terminals Clean •Remove the battery pack from the vie. If the terminals (metal parts on the battery after use, and keep it in a cool place, Whenthe pack)are soiled, the battery life will become battery pack is attached to theviewe shorter.
-
Page 40: Connecting To A Tv
çonnecting to a TV tch cD-l disc programs on a TV equipped with video and audio input jacks. Use an audio/ nme wit ng cord (not supplied) for the connection and refer also to the operating instructions that TVformore information.ACpoweris recommended for thispurpose. Set the switch to OUT LINE Set the TV to video mode... -
Page 41: Connecting To Video Equipment
Connecting to Video Equipment You can use the viewer's LCD display to enjoy video output from video equipment. ror the connection, refer also to the operating instructions that come with the video equipment. Set switch to IN LINE Set the inputtoutput IN OUT switch to output Camcorder... -
Page 42: Using The Supplied Mouse
Using the Supplied Mouse Overview -Mouse connector Button 2 (8-pin mini DIN) Button 1 -Ball -Ballretainer Connection Note Turn off the viewer before connecting the mouse. CONTROL CONTROL R connector (on the viewer) Mouse connector Mouse Putting the Mouse on the Table Top Be sure to place the mouse on a clean, flat surface. - Page 43 • Do not disassemble the mouse. (That is, do not remove the screws on bottom housing.) Refer servicing to your local Sony service facility. • Do not try to pull out the cable. It may cause damage to the cable and the connector. Do not pick up the mouse by holding the cable.
-
Page 44: Precautions
Sony service facility for assistance. the condensation evaporates. If the problem still continues, call your local Sony service facility for assistance. About the lens The lens on the disc table should be kept clean. - Page 45 To replace the lamp. consultthe dealer where you purchased the unit, or a local Sony service facility. The expected life ofthe small fluorescent tube is about three years it this unit is used for an hour each day. When youuse this unit in a cold environment, the fluorescent tube will be dimmer at first.
-
Page 46: Maintenance
Maintenance Viewer LCD display cleaningthe casing Use a soft cloth to wipe the display. Clean the casing with a soft cloth. If the dirt is Discs sernous, slightly mojsten the cloth with a mild detergent solution. Do not usesolVents The CDM-1K/2K CD cleaning kit (not supplied) thinner, benzine, or alcohol, as they may damage is recommended. -
Page 47: Messages
Turn the viewer off, then back on again. Turn off the power immediately. If the problem still continues, call your local Sony service facility for assistance. The viewer settings have returned to their Would you like to set up the control panels? factory preset values. -
Page 48: Troubleshooting
|Ifa problem OCCurs without a message appearing on the LCD display, use the following table to troubleshoot the viewer. If theprot the viewer. If the problem still continues, call your local Sony service facility for assistance. See Also Problem Cause... - Page 49 See Also Check Problem Cause Page No sound comes from The viewer is not properly • Connect them properly. connected to the TV. Adjust thevolume. • The sound volume on the TV is set to the minimum level. Nopicture a ppears •The viewer is not properly •...
-
Page 50: Using The Cd- Viewer Abroad
Using the Cn- Viewer Abroad ho foll.y hasitsown electricity and TV color systems. Before using your CD-l viewer abroad, check the following points, EOen se the CD- viewer in any country with the supplied AC power adaptor within 100V to 240V AC, cannotattachthe power adaptor to an AC outlet, use a power cord plug adaptor (not UPpled). - Page 51 Specifications System Compact Disc Digital Audio and Model Compact Disc Interactive System 16-bit (44.1 kHz) linear, 8-bit (37.8 DIA Conversion kHz)/4-bit (37.8 kHz/18.9 kHz) non- linear Transparent TN LCD panel Display system TET (thin-film transistor active Drive system matrix system) No.
-
Page 52: Index
..29 VOLUME control ..Files ... Viewing video output from other equipment ..41 ..28 Initial screen ... World time clock..*****...24 Key pad speed ..28 .**.. LCD display ... Zone ... Adjusting ..Printed in Japan Sony Corporation...
Need help?
Do you have a question about the IVO-V11 and is the answer not in the manual?
Questions and answers