
Related Manuals for Varitronics VariQuest Perfecta Q36


Summary of Contents for Varitronics VariQuest Perfecta Q36
- Page 1 VariQuest Perfecta ® ® Poster Design System User’s Guide www.variquest.com Contact VariQuest @ 1-800-328-0585 or find your Local Authorized Dealer...
- Page 2 Varitronics disclaims all warranties of merchantability or fitness for a particular purpose. Varitronics reserves the right to make changes without further notice to any product or system herein to improve reliability, function or design. This software and documentation are based in part on software and documentation under license from Hewlett-Packard Company.
- Page 3 Varitronics will at its option repair, replace or refund the purchase price of any accessories, supplies or equipment found to be defective under this warranty. THIS...
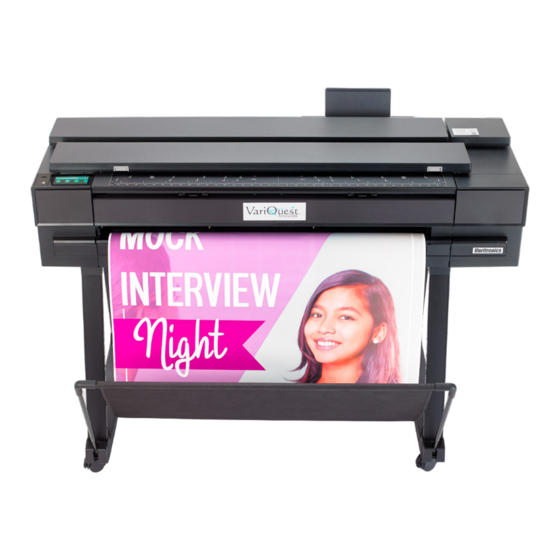
- Page 4 VariQuest Technical Support team: • Email: tech_support@variquest.com • Phone: 1-800-328-0585 (ext 3) Other Varitronics and Hewlett-Packard (HP) worked together to create the VariQuest ® Q36 Poster Design System. Perfecta is a compact and friendly printer Perfecta ® designed specifically for schools. Some features have been optimized for school use.
-
Page 5: Table Of Contents
Table of Contents TABLE OF CONTENTS Introduction Safety precautions Using this guide Main features Main components Turn the printer on & off Front panel Mobile printing Reports Connecting the Printer Choose which connection method to Use Connecting Design Center 2300 Software to the Perfecta ®... -
Page 6: Printing
Table of Contents Change the drying time Turn the automatic cutter on and off Advance button and cut button Printing Printing from an application using a printer driver Print from USB flash drive Print using Wi-Fi Direct Mobile printing Scanning Quick Sets Paper types suitable for scanning Scan widget... -
Page 7: Handling Ink Cartridges And Printhead
Table of Contents Print a presentation Using Adobe Photoshop Handling Ink Cartridges and Printhead About the ink cartridges Store supply usage data Check ink cartridge status Replace an ink cartridge About the printhead Safe mode Maintaining the Printer Check printer status Take care of the printer Clean the exterior of the printer Print Quality Diagnostic Report... -
Page 8: Troubleshooting Print-Quality Issues
Table of Contents A strip stays on the output area and generates jams Printer displays out of paper when paper is available Prints do not fall neatly into the bin Sheet stays in the printer when the print has been completed Paper is cut when the print has been completed Cutter does not cut well Scanner does not load original... -
Page 9: Troubleshooting Ink Cartridge And Printhead Issues
Table of Contents Random vertical lines Wrinkles or folds Line discontinuities Light-colored area fills are missing in the scan or copy Grain in area fills when scanning plain paper Small color differences between adjacent scanbars Vertical light lines at the intersection between scanner scanbars Variable line thickness or missing lines Color fringing Inaccurately reproduced colors... -
Page 10: Troubleshooting General Printer Issues
Table of Contents Wired network issues Wireless network issues Mobile Printing issues Network configuration page Troubleshooting General Printer Issues Printer does not start Printer does not print Printer seems slow Front panel is frozen Cannot access the Embedded Web Server Restore factory defaults and settings Alerts Text messages and numerical error codes... -
Page 11: Introduction
Chapter 1: Introduction INTRODUCTION Essential safety precautions and an overview of the printer’s main features, components, software options and printing possibilities. Safety precautions Ensure proper use of the printer to prevent it from being damaged. Follow these precautions at all times: •... -
Page 12: Using This Guide
Chapter 1: Introduction Using this guide This guide can be downloaded from the VariQuest Resource Center. Introduction This is a brief introduction to the printer and its documentation for new users. Use & maintenance To help you carry out normal printer procedures. Topics include the following: •... -
Page 13: Main Features
Chapter 1: Introduction Glossary The glossary contains definitions of printing and VariQuest terms used in this documentation. See Glossary. Index In addition to the table of contents, there is an alphabetical index to help you to find topics quickly. Warnings & cautions Symbols are used in this manual to ensure the proper use of the printer and to prevent the printer from being damaged. -
Page 14: Main Components
Chapter 1: Introduction Main components Hardware features of your printer. Front view Overview of the front of the printer’s main hardware components. Multi-sheet tray Roll Front panel Cutter Main door Stand and bin Ink cartridges Printhead access door Printhead carriage Scanner Q36 User’s Guide VariQuest... -
Page 15: Turn The Printer On & Off
Chapter 1: Introduction Rear view Overview of rear of the printer’s main hardware components. Ethernet port Power cable Turn the printer on & off The power key is located next to the front panel. The power key is illuminated when the printer is on, or in sleep mode. However, if you plan to store the printer for a long period or the power key does not seem to work, you are recommended to unplug the power cord. -
Page 16: Front Panel
Chapter 1: Introduction Front panel The front panel is a touch-sensitive screen with a graphical user interface located on the front left of the printer. The front panel gives you complete control of your printer. From it you can print, view information about the printer, change printer settings, perform calibrations and tests etc. -
Page 17: Mobile Printing
Chapter 1: Introduction Mobile printing You can print straight from your phone or tablet in just a few simple steps wherever you are using your mobile device OS. • Apple iOS printing is enabled through AirPrint, which comes pre-installed in iOS devices •... -
Page 18: Connecting The Printer
Chapter 2: Connecting the Printer CONNECTING THE PRINTER Printing has never been easier, and your printer comes with various options for connecting to help you do so. Choose which connection method to Use Follow the tree chart to help identify what connection method is best for you. Do you want access to the Internet/your network? Wired or wireless Do you want your printer... - Page 19 Chapter 2: Connecting the Printer Still not sure which connection is best for you or looking for more information on each connection method? Review the following charts for more details. Method 1 Wi-Fi Direct Note: Easy to install - Wi-Fi Direct is a connection that allows for device-to-device communication, linking devices together without a network.
-
Page 20: Connecting Design Center 2300 Software To The Perfecta ® Q36
Chapter 2: Connecting the Printer Connecting Design Center 2300 Software to the Perfecta ® Before printing from the Design Center to the Perfecta Q36, you must first set up the Design Center software and the Perfecta Q36 printer. VariQuest Design Center Software version 10.0 is required to connect to the Perfecta IMPORTANT: ®... - Page 21 Chapter 2: Connecting the Printer You will then be prompted to enter your school mascot and name. Once you have completed entering this information, click OK and you will be taken back to the Menu screen where the Perfecta Q36 icon will be present.
- Page 22 Chapter 2: Connecting the Printer Find the printer’s IP address by tapping Menu on the front panel and navigating to Info > NOTE: Connectivity > Ethernet. Go back to the Menu screen and the Perfecta Q36 icon should be present, so you are able to print from the ®...
- Page 23 Chapter 2: Connecting the Printer Scroll up and tap into Ethernet settings. Tap IPv4 and select IPv4 Configuration Method. Hit OK on the pop-up warning screen below. NOTE: Choose the Manual option and tap Manual on the following information screen. Enter the following information in the Manual IP Settings screen: IP Address: 192.168.001.005 •...
- Page 24 Chapter 2: Connecting the Printer Configuring The VariQuest Design Center Software ® Connect one end of an Ethernet LAN cable to the Perfecta Q36. ® Connect other end of Ethernet LAN cable to the DC2300. Open the VariQuest Design Center Software 10.0 by right clicking on software icon and selecting Run as Administrator.
-
Page 25: Setting Up The Printer
Chapter 3: Setting up the Printer SETTING UP THE PRINTER Introduction There are various printer settings that the printer administrator may wish to control as soon as a new printer is assembled and ready for use. Accessibility To ensure accessibility to the operating area, it is recommended to have an even-leveled clear space of minimum 760 mm (30 inches) by 1220 mm (48 inches). -
Page 26: Change The Language Of The Embedded Web Server
Chapter 3: Setting up the Printer The following browsers are known to be compatible with the Embedded Web Server: • Microsoft Edge (latest version) • Apple Safari 15 or later for OS X 10.15 and later • Mozilla Firefox (latest version) •... - Page 27 Chapter 3: Setting up the Printer Set the Sleep Mode setting Use the front panel menus to specify the amount of time the printer must be inactive before it goes into sleep mode. From the home screen on the printer front panel, tap the Menu icon , then Settings Scroll to and open the following menus: General >...
-
Page 28: Change The Front Panel Display Brightness
Chapter 3: Setting up the Printer Tap an option to specify set the scheduled on or off time (on shown). Set the day(s) and time. You can perform the same operation from the Embedded Web Server by going to General > NOTE: Power settings >... -
Page 29: Configure Firewall Settings
Chapter 3: Setting up the Printer • Print Wireless test report print information about the wireless network. • Print wireless network test runs diagnostic tests of wireless connectivity. • Ethernet settings view and print Ethernet details: Link speed sets the speed at which data are transmitted over the network. The default is Automatic. •... - Page 30 Chapter 3: Setting up the Printer After you tap Apply, the connection to the Embedded Web Server might be temporarily disrupted NOTE: for a short period of time. If the IP address was unchanged, the Embedded Web Server connection will be enabled again.
-
Page 31: Paper Handling
Chapter 4: Paper Handling PAPER HANDLING To print you can load rolls, single sheets, or use the multi-sheet tray. General paper-loading advice You can load paper into the printer in three different ways: from a roll, as a single sheet, or as a stack of single sheets from the multi-sheet tray. -
Page 32: Load A Roll Into The Printer
Chapter 4: Paper Handling If the roll is long, rest the spindle horizontally on a table and load the roll on the table. Slide the new roll onto the spindle. Make sure the paper type is oriented as shown. If it is not, remove the roll, turn it 180 degrees and slide it back on to the spindle. - Page 33 Chapter 4: Paper Handling If the edge of the roll is not straight or torn (sometimes due to tape used to hold end of the roll), pull the paper slightly and cut a straight edge. Insert the edge of the paper into the printer. Do not push your fingers inside the printer’s paper path.
-
Page 34: Unload A Roll
Chapter 4: Paper Handling Unload a roll If there is paper on the roll, you can unload it from the front panel. From the front panel, tap the Paper icon , then select the roll, then tap the Unload button, then Unload roll. -
Page 35: Load A Single Sheet
Chapter 4: Paper Handling Load a single sheet Roll paper and single sheets use the same input slot in the printer. NOTE: Use the multi-sheet tray. Sheets of width 329 mm (12.95 in) or less should be loaded from the multi-sheet tray. NOTE: From the front panel, tap the Paper icon , then select Sheet, then tap the Load button. -
Page 36: Unload A Single Sheet
Chapter 4: Paper Handling Unload a single sheet Sheets are unloaded from the front of the printer. To unload a sheet, go to the front panel and tap the Paper icon , then Sheet loaded > Unload. Either catch the sheet manually or allow it to fall into the bin. If you don’t load a new sheet, the multi-sheet tray is the default active paper source. - Page 37 Chapter 4: Paper Handling If you cancel the drying time during a print, the printer may not feed and cut the paper right away NOTE: due to the printhead maintenance, which runs in parallel. If the dry time is zero, the printer cuts the paper and then performs the printhead maintenance.
- Page 38 Chapter 5: Printing PRINTING Printing has never been easier or more flexible. Print from computers and mobile devices with the use of a variety software, customizable options and advanced settings. Printing from an application using a printer driver This is the traditional way of printing from an application. The correct printer driver must be installed on the computer, and the computer must be connected to the printer by network.
- Page 39 Chapter 5: Printing You can select print-quality options in the following ways: • In the Windows drivers dialog: Go to Basic > Print quality. • In the Mac OS X Print dialog: go to the Paper/Quality panel and look at the Quality Options section. If you select Standard quality options, you will see a simple slider with which you can select speed or quality.
- Page 40 Chapter 5: Printing Custom paper sizes created with the printer driver have the following characteristics: • The paper size is permanent and does not disappear if the driver is closed or the computer is turned off. • The paper size is local to the printer queue and not seen from other printer queues in the same computer. •...
- Page 41 Chapter 5: Printing However, you can change this behavior in the following way: • In the Windows driver dialog: Go to Basic > Margin Layout. • In the Mac OS X Print dialog: Select the Margins/Layout panel. At least some of the following options appear: •...
- Page 42 Chapter 5: Printing • In the Mac OS X Print dialog: Select the Paper Handling panel, then Scale to fit paper size, and select the paper size to which you want to scale the image. If you want to increase the size of the image, make sure that the Scale down only box is unchecked.
- Page 43 Chapter 5: Printing Use ink economically There are some recommendations you can follow to save ink. • For draft prints use plain paper, set Print quality to Economode. • Clean the printhead only when needed. Cleaning the printhead can be useful, but it uses a small amount of ink.
- Page 44 Chapter 5: Printing Print using Wi-Fi Direct With Wi-Fi Direct, you can print wirelessly from a computer, smart phone, tablet, or other wireless-capable device—without connecting to an existing wireless network Guidelines for using Wi-Fi Direct There are essential prerequisites to using Wi-Fi Direct. •...
- Page 45 Chapter 5: Printing Print from a wireless-capable mobile device that supports Wi-Fi Direct Make sure you have installed the latest version of HP Print Service Plugin on your mobile device. If your mobile device does not support Wi-Fi, you are not able to use Wi-Fi Direct. NOTE: Make sure you have turned on Wi-Fi Direct on the printer.
- Page 46 Chapter 5: Printing The printer must be connected to a network with Internet access: connect an Ethernet IMPORTANT: cable. In order to print/scan from mobile devices, Bonjour, IPP/IPPS and Remote scan IMPORTANT: protocols must be enabled in the Embedded Web Server (Network > Advanced Settings). Print from Android You can add and manage your device´s print services from your Android Settings: Settings >...
- Page 47 Chapter 5: Printing To use the default service, follow the steps below: Open the document or photo you want to print, tap the Menu icon, then tap Print. Choose your printer from the list. Printers discovered by the default print service will appear with a generic printer logo.
- Page 48 Chapter 6: Scanning SCANNING The Perfecta Q36 has an integrated color scanner capable of scanning images of the same width that the printer ® can print. Scan resolution is up to 600 dpi in RGB color with 24 bits per pixel, or grayscale with 8 bits per pixel, or black and white with 1 bit per pixel.
- Page 49 Chapter 6: Scanning To add a new Quick Set: Tap the Add icon . A window opens to create a new Quick Set to scan, copy, or print jobs. Select from the drop-down list where the new Quick Set will appear. Choose from: Copy, Network folder, USB drive, or Print from network folder, then tap Next.
- Page 50 Chapter 6: Scanning Select Use the following credentials, then tap Next. Select the Input options you require, then tap Next. A summary of the Quick Set appears. Tap Next to save the Quick Set and continue. Q36 User’s Guide VariQuest Perfecta ®...
- Page 51 Chapter 6: Scanning The Quick Set is added and now available to use. Tap OK to finish. Paper types suitable for scanning Paper categories supported for your Perfecta scanner. ® VariQuest recommends: • White paper: Any matte original printed with inkjet technology. For instance, anything printed with this printer on any of these paper types: Universal Bond Paper, Coated Paper, Heavyweight Coated Paper, plain paper.
- Page 52 Chapter 6: Scanning Tap the Settings icon to edit defined settings. See Scan settings for more information. NOTE: The scan widget settings used to scan and the folder where the job is sent to can be changed in the Embedded Web Server: Scan > Scan to network folder. Before using the scan widget, a network folder needs to be configured.
- Page 53 Chapter 6: Scanning The maximum length of paper that the scanner can scan depends on the paper width, among other NOTE: options such as scan resolution. An alert is displayed if the maximum length is exceeded. Push the sheet into the insertion slot until you feel it contact the rollers. The scanner will automatically grab the sheet and move it into position for scanning.
- Page 54 Chapter 6: Scanning • To a network folder: In this case, you must choose a folder accessible through the network. To create and/or change the folder options, go to the Embedded Web Server, then Scan > Scan to network folder > Default folder, or you can create a network folder quick set. A security PIN can be associated with each folder;...
- Page 55 Chapter 6: Scanning • Original paper type: • White Blueprint: for scanning blueprint originals with optimum results. This option converts to grayscale and • inverts the colors, if needed, producing a white background with black lines. Translucent paper: is a mode specifically for scanning NTP, vellum, and other translucent papers. •...
- Page 56 Chapter 6: Scanning Outgoing email settings • To: select the default address destination • From: define the default email address for the sender • Default from: specify the default email name • Default display name: specify the default name for the email sender •...
- Page 57 Chapter 6: Scanning Create a share name for the folder. Once the shared folder is created, go to the Embedded Web Server and follow the instructions under the Scan to network folder setup process. In the printer’s Embedded Web Server, select the Jobs tab and then Network folder. Select an existing profile or to create a new network folder profile.
- Page 58 Chapter 6: Scanning Type the user name and password of the ‘scanner user’ that you have already created on the remote computer. Leave the user domain field empty unless the user is a member of a Windows domain. If the user is only a local user of the remote computer, leave the field empty.
- Page 59 Chapter 6: Scanning In the Sharing tab, click the Advanced Sharing button. Check the Share this folder box. You need to ensure that the ‘scanner user’ has full read/write control over the shared folder. To do this, click Permissions and grant Full Control to the user (or to any suitable group that includes that user). Table of Contents...
- Page 60 Chapter 6: Scanning If there is a Security tab in the Properties window for your folder, then you must also grant the same user Full Control over the folder in the Security tab. Only some file systems such as NTFS require this. The ‘scanner user’...
- Page 61 Chapter 6: Scanning Check the Share files and folder using SMB box, and make sure that the ‘scanner user’ is checked in the On column. Click Done. You will now see file sharing enabled and Windows sharing on. The ‘scanner user’ can now access the folder and write files to it. Next, you must configure the printer to send scans to the folder.
- Page 62 Chapter 6: Scanning Scanning to the network folder using the widget The scan-to-network-folder widget is a fast way to start a scan and send the document to a network folder. With a document loaded in the scanner, tap the Send button to start scanning it.
- Page 63 Chapter 7: Copying COPYING Copy settings offer you a range of options to adjust, enhance, and alter (color), to ensure that the image is scanned and printed for optimum results. You can scan to fill the whole sheet by remove any cropping, correct skew, and even resize the copy to print at a desired size.
- Page 64 Chapter 7: Copying Push the sheet into the insertion slot until you feel it contact the rollers. The scanner will automatically grab the sheet and move it into position for scanning. If you feel that the sheet has loaded badly and you want to try again, you can pull it out manually.
- Page 65 Chapter 7: Copying Copy settings Some of the default copy settings are displayed. Tap Settings to see the complete list of settings. Original settings • Content type • Lighter/darker allows you to adjust the lightness of the copy. • Background noise removal reduces image defects such as wrinkles. •...
- Page 66 Chapter 7: Copying Copy from the widget The copy widget is a fast way to start a copy. With a document loaded in the scanner, tap on the Copy button to quickly start copying. The number of copies can be defined for the copy widget. Q36 User’s Guide VariQuest Perfecta...
- Page 67 Chapter 8: Quick Sets QUICK SETS A Quick Set is a named group of settings with defined default values. Quick Sets help you be more efficient and are convenient for less experienced users. They offer a ‘one click’ action to scan, copy, and print jobs. Factory Quick Sets The printer comes with some pre-defined factory Quick Sets, designed to support typical user requirements.
- Page 68 Chapter 8: Quick Sets Select the new type of Quick Set from the drop-down list. Choose from Copy, Email, Network Folder, USB Drive, or Print from USB, then tap Next. Give the new Quick Set a name, description, and choose the start option from the drop-down list, then tap Next.
- Page 69 Chapter 8: Quick Sets Editing a Quick Set Quick Sets can be edited from the Embedded Web Server. NOTE: Factory Quick Sets cannot be edited. Select the Quick Set to edit by clicking on the checkbox near the Quick Set name. Tap the Edit icon.
- Page 70 Chapter 8: Quick Sets Tap the Copy icon. A window will open with information on the Quick Set. Give the Quick Set a new name, add a description, and make any other changes to settings. Follow the steps until you have saved the Quick Set. Tap OK to finish. The duplicated Quick Set will now appear in the list.
- Page 71 Chapter 9: Practical Printing Examples PRACTICAL PRINTING EXAMPLES Step by step examples to print drafts, projects, presentations etc. to help you follow correct procedure with your jobs. Print a draft for revision with the correct scale Page size and orientation may not always be set as you require. This can be altered. Using Adobe Acrobat Print a revision draft with the correct scale.
- Page 72 Chapter 9: Practical Printing Examples Print a PDF multipage job from Adobe Acrobat Reader or Adobe Acrobat Pro Set up for a multipage job is a quick and simple process. You can print a multipage job from Adobe Acrobat. Open a multipage job in Adobe Acrobat Reader or Adobe Acrobat Pro (VariQuest recommends always using the latest version).
- Page 73 Chapter 9: Practical Printing Examples Click File > Print. Select the printer and driver from the Printer drop-down menu in the Print dialog box. Driver settings can be adjusted by clicking the Properties button. Adjust the color settings in the driver properties window. Click the Properties button in the Print dialog and set the Color option in the Color mode section.
- Page 74 Chapter 9: Practical Printing Examples Using Adobe Acrobat Pro This is a professional application that allows full color management. See briefly described, the options to select a working color space, convert images to a desired color space, and print. PDF files may not contain a color profile. In the absence of a color profile, Acrobat uses a working color space by default.
- Page 75 Chapter 9: Practical Printing Examples Select the elements you want to convert by specifying matching criteria (object type and/or color type) and then the conversion attributes. If you want to change the embedded color profile, you can select Any Object and Any Colorspace in the Matching Criteria section.
- Page 76 Chapter 9: Practical Printing Examples Print a project using Autodesk AutoCAD Set up a plot to print from a model or a layout. The AutoCAD window can show a model or layout. Normally a layout is printed rather than the model. Click the Plot icon at the top of the window.
- Page 77 Chapter 9: Practical Printing Examples Select the Device and Document Settings tab, and click the Custom Properties button. In the Driver, select the paper type that you intend to use. Select the print quality. If you intend to print on roll paper, you must decide where the printer should cut the paper. •...
- Page 78 Chapter 9: Practical Printing Examples Click the Plot icon at the top of the window. Ensure that the correct printer is selected, then click the Properties button. Select the Device and Document Settings tab, and click the Custom Properties button. In the Driver, select the paper type that you intend to use.
- Page 79 Chapter 9: Practical Printing Examples Using Adobe Photoshop Print a presentation with Adobe Photoshop. In Photoshop, click File > Print and then select your printer. Click Print settings, then select the Document size option. Choose from the available paper sizes. If you don’t find your desired paper size, create it by following the instructions in Custom paper sizes Chapter 5.
- Page 80 Chapter 10: Handling Ink Cartridges and Printhead 10 HANDLING INK CARTRIDGES AND PRINTHEAD There are four replaceable ink cartridges that supply the printhead. You can check status information, and easily change an ink cartridge when required. About the ink cartridges Ink cartridges store the ink and are connected to the printhead, which distributes the ink on the paper.
- Page 81 Chapter 10: Handling Ink Cartridges and Printhead Check ink cartridge status Information about the evolution of the ink cartridges. To view the ink levels of your ink cartridges, tap the Supplies icon , then Ink Cartridges on the front panel. For more information, tap the specific cartridge.
- Page 82 Chapter 10: Handling Ink Cartridges and Printhead About the printhead The printhead, which is supplied installed in the printer, is connected to the ink cartridges and jets ink onto the paper. Observe precautions when handling the printhead, because it is an ESD-sensitive device. CAUTION! Avoid touching pins, leads, and circuitry.
- Page 83 Chapter 11: Maintaining the Printer 11 MAINTAINING THE PRINTER Checking printer status and maintenance are essential to keep your equipment in prime condition. Keep your printer clean, diagnose issues, calibrate, replace the printhead when required, and keep your software up to date. Check printer status There are various ways you can check the current printer status.
- Page 84 Chapter 11: Maintaining the Printer To print the Print Quality Diagnostic Report Check the performance of the printhead that is currently installed in your printer, and whether it suffers from clogging or alignment problems. Use the same paper type that you were using when you detected a problem. The test patterns are easiest to evaluate on plain white paper.
- Page 85 Chapter 11: Maintaining the Printer There are three stages of cleaning (Express, Basic and Advance). Each stage lasts about two minutes, uses one sheet of paper, and uses an increasing amount of ink. After each stage, review the quality of the printed page. You should initiate the next phase of cleaning only if the print quality is poor.
- Page 86 Chapter 11: Maintaining the Printer Replace the printhead When the printhead is out of ink or has an issue that cannot be fixed, you must replace it. After replacement, the printer will automatically perform a printhead alignment on the loaded paper. If you would like to perform the printhead alignment on a different paper (perhaps from the multi-sheet TIP: tray), you could change the paper before starting this procedure.
- Page 87 Chapter 11: Maintaining the Printer Raise the lever to release the tube connector and store the tubes connector on the tubes connector-holder in the printer door. Locate the printhead lever. Raise the lever to release the printhead. Table of Contents...
- Page 88 Chapter 11: Maintaining the Printer Remove the printhead, handling it with care to avoid getting ink on the connections. Insert the new printhead. Lower the printhead lever (white). Insert the tubes connector into the printhead. Q36 User’s Guide VariQuest Perfecta ®...
- Page 89 Chapter 11: Maintaining the Printer Make sure that the tubes connector locks shut. Close the printhead door. Close the main door and follow the instructions on the front panel. The front panel now recommends a printhead alignment. The printer prepares the printhead for use. Do not open any covers during this process.
- Page 90 Chapter 11: Maintaining the Printer Clean the encoder strip You can use a small damp cloth to remove unwanted residue. Turn off the printer: Press the power key and unplug the power cable. Using tap water and a small cloth that will not leave fibers in the printer, dampen the cloth and remove any excess water, so that the cloth is damp but not wet.
- Page 91 Chapter 11: Maintaining the Printer If you would like to fine tune the calibration, or are using a transparent paper, swipe down the dashboard and tap the Menu icon , then Tools > Troubleshooting > Adjust Paper Advance. Select the percentage of change from –99% to +99%. To correct light banding decrease the percentage. To correct dark banding increase the percentage.
- Page 92 Chapter 11: Maintaining the Printer Clean the scanner scanbars and the surrounding area with a lint-free cloth. For more thorough cleaning, clean the calibration surfaces and the feed rollers. Close the scanner cover and gently push it down to lock it into place. Clean the area immediately in front of the scanner, where the scanned sheet rests before scanning.
- Page 93 Chapter 11: Maintaining the Printer Calibrate the scanner Your scanner has been calibrated at the factory, and theoretically CIS scanners do not need to be recalibrated during their lifetimes. Nevertheless, because of environmental changes, your scanner may start showing image defects that can be easily corrected by recalibrating the scanner.
- Page 94 Once the printer detects that there is a new firmware available, follow the instructions on the front panel. Contact Varitronics Technical Support if you have questions regarding supported firmware versions. Software update Updates of printer drivers and other software are available for your printer. Please contact Varitronics Technical Support if you have questions regarding driver and software updates. Q36 User’s Guide VariQuest Perfecta ®...
- Page 95 Chapter 12: Accessories 12 ACCESSORIES Supplies and accessories can be ordered for your printer. How to order supplies and accessories There are two ways to order supplies or accessories for your printer. • Call VariQuest Customer Service at 1-800-328-0585. • Call you Local Authorized VariQuest Dealer or visit the VariQuest Resource Center at https://resources.variquest.com/ The rest of this chapter lists the available supplies and accessories, and their part numbers.
- Page 96 Chapter 13: Troubleshooting Paper Issues 13 TROUBLESHOOTING PAPER ISSUES When the printer detects a jam, it tries to resolve the issue automatically. If it cannot, it stops, and you must fix the problem manually. Paper cannot be loaded successfully There are various reasons why you may have issues loading the paper. •...
- Page 97 Chapter 13: Troubleshooting Paper Issues Unsuccessful sheet load There are checks to make and steps to correct any problems. • Check that the sheet is more than 210 mm (8.3 in) wide (A4). • Guide the sheet, especially thick papers, when the printer initially feeds the sheet. •...
- Page 98 Chapter 13: Troubleshooting Paper Issues Paper loading error messages There is a list of front panel messages related to paper loading, with the suggested corrective action. ERROR MESSAGES FRONT PANEL MESSAGE SUGGESTED ACTION During the paper load process the printer detected that the paper had too much skew.
- Page 99 Chapter 13: Troubleshooting Paper Issues Bond and coated or technical paper Your paper type selection for generic paper depends on the paper’s ink absorption capacity. • For natural tracing papers, select paper type Natural Tracing Paper < 65 g/m2 or Natural Tracing Paper > 65 g/m2, depending on the weight of the paper.
- Page 100 Chapter 13: Troubleshooting Paper Issues Paper mismatch If the paper currently loaded in the printer is not suitable for a particular job, the printer stops and waits for you to decide what to do. There are several ways in which the loaded paper may be considered unsuitable. •...
- Page 101 Chapter 13: Troubleshooting Paper Issues Rewind the roll to create a loop. Cut the paper, if needed. Carefully remove any of the jammed paper that you can from the top of the printer. Carefully remove any of the jammed paper from the front window. Reload the roll, or load a new sheet;...
- Page 102 Chapter 13: Troubleshooting Paper Issues Unlock the multi-sheet tray, using the rotary switch behind it. Pull out the tray. Remove all paper from the tray. Put the multi-sheet tray in again. Lock the multi-sheet tray. The paper has jammed in the scanner The following steps provide the complete procedure for this topic.
- Page 103 Chapter 13: Troubleshooting Paper Issues Open the scanner cover. At the back, pull the media out from the top rear area. Or pull it from the front bottom area between the scanner platen and front window. Do not move the paper sideways; it could damage the scanner! CAUTION! Or pull it from the front bottom area between the scanner platen and front window.
- Page 104 Chapter 13: Troubleshooting Paper Issues A strip stays on the output area and generates jams If a small piece of paper has been cut, such as before printing a new roll, or after the Move and Cut front panel option has been used, the cut strip may remain in the output area. Make sure that the printer is not printing, then reach into the area and remove the strip.
- Page 105 Chapter 13: Troubleshooting Paper Issues Scanner does not load original If you have difficulty loading, first check that the scanner is on, and then follow the steps in order to check and fix any issue. Wait until the scanner has started up completely and is idle. Check for messages on the front panel.
- Page 106 Chapter 14: Troubleshooting Print-Quality Issues 14 TROUBLESHOOTING PRINT-QUALITY ISSUES Step by step instructions are provided for you to identify and resolve your issue. General printing advice To achieve the best performance from your printer, use only genuine manufacturer’s supplies and accessories. •...
- Page 107 Chapter 14: Troubleshooting Print-Quality Issues Check that you are using appropriate print-quality settings for your purposes (see Printing in Chapter 4). In some cases, you can overcome a print-quality problem merely by selecting a higher print-quality level. For instance, if you have set the Print Quality level to Fast, try setting it to Best. Print the Print Quality Diagnostic Report.
- Page 108 Chapter 14: Troubleshooting Print-Quality Issues Lines appear stepped or jagged Check your original image, and print-quality settings. The problem may be inherent in the image. Try to improve the image with the application you are using to edit it. Check that you are using appropriate print-quality settings. See Printing in Chapter 4.
- Page 109 Chapter 14: Troubleshooting Print-Quality Issues Check that you are using appropriate print-quality settings. See Printing in Chapter 4. Print the Print Quality Diagnostic Report, and align the printhead if recommended in the report. See To print the Print Quality Diagnostic Report in Chapter 11.
- Page 110 Chapter 14: Troubleshooting Print-Quality Issues Set Print Quality to Best. Maintain the room at a steady temperature between 10 and 30°C (50 and 86°F). Load the roll of film and let it rest for five minutes before printing. If you are still not satisfied, try recalibrating the paper advance. See Recalibrate the paper advance Chapter 11.
- Page 111 Chapter 14: Troubleshooting Print-Quality Issues Check that the paper type you have loaded corresponds to the paper type selected in the front panel and in your software. If you have doubts about the paper selection, see Paper type is not in the driver or front panel in Chapter 13.
- Page 112 Chapter 14: Troubleshooting Print-Quality Issues Whenever you notice this problem, cancel the printing job immediately. Soaked paper can damage the printhead. If you notice poor print quality after this has happened, clean the printhead. Clean the printhead in Chapter 11. Check that the paper type you have loaded corresponds to the paper type selected in the front panel and in your software.
- Page 113 Chapter 14: Troubleshooting Print-Quality Issues Check that you are using appropriate print-quality settings. See Printing in Chapter 4 for more information. If the problem still persists, try rotating the image. Edges of objects are darker than expected You might see darker edges in some areas of the plot that cause local color variations. Try setting print quality to Best.
- Page 114 Chapter 14: Troubleshooting Print-Quality Issues Check that the paper type you have loaded corresponds to the paper type selected. Check that you are printing on the correct side of the paper. Check that you are using appropriate print-quality settings. For the most accurate colors, select Normal or Best quality.
- Page 115 Chapter 14: Troubleshooting Print-Quality Issues • If you are trying to print a very long image on a roll, check that your software is capable of printing an image of that size. • You may have asked to rotate the page from portrait to landscape on a paper size that is not wide enough. •...
- Page 116 Chapter 15: Troubleshooting Scanner Issues 15 TROUBLESHOOTING SCANNER ISSUES Cannot access the network folder Make sure your computer is using the same network as the printer. If it is, then follow the suggested checks to correct any issue. If you have set up a network folder (see Scan to network setup process in Chapter 6), but the printer cannot access it, try the following suggestions:...
- Page 117 Chapter 15: Troubleshooting Scanner Issues Contact your network administrator for information about your network configuration, transfer rates, scan-to- file destinations on the network and possible solutions for increasing the speeds. If scanning to files on the network is too slow and the network configuration cannot be amended to correct this, improved speeds can be achieved by scanning to a USB flash drive.
- Page 118 Chapter 16: Troubleshooting Copy and Scan Quality Issues 16 TROUBLESHOOTING COPY AND SCAN QUALITY ISSUES A defect is a common image artifact that usually appears when using any CIS scanner. These are due to incorrect settings, product limitations, or easily solvable mistakes. A failure mode is due to malfunctions of some of the scanner components.
- Page 119 Chapter 16: Troubleshooting Copy and Scan Quality Issues If the streaks remain, recalibrate the scanner as indicated in Calibrate the scanner in Chapter 11. Restart the scanner and re-scan your original after the calibration is completed. If the streaks still remain, check the scanner’s glass scanbars and sliders visually. If they are damaged (scratched or broken), call VariQuest Customer...
- Page 120 If the error appears outside these areas, call Varitronics Technical Support. and report “line discontinuities within a scanbar”. Light-colored area fills are missing in the scan or copy When scanning or copying a map with a light area at the top, the Background color removal setting could interpret it as a background color, therefore removing it and other similar areas.
- Page 121 If the problem persists, proceed to analyze areas I and J of the diagnostic plot across modules =, 1 and 3. In the three examples below, the top example is ideal, the middle example can be regarded as acceptable; but, if you see something similar to the bottom example (or worse), call Varitronics Technical Support and report “grain in area fills”.
- Page 122 If the problem persists, proceed to analyze patterns A and G in the diagnostic plot, if you see some color differences between left and right sides of the bars for neutral and vivid colors, call Varitronics Technical Support and report “small color differences between adjacent ”. Otherwise, if you see color differences for...
- Page 123 0.5 cm wide at the intersection between two scanbars. If you see the kind of result shown on the right, call Varitronics Technical Support and report “vertical light bands in area fills at the intersection between scanbars, after calibrating the scanner”.
- Page 124 Chapter 16: Troubleshooting Copy and Scan Quality Issues If the problem persists, turn the original plot 90 degrees before scanning it again. If the problem persists, clean and calibrate the scanner as indicated in Clean the scanner scanbars Calibrate the scanner in Chapter 11.
- Page 125 Normally, they look red at the top and blue or green at the bottom, but it could be the other way around. If you see this effect, call Varitronics Technical Support and report “color fringing problem after calibration”. Clipping in dark or light areas Sometimes you may see that the scanned file or copy of one of your plots has lost detail in light or dark areas (or both).
- Page 126 If your scanned pattern looks like the incorrect one on the right, whether the clipping is in dark and/or light areas, call Varitronics Technical Support and report “Clipping in dark/light areas”. Flare in the image when scanning glossy originals If the scanner is miscalibrated, or if the original plot you are trying to scan is very glossy or reflective, you can sometimes find flare in the scanned image.
- Page 127 Calibrate the scanner. However, if the calibration ended correctly, scan your original again and check that the colored vertical bands have disappeared. If the problem persists, call Varitronics Technical Support and report “vertical red/green bands after calibration”. Vibration If your printer is not properly placed on a flat surface, or if the scanner lid does not close correctly, you may sometimes find that the scanned image suffers from vibration.
- Page 128 Chapter 16: Troubleshooting Copy and Scan Quality Issues If the problem persists, analyze pattern D of the diagnostic plot. If you see the problem shown on the right, call Varitronics Technical Support and report a “vibration problem”. Defocus, blurring and fading colors CIS technology scanners are tuned to work at a fixed focal distance, and they are very sensitive to small variations in the position of the original with respect to the scanner glass plate.
- Page 129 If the problem persists, restart the scanner by turning it off and on again. If you find an error message on the front panel during this operation, call Varitronics Technical Support and report the error message. If no error message appears, try repeating your scan.
- Page 130 Restart the scanner by turning it off and on again. If you find an error message on the front panel during this operation, call Varitronics Technical Support and report the error message. If no error message appears, try repeating your scan.
- Page 131 Open and close the scanner lid by pushing it down until you hear a click. Then repeat your scan and visually check that the original advances correctly through the scanner path. If not, call Varitronics Technical Support and report an “incorrect paper advance” error. Remember that your scanner is not intended to work with originals thicker than 0.75 mm (29 mil).
- Page 132 Turn the original 90 degrees if possible before re-scanning. You can also try modifying the Lighter/Darker setting. If the problem persists, analyze pattern C, modules 0, 1 and 2, of the diagnostic plot. Call Varitronics Technical Support and report an “object replication“ issue if you see the kind of error shown on the right.
- Page 133 Chapter 16: Troubleshooting Copy and Scan Quality Issues Incorrect edge detection, mostly when scanning tracing paper Tracing or translucent papers can be scanned with good results, although totally transparent papers are not supported. Nevertheless, the resulting image may have extra margins or some clipping of the content in some situations when detection of the edge of the paper is not accurate, which may also happen when scanning plain paper if the glass plate is dirty.
- Page 134 Chapter 17: The Scanner Diagnostic Plot 17 THE SCANNER DIAGNOSTIC PLOT You can print the plot onto a roll or a single sheet but do not use recycled or tracing paper. Prepare the printer and the paper to print the diagnostic sheet Turn on your printer and wait until it is functioning.
- Page 135 Chapter 17: The Scanner Diagnostic Plot Resolution By looking at pattern F you may find problems with the printer’s resolution for the loaded paper. Usually, this test does not reveal a printer problem, but a defect in the paper, which may not be suitable for printing the diagnostic sheet with the required quality.
- Page 136 Chapter 17: The Scanner Diagnostic Plot Additionally, misalignment problems can be seen in patterns D and G in the form of color fringing (which is exaggerated below, on the right). That is, the limits between two strong colors are not well defined or a third color appears between them.
- Page 137 Chapter 17: The Scanner Diagnostic Plot Printer banding Looking at patterns A, B, and C, you may see vertical banding problems. Example: Horizontal lines across the image (banding) in Chapter 11 for the troubleshooting steps to follow in this case. Streaks Looking at patterns A, B, C, G and H, you may find vertical streaks if the printer’s printheads are not working correctly.
- Page 138 Chapter 17: The Scanner Diagnostic Plot Scan or copy the diagnostic plot There are two options for evaluating the diagnostic plot: scanning into a JPEG file, or copying onto paper. We recommend using the scan option, so that the generated file can be analyzed more easily by a remote support engineer if necessary.
- Page 139 Chapter 17: The Scanner Diagnostic Plot Monitor calibration The monitor on which the plot is going to be evaluated should ideally be calibrated. As this is not always feasible, we propose here to follow an easy procedure for adjusting the brightness and contrast of the monitor in order to see the patterns correctly.
- Page 140 Chapter 18: Troubleshooting Ink Cartridge and Printhead Issues 18 TROUBLESHOOTING INK CARTRIDGE AND PRINTHEAD ISSUES Step by step instructions are provided for you to identify and resolve your issue. Cannot insert an ink cartridge It is important that you are using the correct type of cartridge, and that it is well placed in its slot. Check that you have the correct type of cartridge (model number).
- Page 141 Chapter 19: Troubleshooting Data Communication Issues 19 TROUBLESHOOTING DATA COMMUNICATION ISSUES Step by step instructions are provided for you to identify and resolve your issue. Communication failures between computer and printer It is important that the printer is communicating properly to the computer to be able to print. Symptoms of a communication failure can be: •...
- Page 142 Chapter 19: Troubleshooting Data Communication Issues Hostname You can use the hostname instead of the numeric IP address. Go to the front panel and tap the Menu icon , then Settings > Network > WiFi/Ethernet details. Take a note of the IP address and the hostname (HPXXXXXX format). If your computer is running Windows, tap the Start button, then the Configuration button, then tap Devices >...
- Page 143 Chapter 19: Troubleshooting Data Communication Issues Wireless network issues Step by step instructions are provided for you to identify and resolve your issue. Wireless network troubleshooting Check that the wireless is on, then follow the troubleshooting steps. To turn on wireless, tap the Menu icon , then Settings >...
- Page 144 Chapter 19: Troubleshooting Data Communication Issues Mac OS X: • Click the Wi-Fi icon in the menu bar at the top of the screen. From the menu that appears, you can determine if the Wi-Fi is turned on and which wireless network your computer is connected to. For more detailed information about your Wi-Fi connection, click System Preferences in the Dock.
- Page 145 Chapter 19: Troubleshooting Data Communication Issues Mobile Printing issues For issues, call your Authorized VariQuest Dealer Varitronics Technical Support Team. ® Network configuration page If the printer is connected to a network, you can print a network configuration page to view the network settings for the printer.
- Page 146 Chapter 19: Troubleshooting Data Communication Issues SLP: Service Location Protocol (SLP) is an Internet standard network protocol that provides a • framework to allow networking applications to discover the existence, location, and configuration of networked services in enterprise networks. This protocol simplifies discovery and use of network resources such as printers, Web servers, fax machines, video cameras, file systems, backup devices (tape drives), databases, directories, mail servers, and calendars.
- Page 147 If you see the orange light, wait for the printer to check if it makes a beeping sound: • Three beeps means an electronic problem; call Varitronics Support Team and explain. Printer does not print If all is in order (paper loaded, all ink components installed and no file errors), there are still reasons why a file you have sent from your computer may not start printing when expected: •...
- Page 148 • Check the functionality of the printer. If the problem persists, call the Varitronics Technical Support Team. Cannot access the Embedded Web Server If you are using a proxy server, try bypassing the server and accessing the Embedded Web Server directly.
- Page 149 Chapter 20: Troubleshooting General Printer Issues Defaults Restore the printer to the original factory defaults. From the front panel, tap Menu > Tools > Maintenance > Restore Settings, then select the appropriate reset option: Restore Network Settings, Restore User Settings, Restore User Data, or Restore All Factory Defaults.
- Page 150 Cartridges depleted cartridges. Contact your Local Authorized VariQuest Dealer or the Maintenance kit 1 required Varitronics Technical Support Team Contact your Local Authorized VariQuest Dealer or the Maintenance kit 2 required Varitronics Technical Support Team Insert cartridges of the correct color as needed. See...
- Page 151 Chapter 21: Front Panel Error Messages Text Messages (continued) MESSAGE RECOMMENDATION You are printing a multipage job. Load another sheet to Load another single sheet. continue printing or cancel the job. Multi-sheet tray is out of paper. Load paper in multi-sheet tray Load paper into the multi-sheet tray.
- Page 152 Chapter 21: Front Panel Error Messages Values of XX (subsystem) VALUE SUBSYSTEM Main PCA Print Bundle PCA Scanner Service Station Ink supply station Printhead Carriage PCA Carriage Motor Pick Motor Feed Motor Rewinder Motor Feed Index PCA Encoder For system errors in the XX.YY.XX.XX format, YY indicates the subsystem. VALUE System Security...
- Page 153 Chapter 21: Front Panel Error Messages Numerical Error Codes ERROR CODE RECOMMENDATION Scanner issue. To continue using the scanner, restart the printer. If the problem persists, call 0009-0101 your support representative. Scanner issue. To continue using the scanner, restart the printer. If the problem persists, call 0009-0301 your support representative.
- Page 154 Chapter 22: Printer Specifications 22 PRINTER SPECIFICATIONS Reference lists of physical, technical, ecological, etc. specifications for your printer. Functional specifications Your printer is designed to deliver CAD / construction drawings as well as high quality graphics. VariQuest ink supplies DESCRIPTION SPECIFICATION Printhead One printhead...
- Page 155 Chapter 22: Printer Specifications Margins DESCRIPTION SPECIFICATION Top left and right margins 5 mm (0.2 in) Bottom margin 17 mm (0.67 in) (manual sheet) Mechanical accuracy SPECIFICATIONS ±0.1% of the specified vector length or ±0.2 mm (whichever is greater) at 23°C (73°F), 50-60% relative humidity, on E/A0 printing material in Best or Normal mode with Heavyweight Coated Paper roll feed.
- Page 156 Chapter 22: Printer Specifications Power specifications Use the electrical cord supplied with the printer and the power supply voltage specified on the label. Avoid overloading the printer’s electrical outlet with multiple devices. Printer power specifications TYPE VALUES 100–240 V ac ∓10%, auto-ranging Source Frequency 50/60 Hz...
- Page 157 Chapter 22: Printer Specifications Acoustic specifications Declared noise emission levels for the VariQuest Perfecta Q36 Poster Design System. Sound pressure levels at ® ® bystander positions and sound power levels measured per ISO 7779. Printer acoustic specifications DESCRIPTION SPECIFICATION Idle sound power <...
- Page 158 Glossary GLOSSARY AirPrint Apple technology that helps you create full-quality printed output without the need to download or install drivers. Bonjour Apple Computer’s trade name for its implementation of the IETF Zeroconf specification framework, a computer network technology used in Apple’s Mac OS X from version 10.2 onwards. It is used to discover services available on a local area network.
- Page 159 Glossary Fast Ethernet An Ethernet network capable of transferring data at up to 100,000,000 bits/second. Fast Ethernet interfaces are capable of negotiating slower speeds when required for compatibility with older Ethernet devices. Firmware Software that controls your printer’s functionality and is stored semi-permanently in the printer (it can be updated). Gamut The range of colors and density values reproducible on an output device, such as a printer or monitor.
- Page 160 Glossary Network A network is a set of connections that pass data between computers and devices. Every device is able to communicate with every other device in the same network. This allows data to be moved between computers and devices, and allows devices such as printers to be shared between many computers. Nozzle One of many tiny holes in a printhead through which ink is deposited onto the paper.
- Page 161 Index INDEX Front panel 16 Connect the printer Choose a method 18 Accessibility 25 Accessibility 25 Connecting printer to the Design Brightness 28 Accessories Center 20 Frozen 148 Order 95 Copying 63 Language 25 Acoustic specifications 157 Copy quick set 64 Front panel option Alerts Copy settings 65...
- Page 162 Ink cartridge Power About 80 On/off 15 Network Cannot insert 140 Power specifications 156 Configuration page 145 Memory chip 80 Preferences Configure 56 Order 95 Window driver 26 Network folder Replace 81 Printer Cannot access 116 Specification 154 Does not print 147 Network settings 28 Status 81 Does not start 147...
- Page 163 Variable line thickness 123 Vertical black band 30 cm wide 129 Quick Sets 48 Telephone number 4 Vertical distortion 131 To print the Print Quality Diagnostic Vertical lines between scanbars 123 Report 84 Vertical red/green bands 127 Tubes Replace an ink cartridge 81 Vibration effect 127 Cannot connect Replace printhead 86...
- Page 164 © 2024 Varitonics, LLC All Rights Reserved. 5/24 R2900412...
Need help?
Do you have a question about the VariQuest Perfecta Q36 and is the answer not in the manual?
Questions and answers