Varitronics VariQuest Perfecta 2400STP User Manual
Scan-to-print poster design system
Hide thumbs
Also See for VariQuest Perfecta 2400STP:
- Printhead installation manual (2 pages) ,
- Printhead installation manual (2 pages) ,
- Assembly instructions manual (10 pages)

Related Manuals for Varitronics VariQuest Perfecta 2400STP


Summary of Contents for Varitronics VariQuest Perfecta 2400STP
- Page 1 ® ® VariQuest Perfecta 2400STP Scan-to-Print Poster Design System User’s Guide www.variquest.com Contact VariQuest @ 800-328-0585 or local authorized Dealer...
- Page 2 LLC. While every precaution has been taken in preparation of this document, Varitronics assumes no liability to any party for any loss or damage caused by errors or omissions or by statements resulting from negligence, accident or any other cause. Varitronics further assumes no liability for incidental or consequential damages arising from the use of this document.
- Page 3 Varitronics will at its option repair, replace or refund the purchase price of any accessories, supplies or equipment found to be defective under this warranty.
- Page 4 Technical Support Technical Support For technical assistance, please contact your authorized VariQuest dealer or the VariQuest Technical Support team: • Email: techsupport@variquest.com • Phone: 1-800-328-0585 Safety Information Observe all warnings and instructions marked on the product. Follow these precautions to ensure proper use and handling of the printer: •...
- Page 5 Other Other ® Varitronics and Hewlett-Packard (HP) worked together to create the VariQuest ® 2400STP Poster Design System. Perfecta is a compact and friendly Perfecta printer designed specifically for schools. Some features have been optimized for school use. For additional features, contact our Technical Support team.
- Page 6 Other This page is intentionally left blank. ® ® 2400STP User’s Guide VariQuest Perfecta...
-
Page 7: Table Of Contents
Introduction ® ® This chapter provides an overview of the VariQuest Perfecta 2400STP Poster Design System. The following information is contained in this chapter: • “Features” on page 1-2 • “Main Components” on page 1-3 • “Printer Software” on page 1-8 •... -
Page 8: Features
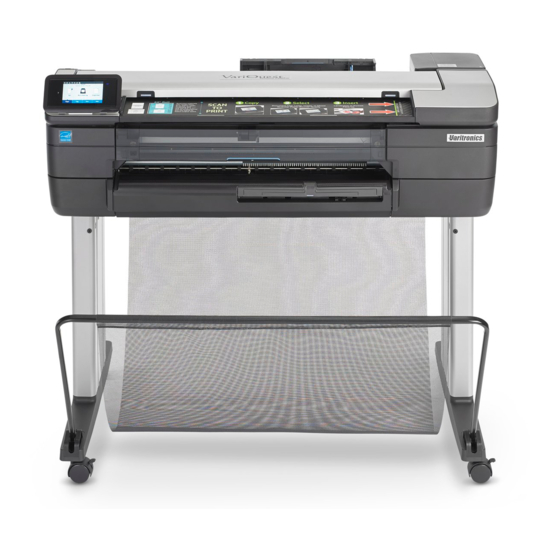
Features Features Your printer is a color inkjet printer designed for printing high-quality images on paper up to 24 inches wide. It also has an integrated color scanner capable of scanning images up to 24 inches wide. Some major features of the printer are: •... - Page 9 Main Components Front View Main Components Front View Multi-sheet tray extenders Ink Cartridges Output Platen Ink Cartridge Cover Front Panel Printhead Door Scanner Cover Printhead Front Window Output Tray Extender Note: Image is intended to show component placement only and may not be an exact representation of your printer.
-
Page 10: Main Components
Main Components Rear View Rear View Roll Cover Multi-sheet Tray Communication Ports Note: Image is intended to show component placement only and may not be an exact representation of your printer. ® ® 2400STP User’s Guide VariQuest Perfecta... - Page 11 Main Components Communication Port Communication Port Ethernet Port Note: Image is intended to show component placement only and may not be an exact representation of your printer. ® ® 2400STP User’s Guide VariQuest Perfecta...
- Page 12 Main Components Front Panel Front Panel The front panel, located on the front left of the printer, is a touch-sensitive screen with a graphical user interface. It gives you complete control of your printer: from the front panel, you can print, scan, view information about the printer, change printer settings, perform calibrations and tests, and so on.
- Page 13 Main Components Front Panel Home Screen Dynamic Icons The following icons are displayed only on the Home screen. Paper Tab Icons Roll Paper: Touch to load, unload, and Single Sheet Paper: Press to load, unload, change options for roll paper and change options for single sheets.
-
Page 14: Printer Software
Printer Software Front Panel Printer Software The following software is provided with your printer: • The GL/2 and RTL driver for Windows • The Embedded Web Server (see “Access the Embedded Web Server” on page 2-18). Allows you to: Manage printer from a remote computer. View status of ink cartridges, printhead, and paper. -
Page 15: Mobile Printing And Web Services
Mobile Printing and Web Services Enable eMail Printing Mobile Printing and Web Services Your printer can be connected to the Internet and the Web, providing various benefits: • Automatic firmware updates (see “Firmware Updates” on page 5-14). • Print on ePrinters from almost anywhere. •... -
Page 16: Turn Printer On And Off
Turn Printer On and Off Enable eMail Printing Turn Printer On and Off 1. To turn the printer on or off, press the Power key on the front panel. 2. To store the printer for a long period, or the Power key does not work, unplug the power cord. -
Page 17: Internal Prints
Internal Prints Enable eMail Printing Internal Prints Internal prints give various kinds of information about your printer and can be requested from the front panel. Before requesting any internal print, check that the printer and the paper are ready for printing. The loaded paper should be at least A4 portrait—8.27 inches wide—otherwise the print may be clipped. - Page 18 Internal Prints Enable eMail Printing This page is intentionallly left blank. ® ® 1-12 2400STP User’s Guide VariQuest Perfecta...
- Page 19 Printer Setup ® ® This chapter provides an setup and personalization of the VariQuest Perfecta 2400STP Poster Design System. The following information is contained in this chapter: • “Choosing Connection Method” on page 2-2 • “Connecting Printer to Network” on page 2-3 •...
-
Page 20: Choosing Connection Method
Choosing Connection Method Choosing Connection Method The following methods can be used to connect your printer. Connection Cable Type Speed Length Other Wireless Moderate; varies according to Sensitive to interference conditions (distance to router, over longer distances; interference, number of wireless requires extra equipment clients, network topology, etc.) (wireless access point or... -
Page 21: Connecting Printer To Network
Connecting Printer to Network Connecting Printer to Network The printer can configure itself automatically for most networks, similar to any computer in the same network. The first time you connect it to a network, the process may take a few minutes. Once the printer has a working network configuration, you can check its network address: 1. -
Page 22: Connecting A Networked Computer To The Printer
Connecting a Networked Computer to the Printer Uninstall Printer Software Connecting a Networked Computer to the Printer Note: This procedure is for Windows computers only. The following instructions apply if you intend to print from software applications using a printer driver. See “Printing” on page 4-1 for alternative ways of printing. Before you begin, check your equipment: •... -
Page 23: Connecting Design Center 2300 Software To Perfecta 2400Stp Printer
Connecting Design Center 2300 Software to Perfecta 2400STP Printer Configure DC2300 & Perfecta 2400STP via Wi-Fi Direct Connecting Design Center 2300 Software to Perfecta 2400STP Printer Before printing from the Design Center to the Perfecta 2400STP, you must first set up the Design Center software and the Perfecta 2400STP printer. Configure DC2300 &... - Page 24 Connecting Design Center 2300 Software to Perfecta 2400STP Printer Configuring DC2300 & Perfecta 2400STP via a Network Configuring DC2300 & Perfecta 2400STP via a Network Both the DC2300 and Perfecta 2400STP must be connected to the network before starting this process. 1.
- Page 25 Connecting Design Center 2300 Software to Perfecta 2400STP Printer Connect DC2300 & Perfecta 2400STP without a Network Connect DC2300 & Perfecta 2400STP without a Network Configuring Design Center 2300 1. Press the Windows button and select Control Panel. 2. On the Control Panel select View Network status and tasks. 3.
- Page 26 Connecting Design Center 2300 Software to Perfecta 2400STP Printer Connect DC2300 & Perfecta 2400STP without a Network Configuring Perfecta 2400STP Printer 1. Touch Settings at the upper left corner of the screen. 2. On the Info screen, touch Settings again. 3.
- Page 27 Connecting Design Center 2300 Software to Perfecta 2400STP Printer Connect DC2300 & Perfecta 2400STP without a Network 4. In the Connected menu, select Ethernet Settings. 5. In the Ethernet Settings menu, select Advanced Settings. 6. In the Advanced Settings menu, set IPv6 to OFF. ®...
- Page 28 Connecting Design Center 2300 Software to Perfecta 2400STP Printer Connect DC2300 & Perfecta 2400STP without a Network 7. In the Advanced Settings menu, select IP Settings. 8. In the IP Settings menu, select Manual. 9. Select OK on any information screens that display. 10.
- Page 29 Connecting Design Center 2300 Software to Perfecta 2400STP Printer Connect Perfecta 2400STP to DC2300 via Ethernet Cable 11. On the keyboard, enter 192.168.001.005, then touch Done. 12. In the Manual IP Settings menu, select Subnet Mask. 13. On the keyboard, enter 255.255.255.0, then touch Done and Apply. Connect Perfecta 2400STP to DC2300 via Ethernet Cable 1.
-
Page 30: Mobile Printing From An Ios Device
Mobile Printing from an iOS Device Print via Wireless Internet using iOS Device Mobile Printing from an iOS Device You can print directly from your smartphone or tablet in just a few simple steps wherever you are using your mobile iOS device. Method 1 is for printing from a mobile device when both your printer and device are connected to the internet. - Page 31 Mobile Printing from an iOS Device Print without Wireless Network using iOS Device Print without Wireless Network using iOS Device To connect the printer to your phone without using a wireless network, you must use the Direct Printing option. 1. On the printer, select at top of screen.
- Page 32 Mobile Printing from an iOS Device Print without Wireless Network using iOS Device 5. In the Choose A Network list, select the printer (e.g., e.g., DIRECT-xx-HP- DesignJet) and when prompted, enter the password from the Info screen. 6. On your mobile device, select a document, then touch Print and select your Printer (HP DesignJet T830 MFP (XXXXXX).
-
Page 33: Setting Up The Printer
Setting Up the Printer Turn Email Notifications On and Off Setting Up the Printer Introduction This section describes various printer settings that the printer administrator may want to control as soon as a new printer is assembled and ready for use. Automatic Firmware Update The printer can automatically check for a firmware update periodically (see “Automatic Firmware Update”... - Page 34 Setting Up the Printer Turn Alerts On and Off Turn Alerts On and Off Printer alerts warn you when there is a printer problem that you can correct by taking action, or when one of your printing jobs changes its status. The alerts are displayed by the printer's front panel, by the printer utility, by the printer driver and by the Embedded Web Server.
- Page 35 Setting Up the Printer Setup Web Services Control Access to Embedded Web Server To prevent users from modifying important device settings, you can set a password in the Embedded Web Server, so that users without the password can see only the Information tabs. Once set, the password is required to view or change any parameters in the other tabs.
-
Page 36: Personalizing The Printer
Personalizing the Printer Access the Embedded Web Server Personalizing the Printer Change Front-Panel Display Language There are two possible ways to change the language of the front-panel menus and messages. If you understand the current language: 1. Swipe down the dashboard, then press 2. - Page 37 Personalizing the Printer Change Embedded Web Server Language Change Embedded Web Server Language The default language for the Embedded Web Server is the language you selected for your browser. If this language is not supported by the Embedded Web Server, the Embedded Web Server will appear in English; however, you can change it to any supported language.
- Page 38 Personalizing the Printer Change Sleep Mode Setting Access the Printer Utility The Printer Utility enables you to manage your printer from a computer with a USB, TCP/IP, or WiFi connection. To access the printer utility: 1. Start the Printer Utility from your desktop shortcut or from Start > All Programs>...
- Page 39 Personalizing the Printer Change Front-Panel Display Brightness Change Auto-Off Setting You can use the printer's auto-off feature to turn the printer off automatically. For example, setting it to 2 hours would turn the printer off after 2 hours of inactivity. In this way, you can save more energy.
- Page 40 Personalizing the Printer Configure Network Settings Configure Network Settings You can view and configure the network settings from the Embedded Web Server, the Printer Utility or the front panel. • Embedded Web Server: Select the Network tab. • Printer Utility: Access the Embedded Web Server through the Printer Utility. •...
- Page 41 Personalizing the Printer Configure Firewall Settings Configure Firewall Settings Firewall features provide network-layer security on both IPv4 and IPv6 networks. The firewall provides simple control of IP addresses that are allowed access. Note: In addition to firewall protection at the network layer, the printer also supports open secure sockets layer (SSL) standards at the transport layer for secure client- server applications, such as clientserver authentication or HTTPS Web browsing.
- Page 42 Personalizing the Printer Configure Firewall Settings Change Firewall Options 1. Open the Embedded Web Server. 2. Click Settings tab, then Firewall Options. 3. Change the desired options then click Apply. Note: After you click Apply, the connection to the Embedded Web Server might be temporarily disrupted.
- Page 43 Personalizing the Printer Change Printer Email Address Reset Network Settings To reset the administrator password and network settings, swipe down on the dashboard, touch , then scroll down and touch Network setup > Restore Network Defaults. Note: Print the network configuration page and check that the network settings have been reset.
-
Page 44: Manage Perfecta 2400Stp Printer Security
Manage Perfecta 2400STP Printer Security Advanced Security Options Manage Perfecta 2400STP Printer Security When you set up Web Services, the printer is in unlock mode. In unlock mode, anyone who knows your printer's email address can print to your printer by just sending a file to it. - Page 45 Manage Perfecta 2400STP Printer Security Advanced Security Options To turn off Broadcast mode: 1. On the Perfecta 2400STP, touch at top left. Note the IP address and Password (listed 2nd from top). 2. In your Browser, enter IP Address 192.168.223.1, then select Network tab. 3.
- Page 46 Manage Perfecta 2400STP Printer Security Advanced Security Options 4. Select Status. 5. In the Wi-Fi Direct menu, select Edit Settings. ® ® 2-28 2400STP User’s Guide VariQuest Perfecta...
- Page 47 Manage Perfecta 2400STP Printer Security Advanced Security Options 6. Under Connection Method, select Advanced. 7. Under Advanced Settings, select the button Do not broadcast the Wi-Fi Direct name, then click Apply. 8. At the prompt indicating the changes were updated successfully, click OK. Connect via a Private Network You can connect your Perfecta 2400STP printer and the Design Center system to a private network that is not accessible to students and other unauthorized users.
- Page 48 Manage Perfecta 2400STP Printer Security Manually Connect to a Wireless Network Manually Connect to a Wireless Network With Broadcast network off, you can manually connect to the printer. 1. From the Control Panel, go to Network and Sharing Center. 2. Select Change advanced sharing settings. 3.
- Page 49 Manage Perfecta 2400STP Printer Security Manually Connect to a Wireless Network 4. In the Add menu, select Manually create a network profile. 5. From the Security type drop-down list, select WPA2-Personal. 6. Click the box for Connect even if the network is not broadcasting. 7.
- Page 50 Manage Perfecta 2400STP Printer Security Manually Connect to a Wireless Network This page is intentionally left blank. ® ® 2-32 2400STP User’s Guide VariQuest Perfecta...
- Page 51 Paper Handling ® This chapter provides paper handling information about the VariQuest Perfecta™ 2400STP Poster Design System. The following information is contained in this chapter: • “General Paper Loading Tips” on page 3-2 • “Loading Paper” on page 3-3 • “Paper Details”...
- Page 52 General Paper Loading Tips General Paper Loading Tips You can load paper into the printer in three ways: from a roll, as a single sheet, or as a stack of single sheets from the multi-sheet tray. Only one of these methods can be used at a time, and switching from one to another is a manual operation.
- Page 53 Loading Paper Load Roll onto Spindle Loading Paper Load Roll onto Spindle Note: If you are a regular user of different paper types, you can change rolls more quickly if you preload rolls of different paper types on different spindles. Extra spindles are available for purchase, contact your authorized VariQuest Dealer or VariQuest Customer Service at 1.800.328.0585.
- Page 54 Loading Paper Load Roll onto Spindle 3. Remove the blue paper stop from the end of the spindle. If the roll is long, rest the spindle horizontally on a table and load the roll on the table. 4. Slide the new roll onto the spindle. Make sure the paper type is oriented as shown.
- Page 55 Loading Paper Load Roll onto Spindle Note: From the back of the printer, the blue stopper is inserted into the right- side holder. Ensure both ends of the roll are as close to the spindle stops as possible. 5. Put the blue paper stop on to the open end of the spindle, and push it toward the end of the roll [1].
- Page 56 Loading Paper Load a roll into the Printer Load a roll into the Printer To start this procedure, you must have a roll loaded on the spindle. See “Loading Paper” on page 3-3. 1. Swipe down on the dashboard and press , then touch Load Roll.
- Page 57 Loading Paper Load a roll into the Printer 4. If the edge of the roll is not straight or is torn (sometimes due to the tape used to hold end of the roll), pull the paper slightly and cut a straight edge. 5.
- Page 58 Loading Paper Load a roll into the Printer 7. The front panel prompts you to select the paper category and type. If you do not see your paper type in the front panel, touch More paper types. If you still cannot find your paper type in the whole list, see “Paper Type Missing from Printer Driver”...
- Page 59 Loading Paper Load a Single Sheet Unload a Roll 1. To unload paper from the front panel: swipe down on the dashboard, then touch , then Unload a Roll. 2. Touch OK when ready. Note: If the end of the paper is no longer attached to the core, the front panel prompts you to unload the roll manually.
- Page 60 Loading Paper Load a Single Sheet 4. Insert the sheet into the right-hand side of the input slot. WARNING Do not push your fingers inside the printer's paper path. 5. Align the sheet with the blue line. 6. Feed the paper into the printer until you feel resistance and the paper bends slightly.
- Page 61 Loading Paper Unload a Single Sheet 8. At the prompt, select the paper category and type. Note: If you do not see your paper type in the front panel, touch More paper types. If you still cannot find your paper type in the whole list, see “Paper Type Missing from Printer Driver”...
- Page 62 Loading Paper Use the Multi-Sheet Tray Use the Multi-Sheet Tray Note: If no roll is loaded or the roll has run out of paper, the multi-sheet tray is active by default. 1. At the front panel, touch , then Use multi-sheet tray. If a roll or single sheet is already loaded, you must wait until it is automatically unloaded.
- Page 63 Paper Details Maintain Paper Quality Paper Details View Paper Information To view the loaded paper information, press the icon of the active paper source. The following information is displayed on the front panel: • Paper type you have selected • Roll or sheet status •...
- Page 64 Paper Details Change Drying Time Change Drying Time You may want to change the drying time setting to suit special printing conditions such as multiple prints where time is of higher importance or when you need to be sure ink is dry before handling. To change drying time: 1.
- Page 65 Change Cutter Settings Turn Automatic Cutter On and Off Change Cutter Settings Turn Automatic Cutter On and Off To turn the printer's paper cutter on or off: 1. Swipe down the dashboard and from the front panel, touch 2. Touch Print retrieval > Enable cutter. 3.
- Page 66 Change Cutter Settings Use Form Feed With or Without Cutting Use Form Feed With or Without Cutting There are at least two reasons why you might want to advance the form feed with or without cutting: • To trim the leading edge of the paper if it is damaged or not straight. •...
- Page 67 Printing ® ® This chapter provides printing information about the VariQuest Perfecta 2400STP Poster Design System. The following information is contained in this chapter: • “Print from USB” on page 4-2 • “Print from a Computer” on page 4-4 • “Advanced Print Settings”...
-
Page 68: Print From Usb
Print from USB Print from USB 1. Swipe down the dashboard and touch the Print tab. Note: If you haven’t connected your USB flash drive yet, a message will prompt you to do it. 2. Touch Print from USB. A list of the documents that can be printed will display. You can sort them by touching: Name Date... - Page 69 Print from USB Mobile printing 5. Touch the name of the file you want to print. 6. Choose the settings: Number of copies (enter the name manually) Paper source (single sheet, multi-sheet, paper roll). 7. Touch Print to start printing the document. 8.
-
Page 70: Print From A Computer
Print from a Computer Mobile printing Print from a Computer Before you can print from a computer, the correct printer driver must be installed on the computer (see “Setting Up the Printer” on page 2-15), and the computer must be connected to the printer by network or WiFi. When the printer driver has been installed and the computer connected to the printer, you can print from a software application by using the application's own Print command and selecting the correct printer. - Page 71 Advanced Print Settings Select Print Quality Select Print Quality The printer has a variety of print-quality options because high-quality printing requires some loss of speed, while fast printing implies some reduction in print quality. Therefore, the standard print-quality selector is a slider that lets you choose between quality and speed.
- Page 72 Advanced Print Settings Custom Paper Sizes Select Paper Size The paper size can be specified as follows: Note: The specified paper size should be the paper size in which the document was created. It is possible to rescale the document to a different size for printing. See “Rescale a Print”...
- Page 73 Advanced Print Settings Custom Paper Sizes Use Windows Forms A custom paper size created in this way has the following characteristics: • The selected paper size is permanent and will not disappear if the driver is closed or the computer is turned off. •...
- Page 74 Advanced Print Settings Choose Margins Options Choose Margins Options By default, the printer leaves a 5 mm margin between the edges of your image and the edges of the paper, increased to 17 mm at the foot of cut-sheet paper. However, you can change these settings.
- Page 75 Advanced Print Settings Print Draft-Quality Output Rescale a Print You can send an image of a certain size to the printer but tell the printer to rescale it to a different size (normally larger). This may be useful: • If your software does not support large formats •...
- Page 76 Advanced Print Settings Ink Economy Print High-Quality Output To specify high-quality printing: 1. In the Windows driver dialog, select Paper/Quality tab. 2. In the Print Quality section, move the print-quality slider to the extreme right ('Quality'). Print High-Resolution Images To print an image with a resolution greater than the rendering resolution: Note: This option is available only if you are printing on glossy paper and have selected Best print quality.
-
Page 77: Color Management
Color Management Color Management Options Color Management Your printer has been engineered with advanced hardware and software features to ensure predictable and dependable color results. • State-of-the-art printheads and inks • Dedicated color resources for most available paper types • Color emulation Color Management Options The aim of color management is to reproduce colors as accurately as possible on... - Page 78 Color Management Printing Greyscale or Black-and-White Printer Emulation If you want to print a job and see approximately the same colors that you would get from printing the same job on a different Designjet printer, you can use the emulation mode provided by your printer. Note: Printer emulation is available only when printing an HP-GL/2 job on plain or coated paper.
-
Page 79: Scanning
Scanning Suitable Paper Types Scanning Suitable Paper Types The scanner may not support the full range of paper types that may be used by the printer. The following paper categories are supported by the scanner. • White paper: Any matte original printed with inkjet technology (e.g., anything printed on Universal Inkjet Bond Paper, Coated Paper, Heavyweight Coated Paper, plain paper). - Page 80 Scanning Scan to File Scan to File You can scan to the following destinations: • Computer • Network folder • Email • You can start a scanning process in two ways: 1. On the front panel, touch Scan tab. 2. Select where you want to store the scanned image. ®...
- Page 81 Scanning Scan to File 3. Feed the document directly: • Load the sheet with the printed side facing up (you can also load the sheet before step 1, if you prefer). • Align the center of the sheet approximately with the center of the scanner. Use the standard size markings to help you.
- Page 82 Scanning Scan to File Scan to Email Before scanning, make sure you have followed the Scan to email setup process. The scan-to-email setup must be done from the Embedded Web Server. For more information, go to “Scan to Email” on page 4-16.
- Page 83 Scanning Scan to File Scan to a Network Folder Before starting the process, make sure you have followed the Scan to Network folder setup process. The scan to Network folder setup must be done from the Embedded Web Server. For more information, go to Scan to Network folder setup process on “Scan to Network Setup Process”...
- Page 84 Scanning Scan to File 5. In the Scan to screen, enter the folder(s) to which the scanned job will be sent. The Scan-to-Network folder options are: • Save As • File Name • Resolution 6. Swipe down the dashboard and touch to change the network folder settings.
- Page 85 Scanning Scan to File Scan to Computer There are two ways of scanning to a computer: • Webscan: You can scan to computer from the Embedded Web Server. Look for the Scan to computer option, then select Webscan. There are fewer scan settings available for scanning to a computer.
- Page 86 Scanning Scan to File Scan to USB When scanning to USB, a folder named HPSCANS is created on the USB drive and the file is saved in that folder. The file format is saved as PDF, JPEG, or TIFF using an automatically generated file name if you have not given it one. Scan to USB user interface options: •...
- Page 87 Scanning Scan Settings Available Scan Settings Available Note: Some of the default scan settings are displayed in the list below. To change scan settings: 1. Touch Settings to see the complete list of settings. 2. Check that the Original type setting corresponds to the paper type you intend to scan.
- Page 88 Scanning Scan Options Setup Process Scan Options Setup Process A scanned image may be saved in a USB flash drive, in a network folder, or in an email. The USB flash drive option requires no preparation, but the other options will not work until they have been set up in the following way.
- Page 89 Scanning Scan Options Setup Process Scan to Email Setup Process 1. To set up Scan to email, follow the process in the Embedded Web Server. 2. Enter or change the available options (see list below). Outgoing Email Settings: • To: Select the default address destination •...
- Page 90 Scanning Scan to Network Setup Process Scan to Network Setup Process A scanned image may be saved in a network folder. The USB flash drive option requires no preparation, but the other options will not work until they have been set up in the following way.
- Page 91 Scanning Scan to Network Setup Process 6. In the printer's Embedded Web Server, select the Scan tab and then Scan to network folder. See “Access the Embedded Web Server” on page 2-18. 7. Select an existing profile or to create a new network folder profile. ®...
- Page 92 Scanning Scan to Network Setup Process 8. Write a name for the folder and type the network path. • Display Name: Displayed in the front panel when you are choosing the scan destination. It may be different from the network or FTP folder name. •...
- Page 93 Scanning Scan to Network Setup Process 10. Define Log-in Authentication settings: • User name: Contains the name of the 'scanner user'. • Password: Contains the password of the 'scanner user'. 11. Enter user name and password of the 'scanner user' that you have already created on the remote computer.
- Page 94 Scanning Scan to Network Setup Process 13. Define the Setup Configuration for files scanned to the network folder. Note: The scan settings defined for a folder, are exclusive for the setup folder. 1. Define the scan settings fields for files scanned to the network folder. •...
- Page 95 Scanning Scan to computer Scan to computer There are two ways to scan to a computer: • webscan • from server/from printer Webscan To use Webscan, the option has to be enabled in the Embedded Web Server. Under the Settings tab, look for Webscan from EWS and make sure it is enabled.
- Page 96 Scanning Scan to computer From Server/From Printer To scan from server/from printer, you have to follow Windows setup process defined for adding a device. 1. Locate Devices and printers > Add a device and follow the instructions. Example: Create a scan-to-network folder under Windows 1.
- Page 97 Scanning Mobile scanning 6. Click Permissions and grant Full Control to the user (or to any group that includes that user). 7. If there is a Security tab in the Properties window for the folder, you must also grant the same user Full Control over the folder in the Security tab. Only some file systems such as NTFS require this.
-
Page 98: Copying
Copying Mobile scanning Copying When performing the copy process, the printer first scans the original into its memory and then prints the scanned image. Note: The maximum paper length allowed depends on the paper width and scan resolution. An alert is displayed if the maximum memory is exceeded. CAUTION! CAUTION! Do not try to feed the scanner while the printer is printing. - Page 99 Copying Mobile scanning 7. Push the sheet into the insertion slot until you feel it contact the rollers. The scanner will automatically grab the sheet and move it into position for scanning. 8. If the sheet has loaded badly, you can pull it out manually and retry. ®...
- Page 100 Copying Copy Settings Copy Settings 1. Touch Settings to see the complete list of settings. 2. When satisfied with the scan settings, touch Save current settings, then touch Back to return to the previous screen. Some of the default copy settings are: Original Settings •...
-
Page 101: Mobile Printing
Mobile Printing Print from Mobile Device Mobile Printing You can print to your printer from many mobile devices and from almost any location. There are two main methods of Mobile Printing: • Direct printing by connection to the same network •... - Page 102 Mobile Printing Mobile Specifications Print by Email (HP ePrint) If you can email it, you can print it. Simply attach a PDF or other print-ready file to an email message and send it to your printer’s dedicated address. In this way, you can print from anywhere with an Internet connection, without needing any printer driver.
-
Page 103: Printing Examples
Printing Examples Adobe Acrobat Printing Examples Use the examples in this section as a general guide to help you print from other applications. Adobe Acrobat To print from Adobe Acrobat: 1. In the Acrobat window, move the mouse cursor to the bottom left corner of the document pane until the document size appears there. - Page 104 Printing Examples Adobe Acrobat 4. Press Properties, then select the Paper/Quality tab. 5. Choose the Document Size and Print Quality you want to use. - or - To define a new custom paper size, press Custom. ® ® 4-38 2400STP User’s Guide VariQuest Perfecta...
- Page 105 Printing Examples Adobe Acrobat 6. Select the Features tab, then check the box for Autorotate. 7. Click OK. 8. In the Print dialog, check that the print preview seems correct., then click OK. ® ® 2400STP User’s Guide 4-39 VariQuest Perfecta...
- Page 106 Printing Examples Print from Autodesk AutoCAD Print from Autodesk AutoCAD The AutoCAD window can show a model or layout. Normally a layout is printed rather than the model. To print from AutoCAD: 1. At the top of the CAD window, click the Plot icon. The Plot window opens. ®...
- Page 107 Printing Examples Print from Autodesk AutoCAD 2. To view more options, press the circular button in the lower right corner of the window. Note: The Quality option does not refer to the final print quality but to the quality of AutoCAD viewport objects that are sent for printing. 3.
- Page 108 Printing Examples Print from Autodesk AutoCAD 4. Press Custom Properties. 5. In the Paper/Quality tab, select the paper type that you intend to use. 6. Select the print quality (your choice between speed and quality of printing). Note: If you intend to print on roll paper, you must choose where the printer should cut the paper.
- Page 109 Printing Examples Print from Autodesk AutoCAD 7. Press Margins/Layout button and select Clip contents by margins. 8. Select the Features tab, then click the box for Autorotate (Autorotation can help to avoid wasting paper). 9. Press OK and save your configuration changes to a PC3 file. ®...
- Page 110 Printing Examples Using Clip Contents by Margins Using Printer Emulation To request printer emulation: 1. Select Color>Color Management>Printer Managed Colors >Printer Emulation. 2. Select Off (no printer emulation) or the name of the printer model that you want to emulate. Note: This setting applies only to jobs that do not contain any printer emulation setting saved in the job.
- Page 111 Printing Examples Print from Adobe Photoshop Print from Adobe Photoshop 1. In Photoshop CS5, select File > Print and then select your printer. 2. Choose from the available paper sizes. - or - If you do not find the paper size that you want, press Custom. Enter the width, the length and the name of your custom paper size.
- Page 112 Printing Examples Print from Adobe Photoshop 4. Select the Color tab. 5. Verify that the default color management option Printer managed colors is selected. Note: This is the correct option because you already selected Printer Manages Colors in Photoshop. ® ®...
- Page 113 Printing Examples Print and Scale from Microsoft Office Print and Scale from Microsoft Office This section demonstrates how to print and scale from the applications in Microsoft Office 2013. PowerPoint 1. Select File>Print, and select the name of your printer. 2.
- Page 114 Printing Examples Print and Scale from Microsoft Office 3. Select the Paper/Quality tab, then choose your Paper Source and Paper Type. 4. Select Margins/Layout, then select Clip contents by margins to keep the size. ® ® 4-48 2400STP User’s Guide VariQuest Perfecta...
- Page 115 Printing Examples Print and Scale from Microsoft Office Project 1. Select File>Print. 2. Select Page Setup and choose the Paper Size from the drop-down list. 3. Select Options to go to the printer driver. ® ® 2400STP User’s Guide 4-49 VariQuest Perfecta...
- Page 116 Printing Examples Print and Scale from Microsoft Office 4. Select the Paper/Quality tab and verify the settings: • Paper source: User Printer settings • Paper Type: Use Printer Settings 5. Select Layout > Fit to to scale the document to a specific size. Note: You can also scale the document in Project.
- Page 117 Printing Examples Print and Scale from Microsoft Office Excel 1. Select the Page Layout tab. 2. Select Size, and choose the paper size you want. 3. Select the File tab. 4. Select Print, and select the name of your printer. ®...
- Page 118 Printing Examples Print and Scale from Microsoft Office 5. Select Printer Properties to go to the printer driver. 6. In the Paper/Quality tab, select Paper source, Paper type and Print Quality. 7. Select Layout/Output > Fit to to scale the document to a specific size. Note: You can also scale the document in Excel.
- Page 119 Ink Cartridge Handling ® ® This chapter provides information about maintenance for the VariQuest Perfecta 2400STP Poster Design System. The following information is contained in this chapter: • “Ink Cartridge Maintenance” on page 5-2 • “Printer Maintenance” on page 5-5 •...
-
Page 120: Ink Cartridge Maintenance
Ink Cartridge Maintenance Storing Anonymous Usage Information Ink Cartridge Maintenance Ink cartridges store the ink and are connected to the printhead, which distributes the ink on the paper. To purchase additional cartridges, see Accessories. CAUTION! CAUTION! Observe precautions when handling ink cartridges because they are ESD- sensitive devices (see the Glossary on page 143). - Page 121 Ink Cartridge Maintenance Replace Ink Cartridge Ink Cartridge Status To view the ink levels of your ink cartridges: 1. Swipe down on the dashboard of the front panel and press 2. Touch the desired ink level for more information. Replace Ink Cartridge There are two occasions when you need to replace an ink cartridge.
- Page 122 Ink Cartridge Maintenance About the Printhead About the Printhead The printhead comes installed in the printer and is connected to the ink cartridges. The printhead jets ink onto the paper. CAUTION! CAUTION! Observe precautions when handling the printhead, because it is an ESD-sensitive device (see “Glossary”...
-
Page 123: Printer Maintenance
Printer Maintenance Cleaning Printer Exterior Printer Maintenance The printer is not designed for any purpose other than printing, copying and scanning. Do not use the printer as a table. The surface can easily be damaged. and if anything falls into the printer, it can cause serious damage. Checking Printer Status You can check the current status of the printer in various ways: •... - Page 124 Printer Maintenance Print Quality Diagnostic Report Print Quality Diagnostic Report The Print Quality Diagnostic Report consists of two test patterns designed to highlight printhead reliability problems. It helps you check the performance of the printhead that is currently installed in your printer, and determine if it suffers from clogging or alignment problems.
- Page 125 5. If the problem continues to persist, replace the printhead (see “Replacing the Printhead” on page 5-9). If the printhead is still in warranty, contact your Varitronics Dealer for support. Cleaning the Printhead If your print is streaked or has incorrect or missing colors, the printhead may need to be cleaned.
- Page 126 Printer Maintenance Aligning the Printhead Aligning the Printhead Precise printhead alignment is essential for accurate colors, smooth color transitions, and sharp edges in graphical elements. Your printer has an automatic printhead alignment process which runs whenever a printhead has been accessed or replaced.
- Page 127 Printer Maintenance Replacing the Printhead Replacing the Printhead When the printhead has been replaced, the printer will automatically perform a printhead alignment on the loaded paper. If you want to perform the printhead alignment on a different paper (e.g., from the multi-sheet tray), change the paper before starting this procedure.
- Page 128 Printer Maintenance Replacing the Printhead 7. Raise the blue lever to release the tube connector [1] and store the tubes connector on the holder in the printer door [2]. Make sure the ink tubes are secured in the door [3]. 8.
- Page 129 Printer Maintenance Replacing the Printhead 10. Remove the printheads. CAUTION! CAUTION! Handle with care to avoid getting ink on the connections. 11. Insert the new printhead [1] and lower the white printhead lever [2]. 12. Insert the tubes connector into the printhead and make sure it locks. 13.
- Page 130 Printer Maintenance Calibrating the Paper Advance Calibrating the Paper Advance Accurate paper advance is important to image quality because it is part of controlling the proper placement of dots on the paper. If the paper does not advance the correct distance between printhead passes, light or dark bands may appear in the print and image grain may increase.
- Page 131 Printer Maintenance Move or Store the Printer Return to Default Calibration Returning to the default calibration sets all the corrections made by the paper advance calibration to zero. To return to the default paper advance calibration value, you must reset the calibration. 1.
-
Page 132: Software And Firmware Updates
Printer Maintenance Software and Firmware Updates Software and Firmware Updates Firmware Updates There are various ways of downloading and installing firmware updates; you can choose whichever you find most convenient. The following QR code image contains a link to a video to get more information about updating your firmware. -
Page 133: Printer Maintenance Kits
When one of them is needed, a message is displayed on the front panel and by the HP Utility. When you see the message, you should contact your Varitronics Dealer and request the maintenance kit. The kits are installed by service technicians only. -
Page 134: Scanner Maintenance
Scanner Maintenance Clean the Scan Bars Scanner Maintenance Clean the Scan Bars The following QR code image contains a link to a video to get more information about cleaning and replacing the scan bar. Note: You should clean the scan bars periodically, depending on how often you use the scanner. - Page 135 Scanner Maintenance Clean the Scan Bars 5. Clean the scan bars and the surrounding area with a lint-free cloth. 6. For more thorough cleaning, clean the calibration surfaces and the feed rollers. 7. Close the scanner cover and gently push it down to lock it into place. 8.
- Page 136 5. If the previous steps do not help, eject the sheet and restart the printer (turn off and on). When the system has restarted, repeat the calibration. Note: If you cannot perform the calibration successfully in three consecutive attempts, contact your Varitronics Dealer for support. ® ®...
- Page 137 Troubleshooting ® ® This chapter provides information about troubleshoot the VariQuest Perfecta 2400STP Poster Design System. The following information is contained in this chapter: • “Troubleshooting Paper Issues” on page 6-2 • “Paper Loading Error Messages” on page 6-4 • “Paper Type Missing from Printer Driver”...
-
Page 138: Troubleshooting Paper Issues
Troubleshooting Paper Issues Troubleshooting Paper Issues Troubleshooting Paper Issues Problem Suggested Action • Check that no paper is already loaded. Paper cannot be loaded successfully. • Ensure that the paper is far enough inside the printer, you should feel the printer grab the paper. •... - Page 139 Troubleshooting Paper Issues Troubleshooting Paper Issues (Continued) Problem Suggested Action • Check that the sheet is more than 12.95 inches wide (A3+). If it is Unsuccessful Sheet Load that width or less, load it from the multi-sheet tray. • Guide the sheet, especially thick papers, when the printer initially feeds the sheet.
-
Page 140: Paper Loading Error Messages
Paper Loading Error Messages Paper Loading Error Messages Paper Loading Error Messages Message Suggested Action • During the paper load process the printer detected that the paper Paper loaded with too much had too much skew. Press OK to unload the roll automatically, skew. -
Page 141: Paper Type Missing From Printer Driver
Paper Type Missing from Printer Driver Paper Type Missing from Printer Driver To work with a paper not in the driver, you can use your paper as one of the presets already in the driver, however, you must identify whether your paper is transparent or translucent, photo or bond, coated or technical. -
Page 142: Troubleshooting Paper Or Paper Quality Issues
Troubleshooting Paper or Paper Quality Issues Troubleshooting Paper or Paper Quality Issues Ink or Wrinkling Problems Problem Suggested Action This happens when your paper is incompatible with matte black Black ink is easily removed when ink. To use an optimized ink combination: touched. - Page 143 Troubleshooting Paper or Paper Quality Issues Paper Jams Problem Suggested Action When a paper jam occurs, a message normally displays on the Paper Roll Jammed. front panel. 1. Open the top cover. 2. Rewind the roll. You may feel resistance if the paper is stuck; pull firmly.
- Page 144 Troubleshooting Paper or Paper Quality Issues Paper Jams (Continued) Problem Suggested Action 6. Open the front window. 7. Try to move the printhead carriage out of the way . 8. Carefully remove any of the jammed paper that you can from the front window.
- Page 145 Troubleshooting Paper or Paper Quality Issues Paper Jams (Continued) Problem Suggested Action 1. Remove the single sheet from the printer. Single-sheet paper has jammed. 2. Open the front cover. 3. Remove any of the jammed paper. 4. Close the front cover. ®...
- Page 146 Troubleshooting Paper or Paper Quality Issues Paper Jams (Continued) Problem Suggested Action The multi-sheet tray has jammed. 1. Remove as much paper as you can from the multi-sheet tray. 2. Push down the multi-sheet tray extenders, making it easier to handle.
- Page 147 Troubleshooting Paper or Paper Quality Issues Paper Output Problems Problem Suggested Action If a small piece of paper has been cut, such as before printing a A strip stays on the output trays new roll, or after the front panel option Form feed and cut has and generates jams.
- Page 148 Troubleshooting Paper or Paper Quality Issues Scanner Problems Problem Suggested Action If you have difficulty loading the original when scanning, try the The scanner does not load the following: original. 1. Check that the unit is on. 2. Wait until the unit has booted up completely and is idle. 3.
- Page 149 Troubleshooting Paper or Paper Quality Issues Scanner Problems (Continued) Problem Suggested Action 3. Using your fingers, you can turn the rubber wheels to get better access to the paper and clear any debris. 4. Close the scanner lid. ® ® 2400STP User’s Guide 6-13 VariQuest...
-
Page 150: Troubleshooting Print Quality Issues
Troubleshooting Print Quality Issues Troubleshooting Print Quality Issues General Printing Tips Problem Suggested Action • To achieve the best performance from your printer, use only When you have any print-quality genuine manufacturer's supplies and accessories, whose problems: reliability and performance have been thoroughly tested to give trouble-free performance and best-quality prints. - Page 151 Troubleshooting Print Quality Issues Horizontal Banding Problem Suggested Action Horizontal lines across the image. If your printed image has added horizontal lines as shown (Note: The color may vary.): 1. Check that the paper type you have loaded corresponds to the paper type selected in the front panel and in your software.
- Page 152 Troubleshooting Print Quality Issues Incorrect Line Weight Problem Suggested Action If your printed image has lines that are too thick, too thin or Line weight on image incorrect. missing: 1. Check that the paper type you have loaded corresponds to the paper type selected in the front panel and in your software.
- Page 153 Troubleshooting Print Quality Issues Jagged-Edged Lines Problem Suggested Action If your printed image has lines that appear stepped or jagged Lines have jagged edges. when printed: 1. The problem may be inherent in the image. Try to improve the image with the application you are using to edit it. 2.
- Page 154 Troubleshooting Print Quality Issues Discontinuous Lines Problem Suggested Action If your lines are broken: Lines are broken or not continuous. 1. Check that you are using appropriate print-quality settings. See “Printing” on page 4-1. 2. Print the Print-Quality Diagnostic Report. See “Print Quality Diagnostic Report”...
- Page 155 Troubleshooting Print Quality Issues Blurred Lines Problem Suggested Action Humidity can cause ink to soak into the paper, making the lines Lines are blurred. blurred and fuzzy. Try the following: 1. Check that your environmental conditions (temperature, humidity) are suitable for high-quality printing. See “Environmental Specifications”...
- Page 156 Troubleshooting Print Quality Issues Inaccurate Line Lengths Problem Suggested Action If your printed line lengths are not accurate for your purposes, you Length of printed lines is not can try to improve line length accuracy. accurate. 1. Print on Matte Film, for which your printer's line length accuracy is specified.
- Page 157 Troubleshooting Print Quality Issues Blurred or Grainy Image Problem Suggested Action The whole image is blurry or grainy. 1. Check that: • The loaded paper type corresponds to the paper type selected in the front panel and in your software. See “View Paper Information”...
- Page 158 Troubleshooting Print Quality Issues Paper Rippled Problem Suggested Action The paper is not flat after printing. If the paper does not lie flat when it comes out of the printer, but has shallow waves in it, you are likely to see defects in the printed image, such as vertical stripes.
- Page 159 Troubleshooting Print Quality Issues Print Scuffed or Scratched Problem Suggested Action The black ink pigment can be scuffed or scratched when touched The paper is scuffed or scratched by a finger, a pen or some other object. This is particularly when it comes out of the printer.
- Page 160 Troubleshooting Print Quality Issues Ink Marks on Paper Problem Suggested Action If a lot of ink is used on plain or coated paper, the paper absorbs Horizontal smears on the front of the ink quickly and expands. As the printhead moves over the coated paper.
- Page 161 Troubleshooting Print Quality Issues Black Ink Rubs Off Problem Suggested Action This problem may be caused by printing with matte black ink on Black ink comes off when you glossy paper. The printer will not use matte black ink if it knows touch the print.
- Page 162 Troubleshooting Print Quality Issues Object Edges Dark Problem Suggested Action If edges of objects seem darker than expected, and you have The edges of objects are darker already set the print-quality slider to Quality in the driver dialog: than expected. 1.
- Page 163 Troubleshooting Print Quality Issues Inaccurate Colors Problem Suggested Action If the colors of your print do not match your expectations, try the Printed colors are not correct. following: 1. Check that the paper type loaded corresponds to the paper type selected. 2.
- Page 164 Troubleshooting Print Quality Issues Image is Incomplete Problem Suggested Action Check the following: The image is clipped at the bottom. • If you pressed before all the printer received all of the data, you ended the data transmission and will have to print the page again. •...
- Page 165 Troubleshooting Print Quality Issues Image is Clipped Problem Suggested Action Clipping normally indicates a discrepancy between the actual The image is clipped when printable area on the loaded paper and the printable area as printed. understood by your software. • Check the actual printable area for the paper size you have loaded (printable area = paper size –...
- Page 166 Troubleshooting Print Quality Issues Some Objects Missing from Image Problem Suggested Action Large quantities of data may be necessary to print a high-quality Some objects are missing from large-format print job, and in some specific workflows there may the printed image. be issues that can lead to some objects missing from the output.
-
Page 167: Troubleshooting Scanner Printing Issues
Troubleshooting Scanner Printing Issues Troubleshooting Scanner Printing Issues Scanner Printing Issues Problem Suggested Action If you have set up a network folder (see “Scan to Network Setup Cannot access the network Process” on page 4-24), but the printer cannot access it, check folder. -
Page 168: Troubleshooting Scan And Copy Issues
Troubleshooting Scan and Copy Issues Troubleshooting Scan and Copy Issues This section describes the most common copy & scan defects and failure modes, sorted by relevance and frequency of appearance. A defect is a common image artifact that usually appears when using any CIS scanner. These are due to incorrect settings, product limitations, or easily solvable mistakes. - Page 169 Troubleshooting Scan and Copy Issues Copy and Scan Quality Issues Problem Suggested Action This is one of the most common issues in sheet-fed scanners. Random vertical lines. Usually, the vertical streaks are caused by dust particles inside the scanner, or mis-calibration of the scanner (in these cases, the problem can be solved).
- Page 170 Troubleshooting Scan and Copy Issues Copy and Scan Quality Issues (Continued) Problem Suggested Action Scanners based on CIS technology have a high optical resolution Wrinkles or folds. within their focus plane, at the price of a very limited depth of field. The images are sharp and detailed when the scanned original is perfectly flat against the glass plate.
- Page 171 Troubleshooting Scan and Copy Issues Copy and Scan Quality Issues (Continued) Problem Suggested Action When scanning or copying large originals, you may sometimes Line discontinuities find issues such as shown in the following image, where a straight line (does not have to be horizontal) appears with discontinuities or small steps.
- Page 172 Troubleshooting Scan and Copy Issues Copy and Scan Quality Issues (Continued) Problem Suggested Action If the problem persists, analyze the following areas of the Problem persists. diagnostic plot: • D, H and L (for three modules, 0-Left, 1-Middle, and 2-Right and its intersection) If you see any of these defects in the studied areas, contact your VariQuest dealer and report a “line discontinuities”...
- Page 173 Troubleshooting Scan and Copy Issues Copy and Scan Quality Issues (Continued) Problem Suggested Action When making copies of an original containing area fills, if the Grain in area fills when scanning paper used in the printer is plain paper (e.g., Universal Bond or plain paper Bright White Inkjet Bond), some grain may appear in the image.
- Page 174 Troubleshooting Scan and Copy Issues Copy and Scan Quality Issues (Continued) Problem Suggested Action When scanning wide plots, slightly different colors can sometimes Small color differences between be seen at both sides of the junction between two scan bars. This adjacent scan bars.
- Page 175 Troubleshooting Scan and Copy Issues Copy and Scan Quality Issues (Continued) Problem Suggested Action Sometimes the color mismatch between adjacent modules can be Large color differences between significant, showing a serious scanner malfunction (see example). adjacent scan bars. If this occurs, see “Completely wrong colors.” on page 6-50. 1.
- Page 176 Troubleshooting Scan and Copy Issues Copy and Scan Quality Issues (Continued) Problem Suggested Action When scanning large uniform area fills that are made of some light Vertical light lines at intersection color, sometimes light vertical bands (~ 0.5 cm wide) occur at the between scanner scan bars.
- Page 177 Troubleshooting Scan and Copy Issues Copy and Scan Quality Issues (Continued) Problem Suggested Action When scanning some CAD plots at low resolution (mostly when Variable line thickness or missing working with grey scale or black-and-white prints that contain very lines. thin lines), you may see a variation in line thickness, or even some missing lines, in some places.
- Page 178 Troubleshooting Scan and Copy Issues Copy and Scan Quality Issues (Continued) Problem Suggested Action You have to deal with several variables if you want perfect color Inaccurately produced colors. matching between the original you are scanning and the copy or scanned file you obtain as a result.
- Page 179 Troubleshooting Scan and Copy Issues Copy and Scan Quality Issues (Continued) Problem Suggested Action Color fringing occurs when the scanner is affected by incorrect Color fringing. paper advance and/or miscalibration. (some color fringing is unavoidable, especially at high scanning speeds). Fringing is most noticeable at the borders of sharp black text over a white background, as in the example (original on left, scanned image on right).
- Page 180 Troubleshooting Scan and Copy Issues Copy and Scan Quality Issues (Continued) Problem Suggested Action Scanned file or copy of your plots loses detail in light or dark areas Clipping in dark or light areas. (or both). See example (original on left, scanned image on right). 1.
- Page 181 Troubleshooting Scan and Copy Issues Copy and Scan Quality Issues (Continued) Problem Suggested Action If the scanner is miscalibrated or if the original plot is very glossy Flare in the image when scanning or reflective, you can sometimes find flare in the scanned image glossy originals.
- Page 182 Troubleshooting Scan and Copy Issues Copy and Scan Quality Issues (Continued) Problem Suggested Action If the printer is not properly placed on a flat surface or if the Vibration scanner lid does not close correctly, you may sometimes find that the scanned image suffers from vibration (original on left, scanned image on right).
- Page 183 Troubleshooting Scan and Copy Issues Copy and Scan Quality Issues (Continued) Problem Suggested Action CIS technology scanners are tuned to work at a fixed focal Defocus, blurring and fading distance and are very sensitive to small variations in the position of colors.
- Page 184 Troubleshooting Scan and Copy Issues Copy and Scan Quality Issues (Continued) Problem Suggested Action You may encounter problems with some thick glossy originals Incorrect paper advance, skew moving through the scanner’s paper path and/or the original may during scanning, or horizontal become skewed during the scanning process.
- Page 185 Troubleshooting Scan and Copy Issues Copy and Scan Quality Issues (Continued) Problem Suggested Action The scanner contains various scanner scan bars, each of which Vertical black band 30cm wide. covers an area 30 cm (12 in) wide. If one of the modules fails and the scanner hardware check does not detect the failure, the scanned image or copy may have a black vertical band corresponding to the area covered by a single scan bar (see...
- Page 186 Troubleshooting Scan and Copy Issues Copy and Scan Quality Issues (Continued) Problem Suggested Action If some of the LEDs used for illumination in the scanner scan bars Completely wrong colors. are failing or the last calibration did not work correctly, although no error message was displayed, you may experience some completely wrong colors in your scanned images (see example, original left, scanned image on right).
- Page 187 Troubleshooting Scan and Copy Issues Copy and Scan Quality Issues (Continued) Problem Suggested Action If the lid sensor of the scanner fails, the scanner cannot detect Vertical distortion. when the lid is open. As a result, you can start a scan and at some point find that the pressure sliders do not move the original through the scanner paper path.
- Page 188 Troubleshooting Scan and Copy Issues Copy and Scan Quality Issues (Continued) Problem Suggested Action This error very rarely appears in CIS scanners. However, you can Object replication (ghosting). occasionally find image defects like the following (original on left, scanned image on right). Image ©...
- Page 189 Troubleshooting Scan and Copy Issues Copy and Scan Quality Issues (Continued) Problem Suggested Action When doing copies or prints (from USB, Embedded Web Server, Clipping or incorrect scale factor or printer driver), the scaling setting is available with various when down-scaling in copies and possible options.
- Page 190 Troubleshooting Scan and Copy Issues Copy and Scan Quality Issues (Continued) Problem Suggested Action Originals are often loaded into the scanner with some degree of A copied or scanned image is skew. To correct for this unavoidable problem, the scanner has a very skewed built-in automatic de-skew algorithm, which measures the skew in the original and rotates the scanned image so the result is...
- Page 191 Scanner Diagnostic Plot Scanner Diagnostic Plot Paper Jams Problem Suggested Action 1. Turn on printer and wait until it is functioning. Prepare printer and paper to print 2. Select the paper on which the diagnostic plot is going to be diagnostic sheet.
- Page 192 Scanner Diagnostic Plot Paper Jams (Continued) Problem Suggested Action By looking at pattern F you may find problems with the printer’s Resolution resolution for the loaded paper. Usually, this test does not reveal a printer problem, but a defect in the paper, which may not be suitable for printing the diagnostic sheet with the required quality.
- Page 193 Scanner Diagnostic Plot Paper Jams (Continued) Problem Suggested Action Looking at patterns D, K, and L, you may find problems with the Alignment printer’s printhead alignment, which can cause defects such as the following. Misalignment problems is visible in patterns D and G in the form of color fringing (which is exaggerated below, on the right).
- Page 194 Scanner Diagnostic Plot Paper Jams (Continued) Problem Suggested Action Looking at pattern H, you may find a problem with the printer or the Loss of shadow or highlight paper. If you can distinguish lightness steps beyond the upper and details. lower specified thresholds, then the printer is fine.
- Page 195 Scanner Diagnostic Plot Paper Jams (Continued) Problem Suggested Action Patterns A, B, C, G and H show examples of vertical streaks. This Streaks occurs if the printer’s printheads are not working correctly. Replacing the printhead for the color showing the streaks may solve the problem.
- Page 196 Scanner Diagnostic Plot Paper Jams (Continued) Problem Suggested Action Scan or copy the diagnostic plot. There are two options for evaluating the diagnostic plot: scanning into a JPEG file, or copying onto paper. We recommend using the scan option, so the generated file can be analyzed more easily by a remote support engineer if necessary.
- Page 197 Scanner Diagnostic Plot Paper Jams (Continued) Problem Suggested Action The monitor on which the plot is going to be evaluated should Monitor calibration. ideally be calibrated. As this is not always possible, follow this easy procedure for adjusting the brightness and contrast of the monitor to see the patterns correctly.
- Page 198 Troubleshooting Ink Cartridge and Printhead Issues Troubleshooting Ink Cartridge and Printhead Issues Cannot Insert Ink Cartridge Problem Suggested Action 1. Check that you have the correct type of cartridge (model Ink cartridge cannot be inserted number). into the printer. 2. Check that the colored label on the cartridge is the same color as the label on the slot.
- Page 199 Troubleshooting Ink Cartridge and Printhead Issues Cannot Insert Printhead Problem Suggested Action 1. Check that you have the correct type of printhead (model Printhead cannot be inserted into number). the printer. 2. Check that you have removed the orange protective cap from the printhead.
- Page 200 Troubleshooting Data Communication Issues Troubleshooting Data Communication Issues Communication Failures between Computer and Printer Symptom Suggested Action • Check that the correct printer is selected in your application, see • Front-panel display does not show the Printing message “Printing” on page 4-1. when an image is sent to the •...
- Page 201 Troubleshooting Data Communication Issues Wired Network Issues Problem Suggested Action Check that: Unable to install the software provided with the printer. • All cable connections to the computer and the printer are secure. • The network is operational and the network hub is turned on. •...
- Page 202 Troubleshooting Data Communication Issues Wireless Network Issues Problem Suggested Action Make sure the wireless (802.11) light at the top left of the front Cannot connect wirelessly. This printer supports 2.4 GHz panel is turned on . If the blue light is not lit, the wireless Wireless connection.
- Page 203 Troubleshooting Data Communication Issues Wireless Network Issues Problem Suggested Action If you have tried the previous suggestions and are still unable to Advanced Wireless Network connect to your printer to the wireless network, try the following: Troubleshooting: Problems persist even after trying 1.
- Page 204 Troubleshooting Data Communication Issues Wireless Network Issues Problem Suggested Action 3. If you have established that the computer and the printer both have active connections to a network, you can check whether they are on the same network by trying to access the printer's Embedded Web Server (see “Access the Embedded Web Server”...
- Page 205 Troubleshooting Data Communication Issues Wireless Network Issues Problem Suggested Action If you install the HP software a second time, the installer may create a second version of the printer driver in your Printers or Printers and Faxes folder. If you have difficulties printing or connecting to the printer, make sure the correct version of the printer driver is set as the default.
- Page 206 Troubleshooting Data Communication Issues Add Hardware Addresses to Wireless Access Point (WAP) Add Hardware Addresses to Wireless Access Point (WAP) Add WAP Address Problem Suggested Action MAC filtering is a security feature in which a WAP is configured Need to add a hardware with a list of MAC addresses (also called “hardware addresses”) of address(es) to a wireless access devices that are allowed to gain access to the network through the...
- Page 207 Network Configuration Page Add Hardware Addresses to Wireless Access Point (WAP) Network Configuration Page If the printer is connected to a network, you can print a network configuration page to view the network settings for the printer. You can use the network configuration page to help troubleshoot network connectivity problems.
- Page 208 Network Configuration Page Add Hardware Addresses to Wireless Access Point (WAP) Network Configuration Page Details Section Description Information about the current status and active connection type 1. General Information of the network, and other information, such as the URL of the Embedded Web Server.
- Page 209 Network Configuration Page Add Hardware Addresses to Wireless Access Point (WAP) Network Configuration Page Details Section Description SNMP (Simple Network Management Protocol): Used by network management applications for device management. The printer supports SNMPv1 protocol on IP networks. WINS: If you have a Dynamic Host Configuration Protocol (DHCP) server on your network, the printer automatically obtains its IP address from that server and registers its name with any RFC 1001 and 1002-compliant dynamic name...
- Page 210 Troubleshooting General Printer Issues Add Hardware Addresses to Wireless Access Point (WAP) Troubleshooting General Printer Issues General Printer Issues Problem Suggested Action If the printer does not start (the front panel is blank), hold down the The printer does not start. Power key for a few seconds and check whether the Power LED turns orange while the key is held down.
- Page 211 Troubleshooting General Printer Issues Add Hardware Addresses to Wireless Access Point (WAP) General Printer Issues (Continued) Check: The printer seems slow. • That print-quality is set to Best or Max Detail. Best-quality and maximum detail prints take longer. • That the correct paper type when loading the paper is specified. Some paper types require more time for printing;...
- Page 212 Troubleshooting General Printer Issues Add Hardware Addresses to Wireless Access Point (WAP) Alerts Problem Suggested Action By default, error alerts (critical alerts) are always displayed and warning alerts (non-critical alerts) are displayed only when you are printing. If alerts are enabled and there is a problem that prevents a job from completing, you see a pop-up window, which explains the reason for the problem.
- Page 213 Front Panel Error Messages Add Hardware Addresses to Wireless Access Point (WAP) Front Panel Error Messages Occasionally you may see one of the following messages appear on the front- panel display. If so, please follow the advice in the Suggested Action column. Front Panel Error Messages Message Suggested Action...
- Page 214 Front Panel Error Messages Add Hardware Addresses to Wireless Access Point (WAP) Front Panel Error Messages (Continued) Remove and reinsert the same printhead, or try Missing or failed printhead. cleaning the electrical connections. If necessary, insert a new printhead. See “Replacing the Printhead”...
- Page 215 Front Panel Error Messages Add Hardware Addresses to Wireless Access Point (WAP) Numerical Error Codes Error Code Suggested Action Restart the printer. 0001 - 0001 There may be a paper or carriage jam. Check and 0081 - 0008 clear the paper path if necessary. The battery of the real-time clock has expired.
- Page 216 Front Panel Error Messages Add Hardware Addresses to Wireless Access Point (WAP) This page is intentionally left blank. ® ® 6-80 2400STP User’s Guide VariQuest Perfecta...
- Page 217 Printer Specifications ® ® This chapter provides the specifications for the VariQuest Perfecta 2400STP Poster Design System. The following information is contained in this chapter: • “Functional Specifications” on page 7-2 “Physical Specifications” on page 7-5 • “Memory Specifications” on page 7-5 •...
- Page 218 Functional Specifications Functional Specifications Your printer is a color inkjet printer designed for printing high-quality images on paper up to 24 inches or 36 inches wide. Ink Supplies Name Description One printhead Printhead Cartridges containing 69 ml of ink: black, yellow, cyan and magenta. cartridges Paper Sizes Name...
- Page 219 Functional Specifications Printing Resolutions Print Quality Maximum Detail Rendering Printing Resolution Resolution (ppi) (dpi) 1200 × 1200 2400 × 1200 Best (glossy paper*) 600 × 600 1200 × 1200 600 × 600 1200 × 1200 Best (other papers) 600 × 600 1200 ×...
- Page 220 Functional Specifications Mobile Printing Specifications Mobile printing Yes, directly from both iOS with AirPrint and Android with HP Print Service Plugin Mobile devices supported by HP Smartphones and tablets Mobile printing Supported operating systems iOS, Android, Windows OS Versions iOS from 7.0 and Android from 4.4, Windows any Connectivity requirements Printer and mobile device must use the same network Supported file formats...
- Page 221 Physical Specifications Physical Specifications Printer Physical Specifications Minimum Maximum 62.5 kg (137.79 lb) Weight 1402.5 mm (55.22 in) Width 629.19 mm (24.77 in) 896 mm (35.3 in) Depth 966 mm (38.03 in) with stand 1155 mm (45.47 in) Height 306 mm (12.05 in) without stand 306mm (12.05) without stand 1155mm (45.47 in) with trays open Scanner open: 1060mm 41.73 in)
- Page 222 Environmental Specifications Environmental Specifications Printer Environmental Specifications Specification Rating 5 to 40°C (41 to 104°F) Operating temperature 15 to 35°C (59 to 95°F), depending on paper type Recommended operating temperature –25 to 55°C (–13 to 131°F) Storage temperature 20 to 80% RH, depending on paper type Recommended operating humidity 0 to 95% RH Storage humidity...
- Page 223 Glossary ® This chapter provides a description of some of the terms used in the VariQuest ® 2400STP Poster Design System user guide. Perfecta ® ® 2400STP User’s Guide VariQuest Perfecta...
- Page 224 Glossary Glossary Bonjour: Apple Computer's trade name for its implementation of the IETF Zeroconf specification framework, a computer network technology used in Apple's Mac OS X from version 10.2 onwards. It is used to discover services available on a local area network. It was originally known as Rendezvous. Color accuracy: The ability to print colors that match the original image as closely as possible, bearing in mind that all devices have a limited color gamut and may not be physically capable of matching certain colors precisely.
- Page 225 Glossary Gigabyte Ethernet: An Ethernet network capable of transferring data at up to 1000,000,000 bits/second. Fast Ethernet interfaces are capable of negotiating slower speeds when required for compatibility with older Ethernet devices. Hi-Speed USB: A version of USB, sometimes called USB 2.0, that can run 40 times faster than original USB, but is otherwise compatible with original USB.
- Page 226 Glossary Platen: The flat surface within the printer over which the paper passes while it is being printed on. Printer driver: Software that converts a print job in a generalized format into data suitable for a particular printer. Printhead: A removable printer component that takes ink of one or more colors from the corresponding ink cartridge(s) and deposits it on the paper, through a cluster of nozzles.
- Page 227 © 2018 Varitonics, LLC All Rights Reserved.
Need help?
Do you have a question about the VariQuest Perfecta 2400STP and is the answer not in the manual?
Questions and answers