Advertisement
Available languages
Available languages
Quick Links
IMPORTANT!
Read all instructions before installing and using. Installer: This manual must be
delivered to the end user.
!
WARNING!
Failure to install or use this product according to manufacturer's recommendations may result in property
damage, serious bodily/personal injury, and/or death to you and those you are seeking to protect!
Do not install and/or operate this safety product unless you have read and understand the safety
information contained in this manual.
1. Proper installation combined with operator training in the installation, use, care and maintenance of vehicle equipment accessories is
essential to ensure the safety of you and those you are trying to protect.
2. Exercise caution when working with live electrical connections.
3. This product must be properly grounded. Inadequate grounding and/or shorting of electrical connections can cause high
current arcing, which can cause personal injury and/or severe vehicle damage, including fire.
4. Proper placement and installation are vital to the performance of this worklamp. Install this product so that output
performance of the system is maximized and the controls are placed within convenient reach of the operator so that s/he can
operate the system without losing eye contact with the work area.
5. It is the responsibility of the vehicle operator to ensure during use that all features of this product work correctly. In use, the
vehicle operator should ensure the projection of the beam is not blocked by vehicle components (i.e., open trunks
or compartment doors), people, vehicles, or other obstructions.
6. The manufacturer assumes no liability for any loss resulting from the use of this device.
SAA
NOTE: Black die cast Aluminum housing gets very hot to the touch after operating constantly for several hours.
Specifications:
Input Voltage: 12-24 VDC
Temp Range: -40°C to 65°C
-40°F to 150°F
*ramp speed: -10°F to 32°F in 3 minutes
Power Consumption @ 12 VDC:
EW2421H: 43 Watts
E92006H: 28 Watts
E92005H: 28 Watts
EW2001H: 17 Watts
Current Draw @ 12 VDC:
EW2421H: 3.4 Amps
E92006H: 2.2 Amps
E92005H: 2.2 Amps
EW2001H: 1.3 Amps
*Note: When power is applied to the light
the heat element is activated as well.
The normal operation temp is 180°F.
The heater will engage at a max tempera-
ture of 180°F (82°C) while operating.
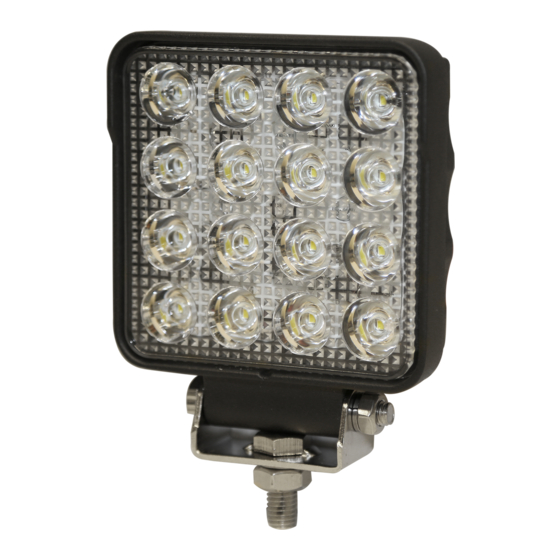
Installation and Operation Instructions
HEATED LENS LED WORKLIGHTS
Bracket Installation:
1. Select a mounting location for the unit on a flat surface.
Drill a hole in mounting surface to match diameter of included
bracket. Place the unit and the flat washer over the hole with
the included bolt through the washer and clearance hole and
secure with a lock washer and lock nut on the bottom side.
2. Adjust beam location of the unit in the horizontal direction
and tighten the lock nut with a wrench.
3. Adjust the beam location of the unit in the vertical direction
and tighten the lock nut with a wrench.
Surface Mount Installation
1. Select a mounting location for the unit on a flat surface.
Drill a hole in mounting surface, use the product as template.
2. If the product comes with a gasket, place it behind the unit.
3. Use supplied mounting hardware to mount the product.
Fuse 5A
Ground
User Supplied
Switch
User Supplied
WIRING DIAGRAM FOR REFERENCE ONLY
Worklight
RED
BLK
Ground
Page 1 of 2
Advertisement

Related Manuals for Ecco E92005H


Summary of Contents for Ecco E92005H
- Page 1 E92006H: 28 Watts Surface Mount Installation E92005H: 28 Watts EW2001H: 17 Watts 1. Select a mounting location for the unit on a flat surface. Drill a hole in mounting surface, use the product as template.
- Page 2 Electronics Controls Company “ECCO” (Manufacturer) ECCO warrants that on the date of purchase, this product will conform to ECCO’s specifications for this product (which are available from ECCO upon request). This Limited Warranty extends for thirty-six (36) months from the date of purchase.
-
Page 3: Especificaciones
Instrucciones de instalación y operación FOCOS LED DE TRABAJO ¡IMPORTANTE! Lea todas las instrucciones antes de la instalación y el uso. Instalador: El presente manual debe entregarse al usuario final. ¡ADVERTENCIA! En caso de no instalar ni utilizar este producto conforme a las sugerencias del fabricante se podrían ocasionar daños a la propiedad, lesiones graves personales o el deceso del usuario y de las personas que se busca proteger. - Page 4 Unit 1, Green Park, Coal Road Boise, Idaho 83705 Seacroft, Leeds, England LS14 1FB 800-635-5900 +44 (0)113 2375340 orders@eccogroup.com esguk-code3@eccogroup.com ECCOESG.com ECCOESG.co.uk An ECCO SAFETY GROUP™ Brand ECCOSAFETYGROUP.com © 2023 ECCO, Inc. Todos los derechos reservados. 920-1075-00 Rev. B Página 2 de 2...
-
Page 5: Instructions D'installation Et D'utilisation
Instructions d'installation et d'utilisation FEUX DE TRAVAIL À DEL IMPORTANT! Avant dʼinstaller et dʼutiliser lʼunité, lisez lʼensemble des instructions. Installateur : Ce manuel doit être remis à lʼutilisateur final. AVERTISSEMENT! Le non-respect des recommandations dʼinstallation ou dʼutilisation du fabricant peut entraîner des dommages matériels, de graves blessures et/ou votre mort et celle de ceux que vous cherchez à... - Page 6 Bâtiment A15, 5 Avenue Lionel Terray, Boise, Idaho 83705 Meyzieu, 69330, France 800-635-5900 +33 (0) 4 78 79 60 00 orders@eccogroup.com adv@esg.global ECCOESG.com ECCOESG.co.uk An ECCO SAFETY GROUP™ Brand ECCOSAFETYGROUP.com © 2023 ECCO, Inc. Tous droits réservés. 920-1075-00 Rev. B Page 2 sur 2...
-
Page 7: Installations- Und Bedienungsanleitung
Installations- und Bedienungsanleitung LED-ARBEITSSCHEINWERFER WICHTIG! Lesen Sie vor der installation und Verwendung alle Anwelsungen. Monteur: Diese Anwel- sungen muss dem Endbenutzer zugestellt werden. WARNUNG Wenn Sie dieses Produkt nicht gemäß den Empfehlungen des Herstellers installieren oder verwenden, kann dies zu Sachschäden, schweren Personenschäden und/oder zum Tod für Sie und die Personen, denen Sie helfen möchten, führen! Installieren und/oder verwenden Sie dieses Sicherheitsprodukt nur, wenn Sie die Sicherheitsin- formationen in dieser Anleitung gelesen und verstanden haben. - Page 8 ECCO (Hersteller) ECCO garantiert, dass dieses Produkt zum Zeitpunkt des Erwerbs den Spezifkationen von ECCO für dieses Produkt (auf Anfrage bei ECCO erhältlich) entspricht. Diese beschränkte Garantie gilt sechsunddreißig (36) Monate ab dem Zeitpunkt des Erwerbs. BEI SCHÄDEN AN TEILEN ODER PRODUKTEN, DIE DURCH MANIPULATION, UNFALL, MISSBRAUCH, UNSA- CHGEMÄSSE VERWENDUNG, FAHRLÄSSIGKEIT, NICHT GENEHMIGTE VERÄNDERUNGEN, FEUER ODER SON-...
Need help?
Do you have a question about the E92005H and is the answer not in the manual?
Questions and answers