Advertisement
Quick Links
Adult assembly required. Small parts may
present choking hazard prior to assembly.
Enclosed please find the simple step-by-step instructions
to help you quickly assemble your product. Before you
begin we recommend that you follow the steps below:
1.
Please read the instructions thoroughly
2.
Identify all parts and hardware
3.
You may need to provide the following tools: Philips
Head screw driver, Flat head screw driver, Hammer.
Do Not Use Power Drills or Drivers
Keep these instructions for future use.
To protect your parts during assembly please place them on a soft
surface. To clean surface use only water on a damp cloth. Do not
use window cleaners or cleaning abrasives as it will scratch the
surface and could damage the protective coating.
To register your product for important safety alerts and updates
to your product please visit www.storkcraft.com and click on
Product Registration.
Made in Malaysia/
Fabriqué au Malaysia/
Hecho en Malaysia
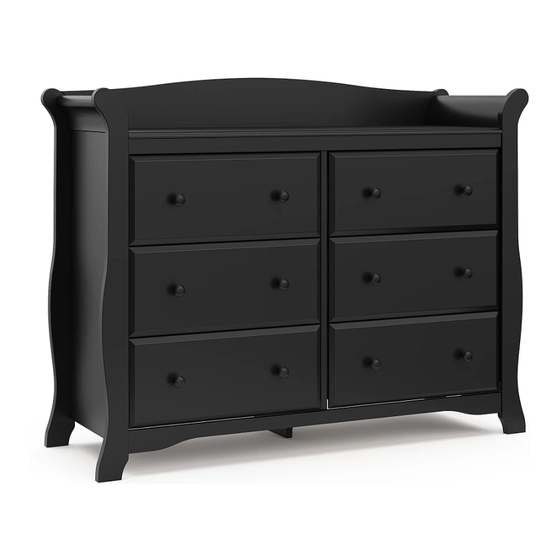
Avalon 6 Drawer Dresser
Avalon Chiffonnier a 6 Tiroirs
Cajonera de 6 cajones Avalon
Doit être assemblé par un adulte.
Les petites piêces peuvent prêsenter un
risque d'étouffement avant l'ssembla ge.
Veuillez trouver ci-joint les simples instructions, étape par étape,
pour vous aider à rapidement assembler votre produit. Avant de
commencer, nous vous recommandons de suivre les étapes
ci-dessous:
1.
Veuillez lire les instructions attentivement
2.
Identifier toutes les pièces et le matérie
3.
Vous devrez peut-être fournir les outils suivants:
Philips tournevis, tournevis à tête plate, marteau.
Ne pas utiliser de perceuse out outils électrique
Conservez ces instructions pour
une utilisation ultérieure.
Pour protéger vos pièces lors de l'ssemblage veuillez placezles
sur une surface souple. Pour nettoyer la surface souple.
Pour nettoyer la surface de l'au sur un chiffon humide. Ne pas
utiliser de nettoyants ou de nettoyage abrasifs comme il ne fera
qu'égratigner la surface et pourrait endommager le revêtement
de protection.
Pour enregistrer votre produit afin de recevoir des alertes de
sécurité et des mises à jour importantes relatives à
votre produit, veuillez visiter le site www.storkcraft.com, puis
cliquer sur Enregistrement de produits.
Se requiere ensamblaje por un adulto.
Las pieza pequeňas pueden presentar
un peligro de asfixia antes de instalarlas
Adjunto encontrará instrucciones sencillas paso a paso para
ayudarle a ensamblar rápidamente su producto. Antes de
empezar le recomendamos que siga los siguientes pasos:
1. Por favor leer detenidamente las instrucciones
2. Identificar todas las piezas y herrajes
3. Necesitará las siguientes herramientas (no incluidas):
Destornillador de cruz, Destornillador plano Martillo
No utilice destornilladores el
Guarde estas instrucciones para uso futuro.
Para proteger las piezas durante el montaje por favor,
colóquelos sobre una superficie blanda. Para limpiar l
superficie, usar sólo agua sobre un paňo húmedo
Para registrar su producto a fin de recibir importantes alertas
actualizaciones de seguridad, visite www.storkcraft.com y haga
clic en Registro de Productos (Product Registration).
1
Model /
Modele No /
Numéro de modèle
03556-20
-LB
COLOR / COULEUR / COLOR
é
ctricos
ID7614
Aug. 2023
Advertisement

Related Manuals for Storkcraft Avalon 03556-20-LB Series


Summary of Contents for Storkcraft Avalon 03556-20-LB Series
- Page 1 To register your product for important safety alerts and updates utiliser de nettoyants ou de nettoyage abrasifs comme il ne fera to your product please visit www.storkcraft.com and click on qu’égratigner la surface et pourrait endommager le revêtement Product Registration.
- Page 2 La manera más fácil de contactarnos es: • Por nuestro chat en línea a través de nuestra página web www.storkcraftdirect.com • Por correo electrónico a customercare@storkcraft.com • Por teléfono sin costo al 1-877-274-0277 en Norte América. Será un placer asistirle.
-
Page 3: Notes On Assembly
- Use of a vaporizer near furniture will cause wood to swell and finish to peel. Distributed by Storkcraft Manufacturing Inc. 3993 Howard Hughes Parkway, Unit# 250 T: 1 877 274 0277 | E: customercare@storkcraft.com | Twitter @Storkcraft Las Vegas, NV, USA. 89169... - Page 4 Utilisation d’un vaporisateur près du meuble pourrait causer le bois de gonfier et le fini de pelée Distribué par Storkcraft Manufacturing Inc. 3993 Howard Hughes Parkway, Unit# 250 T: 1 877 274 0277 | E: customercare@storkcraft.com | Twitter @Storkcraft Las Vegas, NV, USA. 89169...
- Page 5 El uso de un vaporizador cerca de los muebles hará que la madera se hinche y el acabado se descarapele. Distribuido por Storkcraft Manufacturing Inc. 3993 Howard Hughes Parkway, Unit# 250 T: 1 877 274 0277 | E: customercare@storkcraft.com | Twitter @Storkcraft Las Vegas, NV, USA. 89169...
- Page 6 ASSEMBLY INSTRUCTIONS / INSTRUCTIONS D’ASSEMBLAGE / INSTRUCCIONES DE ENSAMBLAJE HOW TO USE THE CAMLOCK BOLT(-1-) AND THE CAMLOCK(-4-) EXEMPLE D’UTILISATION (BOULON CAMLOCK(-1-) RACCORD CAMLOCK(-4-) EJEMPLO DE UTILIZACIÓN (CAMLOCK(-1-) TORNILLO CAMLOCK(-4-) ESPAÑOL ENGLISH FRANÇAIS Enrosque completamente el “Perno Camlock Fully thread the “Camlock Bolt Enfilez complètement le «...
- Page 7 Identifying the parts / Identification des pièces / Identificación de piez DRESSER PARTS/ PIECES DU CHIFFONNIER/ PIEZAS DE LA CAJONERA AL) Top/ Dessus/ BL) Left Side/ CL) Center Panel DL) Right Side/ Tapa Superior x1 Côté Gauche/ Panneau du centre/ Côté...
- Page 8 Identifying the parts / Identification des pièces / Identificación de piez Identifying the parts / Identification des pièces / Identificación de piez HARDWARE/ Quincailleries/ HERRAJE x 18 x 24 x 18 x 24 Camlock Bolt Drawer Camlock Bolt Camlock Drawer Camlock Boulon Camlock Cajón perno Camlock Raccord Camlock...
- Page 9 ASSEMBLY INSTRUCTIONS / INSTRUCTIONS D'ASSEMBLAGE / INSTRUCCIONES DE ENSAMBLAJE Step 1/ Étape 1/ Paso 1 Required/ Requis/Requerido x 18 HL x 2 - Insert 1(x 18) into AL, BL, DL, EL, FL, HL(x2) & IL.
- Page 10 ASSEMBLY INSTRUCTIONS / INSTRUCTIONS D'ASSEMBLAGE / INSTRUCCIONES DE ENSAMBLAJE Step 2/ Étape 2/ Paso 2 Required/ Requis/Requerido x 31 HL x 2 - Insert 7 (x 31) into AL, CL, EL, FL, GL, HL(x 2) & IL.
- Page 11 ASSEMBLY INSTRUCTIONS / INSTRUCTIONS D'ASSEMBLAGE / INSTRUCCIONES DE ENSAMBLAJE Step 3/ Étape 3/ Paso 3 Required/ Requis/Requerido With your thumb, insert the "camlock -4-" into the x 18 specified holes with the arrow pointing toward the insertion hole. HL x 2 - Insert 4 (x 18) into CL, EL, FL, GL, HL(x 2) &...
- Page 12 ASSEMBLY INSTRUCTIONS / INSTRUCTIONS D'ASSEMBLAGE / INSTRUCCIONES DE ENSAMBLAJE Step 4/ Étape 4/ Paso 4 LOCK CORRECT/ INCORRECT/ CORRECTO INCORRECTO - Insert CL into EL & FL. - Tighten right 4 (x 2) little more than a half turn on EL & FL to lock them together. Step 5/ Étape 5/ Paso 5 LOCK CORRECT/...
- Page 13 ASSEMBLY INSTRUCTIONS / INSTRUCTIONS D'ASSEMBLAGE / INSTRUCCIONES DE ENSAMBLAJE Step 6/ Étape 6/ Paso 6 - Insert GL, HL(x2) & IL into DL & CL. LOCK CORRECT/ INCORRECT/ - Tighten right 4 (x 7) little more than CORRECTO INCORRECTO a half turn on GL, HL(x2) & IL to lock them together.
- Page 14 ASSEMBLY INSTRUCTIONS / INSTRUCTIONS D'ASSEMBLAGE / INSTRUCCIONES DE ENSAMBLAJE Step 8/ Étape 8/ Paso 8 - Insert BL into EL, FL, GL, HL(x2) & IL. LOCK CORRECT/ INCORRECT/ CORRECTO INCORRECTO - Tighten right 4 (x 6) little more than a half turn EL, FL, GL, HL(x2) & IL to lock them together.
- Page 15 ASSEMBLY INSTRUCTIONS / INSTRUCTIONS D'ASSEMBLAGE / INSTRUCCIONES DE ENSAMBLAJE Step 10/ Étape 10/ Paso 10 LOCK CORRECT/ INCORRECT/ CORRECTO INCORRECTO - Tighten right 4 (x 1) little more than a half turn on CL to lock them together. Step 11/ Étape 11/ Paso 11 Required/ Requis/Requerido...
- Page 16 ASSEMBLY INSTRUCTIONS / INSTRUCTIONS D'ASSEMBLAGE / INSTRUCCIONES DE ENSAMBLAJE Required/ Requis/Requerido Step 12/ Étape 12/ Paso 12 x 24 KL x 3 - Insert 2(x 24) into KL(x 3), K1L(x 3) & NL(x 6). K1L x 3 NL x 6 Step 13/ Étape 13/ Paso 13 Required/ Requis/Requerido LL x 3...
- Page 17 ASSEMBLY INSTRUCTIONS / INSTRUCTIONS D'ASSEMBLAGE / INSTRUCCIONES DE ENSAMBLAJE Step 14/ Étape 14/ Paso 14 Required/ Requis/Requerido With your thumb, insert the "camlock -5-" into the x 24 specified holes with the arrow pointing toward the insertion hole. LL x 3 M1L x 3 L1L x 3 ML x 3...
- Page 18 ASSEMBLY INSTRUCTIONS / INSTRUCTIONS D'ASSEMBLAGE / INSTRUCCIONES DE ENSAMBLAJE Step 16/ Étape 16/ Paso 16 OL x 3 LL x 3 M1L x 3 NL x 3 - Slide OL(x 6) into the grooves of LL(x 3), M1L(x 3) & NL(x 3). Step 17/ Étape 17/ Paso 17 PL x 3 LOCK...
- Page 19 ASSEMBLY INSTRUCTIONS / INSTRUCTIONS D'ASSEMBLAGE / INSTRUCCIONES DE ENSAMBLAJE Step 18/ Étape 18/ Paso 18 KL x 3 LOCK CORRECT/ INCORRECT/ LL x 3 CORRECTO INCORRECTO M1L x 3 PL x 3 OL x 3 - Insert LL, M1L, OL & PL into KL(x 3). - Tighten right 5 (x 9) little more than a half turn on LL, M1L &...
- Page 20 ASSEMBLY INSTRUCTIONS / INSTRUCTIONS D'ASSEMBLAGE / INSTRUCCIONES DE ENSAMBLAJE Step 20/ Étape 20/ Paso 20 Step 21/ Étape 21/ Paso 21 Required/ Requis/Requerido L1L x 3 NL x 3 ML x 3 - Insert NL(x 3) between L1L(x 3) & ML(x 3). - Screw 10(x 6) through L1L(x 3) &...
- Page 21 ASSEMBLY INSTRUCTIONS / INSTRUCTIONS D'ASSEMBLAGE / INSTRUCCIONES DE ENSAMBLAJE Step 22/ Étape 22/ Paso 22 OL x 3 L1L x 3 ML x 3 NL x 3 - Slide OL(x 3) into the grooves of L1L(x 3), ML(x 3) & NL(x 3). Step 23/ Étape 23/ Paso 23 PL x 3 LOCK...
- Page 22 ASSEMBLY INSTRUCTIONS / INSTRUCTIONS D'ASSEMBLAGE / INSTRUCCIONES DE ENSAMBLAJE Step 24/ Étape 24/ Paso 24 KL x 3 LOCK CORRECT/ INCORRECT/ L1L x 3 CORRECTO INCORRECTO ML x 3 P x 3 O x 3 - Insert L1L, ML, OL & PL into KL(x 3). - Tighten right 5 (x 9) little more than a half turn on L1L, ML &...
- Page 23 ASSEMBLY INSTRUCTIONS / INSTRUCTIONS D'ASSEMBLAGE / INSTRUCCIONES DE ENSAMBLAJE Step 26/ Étape 26/ Paso 26 Step 27/ Étape 27/ Paso 27 Required/ Requis/Requerido WALL STUD SAFETY BRACKET INSTRUCTIONS Montant du mur Instruction pour les crochets de sécurité MONTAJE PARA PARED INSTRUCCIONES DEL SOPORTE DE SEGURIDAD...
- Page 24 WALL STUD SAFETY BRACKET INSTRUCTIONS Part Enclosed : A) Bracket B) Safety Strap C) 2" Wood Screw D) 5/8" Wood Screw IMPORTANT: Tipping can injure young children. Use of this safety hardware is highly recommended. This safety hardware, when properly installed, can provide furniture protection against unexpected accidental tipping of furniture due to improper use. Step 1 Step 2 Step 3...
- Page 25 Montant du mur Instruction pour les crochets de securite Pieces incluses: A) Crochet B) Sangle de securite C) Vis a bois 2" D) Vis a bois 5/8" MISE EN GARDE -- La bascule du meuble peut blesser un enfant. L'utilisation des crochets de securite et hautement recommande.
- Page 26 MONTAJE PARA PARED INSTRUCCIONES DEL SOPORTE DE SEGURIDAD Piezas incluidas: A) Soporte B) Correa de seguridad C) Tornillo para madera de 2" D) Tornillo para madera de 5/8" IMPORTANTE: Una caida puede lesionar a los ninos pequenos. Se recomienda el uso de esta herramienta de seguridad. Esta herramienta de seguridad, cuando se instala correctamente, puede proporcionar proteccion en los muebles contra una inesperada caida accidental de los muebles debido al uso incorrecto.
- Page 27 Storkcraft strongly advises that you do not, under any circumstances, tamper with ® or prohibit the intended use of this product’s interlocking drawer system. Storkcraft designs and manufactures safe products when they are assembled and used as intended. This product’s interlocking drawer system is our company’s commitment to ensuring a safer product for your...
- Page 28 ASSEMBLY INSTRUCTIONS / INSTRUCTIONS D'ASSEMBLAGE / INSTRUCCIONES DE ENSAMBLAJE REMOVING THE DRAWERS / DEMONTAGE DES TIROIRS / QUITAR LOS CAJONES 1. Remove drawer / Retirer le tiroir / Quitar cajón 2. Reset the interlocking bar by sliding the bar downward past the detent ball / Réinitialisez la barre de verrouillage en faisant glisser la barre vers le bas au-delà...
-
Page 29: Limited One-Year Warranty
II. WARRANTY SERVICE: Phone Toll Free: 1-877-274-0277 Storkcraft will replace parts or products, at its sole option, from any Hours of Operation: 6:30 am - 4:00 pm PST / 9:30 am- 7:00 pm EST defective product. Service under this Warranty shall be rendered in... - Page 30 Nonobstant ce qui prédèe, Storkcraft se réserve le droit de : (a) modifier la méthode par laquelle Storkcraft GARANTIE LIMITEE D'UN AN/ acceptera les demandes de réparation ou de remplacement du consommateur en vertu de la présente garantie;...
- Page 31 Teléfono (Líea gratuita): 1-877-274-0277 prestado de la manera que Storkcraft considere adecuada en su propio juicio y Storkcraft puede, a su discreción, requerir al consumidor enviar correos electrónicos o enviar artículos y/o Horario: 6:30 am –4:00 pm PST / 9:30 am –7:00 pm EST,...
Need help?
Do you have a question about the Avalon 03556-20-LB Series and is the answer not in the manual?
Questions and answers