Advertisement
Quick Links
To ensure ease of assembly read all instructions before assembly and follow step by step illustrations.
Pour assurer l´assemblage facile veuillez lire toutes les instructions avant l´assemblage et veuillez
suivre les illustrations pour chaque etapes.
Para garantizar la facilidad de ensamblaje lea todas las instrucciones antes de iniciar y siga paso a
paso las ilustraciones.
Keep instructions for future use.
Adult assembly required.
Due to the presence of small parts during assembly, keep out of reach of children until assembly is
complete.
Veuillez garder ces instructions pour l´usage ulterieur.
Assemblage requis pas un adulte.
Due a la presence de petite pieces durant l´assemblage, veuillez garder hors de porter des enfants
jusqu´a ce que l´assemblage soit completer.
Guarde las instrucciones para futuras referencias.
El ensamblaje requiere de un adulto.
Debido a que hay piezas pequeñas, mantenga fuera del alcance a los niños durante el ensamblaje,
hasta que haya terminado.
Made in Vietnam/ Fait au Vietnam/ Hecho en Vietnam
Model No./ Numéro de modèle / Número de modelo
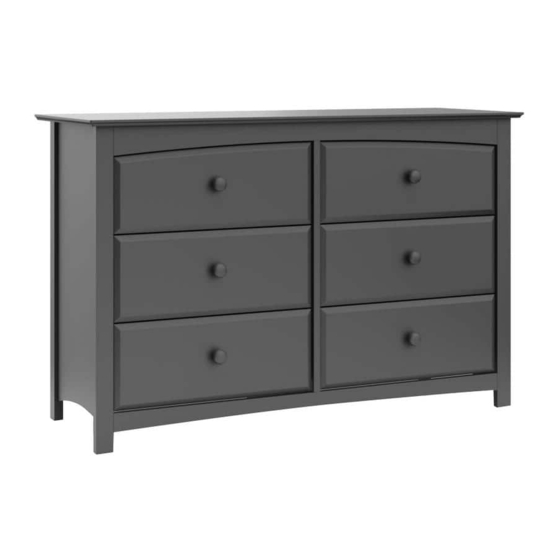
Kenton 6 Drawer Dresser
Kenton Chiffonnier a 6 Tiroirs
Cajonera de 6 cajones Kenton
1
03556-10
-AY
Color/ Couleur/ Color
ID626C
Jan 2018
Advertisement

Subscribe to Our Youtube Channel
Related Manuals for Storkcraft 03556-10 Series


Summary of Contents for Storkcraft 03556-10 Series
- Page 1 Model No./ Numéro de modèle / Número de modelo 03556-10 Color/ Couleur/ Color Kenton 6 Drawer Dresser Kenton Chiffonnier a 6 Tiroirs Cajonera de 6 cajones Kenton To ensure ease of assembly read all instructions before assembly and follow step by step illustrations. Pour assurer l´assemblage facile veuillez lire toutes les instructions avant l´assemblage et veuillez suivre les illustrations pour chaque etapes.
- Page 2 El almacén no cuenta con piezas de reemplazo y posiblemente no le podrían ayudar. Por favor contacte a Stork Craft directamente y nosotros le mandaremos las piezas requeridas sin costo alguno directamente a su domicilio. Contáctenos de la siguiente forma: Por correo electrónico: customercare@storkcraft.com...
-
Page 3: Notes On Assembly
-Use of a vaporizer near furniture will cause wood to swell and nish to peel. Stork Craft Manufacturing USA Inc. 1-877-274-0277 (604)-274-9727 Customer Service Direct Telephone Line : Fax : Hours of operation : 7:00 AM - 3:00 PM Monday to Friday Pacific Time email : customercare@storkcraft.com... - Page 4 -Utilisation d’un vaporisateur près du meuble pourrait causer le bois de gon er et le ni de pelée Stork Craft Manufacturing USA Inc. 1-877-274-0277 (604)-274-9727 Service aux clients : Fax : Heure d’opérations 7 :00 – 15 :00 Lundi au Vendredi Heure du Pacif i que Correo electrónico :customercare@storkcraft.com...
- Page 5 - Levante ligeramente cuando lo muevan sobre una alfombra para así evitar dañar las patas del mueble. - El uso de un vaporizador cerca de los muebles hará que la madera se hinche y el acabado se descarapele. Línea telefónica de servicio al cliente: 1-877-274-0277 Fax: (604) 274-9727 correo electrónico: customercare@storkcraft.com...
- Page 6 (4) CENTER PANEL/ Panneau du centre/ Panel central x1 (7) Bottom front rail/ (6) Top front rail/ Traverse inferieur du Traverse supérieur du devant/Riel frontal inferior devant/ Riel frontal superior (3) Right side/ Cote droit/ Lateral derecho (2) Left side/ (8) Top back rail/ Cote guache/ Traverse supérieur du...
- Page 7 ASSEMBLY INSTRUCTIONS/INSTRUCTION D’ASSEMBLAGE/ INSTRUCCIONES DE ENSAMBLAJE HARDWARE/ Quincailleries/ HERRAJE DRAWER SCREW/ Vis de tiroir/Tornillo de cajón KNOB/ BACK SCREW/ Vis/ 1/4" X ALLEN WRENCH/ Poignée/ TORNILLO PARA TAPA 5/8" BOLT/ Clef Allen/ LLAVE AGARRADERA TRASERA X27 Boulon/ ALLEN x1 TORNILLO x2 Drawer support Bracket Rear/ Support arrière du tiroir/ Cajón trasero...
- Page 8 ASSEMBLY INSTRUCTIONS/INSTRUCTION D’ASSEMBLAGE/ INSTRUCCIONES DE ENSAMBLAJE Rotate center panel (4) and position it between Rails (6,7,8,9) Using "L" Bracket (K) secure in place with Bolts (A). Tighten using Allen Wrench (C). ASSEMBLE Rails (6,7,8,9) to Right Side (3) using Bolt (B) with Washer (G).
- Page 9 ASSEMBLY INSTRUCTIONS/INSTRUCTION D’ASSEMBLAGE/ INSTRUCCIONES DE ENSAMBLAJE Secure Top (1) by pushing Push Pin (F) into each mounting blocks located uner the Top. Attacher le dessus (1) a l’aide des goujons en plastique (F) dans chaque bloques monter sous le dessus. Fije la parte superior (1) empujando el empuje el pasador (F) en cada uno de los bloques de montaje ubicado uner la parte superior.
- Page 10 DRAWER ASSEMBLY/ ASSEMBLAGE DES TIROIRS/ ENSAMBLAJE DE CAJÓN Step 1/ Étape 1/ Paso 1 Install Screws (H) into Drawer Sides (12 & 13) and align with pilot holes located in the mounting blocks of Drawer Back (14). Tighten using Phillips screw driver (not included) Installer les visses (H) dans les côtés du tiroir (12 &...
- Page 11 Drawer assembly/ Assemblage des tiroirs/ Ensamblaje de cajón Step 3/ Étape 3/ Paso 3 Assemble 4 drawers using Lower Drawer Fronts (11). Align Drawer Support (16) into Groove located in the back side of the Drawer Front as well as Drawer Bottom (15) into corresponding Groove Secure using Screws (H). Tighten by using a Phillips Screw driver (not included) Repeat process for Top Drawer Front (10A) and (10B) Assembler les quatre tiroirs en utilisant les devant de tiroirs inferieurs (11).
- Page 12 Drawer Assembly/ Assemblage des tiroirs/ Ensamble de cajón Step 4/ Étape 4/ Paso 4...
- Page 13 Drawer Assembly/ Assemblage des tiroirs/ Ensamble de cajón Step 5/ Étape 5/ Paso 5 Install (D) using Screws (E). Tighten by Phillips Screw Driver (not included) Installer la poignée (D) a l’aide de la vis (E) Serrer le tous a l’aise d’un tournevis cruciforme.
- Page 14 WALL STUD SAFETY BRACKET INSTRUCTIONS Parts Enclosed: A Bracket B Safety strap 1-1/2" Wood screw D 3/4 Wood screw IMPORTANT: Tipping can injure young children. Use of this safety hardware is highly recommended. This safety hardware, when properly installed, can provide protection against unexpected accidental tipping of furniture due to improper use. Step 1 Step 2 Step 3...
- Page 15 MONTANT DU MUR INSTRUCTION POUR LES CROCHETS DE SÉCURITÉ C Vis à bois 1 1/2’’ A Crochet Sangle de sécurité Vis à bois 3/4’’ MISE EN GARDE: La bascule du meuble peut blesser un enfant. L’utilisation des crochets de sécurité et hautement inattendu du meuble.
- Page 16 MONTAJE PARA PARED INSTRUCCIONES DEL SOPORTE DE SEGURIDAD Piezas incluidas: A Soporte Tornillo para madera D Tornillo para B Correa de seguridad C de 1-1/2" madera de 3/4" IMPORTANTE: Una caída puede lesionar a los niños pequeños. Se recomienda el uso de esta herramienta de seguridad. Esta herramienta de seguridad, cuando se instala correctamente, puede proporcionar protección en los muebles contra una inesperada caída accidental de los muebles debido al uso incorrecto.
- Page 17 Servicio de linea telefónica directa al cliente: 1-877-274-0277 Fax (604) 274-9727 DISTRIBUIDO POR: Horario de atención: 7:00 AM to 3:00 PM, hora del pacifico Stork Craft Manufacturing Inc. e-mail: customercare@storkcraft.com #200 12033 Riverside way Atención al cliente de México Richmond,BC V6W 1K6 Por correo electrónico: customercare@storkcraft.com Twitter @Storkcraft...
Need help?
Do you have a question about the 03556-10 Series and is the answer not in the manual?
Questions and answers