Advertisement
Quick Links
Single Sided Crank Workstation
Instruction Manual
Table of Contents
Component parts ............................................................................................................................................ 2
Assembly Instructions ...................................................................................................................................... 3
Important Safety Instructions ......................................................................................................................... 9
1
Advertisement

Related Manuals for Rapidline Single Sided Crank Workstation


Summary of Contents for Rapidline Single Sided Crank Workstation
- Page 1 Single Sided Crank Workstation Instruction Manual Table of Contents Component parts ............................2 Assembly Instructions ……..........................3 Important Safety Instructions …………………....................9...
-
Page 2: Component Parts
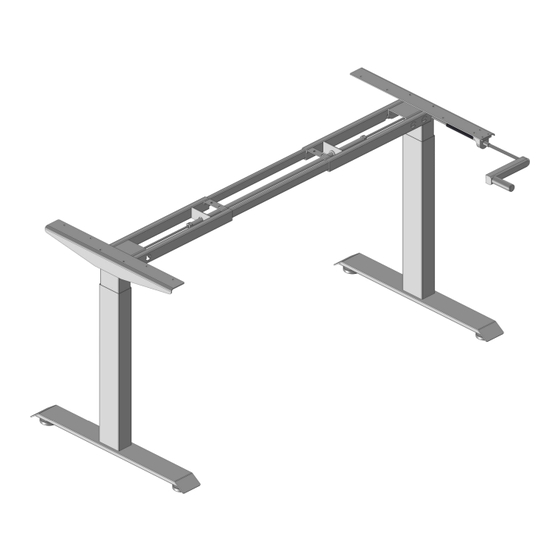
Component parts Component Name Component Name Leveling pads Center rails Table feet Side brackets-2 Lifting column Open spanner(6mm) Bolt: M6x12 Open spanner(18mm) Screw:ST4x16 Allen Wrench(4mm) Side brackets-1 Allen Wrench(2mm) Rubber pad Longer aluminum pipe for 1800W tabletop Top frame... - Page 3 Assembly Instructions Step 1 Loosen the pre-installed bolts and Adjust the length of the top frame to match the size of the table top. 1800W If the tabletop size 1200W,please use the Shorter aluminium pipe. If the tabletop size ,please use the Longer aluminium pipe. Step 2 Inset the lifting column to the top frame.
- Page 4 Step 3 Install the two table feet with Screws 8 pcs M6x16, Install the 4 pcs leveling pads Step 4 Install the two side brackets with Screws 4 pcs M6x12,...
- Page 5 Step 5 Install the desk frame to the tabletop with ST4 * 16 screws, insert the transmission rod into the left and right lifting columns, and tighten with an open-ended wrench. Fix the handle holder with 2 ST4 * 16 screws to the tabletop B.
- Page 6 Add-On: Cable tray installation Step 1 - Fix the cable tray to the cable tray arms with 8 pcs M6x10 screws. Step 1 - Install the U brackets to the desk frame with 4 pcs M8x10 screws. - Mount the cable tray to the desk frame and fix it with 6 pcs M6x10 screws...
- Page 7 Add on : Screen panel installation Step 1 - Insert the tapped plates to the screen panel Step 2 - Install the brackets to the panel with 8 pcs M5x6 screws.
- Page 8 Step 3 - Fix the panel to the desk frame with 10 pcs M6x10 screws.
Need help?
Do you have a question about the Single Sided Crank Workstation and is the answer not in the manual?
Questions and answers