Table of Contents
Advertisement
Quick Links
User Manual
LG Energy Solution strongly advises users to exercise due care in following
LG Energy Solution's product installation manual. Warranty claims are invalid if damage is
caused by human error in a manner inconsistent with the installation manual's instructions.
Version 1.0
for
Hybrid Inverter
SLH-G1 Series
5.0-6.0kW
Advertisement
Table of Contents

Related Manuals for LG SLH-G1 Series


Summary of Contents for LG SLH-G1 Series
- Page 1 5.0-6.0kW LG Energy Solution strongly advises users to exercise due care in following LG Energy Solution’s product installation manual. Warranty claims are invalid if damage is caused by human error in a manner inconsistent with the installation manual’s instructions. Version 1.0...
-
Page 2: Table Of Contents
Trademarks and other LG trademarks are trademarks of LG Energy Solution, Ltd. All other trademarks or registered trademarks mentioned in this manual are owned by LG Energy Solution, Ltd. NOTICE The information in this user manual is subject to change due to product updates or other reasons. -
Page 3: About This Manual
1. About This Manual 2. Safety Precaution This manual describes the product information, Please strictly follow these safety instructions in the user installation, electrical connection, commissioning, manual during the operation. troubleshooting and maintenance. Read through this NOTICE manual before installing and operating the product. All the installers and users have to be familiar with the The inverters are designed and tested strictly to comply with related safety rules. -
Page 4: Inverter Safety
2.6 EU Declaration of Conformity being burnt. LG Energy Solution, Ltd. hereby declares that the Do not dispose of the inverter as inverter with wireless communication modules sold in household waste. Discard the product... -
Page 5: Product Introduction
Chemicals (EC) No 1907/2006 (REACH) must be less than 10V. LG Energy Solution, Ltd. hereby declares that the inverter without wireless communication modules sold in the European market meets the requirements of the following directives: • Electromagnetic compatibility Directive 2014/30/EU... - Page 6 Self Consumption System (Hybrid Scenarios) Smart Meter Inverter AC Circuit Breaker Smart Meter Utility Grid AC Circuit PV String Breaker Battery Breaker ON-GRID Load Battery SPDT (Single Pole, Double BACK-UP Load Signal cable Power cable Throw) Switch Parts Description Parts Description PV string is composed of series •...
-
Page 7: Working Mode
3.3 Working Mode • Day: - When the power generated in the PV system is 3.3.1 System working mode sufficient, the inverter supplies electricity to the household load as first priority as priority. The excess Economic mode power will then charge the batteries first, and still remaining power will be fed back into the grid. - Page 8 Back-up mode 3.3.2 Inverter operation mode NOTICE Waiting mode Off-grid mode • Back-up mode: This mode is used when the grid is unstable and there is an important load. The inverter supplies power to the load in off-grid mode when the grid is disconnected , and Self-check mode switches to on-grid mode when the grid is restored.
-
Page 9: Functionality
The load control methods are as follows: • Time control: set the time to enable/disable the load, LGES PV Master App LG RESU HOME App and the load will be turned on or off automatically within the setting time period. -
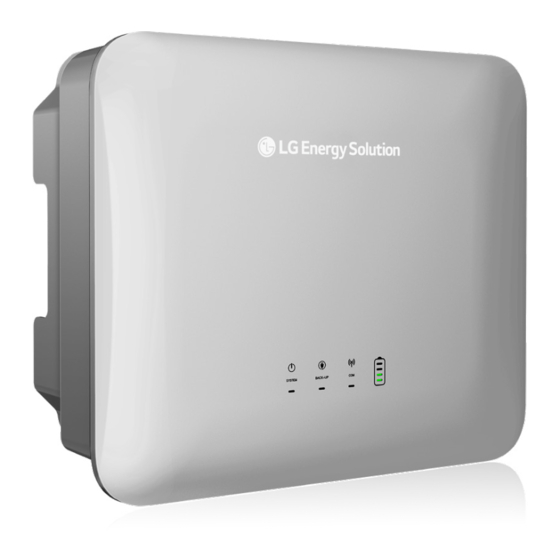
Page 10: Appearance
3.5 Appearance 3.5.2 Dimension ⑫ ⑬ 3.5.1 Parts BACK-UP ON-GRID COM1 BAT+ BAT- METER COM2 ① ②③④ ⑤ ⑥ ⑦ ⑧ ⑨⑩ SYSTEM BACK-UP ⑪ Battery DC Input Port (BATTERY+/-) COM Port with BMS (BMS) Communication Module Interface(COM1) 3.5.3 Indicator Description COM Port for Meter (METER) Indicator Status... -
Page 11: Check And Storage
3.5.4 Nameplate Label The nameplate is for reference only. LG trademark, product type, and Inverter DC connector x2 Mounting plate x1 product model Expansion bolt x4 Communication Smart Meter x1 module unlock tool x1 Technical parameters COM cable for OT terminal x1... -
Page 12: Installation
4. The inverters must be stacked with caution to prevent any fall of the inverter. 5. If the inverter has been long term stored, it should be checked by professionals before being put into use. 5. Installation Children No Touch 5.1 Installation Requirements ≥... -
Page 13: Inverter Installation
5.2 Inverter Installation 5.2.1 Moving the Inverter SYSTEM BACK-UP CAUTION • Operations such as transportation, loading, unloading, installation and so on must meet the requirements of the laws and regulations of the country or region where it is located. • Move the inverter to the site before installation. Follow the instructions below to avoid personal injury or equipment damage. -
Page 14: Electrical Connection
Diameter: 10mm Depth: 80mm 6. Electrical Connection 6.1 Circuit Diagram Main Panel Inverter BACK-UP Load Battery Utility String Grid Normal Load... -
Page 15: Safety Precaution
6.3 Connecting the PE cable NOTICE • The wiring for N and PE connections via the ON-GRID and BACK- WARNING UP ports of the inverter vary depending on regional regulations. • The PE cable connected to the enclosure of the inverter cannot Please refer to the specific requirements outlined in your local replace the PE cable connected to the AC output port. -
Page 16: Connecting The Ac Cable
6.4 Connecting the AC cable Supported by SLH-G1-050-GL, SLH-G1-060-GL inverters. WARNING • Do not connect loads between the inverter and the AC switch 12-14m m directly connected to the inverter. • The inverter is equipped with a residual current monitoring unit (RCMU) to detect and quickly disconnect from the grid in case of leakage current exceeding the allowable value. -
Page 17: Connecting The Dc Input Cable(Pv)
6.5 Connecting the DC Input Cable(PV) DANGER • Do not connect a single PV string to multiple inverters simultaneously as it may lead to inverter damage. • Verify the following information prior to connecting the PV string to the inverter to prevent permanent inverter damage, fire, and personal or property loss: 1. -
Page 18: Connecting The Battery Cable
20mm ≤ S ≤ 35mm 6.6 Connecting the battery cable DANGER • The battery used with the inverter shall be approved by inverter manufacturer. The compatible battery list can be obtained through the official website. • A short circuit in the battery may cause personal injury. The instantaneous high current caused by a short circuit can release a large amount of energy and may cause a fire. -
Page 19: Communication
6.7 Communication NOTICE Ensure correct connection of the communication device to the designated COM port, and avoid interference by routing the communication cable away from any potential sources of signal disruption, such as power cables or other sources of electromagnetic interference. 6.7.1 Connecting the COM cable (Load Control, Remote Shutdown, DI Signal, Generator Control, DRED, RCR and EMS) Port Definition... - Page 20 Remote Load Control Shutdown 1: DO1+ 4: Remote 2: N/A Shutdown 3: DO1- 5: GND Generator 6: DI+ 8: DO2+ 7: DI- 9: DO2- Color EMS/PAR Orange and White RS485A (EMS) Orange RS485B (EMS) Green and White DRED or RCR 10: COM/DRM0 or REF_1 Blue 11: REFGEN or REF_2...
- Page 21 • The included communication cables for the BMS and Meter have inverter is used under the self consumption mode, the default lengths of 3m and 10m respectively. Install the Meter Power Limit can be realized by connecting SLH-G1 series and CT according to your specific needs. inverters with GM1000.
- Page 22 When the load connected is split phase, the Power Limit When the load connected is three-phase, the Power Limit can be realized by connecting SLH-G1 series inverters can be realized by connecting SLH-G1 series inverters with GM3000. Connect the cables by following below with GM3000.
-
Page 23: Equipment Commissioning
Grid-tied or off-grid modes. BACK-UP output overload. 8.3 Monitoring via LG RESU HOME LG RESU HOME is an monitoring platform used to A fault has occurred. communicate with the inverter via WiFi. Commonly used The inverter is powered off. -
Page 24: Maintenance
It is not permissible to dispose of the inverter as household waste. 9.4 Troubleshooting LGES PV Master App LG RESU HOME App If the inverter encounters problems, try to troubleshoot by following these methods. If the problems persist, 9. Maintenance contact the after-sales service. - Page 25 Fault Cause Solutions 1. Utility grid power fails. 1. The alarm is automatically cleared after the grid power supply is restored. 2. The AC cable is Utility Loss disconnected, or the AC 2. Check whether the AC cable is connected and the AC breaker is off.
- Page 26 Fault Cause Solutions 1. If this fault occurs occasionally, it may be due to temporary abnormalities in the utility grid. The inverter will recover automatically after detecting a return to normal grid conditions. The moving average voltage of the grid over a period of 10 2.
- Page 27 Fault Cause Solutions Utility grid exception. The 1. If this fault occurs occasionally, it may be due to LVRT duration of the utility grid temporary abnormalities in the utility grid. The inverter Undervoltage exception exceeds the set will recover automatically after detecting a return to time of LVRT.
- Page 28 Fault Cause Solutions 1. Frame format error 2. Parity checking error 3. Can bus offline Disconnect the AC output switch and DC input switch, Internal Comm wait for 5 minutes, and then connect them again. If the 4. Hardware CRC error Loss problem persists, contact the dealer or after-sales service 5.
-
Page 29: Routine Maintenance
Fault Cause Solutions The PV array configuration Check the serial connection of the PV array and ensure PV Input is not correct. Too many PV that it is correct. Verify that the open circuit voltage of Overvoltage panels are connected in series the PV string is not higher than the maximum operating in the PV string. -
Page 30: Technical Parameters
10. Technical Parameters SLH-G1- SLH-G1- SLH-G1- SLH-G1- Technical Data Technical Data 050-GL 060-GL 050-GL 060-GL Battery Input Data Max. AC Current Output to 22.7 27.3 Utility Grid (A) Battery Type Li-Ion Max. AC Current From Utility 43.5 Nominal Battery Voltage (V) Grid (A) Nominal AC Current From Battery Voltage Range (V) - Page 31 SLH-G1- SLH-G1- SLH-G1- SLH-G1- Technical Data Technical Data 050-GL 060-GL 050-GL 060-GL Protection Battery: A PV String Current PV: C The Decisive Voltage Class Integrated Monitoring (DVC) AC: C PV Insulation Resistance Com: A Integrated Detection Mounting Method Wall Mounted Residual Current Monitoring Integrated SMS(Slip-mode...
- Page 32 Keep this manual for later use © 2023 LG Energy Solution ESS Battery Division PARC1, 108, Yeoui-daero, Yeongdeungpo-gu, Seoul, Republic of Korea, 07335 https://www.lghomebattery.com http://www.lgensol.com 340-00937-00...
Need help?
Do you have a question about the SLH-G1 Series and is the answer not in the manual?
Questions and answers