Advertisement
Quick Links
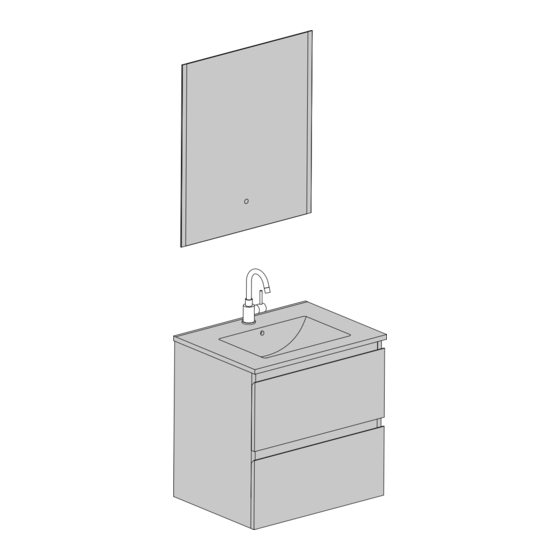
InBe - dresser, washbasin & mirror
Greek oak, ceramics, gloss white
CL/07.106.206.01.63 - CL/07.106.208.01.63 - CL/07.106.210.01.63 -
CL/07.106.212.01.63 - CL/07.106.212.02.63
Montage instructies
Installation instructions
Notice de montage
Montageanweisungen
REV 01
07.09.2023
Advertisement

Subscribe to Our Youtube Channel
Related Manuals for Clou InBe CL/07.106.206.01.63


Summary of Contents for Clou InBe CL/07.106.206.01.63
- Page 1 InBe - dresser, washbasin & mirror Greek oak, ceramics, gloss white CL/07.106.206.01.63 - CL/07.106.208.01.63 - CL/07.106.210.01.63 - CL/07.106.212.01.63 - CL/07.106.212.02.63 Montage instructies Installation instructions Notice de montage Montageanweisungen REV 01 07.09.2023...
- Page 2 Alle vermelde afmetingen executing the action. in deze handleiding dienen te worden - Clou b.v. can not be held responsible for geverifieerd alvorens de actie uit te voeren. the results of improper use, improper - Clou b.v. kan niet verantwoordelijk worden...
- Page 3 éventuellement verfliesten Untergrund vorgesehen. Für consolider le mur si nécessaire. andere Untergründe prüfen Sie hier die - Clou b.v. se réserve le droit pour tout erforderlichen Befestigungsmaterialien, die changement technique ou optique par Sie in Eigenverantwortlichkeit beschaffen.
- Page 4 Oberfläche des Prodktes durch Auflegen harter Fertigteile beschädigt wird. Gebruiksvoorschriften: Zie ook de onderhoudsvoorschriften op www.clou.nl max. User’s instructions: 15 kg See also the maintenance guides at www.clou.nl Instructions d’utilisation: Consultez également les instructions de nettoyage sur www.clou.nl Gebrauchsanweisungen: Sehen Sie auch die Wartungsanweisungen auf www.clou.nl...
- Page 5 InBe - dresser, washbasin & mirror With tap hole, with siphon recess, 60cm CL/07.106.206.01.63 CL/07.106.206.01.63 Dimensions in mm, for reference only / 01.09.2023 / rev_01 www.clou.nl...
- Page 6 InBe - dresser, washbasin & mirror With tap hole, with siphon recess, 80cm CL/07.106.208.01.63 CL/07.106.208.01.63 Dimensions in mm, for reference only / 01.09.2023 / rev_01 www.clou.nl...
- Page 7 InBe - dresser, washbasin & mirror With tap hole, with siphon recess, 100cm CL/07.106.210.01.63 CL/07.106.210.01.63 1000 1010 1000 Dimensions in mm, for reference only / 01.09.2023 / rev_01 www.clou.nl...
- Page 8 InBe - dresser, washbasin & mirror With tap hole, with siphon recess, 120cm CL/07.106.212.01.63 CL/07.106.212.01.63 1080 1200 1210 1200 Dimensions in mm, for reference only / 01.09.2023 / rev_01 www.clou.nl...
- Page 9 InBe - dresser, washbasin & mirror Double, with tap holes, with siphon recesses, 120cm CL/07.106.212.02.63 CL/07.106.212.01.63 1080 1200 1210 1200 Dimensions in mm, for reference only / 01.09.2023 / rev_01 www.clou.nl...
- Page 10 CL/07.106.206.01.63, CL/07.106.208.01.63, CL/07.106.210.01.63, CL/07.106.212.01.63 en CL/07.106.212.02.63. Dimensions in mm, for reference only / 05.09.2023 / rev_01 www.clou.nl The exploded view above shows the 60cm set. However, CL/1047.7080 is universally applicable for: CL/07.106.206.01.63, CL/07.106.208.01.63, CL/07.106.210.01.63, CL/07.106.212.01.63 and CL/07.106.212.02. 63.
- Page 11 60cm CL/07.106.206.01.63 max. 750 min. 715 Dimensions in mm, for reference only / 05.09.2023 / rev_01...
- Page 12 In deze handleiding worden illustraties van de 60cm set weergegeven. Echter, is de installatieprocedure hetzelfde voor andere afmetingen. Deze handleiding is te gebruiken voor: CL/07.106.206.01.63, CL/07.106.208.01.63, CL/07.106.210.01.63, CL/07.106.212.01.63 en CL/07.106.212.02.63. Illustrations of the 60cm set are shown in this manual. However, the installation procedure is the same for other dimensions.
- Page 13 Duidt met potlood en waterpas de gewenste hoogte Y1 van de ladekast aan. (aangeraden: Y1 = 880 mm) Mark with pencil and level the prefered height Y1 of the dresser. (recommended: Y1 = 880 mm) Marquez avec un crayon et avec un niveau la hauteur souhaitée Y1 de la commode.
- Page 14 Boor de gaten voor de haaklatjes (ø 8 mm). Drill the holes for the french cleat hangers (ø 8 mm). Percez les trous pour les taquets français (ø 8 mm). Bohren Sie die Löcher für die ø 8 mm Aufhängeschiene (ø 8 mm). Steek de pluggen in de gaten en bevestig de haaklatten met de schroeven.
- Page 15 Draai beide schroeven aan de onderkant van de bovenste ladegeleiders los [1] en haal de bovenste lade uit de ladekast door ze naar voor en omhoog te trekken [2]. Unscrew both screws on the bottom of the upper drawer slides [1] and remove the top drawer by pulling it forward and upward [2].
- Page 16 Stel de positie van de ladekast bij. Met schroef A regelt men de hoogte van de ladekast, met schroef B de afstand tot de muur. Adjust the position of the dresser. With screw A you regulate the heigth of the dresser, with screw B you adjust the distance to the wall.
- Page 17 Duidt met potlood de plaatsen Y2-line aan waar u gaten moet boren. Het is aangeraden de gegeven afmetingen na te meten. 33 mm X - 16,5 mm X - 16,5 mm 33 mm Mark with pencil the spots to drill holes. It is recommended to verify the given dimensions.
- Page 18 Steek de pluggen in de gaten en bevestig de ophangbeugels met de schroeven. Insert the dowels in the holes and mount the mounting brackets with the screws. Enfoncer les chevilles dans les trous et fixer les supports avec les vis. Bringen Sie die Dübel in den Löchern an und befestigen Sie die Halterungen mit den...
- Page 19 Bevestig de kraan en afvoer (niet inbegrepen) aan de wastafel. Mount the tap and drain (not included) onto the washbasin. Fixer le robinet et la bonde (non incluse) à le lavabo. Befestigen Sie die Waschtischarmatur und den Ablauf (nicht im Lieferumfang enthalten) am Waschbecken.
- Page 20 Sluit de kraan aan op de waterleiding en bevestig de sifon (niet inbegrepen) aan de afvoer en aan de afvoerleiding. Connect the tap to the water supply and attach the trap (not included) to the drain and to the waste pipe. Raccordez le robinet à...
- Page 21 Kit de naden tussen wastafel en muur af met sanitair kit. Seal all seams between washbasin and wall with silicon paste for sanitary. Mastiquer tout les joints entre la lavabo et le mur avec du mastic sanitaire. Dichten Sie alle Näht zwischen Waschbecken und Wand mit Silikon für Sanitär.
- Page 24 Clou. Bath findings. Clou bv Thermiekstraat 1 NL-6361 HB Nuth T +31 (0)45 524 56 56 info@clou.nl www.clou.nl Looking for inspiration?
Need help?
Do you have a question about the InBe CL/07.106.206.01.63 and is the answer not in the manual?
Questions and answers