
Related Manuals for Pentax WG-1000


Summary of Contents for Pentax WG-1000
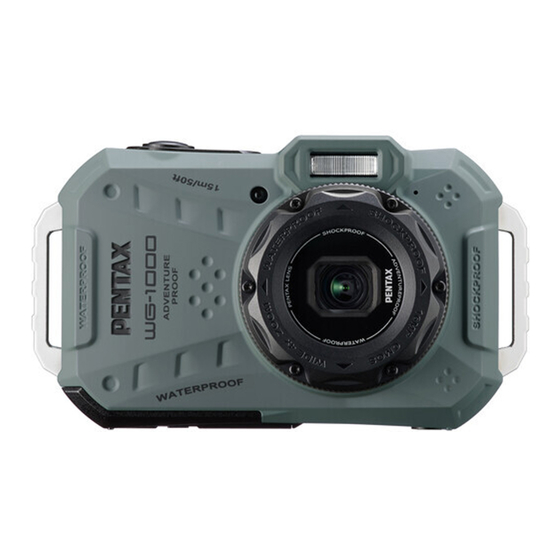
- Page 1 Operating Manual To ensure the best performance from your camera, please read the Operating Manual before using the camera. Model: R08040...
-
Page 2: Before You Start
For Customers in USA STATEMENT OF FCC COMPLIANCE Supplier’s Declaration of Conformity 47 CFR § 2.1077 Compliance Information Product Name: PENTAX WG-1000 Model: R08040 This device complies with Part 15 of the FCC Rules. Operation is subject to the following two conditions: (1) This device may not cause harmful interference, and (2) this device must accept any interference received, including interference that may cause undesired operation. - Page 3 stomers in Canada For Cu Innovation, Science and Economic Development Canada (ISED) Regulatory Compliance Notice This Class B digital apparatus complies with Canadian ICES-003 (B). Pour les utilisateurs au Canada Avis de conformité à la réglementation d’Innovation, Sciences et Développement économique Canada (ISDE) Cet appareil numérique de la classe B est conforme à...
- Page 4 For Switzerland: Used electrical/electronic equipment can be returned free of charge to the dealer, even when you don’t purchase a new product. Further collection facilities are listed on the home page of www.swico.ch or www.sens.ch. Notice to Users in Countries that Require the CE Marking This product complies with the essential requirements and provisions of EMC Directive 2014/30/EU.
- Page 5 All trademarks mentioned in this manual are used for identification purposes only and are properties of their respective owners. This manual provides you with instructions on how to use your new RICOH WG-1000. Every effort has been made to ensure that the contents of this manual are accurate; however RICOH IMAGING COMPANY, LTD.
-
Page 6: Waterproof/Dustproof/Shockproof
WATERPROOF/DUSTPROOF/SHOCKPROOF JIS / IEC waterproof grade 8 (IPX8). After using the product in water or near sand, mud or other foreign materials, please rinse it with clean JIS / IEC dustproof grade 6 (IP6X). water (close the battery cover before cleaning). After Height for shockproof rating is 2m (6.6 feet). -
Page 7: Safety Notes
SAFETY NOTES Safety Notes for this Camera Do not drop the camera or allow it to hit solid objects. Do not attempt to disassemble or repair the camera. Do not use or store the camera in a hot environment or in direct sunlight. Do not use or store the camera near powerful magnetic fields, for example near a magnet or transformer. - Page 8 If any irregularities occur during use, such as smoke or a strange odor, stop use immediately, remove the battery or the power adapter, and contact your nearest service center. Continuing to use the product can cause a fire or electric shock. Don’t discharge the flash while it is touching your clothing as there is a risk of discoloring.
- Page 9 Do not attempt to disassemble the battery. Do not expose the battery to water. Always keep the battery contacts dry. Do not heat the battery or throw it into a fire to avoid a possible explosion. Do not store the battery in a hot environment or in direct sunlight. If the battery overheats during charging or use, stop charging or stop use immediately.
- Page 10 Safety Notes for the USB Power Adapter Always use the USB power adapter exclusively developed for this product, with the specified power and voltage. Using a power adapter not exclusive to this product, or using the exclusive power adapter with an unspecified power or voltage can cause a fire, electric shock, or camera breakdown.
- Page 11 Safety Notes for Memory Cards The memory card referred to in this user manual is a SD/SDHC/SDXC memory card that is Class 6 or higher. We highly suggest buying only well-known, name brand memory cards to ensure peak performance and reliability.
- Page 12 3. Small accessories such as battery or a SD Card may be swallowed. Seek medical attention immediately if an accessory is accidentally swallowed. WARNING Altering, tampering or modifying the any parts of RICOH WG-1000 are unauthorized and will void the manufacturer’s warranty and “could” void Federal and/or State Compliance.
-
Page 13: Table Of Contents
CONTENTS BEFORE YOU START ......1 Set your Language, Date/Time ......26 Set your Language, Date/Time after the First Power-On .........26 WATERPROOF/DUSTPROOF/ Resetting your Language ......27 SHOCKPROOF ........5 Resetting Date/Time........28 SAFETY NOTES ........6 MODE OVERVIEW ....... 29 Display Setting ............29 CONTENTS .......... - Page 14 Overview of the Screen Icons in Panorama Mode ........38 Playback Mode............49 Underwater Mode ........40 Switching Screen..........50 CALS Mode ..........40 Viewing Photos and Videos .........51 Using Zoom Playback (for Still Pictures Only) ...54 BASIC OPERATION ......41 Animation Panorama Play ........55 Using the Zoom Function ........41 Slideshow ..............56 Macro Mode ............42...
- Page 15 White Balance Setting ........64 Face Detection ..........77 Color Effect .............65 Playback Settings ..........78 Menu ...............66 Protect .............78 Playback Menu .............68 Delete ..............79 Display Mode ..........68 Trim ..............80 HDR (High Dynamic Range) ......69 General Settings ...........81 Red-Eye Reduction .........69 Sound Settings ..........81 Rotate ..............70 World Time .............82 Resize ..............71...
- Page 16 File Settings ............86 Format .............86 Copy to Card ...........87 File Numbering ..........87 Reset ..............88 FW Version ............88 APPENDICES ........89 Specifications ............89 Prompts and Warning Messages .......94 Troubleshooting ...........98 Trademark Information ......100 LZF Lib Open Source........101 Warranty Policy ..........102...
-
Page 17: Getting Started
GETTING STARTED Accessories Included Your camera box should contain the camera model you purchased along with the following accessories. If anything is missing or appears to be damaged, please contact your retailer first or our customer service center. (The Power plug of the USB power adapter may be a little different in shape due to the difference of countries or regions this type of cameras are sold to, and are subject to matching the physical product). -
Page 18: Part Names
Part Names 7 8 9 10 11 15 16 21 22 1 Flash 8 USB terminal 16 Shutter button 23 Flash button/ Arrow button (Right) 2 Lens 9 Battery lock lever 17 MODE button 3 Strap attachment 10 Card slot 18 Zoom button 24 Delete button/Self-timer button/ Arrow button (Down) -
Page 19: Installing Battery And Memory Card
Installing Battery and Memory Card 1. Push the Battery cover lock lever as shown in 2. While checking the positive and negative of the step ①, push the battery cover as shown in battery, use the side of the battery to release the step ②... - Page 20 4. Close the battery cover as shown in step ① 3. Insert the memory card into the memory card slot as shown in the figure, push exposed edge and slide the battery cover as shown in step ②. Make sure that a red mark appears on the of the memory card fully into the slot with your fingertip.
-
Page 21: Charging The Battery
Charging the Battery Before you charge your battery, make sure the camera is off and the battery is inserted correctly. 1. Insert the Power plug to the USB power adapter as show in ❶. 2. Connect the camera to the USB power adapter using the supplied USB cable as show in ❷, ❸. 3. - Page 22 After the battery is stored for long periods of time, use the supplied power charger to fully charge the battery prior to use. When the camera is turned off, you can also connect the camera to your PC using a USB cable to charge the battery.
-
Page 23: Installing Silicone Case
Installing Silicone Case To protect the main body, please confirm that the Silicone case is clean, free of sand, dust, eg. or other foreign objects inside. 1. Thread the side with buttons protection of the Silicone case through the strap attachment of the main body. -
Page 24: Attaching The Carabiner Strap
Attaching the Carabiner Strap 1. Pass the tip of the carabiner strap through the strap attachment part of the main body as shown in the figure and fix it to the fastener. 2. In order to prevent scratches when the carabiner strap and the main body against each other, please adjust the position of the rubber rings so that they do not influence each other. -
Page 25: Turning Camera On And Off
Turning Camera On and Off Press the Power button, the Indicator lamp and monitor will light up. Please follow the steps of Page 27 to 28 to set the language, date and time which displayed by the monitor. Press the Power button again, the the Indicator lamp and monitor will be turned off. -
Page 26: How To Take Pictures
How to Take Pictures 1. Hold the camera with both hands, being careful to not block the flash and lens with fingers. 2. Point the Lens toward the object you want to take a picture of, then frame it with the monitor. 3. -
Page 27: Set Your Language, Date/Time
Set your Language, Date/Time Set your Language, Date/Time after the First Power-On 1. When you turn the camera on for the first time, the language selection screen appears. 2. Press the [ ] buttons to select your desired language. 3. After you press the button to confirm your language selection, the Date/Time settings screen will appear. -
Page 28: Resetting Your Language
Resetting your Language After you set your language for the first time, follow the instructions below to reset your desired language. 1. Press the button and press the [ ] buttons to select . Press the button to enter the menu. -
Page 29: Resetting Date/Time
Resetting Date/Time After you set your Date/Time for the first time, follow the instructions below to reset date and time. 1. Press the button and press the [ ] buttons to select . Press the button to enter the menu. 2. -
Page 30: Mode Overview
MODE OVERVIEW Display Setting Press the [ ] button to display the settings: Classic, Full, Off. Classic: Displays the camera parameters on screen Full: Camera parameters with Grid and Histogram x1.9 x1.9 x1.9 x1.9 1234 1234 1234 1234 00:56:00 00:56:00 00:56:00 00:56:00 F4.2... -
Page 31: Monitor Display
Monitor Display Overview of the Screen Icons in Photo Shooting Mode x1.9 x1.9 1234 1234 00:56:00 00:56:00 F4.2 F4.2 1/15 1/15 -0.3 EV -0.3 EV 400 ISO 400 ISO 1 Shutter Speed 13 Zoom Display 18 Image Size Expo Metering Auto Focus (AF) Mode 14 Memory Card/ 2 Aperture Value 19 Number of Remaining Shots... -
Page 32: Overview Of The Screen Icons In Movie Mode
Overview of the Screen Icons in Movie Mode x1.9 x1.9 00:56:00 00:56:00 00:56:00 -0.3 EV -0.3 EV Exposure Compensation Macro Mode 11 Color Effect Focus Frame Self-timer 12 Video Quality Expo Metering Zoom Display 13 Remaining Recording Time Single-AF Memory Card/Built-In Memory 10 Battery Status Movie Mode... -
Page 33: Using The Mode Button
Using the MODE button This camera provides a convenient MODE button that allows you to switch easily between different modes. 1. Press the Power button to turn the camera on. Press the button to enter the Mode Selection Menu. 2. Press the [ ] buttons to choose the selected mode. -
Page 34: Auto Mode
Auto Mode Auto mode is the most common and easiest mode to take photos. While operating in this mode, the camera automatically optimizes numerous camera settings to take photos and videos with the best possible results. x1.9 x1.9 1234 1234 00:56:00 00:56:00 1. - Page 35 The camera will automatically detect the most suitable scene to capture the best pictures. Mode Name Description The camera automatically adjusts the exposure and focus to ensure the best Auto Mode possible pictures. For landscapes, automatically adjusts the exposure and reproduces vivid green Landscape Mode and blue colors.
-
Page 36: Program Ae
Program AE Under different scenes, the user can switch the ISO and EV value according to personal preference, the camera can automatically set the shutter speed and aperture value. Manual Mode Aperture, Shutter Speed and ISO can be configured manually in this mode. Movie Mode Switch to this mode to record videos. -
Page 37: Scene Mode
Scene Mode You can select an appropriate mode from the 18 scene modes according to the type of environment you are shooting in. The camera then automatically configures the most appropriate settings for the best possible photos. 1. Press the [ ] buttons to select a scene and press the button to confirm. - Page 38 Portrait Fireworks Most suitable for capturing people, focusing on their For fireworks at night. Use of a tripod is face. recommended with this setting. Landscape Night Landscape For landscapes and outdoor shots. Vivid For night scenes. Use of a tripod is recommended reproduction of greens and blues.
-
Page 39: Panorama Mode
Panorama Mode This feature allows you to capture a panoramic view that will have significantly more content than a single photograph. Follow the arrow while keeping the camera steady to seamlessly shoot an ultra-wide scene of up to 360 degrees. 1. - Page 40 During panorama mode shooting, when the Panning Shot moving direction of the camera is wrong or the Suitable for capturing fast moving objects to have a angle deviates from the internal settings, the clear subject with a blurred background. monitor shows a warning message [Improper alignment.
-
Page 41: Underwater Mode
Underwater Mode CALS Mode When you are in the water, you can select Records in a size suitable for electronic delivery in Underwater Mode in the Mode Selection Menu to accordance with construction CALS. take pictures under water. CALS Mode (Construction Purposes) Underwater Mode Save... -
Page 42: Basic Operation
BASIC OPERATION Using the Zoom Function Your camera is equipped with two types of Zoom Functions: Optical Zoom and Digital Zoom. Press the Zoom button of the camera to zoom in or out on the subject while taking pictures. Zoom Indicator x1.9 x1.9 1234... -
Page 43: Macro Mode
Macro Mode The Macro Setting is ideal for shooting small objects or close-up photos. This mode allows you to focus on subjects very close to the camera. 1. Press the [ ] button to enter the Macro Menu. acro Off 2. -
Page 44: Self-Timer Setting
Self-timer Setting Use this function to take pictures at pre-set intervals. • Self-timer 10sec The camera shutter speed can be set to 2 seconds, A single picture is shot 10 seconds after 10 seconds or when a smile is detected. the Shutter button is pressed. -
Page 45: Flash Mode
Flash Mode The flash provides supplemental light for scenes. • Fill Flash The flash is usually used when shooting against the The flash will engage with each shot light to highlight the object; it is also suitable for even, supplementing the existing light metering and shooting in darker scenes to improve in a scene and helping to eliminate the exposure. -
Page 46: Ev Setting
EV Setting The EV function menu of the camera includes functions, such as EV (Exposure Value) Adjustment, ISO, Shutter Adjustment, Aperture Adjustment, etc. Using the appropriate function settings can improve your pictures. 1. Press the button to display the Settings screen. 2. -
Page 47: Exposure Compensation
Exposure Compensation Set up to adjust the picture brightness. In the case of a very high contrast between the photographed object and the background, the brightness of the picture can be appropriately adjusted. The adjustable range of exposure value is from EV -3.0 to EV +3.0. ISO allows you to set the sensitivity of the camera sensor. -
Page 48: Using Quick Recording
Using Quick Recording While in the Photo Shooting Mode, press the Movie button to begin recording a video. x1.9 x1.9 00:00:06 00:00:06 Once you are finished, press the Movie button or the Shutter button to stop and store the video. The camera’s Memory Card will store the video and return to the shooting screen. - Page 49 • Options in the shooting mode (✓: Available) Shooting Mode Options Others ✽1 ✓ ✓ ✓ ✓ ✓ ✓ ✓ Macro ✓ ✓ ✓ ✓ ✓ ✓ ✓ ✓ ✓ ✓ Self-timer ✽2 ✓ ✓ ✓ ✓ ✓ ✓ Flash ✓ Aperture ✓ Shutter Speed ✓ ✓...
-
Page 50: Playback
PLAYBACK Overview of the Screen Icons in Playback Mode 1/45 SD SD 00:01:23 15:37 2024 04-01 File Protection Video Quality 11 Playback Type Movies /Animated Record Time 12 Deletion panoramas Memory space (indicating the current number 13 Shooting Date of photos and total number of photos) 14 Image Zone Red-Eye Reduction Memory Card/Built-In Memory... -
Page 51: Switching Screen
Switching Screen Press the [ ] button to switch among 3 screens. Mode: Press the button to display the playback screen, press the [ ] button to switch among 3 screens. 1/45 1/45 SD SD F3.0 F3.0 EV-0.3 EV-0.3 1/60 1/60 ISO100 ISO100... -
Page 52: Viewing Photos And Videos
Viewing Photos and Videos To view captured photos and video clips on the monitor: 1. After pressing the button, the last photo or video clip taken will be displayed on the monitor. 2. Use the [ ] buttons to scroll through the photos or video clips stored on the built-in memory or on the Memory Card in the camera. - Page 53 When in Playback Mode, press the on the Zoom button to display thumbnail images of photos and videos on the screen. W Zoom Out T Zoom In • For Normal Mode 1. Slide the Zoom button to switch between 3 x 3 and 4 x 4 thumbnails. 2.
- Page 54 • For Date Mode 1. Press the button to enter playback screen and press the button to enter Menu screen. 2. Select and press the button to confirm. 3. Press the [ ] buttons to select 4. Slide the Zoom button to switch between 2 x 2 and 4 x 4 thumbnails. 5.
-
Page 55: Using Zoom Playback (For Still Pictures Only)
Using Zoom Playback (for Still Pictures Only) When playing back photos, you can also use the Zoom button to zoom in on the photos, 2 to 8 times their original magnification. 1. Press the [ ] buttons to select the picture on which to use the zoom feature. 2. -
Page 56: Animation Panorama Play
Animation Panorama Play Panoramic Animation Playing is when full size images are played in accordance with the shooting direction. After playing, it will automatically return to the initial panorama screen. 1. Press the button to enter Playback Screen. 2. Press the [ ] buttons to select animated panoramic photos. -
Page 57: Slideshow
Slideshow This setting allows you to view all the stored pictures as a slideshow. 1. Press the button to enter playback screen. 2. Press the button to enter slide option. 3. Press the [ ] buttons to select slideshow playing or [Cancel] to return to the playback screen. Play Slide Show Effect 2 Play Slide Show Effect 1... -
Page 58: Deleting Photos And Videos
Deleting Photos and Videos In Playback Mode, press the [ ] button to select your desired photos and videos. To delete photos or videos: 1. Press the button to switch to Playback Mode. 2. Press the [ ] buttons to select the photos and videos to be deleted. 3. -
Page 59: Using The Menus
USING THE MENUS Shooting Menu Mode: 1. In Shooting Mode, press the button to enter the Shooting Menu. • Scene • Expo Metering • Image Size • Video Quality • Cont. AF • Continuous Shot • Focus Setting • White Balance • Color Effect • Menu Functions that can be enabled are different under each mode. For more details, please refer to P67 of this manual. -
Page 60: Scene
Scene Expo Metering (Exposure Metering) Select a scene under Scene Mode . Use this setting to select the “target” size of the camera’s field of view to be metered. Press OK To Select Scene Portrait Expo Metering: AiAE For more details, please refer to the “Scene Mode" section on P36 of this manual. -
Page 61: Image Size
Image Size The size setting refers to the image resolution in pixels. A higher image resolution allows you to print that image in larger sizes without degrading the photo image quality. 4608×3072(3:2) • 16M 4608×3456 (4:3) • 2048x1536 (4:3) • 14M 4608×3072 (3:2) •... -
Page 62: Video Quality
Video Quality Set the image resolution used during video * The recording limit is 29 minutes at one time. recording. If the recorded video segment/file exceeds 4GB(Use FAT 32 memory card): 1) The camera will automatically generate a new separate file(s) sequentially and will continue recording until the SD memory card Size: 1080p 30fps is full. -
Page 63: Continuous Auto Focus (Cont. Af)
Continuous Auto Focus (Cont. AF) Continuous Shot Use the Continuous AF setting to be able to Use this setting to perform continuous shooting. continuously focus automatically when taking After entering this mode, you can shoot multiple pictures. images by continuously holding the Shutter button down. -
Page 64: Focus Setting
Focus Setting This setting allows you to select different modes for • Time-Lapse 30sec optimum focus. • Time-Lapse 1min • Time-Lapse 5min • Time-Lapse 10min Press the Shutter button to start shooting. Cont. AF:Off Single-AF In Continuous Shot mode, the flash is automatically set to Force Off in order to There are 2 options: achieve quick succession of shots. -
Page 65: White Balance Setting
White Balance Setting The white balance setting allows you to adjust the color temperature for different lighting conditions to ensure the most accurate color reproduction. mode Manual WB Fully press the Shutter button to detect the white balance value. Daylight Color Temp. -
Page 66: Color Effect
Color Effect The Image Color Setting allows you to select different color effects. Normal Mode Normal Sepia Vignetting Vivid Partial Color-Red Salon Japan Style Partial Color-Blue Fish Eye Italian Style Partial Color-Yellow Reflection French Style Partial Color-Green 4 Grids - Stylish (2M) Punk Negative Sketch... -
Page 67: Menu
Menu Activate Continuous Shot ( Mode) Normal Sepia Press OK To Enter Vivid Partial Color-Red Menu Japan Style Partial Color-Blue Italian Style Partial Color-Yellow French Style Partial Color-Green Black and Negative Press the button to enter the menu. White Mode Quality Best Normal... -
Page 68: Video Quality
• Options in the shooting mode ( ✓: Available ) Shooting Mode Menu Others ✓ Scene ✓ ✓ ✓ ✓ ✓ ✓ ✓ ✓ ✓ Expo Metering ✓ ✓ ✓ ✓ ✓ ✓ ✓ ✓ Image Size ✓ Video Quality ✓ ✓ ✓ ✓ ✓ Cont. AF ✓... -
Page 69: Playback Menu
Playback Menu Display Mode Mode: 1. Press the button to display the playback screen and press the button to enter the menu. • Display Mode • HDR (High Dynamic Range) • Red-Eye Reduction • Rotate Date Mode: Arranged by date. • Resize • Color Effect • Menu Normal Mode: Display all images. -
Page 70: Hdr (High Dynamic Range)
HDR (High Dynamic Range) Red-Eye Reduction With the HDR function, pictures that are You can use this setting to reduce the red-eye of the overexposed may be corrected to optimize the picture. highlights and lowlights captured to more accurately represent the actual scene. Cancel Red-Eye Reduction Cancel... -
Page 71: Rotate
Rotate You can use this setting to change the orientation of the picture. Cancel Turn Right Turn Left Cancel Videos and panoramic pictures cannot be rotated. The rotated picture file will replace the original photo. -
Page 72: Resize
Resize This setting allows you to resize a picture to a particular resolution and saves it as a new picture. Resize to 1024x768 Resize to 1024x768 Resize to 1024x680 Resize to 1024x576 Resize to 640x480 Resize to 640x424 Resize to 640x360 Cancel This function can only be used to downsize photos to a lower resolution. -
Page 73: Color Effect
Color Effect This setting allows you to change the picture color effect. The file is saved as a new photo and stored in memory together with the original photo. Cancel There are 19 options available: Cancel Punk Partial Color-Yellow Salon Vivid Black and White Partial Color-Green... -
Page 74: Using The Menus Button
USING THE MENUS BUTTON Mode: In each mode, press the button, press the [ ] buttons to select and then press the button to enter the menu. Press OK To Enter Menu Press the [ ] buttons to select the item to be set and then press the ] button to enter the menu. -
Page 75: Shoot Settings
Shoot Settings Quality 1. Press the ] button to enter the menu. The quality setting can be used to adjust the image compression ratio. Quality Best AF Assist Beam Quality Best Digital Zoom Fine Date Imprint Normal Quick Review Functions that can be enabled are different under each mode. -
Page 76: Af Assist Beam
AF Assist Beam Digital Zoom In a darker environment, the AF assist beam setting This setting is for adjusting digital zoom. If this can be turned on for better focus. function is disabled, only optical zoom can be used. AF Assist Beam Digital Zoom When AF assist beam is turned on, press the Shutter button halfway and the camera will... -
Page 77: Quick Review
Date Imprint Quick Review Include a Date/Time stamp on the photo image. This option allows quick review of the photos immediately after they are taken. Each photo is displayed on the monitor based on the selected time. Date Date/Time Date Imprint 1 sec 2 sec 3 sec... -
Page 78: Face Detection
Face Detection 2. Press the Shutter button half-way down to focus. Detects and focuses on faces to make all faces as The LCD will show a green focus frame when the clear as possible in Photo Mode. subject is in focus. Face Detection F3.0 F3.0... -
Page 79: Playback Settings
Playback Settings Protect 1. Press the ] button to enter the menu. To prevent any pictures or videos from being accidentally erased, use this setting to lock one or all of the files. Protect Delete Trim Protect Date folder Reset 2. -
Page 80: Delete
Delete You can delete one or all photo/video files. Delete Date folder • One: Delete one photo or video. • Date Folder: Delete all photos in the Date Folder. • All: Delete all photos or videos. indicator means a file is protected. File protection must be removed before a file can be deleted. -
Page 81: Trim
Trim The Trim setting allows you to crop photos and save them as new pictures. 1. Select [Yes] to confirm trim. Select a section of the photo to be trimmed using the Zoom button and ] buttons to trim a photo. 2. -
Page 82: General Settings
General Settings Sound Settings 1. Press the ] button to enter the menu. With this setting you may adjust the sound volume. Sound Settings Sound Settings Power Saver Auto Language English Volume World Time Home Date & Time 2024.01.01 00:00 Back 2. -
Page 83: World Time
Power Saver World Time This setting allows you to save power and get the The World Time setting is a useful function for your maximum possible running time for your camera’s overseas trips. This feature enables you to display battery. Follow the steps below to turn the monitor the local time on the monitor while you are abroad. -
Page 84: Lcd Brightness
LCD Brightness Folder Name Use this setting to adjust the brightness of your Select the saved folder name for the picture taken monitor. by the camera. ***PENTX LCD Brightness Normal ***_MMDD Folder Name ***_DDMM Normal End screen Setting and adjusting your camera’s LCD Displays the end screen. -
Page 85: Connection Settings
Connection Settings Press the ] button to enter the menu. 1. Make sure both the camera and computer are turned on. 2. Connect one end of the supplied USB cable to the USB terminal on your camera. 3. Connect the other end of the cable to an available USB terminal on your computer. -
Page 86: Viewing Images On Computer
Viewing Images on Computer Display transferred images on a standard image viewer etc. that an OS has. For details about viewing images, see the help menu on the viewer. Supported OS==>Windows: Windows® 11 / Windows® 10 / Windows® 8.1 Macintosh: Mac OS X 10.15, OS X 11 / 12 / 13 / 14 If a memory card is inserted in the product, only files in the memory card will be read. -
Page 87: File Settings
File Settings 1. Press the ] button to enter the menu. Format Please Note: formatting enables you to delete all contents on the memory card and camera’s built-in memory, including protected photo and movie files. Format Copy to Card Format File Numbering Doing so will clear all data. -
Page 88: Copy To Card
Copy to Card File Numbering Use this setting to copy the files stored in the After you take a picture or video clip, the camera will camera’s built-in memory to a memory card. automatically save it with a sequential number. You can use this to reset the file numbering to 1. -
Page 89: Reset
Reset FW Version Use this setting to restore the camera to its original Use this setting to view the current camera firmware factory default settings. version. FW Version Reset Current Ver: V1.00 Reset camera settings to factory defaults. Back When there is a new firmware version saved on the SD card, select [Yes] to update. -
Page 90: Appendices
APPENDICES Specifications Design and specifications are subject to change without notice. Type 1/2.3" BSI CMOS Image Effective Pixels 16.35 Megapixels Sensor Total Pixels 16.76 Megapixels Focal Length 4.9mm (Wide) — 19.6mm (Tele) 35mm Film 27mm (Wide) — 108mm (Tele) Equivalent F Number F3.0 (Wide) —... - Page 91 (4:3) (3:2) (16:9) 16MP: 4608 x 3456 14MP: 4608 × 3072 12MP: 4608 x 2592 10MP: 3648 x 2736 2MP: 1920 x 1080 5MP: 2592 x 1944 Still Image Number of 3MP: 2048 x 1536 Recording 2MP: 1600 x 1200 Pixels 1MP: 1280 x 960 0.3MP: 640 x 480...
- Page 92 Shockproof Up to 2m Dustproof Equivalent to JIS/IEC (IP6X) Red-Eye Removal Yes (Post-Processing) Panorama Up to 360° Monitor Display 2.7 inch (230k Pixels) ISO Sensitivity Auto, ISO 100/200/400/800/1600/3200 AF Method Single-AF, Multi-AF (TTL 25-point), Face Detection Exposure Metering Method AiAE, Spot, Center, Face AE Exposure Control Method Program AE (AE-Lock Available) Exposure Compensation...
- Page 93 Flash Method Internal Flash Force Off, Flash Auto, Fill Flash, Slow Sync., Flash Modes Slow Sync.+Red-Eye Reduction, Red-Eye Reduction Internal Memory: Approx. 29MB Recording Media SD/SDHC/SDXC Card (Up to 512GB Support) Multi-Language Support 26 Languages Jacks USB2.0 TypeC, Micro HDMI (Type D) Power Rechargeable lithium-ion battery D-LI96, 3.7v 890mAh Number of shots: Approx.
- Page 94 USB power adapter D-PA180 Power Supply 100 to 240V AC(50/60 Hz), 0.2A Output 5.0V DC, 1.0A, 5.0W Average Active Efficiency No-Load Power Consumption 35mW Operating Temperature 0 to 40 °C * Storage Temperature -20 to 60 °C 34.5 mm (W) × 47 mm (H) × 26.5 mm (D) (1.4 in. (W) × 1.9 in. (H) ×1.1 in. (D) Dimensions (excluding the power plug) Weight...
-
Page 95: Prompts And Warning Messages
Prompts and Warning Messages Message Description Action The camera battery is depleted. It is a Charge battery or replace with a Warning! Battery warning indicating that the camera is going charged battery. The camera will exhausted. to shut off. shut down in 2 seconds. The lens is jammed or some foreign object Lens obstruction, Re- Turn the camera off and restart it... - Page 96 Message Description Action Warning! Do not turn The message appears during the The message disappears after the camera off your camera during firmware update process. update and restart. update! Remove USB cable, reinsert cable, and retry Failure to connect to your PC, TV. Connection Failed! connection.
- Page 97 Message Description Action Format the memory card. WARNING: Formatting the memory card will erase all When an error occurs in the data on the card. Copy the data from the Card is not formatted. memory card, the message "Not memory card to another storage, such Formatted"...
- Page 98 Message Description Action This image cannot be The file format does not support editing The message will disappear after 2 edited. or the edited file cannot be edited again. seconds. During the playback by date, the images The message disappears after 2 seconds Too many pictures for exceed specifications so that it is not and the camera returns to normal...
-
Page 99: Troubleshooting
Troubleshooting Problem Possible causes Solution The battery has been depleted. Replace the battery. Camera does not turn on The battery is not inserted correctly. Correctly reinstall the battery. Replace the battery. Charge the battery. Make sure the camera is actually Camera turns off shutting off and not entering suddenly during... - Page 100 Problem Possible causes Solution Use a memory card with Saving data to Using a memory card below Class 4 may Class 6 or higher to improve memory card is slow result in slower recording times. performance. The number of pictures or folders in the Too many movies to memory card exceed the specifications, Delete unwanted files.
-
Page 101: Trademark Information
Trademark Information SDXC logo is a trademark of SD-3C, LLC. HDMI, the HDMI logo, and High-Definition Multimedia Interface are trademarks or registered trademarks of HDMI Licensing, LLC in the United States and/or other countries. Microsoft, Windows and Windows Vista are registered trademarks of Microsoft Corporation in the United States of America and other countries. -
Page 102: Lzf Lib Open Source
LZF Lib Open Source Copyright (c) 2000-2008 Marc Alexander Lehmann <schmorp@schmorp.de> Redistribution and use in source and binary forms, with or without modification, are permitted provided that the following conditions are met: 1. Redistributions of source code must retain the above copyright notice, this list of conditions and the following disclaimer. -
Page 103: Warranty Policy
Warranty Policy ■ All our cameras purchased through authorized bona fide photographic distribution channels are guaranteed against defects of material or workmanship for a period of twelve months from the date of your purchase. Service will be rendered, and defective parts will be replaced without cost to you within that period, provided the camera does not show evidence of impact, sand or liquid damage, mishandling, tampering, battery or chemical corrosion, operation contrary to operating instructions, or modification by an unauthorized repair shop. - Page 104 To prove the date of your purchase when required, please keep the receipt or bills covering the purchase of your camera for at least a year. Before sending your camera for servicing, please make sure that you are sending it to the manufacturer’s authorized representatives or their approved repair shops, unless you are sending it directly to the manufacturer.
- Page 105 RICOH IMAGING COMPANY, LTD. 1-3-6, Nakamagome, Ohta-ku, Tokyo 143-8555, JAPAN (https://www.ricoh-imaging.co.jp) RICOH IMAGING EUROPE S.A.S. 7-9, avenue Robert Schuman, 94150 RUNGIS, FRANCE (https://www.ricoh-imaging.eu) RICOH IMAGING 2 Gatehall Drive Suite 204, Parsippany, New Jersey 07054, U.S.A. AMERICAS CORPORATION (https://www.us.ricoh-imaging.com) 5560 Explorer Drive Suite 100, Mississauga, Ontario, RICOH IMAGING CANADA INC.
Need help?
Do you have a question about the WG-1000 and is the answer not in the manual?
Questions and answers