Table of Contents
Troubleshooting

Subscribe to Our Youtube Channel
Related Manuals for Glunz & Jensen Chemfree Plate Processor 85

Summary of Contents for Glunz & Jensen Chemfree Plate Processor 85
- Page 1 Service Manual Plate Processor 85 Chemfree IMPORTANT Please keep this manual with other equipment documentation for future reference. June 14th, 2024 Edition BA, Part No 10062571 English (en-us) Original version...
-
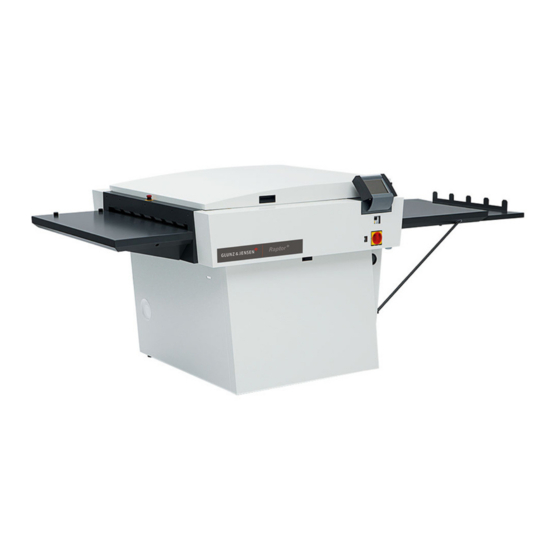
Page 2: Gum
( Blank ) Service Manual Plate Processor 85 June, 2024... -
Page 3: About This Manual
About this manual About this manual This manual applies to the Plate Processor Plate Processor 85. The manual is for Service Technicians only and the instructions given must not be followed by unauthorized personnel. Always read the separate Safety Instruction Manual part No 21741 before installing, servicing, or operating the equipment. -
Page 4: Table Of Contents
Table of Contents Table of Contents About this manual Table of Contents General information Reservations Notes, Cautions and Warnings! Other manuals The equipment Approvals Unintended use of the equipment Intended use of the equipment Installation Technical data Chemicals 'End of lifetime' disposal Service assistance Technical specifications General environmental information... - Page 5 Table of Contents Offline processor Online processor Customer training hours Site preparation Free space around the equipment Main power outlet Cleaning facilities Drains for waste chemicals Environmental requirements Heating and ventilation Unpacking the equipment Checking the crate for damage Installation kit Required width of passage and doorways Transport security items Lifting...
- Page 6 Table of Contents Functional description Sections Preheat Gum 1 Gum 2 Dryer Transport system Electronic control Maintenance Safety check Fuses Adjusting brushes Replacement of bearing bushing Cleaning Cleaning accessories Cleaning agents Cleaning of heating element Filter cleaning Cleaning pumps Cleaning of circulation pump Cleaning of replenish pump Troubleshooting Before starting troubleshooting...
-
Page 7: General Information
General information General information Reservations • This manual was written and illustrated using the best possible information available at the time of publication. • Any differences between this manual and the equipment reflect improvements introduced after the publication of the manual. •... -
Page 8: Unintended Use Of The Equipment
General information Unintended use of the equipment Glunz & Jensen does not take any responsibility for any damage or accidents caused by unintended use of the equipment. The equipment is certified by accredited test laboratory (UL International Demko A/S). It is absolutely prohibited to make any modifications, electrical or mechanical, of the equipment. -
Page 9: Service Assistance
General information Service assistance If help is needed to correct any problem with the equipment, please contact your local supplier. June, 2024 Service Manual|Plate Processor 85... - Page 10 Service Manual Plate Processor 85 June, 2024...
-
Page 11: Technical Specifications
Technical specifications Technical specifications General environmental information The equipment does not contain • Ozone depleting substances according to Montreal protocol • Asbestos • Polychlorinated biphenyl or Poly- Cyclohexylenedimethylene Terephthalate • Mercury • Cadmium • Lead as additive to plastic parts The equipment complies with the RoHS directive (2011/65/EU). -
Page 12: Noise Emission
Technical specifications Noise emission Acoustic noise according to ISO 11201:1996 Decsription Operation mode < 60.5 dB Stand-by mode < 60.5 dB Chemical emission Ozone: 0 mg/m³ mg/m Dust: 0 mg/m³ mg/m Styrene: 0 mg/m³ mg/m Service Manual Plate Processor 85 June, 2024... -
Page 13: Mechanical Specifications
Technical specifications Mechanical specifications Dimensions June, 2024 Service Manual|Plate Processor 85... -
Page 14: Performance
Technical specifications Performance Plate Processor Plate types Violet chemfree plates Plate width, min. – max. 200 - 850 mm (7.9" - 33.5") Plate length, min. – max. 290 - 3000 mm (11.4 - 118.1") Plate thickness, min. – max. 0.15 - 0.30 mm (0.006 - 0.012") Plate speed, min. -
Page 15: Electrical Specifications
Technical specifications Electrical specifications Power supply requirements CAUTION: The requirements below are specifications for preparing the installation protection. The fuses/circuit breakers must be prepared according to local regulations, and with adequate capacity as specified here. The circuit breakers must be suitable for inventor operation. NOTE: Specifications on the equipment's name plate is the actual input current and will thus not be identical to below mentioned. - Page 16 Service Manual Plate Processor 85 June, 2024...
-
Page 17: Installation
Installation Installation Installation hours Working hours planned for the installation: Offline processor • Unpacking and transportation from pallet to the installation site: 2 - 3 hours. • If the processor need to be disassembled to get through narrow doorways etc. and thus reassembled before the actual installation, add another: 4 - 5 hours. -
Page 18: Site Preparation
Installation Site preparation The customer is responsible for all building modifications and alterations necessary to install the equipment on the desired location. Free space around the equipment Decide for a proper installation site for the equipment and make sure that the free space around the equipment makes servicing possible. -
Page 19: Main Power Outlet
Installation Main power outlet Provide an mains power-outlet with an electrical plug lockout close to the installation site. The table showing "Power supply requirements" on page 15 indicates the applicable power supply types. Cleaning facilities It is essential to have easy access to a sink and a water tap with hot water where rollers, guides, and brushes can be washed. -
Page 20: Unpacking The Equipment
Installation Unpacking the equipment Checking the crate for damage Upon receipt of the machinery, check if the crate is damaged on delivery at the customer's address. Make notes of any damages, before opening the crate. Provide a detailed description and take a photograph of the damage. -
Page 21: Required Width Of Passage And Doorways
Installation Required width of passage and doorways Depending on the width of the passage- and doorways through which the equipment has to be transported to the installation site, the service technician may have to perform the actions described in the table below: If width of Then ... -
Page 22: Lifting
Installation Lifting Four persons are needed for lifting the processor down from the pallet. NOTE: Rollers are placed under the processor in separate boxes due to transport security reasons. The boxes need to be removed from the pallet before lifting up the processor from the pallet. -
Page 23: Mechanical Installation
Installation Mechanical installation Rollers installation Before installing rollers and covers, first vacuum clean the tank sections to remove sponge rubber remains and dust etc. There is a label showing the roller configuration (a) on the top cover from the inner side. Each brush or roller is marked with a small number (b). -
Page 24: Leveling
Installation Leveling NOTE: If you are installing a processor to be used for online processing, please refer to the separate “INTERFACE MANUAL” for additional details about specific processor height. CAUTION: The unit must be placed on a steady surface, so that it does not shake easily. Do not rely on the floor being absolutely in level. -
Page 25: Interlock Switches Actuators
Installation Interlock switches actuators WARNING: The actuators must be installed as described below to prevent personal injury. Loosen the screws (1) and adjust the actuator (2) until it fits smoothly into the interlock switch (3). If it is necessary, loosen also the screws (4) and adjust interlock switch (3) too. June, 2024 Service Manual|Plate Processor 85... -
Page 26: Filling Up
Installation Filling up Fit the containers to the right tubes with equivalent labels and close below illustrated valves. Make sure that the drain stand pipe is closed. Service Manual Plate Processor 85 June, 2024... -
Page 27: Feed Table Installation
Installation Feed table installation Mounting of the feed table is described in the manual for the feed table kit. Exit table installation CAUTION: The exit table is mounted from the factory and prepared for slanted position (A) but can be mounted for slanted position (B) too. Follow the description of mounting the supports for position A or position B below. - Page 28 Installation Service Manual Plate Processor 85 June, 2024...
-
Page 29: Electrical Installation
Installation Electrical installation WARNING: The equipment is Class 1 equipment. Therefore, the equipment must be connected to earth to avoid electrical shocks. It is recommended to use a lockout type power switch for the electrical connection. WARNING: Electrical installation, all cabling and cabling connections, fusing and isolation must conform to local and/or national regulations and guidelines. -
Page 30: Cooler Installation
Installation Cooler installation CAUTION: Do not place the cooler underneath the processor. • Place the cooler (a) behind the processor. • Lead the hoses from the cooler unit through the hole for hoses (b) in the rear panel. • Connect the cooler hoses (c) and (d) to the in- and outlets to the left underneath the tank. •... -
Page 31: Connections
Installation Connections Stacker connection Not all models (accessory equipment). Cable for connection to a stacker is placed underneath the dryer section. Unpack the cable and connect it to the stacker (see also the stacker manual). WARNING: As the stacker will get power supply from the unit make sure that stackers power consumption does not exceed 250 W. -
Page 32: Finishing Installation
Installation Finishing installation Setter interface installation See the setter interface manual. When installation of the setter interface is complete, please return to this manual for finishing the entire installation by continuing with the following instructions. Software service settings The processor is configured from the factory. If however any extra features like level sensors for replenish containers etc. -
Page 33: Configuration And Settings
Installation Value Default Recommended Plate sizes (length/width) 650/550 mm Actual plate size Cleaning time 10 min 10 min Developer stand by antioxidation 0 ml 0 ml Developer off antioxidation 0 ml 0 ml Manual replenish amount 100 ml 250 ml Configuration and settings A few adjustments of user program parameters are also needed before the installation is finished. -
Page 34: Safety Check
Installation Safety check WARNING: Safety check must be performed after installation. Safety check should be performed at least once a year. Access level Set control panel access level to “User”. Please refer to the Software Service Manual for a detailed description on access levels. -
Page 35: Functional Description
Functional description Functional description Sections The processor contains four major sections, each performing a basic function to change the exposed plate into a fully developed and dry plate, ready for handling (see illustration below). Preheat Hardening of the emulsion of the exposed plate by circulation of hot air. Processing of the plate and removing of the remaining unexposed/- exposed Gum 1 emulsion. -
Page 36: Preheat
Functional description Preheat Service Manual Plate Processor 85 June, 2024... -
Page 37: Gum 1
Functional description Gum 1 June, 2024 Service Manual|Plate Processor 85... -
Page 38: Dryer
Functional description Gum 2 Dryer Service Manual Plate Processor 85 June, 2024... -
Page 39: Transport System
Functional description Transport system The plate is transported through the processor by a series of rollers and roller guides. The rollers are driven by a drive motor and a worm gear drive system. The preheat section rollers (H1) transport the plate through the preheat section. The rubber rollers (D1) at the gum 1section entrance always run dry to ensure a homogeneous development. -
Page 40: Electronic Control
Functional description Electronic control Master input/output unit (MIO) The electrical control system is controlled by the MIO board via the SOM (System on Module). There are two separate communication lines (buses): • GNUIB for all internal communication in the equipment (RS485). •... - Page 41 Functional description June, 2024 Service Manual|Plate Processor 85...
- Page 42 Service Manual Plate Processor 85 June, 2024...
-
Page 43: Maintenance
Maintenance Maintenance WARNING: Please note that where this label appears on the processor electrical shock hazard still exists when main switch is turned off. WARNING: When performing any service, maintenance, calibration, or troubleshooting etc. it may be necessary to override the function of the processor’s interlock switches. In these cases please be aware that the processor’s jog function may still be active making the drive system run idle at intervals. -
Page 44: Safety Check
Maintenance Safety check WARNING: Safety check must be performed after installation. Safety check should be performed at least once a year. Electrical Refer to the electrical diagrams. • Check proper function of: Interlock switches. Processor must stop if certain cover is open. Emergency switches. - Page 45 Maintenance PCB fuses Fuse Fuse for Type/part no. 12AT, 6.3 × 32 mm F1 & F2 & F3 Main power supply 5527 2AT, 6.3 × 32 mm Stacker connection 6716 PCB PCU fuses Fuse Fuse for Type/part no. 1AT, 5 mm round Gum circulation pump K4 10011284 1AT, 5 mm round...
-
Page 46: Adjusting Brushes
Maintenance Adjusting brushes The following describes a standard adjustment for the brushes in the gum 1 section. The brush adjustment can vary from one processor to another since it must apply to the specific plate and solution type etc. Tools 5 mm hex T-key test plate 100 ×... - Page 47 Maintenance June, 2024 Service Manual|Plate Processor 85...
-
Page 48: Replacement Of Bearing Bushing
Maintenance Replacement of bearing bushing • Remove the spring (1) from the roller bearing (2) using screwdriver. • Replace the bearing bushing (3). • Compress the spring (1) and insert it back into the roller bearing (2). Service Manual Plate Processor 85 June, 2024... -
Page 49: Cleaning
Maintenance Cleaning Important! Thorough cleaning of the unit tank interior, tank parts, pumps, filters etc. on a regular basis will minimize the risk of sediment build-up in and around vital parts of the equipment and prolong the lifetime of the equipment. Cleaning accessories CAUTION: Never use any hard tools or abrasive materials when cleaning any part of the equipment... -
Page 50: Cleaning Of Heating Element
Maintenance Cleaning of heating element WARNING: Keeping the heating element and it's surroundings clean, eliminates the risk of sediment build-up underneath the heating element, and eliminates the risk of heating damages of the tank. When cleaning the tank, make sure to wash off all residues around the heating element. Use plenty of water, a soft brush and a soft cloth to clean the gab between the heating element and the tank bottom. -
Page 51: Filter Cleaning
Maintenance Filter cleaning Change or clean the filter regularly as described below: • Close the valve (1). • Open the drain valve (2) to empty the filter vessel (4) of finisher solution. • Loosen the filter vessel (4) by means of the filter key (3) and unscrew the vessel. •... - Page 52 Maintenance Small filter cleaning • Open the drain valve (2) to empty the filter vessel (3) of finisher solution. • Unscrew the filter vessel. • Take out the filter insert (7) and clean or replace it. Reinstall the filter insert. Remount the filter vessel (3) and make sure the o-ring (5) fits properly into the groove in the upper filter housing (8).
-
Page 53: Cleaning Pumps
Maintenance Cleaning pumps Cleaning of circulation pump • Cut off the power to the equipment and empty the tank. • Dismount the hoses from the pump. Be careful not to spill the chemicals on the floor. • Note the position of the outlet nozzle (5). •... -
Page 54: Cleaning Of Replenish Pump
Maintenance Cleaning of replenish pump If the pump ceases to function properly, run it with some warm water in order to remove the chemicals. If this does not help, take the pump apart and clean the small valves with hot water. Reinstall the valves and make sure they are placed correctly to allow free unobstructed flow. -
Page 55: Troubleshooting
Troubleshooting Troubleshooting If the processor does not work properly, refer to the following pages to find the paragraph that comes closest to your problem. The troubleshooting guide is divided into 2 sections: Problems with processor Problems with processed material For information about alarms press ->... -
Page 56: Before Starting Troubleshooting
Troubleshooting Before starting troubleshooting Check S2 switch on PCU board There is a switch S2 for PCU settings on the PCU board. The setting related to this variant of processor should be as illustrated below: CAUTION: Make sure that all the four positions are off for this variant of the processor. Service Manual Plate Processor 85 June, 2024... - Page 57 Troubleshooting Check LED signals on PCU board LED diodes are situated on PCU board. The status of LED diodes on the PCU-board should be related to this variant of the processor as shown below: GREEN YELLOW GREEN Condition LED D88 LED D3 LED D2 LED D1...
- Page 58 Troubleshooting Check LED signals on MIO board GREEN Condition LED D16 LED D17 Normal condition at power off. If OFF for >1 minute, then CPU power supply missing or malfunction SoM/MIO: • Measure power supply to MIO. • Remove all cables from electronics cabinet (except power and emergency switch) and try again.
- Page 59 Troubleshooting GREEN Condition LED D16 LED D17 (For software from xxx-20111201.) Status during 60-90 seconds after power up: • Software started. Please see display for status. • If green LED does not toggle during first 60-90 seconds from power up then please read note in the row above. June, 2024 Service Manual|Plate Processor 85...
- Page 60 Troubleshooting Check LED signals on SoM board GREEN YELLOW GREEN GREEN Condition LED D13 LED D3 LED D2 LED D1 Power is off or missing. Glows 0-1 second after power up. D13 glows very fussy almost invisibly. very fussy 1 flash 1 flash 1 flash Glows 1-2 seconds after power up.
-
Page 61: Problems With Processor
Troubleshooting Problems with processor Symptom Probable cause Remedy No function active. • Fuse(s) blown. • Replace fuse(s). • Main switch turned off or • Connect cable to main power cable not connected power outlet and/or turn to main power outlet. main switch on. - Page 62 Troubleshooting Symptom Probable cause Remedy Dryer blower works, heater • Fuse(s) blown. • Replace fuse(s). does not. • Temperature sensor • Replace temperature defective. sensor. • Heating element defective. • Replace heating element. • Electronics defective. • Replace defective electronics. Dryer blower does not work.
-
Page 63: Problems With Processed Material
Troubleshooting Symptom Probable cause Remedy Buffer system does not work • Buffer parameters settings • Make correct settings. although the unit is in process not correct. mode. • Plate sizes not correct. • Check plate table for actual plate sizes. •... - Page 64 Troubleshooting Symptom Probable cause Remedy Plate has stripes lengthwise or • Defective or dirty rollers or • Take rollers and/or guides crosswise. guides. out, inspect and wash them. Rollers with dents or other marks must be changed. • Brush(es) misadjusted. •...
- Page 65 Appendix A Appendix A June, 2024 Service Manual|Plate Processor 85...
- Page 66 Appendix A Service Manual Plate Processor 85 June, 2024...
- Page 67 Appendix A June, 2024 Service Manual|Plate Processor 85...
Need help?
Do you have a question about the Chemfree Plate Processor 85 and is the answer not in the manual?
Questions and answers