
Subscribe to Our Youtube Channel
Related Manuals for FALMEC Elements Shelf

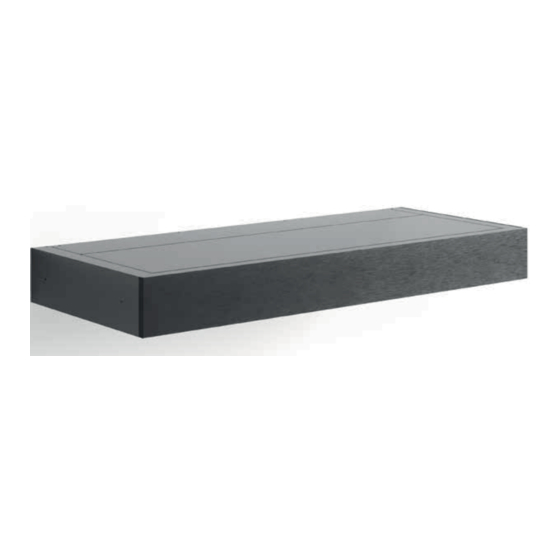
Summary of Contents for FALMEC Elements Shelf
- Page 1 Elements Shelf Moduli accessori/Accessory modules INSTRUCTIONS BOOKLET LIBRETTO ISTRUZIONI INSTRUCTIONS BOOKLET...
- Page 2 602 / 902 599 / 899 Staffa fissaggio parete / Wall fixing bracket 270 / 420 270 / 420 * Dimensione mensola * Shelf dimensions 602 / 902* Versione pannellabile: dimensone pannello / Version supporting panels: panel dimensions - Considerare lo spessore dei tamponamenti laterali nella realizzazione del pannello EN - Consider the thickness of the side infills when making the panel 599 (602*) / 899 (902*)
- Page 3 IT - Prima dell’installazione dei moduli acces- sori installare e regolare correttamente la cappa. EN - Before installing the accessory modules, install and correctly adjust the hood lieren, müssen Sie die Abzugshaube installieren und richtig einstellen IT - Togliere le viti indicate. Estrarre la barra di montaggio (1).
- Page 4 IT - Togliere il coperchio (3). EN - Remove the cover (3). Versione con pannello frontale in dotazione Version with front panel supplied IT - Montare le spine per l’accoppiamento con la cappa EN - Assemble the plugs to couple with the hood IT - Posizionare il modulo accessorio nella barra di montaggio.
- Page 5 IT - Collegamento cavi luci LED (5). Regolare l’inclinazione del modulo agendo sulle viti di regolazione, con un cacciavite a bussolaa (6). Montare le due viti superiori del coperchio (7). EN - LED light cables connection (5). Adjust the module tilt by turning the adjusting screws with a socket screwdriver (6).
- Page 6 IT - Fissare la mensola alla cappa, in base al lato di accoppiamento (8). Montare il coperchio (9). Montare i tamponamenti laterali (10). EN - Secure the shelf to the hood, based on the coupling side (8). Mount the cover (9). Install the side infills (10).
- Page 7 IT - Versione pannellabile EN - Version supporting panels IT - Inserimento dell’accessorio “Vasca per modulo” EN - Inserting the 'Module basin' accessory...
- Page 8 IT - Installazione del modulo accessorio in abbinamento alla cappa in versione aspirante EN - Installation of the accessory module in combination with the extractor hood IT - Montare i profili per cartongesso regolabi- li. Procedere all’installazione del modulo acces- sorio.
-
Page 9: Istruzioni Di Sicurezzae Avvertenze
inoltre conforme alle normative Europee sull’an- ISTRUZIONI DI SICUREZZA tidisturbo radio. E AVVERTENZE Prima di installare la mensola verificare che la tensio- Il lavoro d’installazione deve essere esegui- ne di rete corrisponda a quella riportata dalla targhet- to da installatori competenti e qualificati, ta posta all’interno della mensola. -
Page 10: Manutenzione
Se la pulizia non è condotta secondo le modalità e i lizzo delle salviette "Magic Steel" che si possono anche ordinare on-line sul sito www.e-falmec.com. prodotti indicati nel presente libretto è possibile un In alternativa e per tutti gli altri tipi di superfici, la pulizia va eseguita usando rischio di incendio. - Page 11 SMALTIMENTO A FINE VITA Il simbolo del cestino barrato riportato sull’apparecchiatura in suo pos- sesso indica che il prodotto è un RAEE, cioè un “Rifiuto derivante dalle Apparecchiature Elettriche ed Elettroniche” e pertanto non deve essere gettato nella spazzatura indifferenziata (cioè insieme ai “rifiuti urbani misti”), ma deve essere gestito separatamente così...
-
Page 12: Safety Instructions And Warnings
SAFETY INSTRUCTIONS comply with European standards regarding radio AND WARNINGS antistatic properties. Installation operations are to be carried Before installing the shelf, check that the electrical out by skilled and qualified installers in ac- mains power supply corresponds with what is report- cordance with the instructions in this book- ed on the identification plate located inside the shelf. -
Page 13: Installation
The maximum overall weight of any objects placed MAINTENANCE or hung (if applicable) on the shelf must not exceed Before cleaning or carrying out maintenance operations, discon- 5 Kg. nect the equipment by removing the plug or switching off the main switch. - Page 14 Falmec S.p.A via dell’Artigianato, 42 z.i. 31029 Vittorio Veneto Treviso — Italy info@falmec.com falmec.com Codice / Code Matricola / Serial Number...
Need help?
Do you have a question about the Elements Shelf and is the answer not in the manual?
Questions and answers