Advertisement
Quick Links
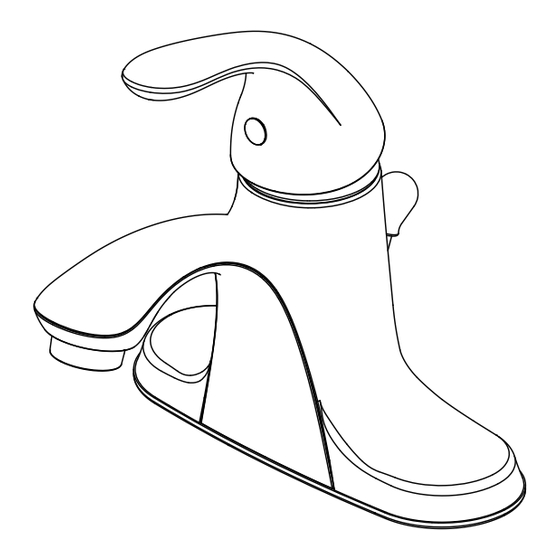
Anchor Point™ Single Handle Bath Faucet,
With Quick Install Pop Up, Brushed Nickel, 1.2 GPM
Mezcladora Anchor Point™ para baño, de un solo maneral,
con sistema emergente de instalación rápida,
níquel cepillado, 1.2 GPM
NSF/ANSI/CAN 61: Q ≤ 1
Exclusively Distributed By:
HD Supply
Atlanta, GA 30339
© 2022
1
Part #: 211815
USN #: 320467924
Mfg #: 67356W-8004
To Reorder:
1-800-431-3000
hdsupplysolutions.com
Advertisement

Related Manuals for SeasonsComfort Anchor Point 211815


Summary of Contents for SeasonsComfort Anchor Point 211815
- Page 1 Part #: 211815 USN #: 320467924 Mfg #: 67356W-8004 Anchor Point™ Single Handle Bath Faucet, With Quick Install Pop Up, Brushed Nickel, 1.2 GPM Mezcladora Anchor Point™ para baño, de un solo maneral, con sistema emergente de instalación rápida, níquel cepillado, 1.2 GPM NSF/ANSI/CAN 61: Q ≤...
-
Page 2: Preparation / Preparación
Preparation / Preparación Before beginning the assembly of this product, make sure all parts are present. Compare parts with the package contents list. If any part is missing or damaged, do not attempt to assemble the product. Contact customer service for replacement parts. Antes de comenzar el ensamblaje del producto, asegúrese de tener todas las piezas. - Page 3 Assembly Instructions / Instrucciones de Ensamblaje Shut off water supply at angle stop. Remove old faucet. Clean sink Place the faucet (A) through the mounting holes in the sink. Secure surface in preparation for new faucet. Before installing the new the faucet (A) to the sink using the mounting nuts (C) provided.
- Page 4 Assembly Instructions / Instrucciones de Ensamblaje Insert 2 Insert 3 Folleto 2 Folleto 3 Installing the stopper and horizontal rod: Installing the lift rod: Before installation, unscrew the protective cap (1) from the horizontal Slide the lift rod (O) down into the lift rod strap (M) through the faucet rod (L).
- Page 5 Assembly Instructions / Instrucciones De Ensamblaje Flushing and checking for leaks: Making the water supply connections: Important: After installation is completed, remove aerator. Turn on Use 1/2 in. I.P.S. faucet connections (2), or use supply line coupling nuts (3) (not included) with a 3/8 in. O.D. ball-nose riser (1). Do not water supply and allow both hot and cold water to run for at least one overtighten.
- Page 6 Troubleshooting / Solución de Problemas If you've followed the instructions carefully and your faucet still does not work properly, take these corrective steps. Si usted ha seguido las instrucciones cuidadosamente y su grifo todavía no funciona correctamente, sigue estos pasos correctivos. Problem Cause Action...
Need help?
Do you have a question about the Anchor Point 211815 and is the answer not in the manual?
Questions and answers