Table of Contents
Advertisement
REGISTER YOUR PRODUCT ONLINE AT:
Broan-NuTone.com/en-us/product-registration-form
For additional information, videos and more, scan this QR code.
Broan-NuTone LLC, 926 West State Street, Hartford, Wisconsin, USA 53027 Broan-NuTone.com 800-558-1711
USER AND INSTALLER MANUAL
RESIDENTIAL USE ONLY
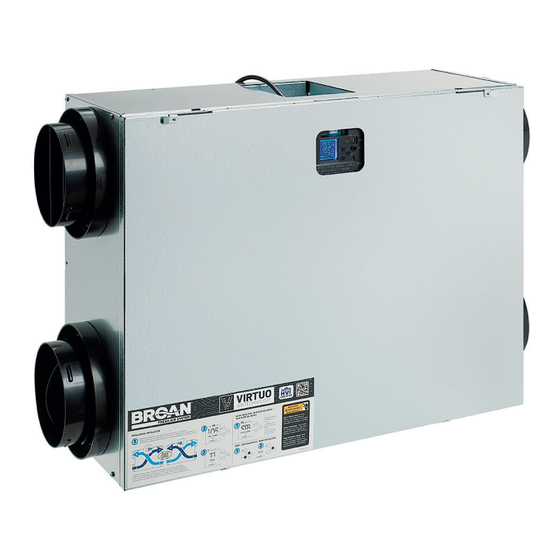
BLP150E75NS-HW
BLP150E75NS-PC
FAULT INDICATOR DISPLAY REQUIREMENTS
1112312WEB
. A
rEv
Advertisement
Table of Contents
Troubleshooting

Related Manuals for Broan BLP150E75NS-HW


Summary of Contents for Broan BLP150E75NS-HW
- Page 1 USER AND INSTALLER MANUAL BLP150E75NS-HW BLP150E75NS-PC FAULT INDICATOR DISPLAY REQUIREMENTS REGISTER YOUR PRODUCT ONLINE AT: Broan-NuTone.com/en-us/product-registration-form RESIDENTIAL USE ONLY For additional information, videos and more, scan this QR code. 1112312WEB Broan-NuTone LLC, 926 West State Street, Hartford, Wisconsin, USA 53027 Broan-NuTone.com 800-558-1711...
- Page 2 Please take note that this manual uses the following symbols to emphasize particular information: WARNING Identifies an instruction which, if not followed, might cause serious personal injuries including possibility of death. CAUTION Denotes an instruction which, if not followed, may severely damage the unit and/or its components. NOTE: Indicates supplementary information needed to fully complete an instruction.
-
Page 3: Table Of Contents
TABLE OF CONTENTS 1. TECHNICAL DATA .......................4 1.1 AIR DISTRIBUTION (NORMAL OPERATION) .....................4 2. INSTALLATION ........................4 2.1 LOCATING AND MOUNTING THE UNIT .....................4 2.2 INSTALLING THE DUCTWORK AND THE REGISTERS ................6 2.2.1 F (t-1) ........................6 ully ucteD yStem 2.2.2 e (t-2) ........................6 xhauSt ucteD... -
Page 4: Technical Data
4 - Exhaust air to outside VF0083 NOTE: The dimensions, performance charts and specifications are listed on the specification sheets of the unit. Visit our website at Broan-NuTone.com. 2. INSTALLATION WARNING The wearing of safety glasses and gloves is recommended when installing, maintaining or cleaning the unit to reduce the risk of injury that could be caused by the presence of thin metal and/or high moving parts. - Page 5 2.1 l ocAting AnD ounting the cont IMPORTANT: Fully insert the brackets in the unit to align both holes (not the slot). Use short screws provided to secure it. VD0560 Ceiling Installation: VD0549 VD0550 VD0551 Wall Installation: NOTE: Make sure the electrical box is installed upward. VD0548 Flat Installation: NOTE: To prevent vibration transmission, do not...
-
Page 6: Installing The Ductwork And The Registers
2.2 i nstAlling the uctwork AnD the egisters WARNING Never install a stale air exhaust register in a room where there is a combustion device, such as a furnace, gas water heater, fireplace or any appliance or equipment that can generate gaseous contaminants, or pollutants. The negative pressure this could create in the room may impair proper evacuation of the gas or pollutants, which may have severe health consequences. -
Page 7: S Implified I Nstallation (T-4)
(t-3) ltErnatE inStallation Unit should be synchronized with central forced-air system operation to avoid condensation and mold growth in central forced-air system distribution ducting if cooling mode of central forced-air system is used. CAUTION This configuration is not recommended with high velocity central forced- air system. -
Page 8: Exterior Hoods Installation / Location
2.3 e xterior ooDs nstAllAtion ocAtion WARNING Make sure intake hood is located at least 10 feet away from any of the following: • Dryer exhaust, central vacuum vent • Gas meter exhaust, gas barbecue-grill • Any exhaust vents or chimney from a combustion source •... -
Page 9: Connecting The Ducts To The Unit
2.4 i ® nstAlling A AnDem rAnsition ptionAl If desired, a Tandem transition kit can be used instead of 2 exterior hoods. • Follow the instructions included with the tandem termination kit. *Patented. VR0003 Part No. VTYIK1 VR0021 Part No. V14695 2.5 c onnecting the ucts to the... -
Page 10: D Ucts C Onnection
2.5.1 d uctS onnEction IMPORTANT: Make sure to connect ducting as illustrated below to get airflows reading accuracy. Correct installation will also allow proper drainage of water that may accumulate in ducting. orreCt installation R = 3" minimum VD0553 CAUTION Ducting must not be too crushed. -
Page 11: Connections
Metal wires should not cross and touch each other. Check if all wires are correctly inserted in their corresponding holes in the terminal connector. Use screws to fix wires in the terminal connector. NOTE : For information about the operation of the wall control, refer to the corresponding Installation and User Guide, available at Broan-NuTone.com. 3.1.1 E lEctrical... -
Page 12: Electrical Connection To Optional Auxiliary Wall Control
3. CONNECTIONS ( ’ Cont 3.2 e lectricAl onnection to ptionAl uxiliAry ontrol 3.2.1 E 20-40-60 o lEctrical onnEction to ptional uxiliary ontrol When configurating OVR option on the LCD screen, choose among these 3 configurations: BAL (the unit remains balanced while providing maximum airflow), PER (the unit is slightly unbalanced since the distribution motor is in MAX speed while allowing maximum exhaust ventilation) and DIS (the unit is unbalanced since air... -
Page 13: Ynchronization With Entral Orced Ir Ystem Unction
3.3.2 u (r/c/g/g ntErconnEction With Entral orcEd yStEm Wiring Options with Central Forced-Air System LCD Assembly These connections must be done if you want the Terminal Block unit to force the central forced-air system blower operation when ventilating (refer to solid lines in Central Forced-Air System Thermostat above diagram). -
Page 14: Wiring Diagram
4. WIRING DIAGRAM WARNING • Risk of electric shocks. Before performing any maintenance or servicing, always disconnect the unit from its power source. • This product is equipped with an overload protection (fuse). A blown fuse indicates an overload or a short-circuit situation. If the fuse blows, unplug the product from the outlet. -
Page 15: Navigation On Lcd Screen
5. NAVIGATION ON LCD SCREEN... -
Page 16: Lcd Screen
5.1 lcD s creen DISPLAY DEFINITION DISPLAY DEFINITION Standby mode OVR CNT Override by dry contact MED speed Refer to section 6.3 for explanation Intermittent mode Humidistat or Dehumidistat override AUTO mode Turbo mode SMART mode Away mode or Scheduling mode OVR 20 Override 20 min Flow unbalancing for frost prevention... -
Page 17: Settings Modification
5.4 s ettings oDiFicAtion 5.4.1 p rocEdurE to odify min cfm Etting • Go to MIN using (+/-) then press on the √ button for 4 seconds. • Use (+/-) to increase/decrease CFM and √ to confirm. 5.4.2 p rocEdurE to odify max cfm Etting •... -
Page 18: Factory Settings Reset
5.5 F Actory ettings eset If any change is made to the ducting, reset settings to restart the airflow test. rocEdurE to rESEt SEttingS Press on the √ and (-) buttons simultaneously for 4 seconds. Use (+/-) to select Yes or No and √ to confirm. Then perform the auto-balancing procedure. -
Page 19: Service Parts
7. SERVICE PARTS EScription art numBEr Door assembly SV1115062 Electronic assembly SV1115063 Blower right SV1115070 Blower left SV1115071 Port collar right 6" SV1115072 Port collar left 6" SV1115073 Motorized damper assembly port 6" SV1115074 Filters kit MERV8 SV1115075 Core ERV 75% SV1115076 VL0092 Hardware kit*... -
Page 20: Installer's Troubleshooting
8. INSTALLER’S TROUBLESHOOTING WARNING • Risk of electric shocks. Before performing any maintenance or servicing, always disconnect the unit from its power source. • The wearing of safety glasses and gloves is recommended since a few diagnosis procedures may require the unit to be in operation while proceeding. - Page 21 8. INSTALLER’S TROUBLESHOOTING (CONT’D) rror Escription olution Left motor (drive over current) STEP 1: Turn power OFF 30 s, then ON. If STEP 1 did not fix the problem, perform STEP 2: Remove core and clear the Left motor (drive foc duration) ventilation wheel from any dirt or obstacles.
- Page 22 8. INSTALLER’S TROUBLESHOOTING (CONT’D) arning Escription olution Right blower airflow STEP 1: Perform a visual inspection of the supply damper system. Clean filters, distribution registers and outside supply hood. Inspect ducting to ensure it is not squeezed or bent. If STEP 1 did not fix the problem, perform STEP 2: Remove ducting of the supply path. On the LCD screen, select MAX to check if the unit is able to reach the selected flow.
-
Page 23: Maintenance
9. MAINTENANCE WARNING High voltage risk. During maintenance or repairs, always stop the unit then disconnect the unit from its power source to prevent any risk of electric shock. The wearing of safety glasses and gloves is recommended when handling unit components to prevent any risk of injury that could be caused by the presence of thin metal. -
Page 24: Annual (At Fall)
9. MAINTENANCE (CONT’D) 9.2 A nnuAl Repeat steps 1 to 6 from the previous section and continue with the following steps: CAUTION • Handle the recovery core with care. Clean the recovery core: erV M odels Remove the dust on the core using a vacuum cleaner and a soft brush attachment. -
Page 25: Warranty
REPLACEMENT PARTS AND REPAIR In order to ensure your ventilation unit remains in good working condition, you must use the Broan genuine replacement parts only. The Broan genuine replacement parts are specially designed for each unit and are manufactured to comply with all the applicable certification standards and maintain a high standard of safety.
Need help?
Do you have a question about the BLP150E75NS-HW and is the answer not in the manual?
Questions and answers