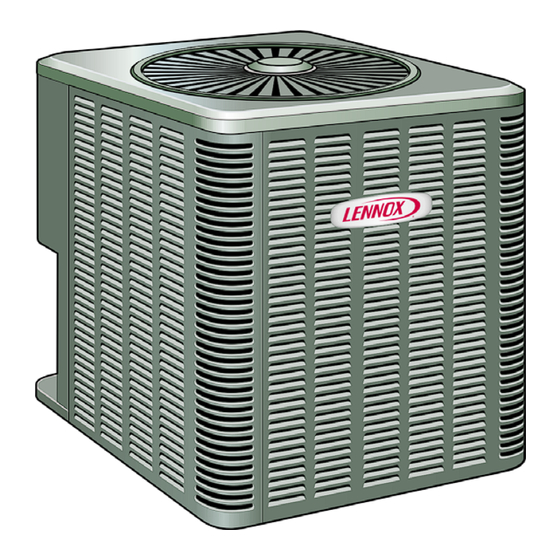
Lennox Merit 13HPX-018 Installation Instructions Manual

Lennox Merit 13HPX-018 Installation Instructions Manual

Hide thumbs Also See for Merit 13HPX-018:

Advertisement

Quick Links

E2009 Lennox Industries Inc.
Dallas, Texas, USA
RETAIN THESE INSTRUCTIONS
FOR FUTURE REFERENCE
WARNING
Improper installation, adjustment, alteration, service or
maintenance can cause personal injury, loss of life, or
damage to property.
Installation and service must be performed by a licensed
professional installer (or equivalent) or a service agency.
IMPORTANT
The Clean Air Act of 1990 bans the intentional venting of
refrigerant (CFCs, HCFCs and HFCs) as of July 1, 1992.
Approved methods of recovery, recycling or reclaiming
must be followed. Fines and/or incarceration may be
levied for noncompliance.
IMPORTANT
This unit must be matched with an indoor coil as
specified in Lennox Engineering Handbook. Coils
previously charged with HCFC−22 must be flushed.
WARNING
Electric Shock Hazard. Can cause injury
or death. Unit must be grounded in
accordance with national and local
codes.
Line voltage is present at all components
when unit is not in operation on units with
single-pole contactors. Disconnect all
remote electric power supplies before
opening access panel. Unit may have
multiple power supplies.
11/09
*2P1109*
INSTALLATION
INSTRUCTIONS
®
Merit
Series 13HPX Units
HEAT PUMP UNITS
506376−01
11/09
Supersedes 506269−01

TABLE OF CONTENTS

. . . . . . . . . . . . . . . . . . . . . . . . . . . . . . . . . . . . . . . .
. . . . . . . . . . . . . . . . . . . . . . . . . . . . . . . . .
. . . . . . . . . . . . . . . . . . . . . . . . . . . . . . .
. . . . . . . . . . . . . . . . . . . . . . . . . . . . . . . . . . . . . . .
. . . . . . . . . . . . . . . . . . . . . . . . . . . . . .
. . . . . . . . . . . . . . . . . . . . . . . . . . . . . . . .
. . . . . . . . . . . . . . . . . . . . . . . . . . . . . . . . . . .

Shipping and Packing List

1 − Assembled 13HPX outdoor unit
Check the unit components for shipping damage. If you
find any damage, immediately contact the last carrier.

General

®
The Merit
13HPX model is designed for use with
HFC−410A refrigerant only. This unit must be installed with
an approved indoor air handler or coil. See the Lennox
13HPX Engineering Handbook for approved indoor
component matchups.
IMPORTANT
This model is designed for use in expansion valve
systems only. An indoor expansion valve approved for
use with
HFC−410A
separately, and installed prior to operating the system.
Page 1
Litho U.S.A.
. . . . . . . . . . . . . . . . . . . . . . . .
. . . . . . . . . . . . . . . . . . .
. . . . . . . . . . . . . . . . . . . . . .
. . . . . . . . . . . . . . . . . . . . . . . . . . . . .
. . . . . . . . . . .
. . . . . . . . . . . . . . . . . . . . .
. . . . . . . . . . . . . . . . . . . . .
. . . . . . . .
. . . . . . . . . . . . . . . . . . . . . . . . . .
. . . . . . . . . . . . . . . . . . . . . . . . . .
. . . . . . . . . . .
. . . . . . . . . . . . . . . . . . . . . . . . . . . . .
. . . . . . . . . . . . . . . . .
. . . . . . . . . . . . . .
refrigerant must be ordered
506376−01
*P506376-01*
1
1
2
2
3
3
3
. . . . . . .
5
6
6
10
11
12
13
16
16
16
22
23
23
25
27

Advertisement

Table of Contents
loading
Need help?

Need help?

Do you have a question about the Merit 13HPX-018 and is the answer not in the manual?

Questions and answers

Summary of Contents for Lennox Merit 13HPX-018

  • Page 1: Table Of Contents

    13HPX model is designed for use with HFC−410A refrigerant only. This unit must be installed with Electric Shock Hazard. Can cause injury an approved indoor air handler or coil. See the Lennox or death. Unit must be grounded in 13HPX Engineering Handbook for approved indoor accordance with national and local component matchups.
  • Page 2: Unit Dimensions

    Unit Dimensions − inches (mm) DISCHARGE AIR OUTDOOR COIL FAN COMPRESSOR SUCTION AND LIQUID LINE CONNECTION OPTIONAL UNIT STANDOFF KIT (4) (FIELD INSTALLED) SIDE VIEW SIDE VIEW Model No. 13HPX−018 24−1/4 (616) 33−1/4 (845) 32−1/2 (826) 13HPX−024 24−1/4 (616) 33−1/4 (845) 32−1/2 (826) 13HPX−030 24−1/4 (616)
  • Page 3: Model Number Identification

    To reduce exposure to this substance or for further See the Lennox Service and Application Notes #C−08−1 information, consult material safety data sheets for further details and information. available from address shown below, or contact your supervisor.
  • Page 4 OPERATING SERVICE VALVES Each valve is equipped with a service port which has a factory−installed valve stem. Figure 1 provides information The liquid and vapor line service valves are used for on how to access and operating both angle and ball service removing refrigerant, flushing, leak testing, evacuating, valves.
  • Page 5: Recovering Refrigerant From Existing System

    Recovering Refrigerant from Existing System RECOVERING REFRIGERANT FROM SYSTEM DISCONNECT POWER CONNECT MANIFOLD GAUGE SET Disconnect all power to the existing outdoor unit at the service Connect a gauge set, clean recovery cylinder and a recovery disconnect switch or main fuse box/breaker panel. machine to the service ports of the existing unit.
  • Page 6: New Outdoor Unit Placement

    New Outdoor Unit Placement INSTALL UNIT AWAY See Unit Dimensions on Page 2 for sizing mounting slab, FROM WINDOWS platforms or supports. Refer to Figure 2 for mandatory installation clearance requirements. TWO 90_ ELBOWS INSTALLED IN LINE SET WILL REDUCE LINE SET VIBRATION Figure 3.
  • Page 7 To obtain the correct information from Lennox, be sure to New or Replacement Line Set communicate the following points: This section provides information on new installation or Model (13HPX) and size of unit (e.g. −060). replacement of existing line set. If a new or replacement...
  • Page 8 LINE SET IMPORTANT Refrigerant lines must not contact structure. INSTALLATION REFRIGERANT LINE SET INSTALLING Line Set Isolation The following illustrations are VERTICAL RUNS (NEW CONSTRUCTION SHOWN) examples of proper refrigerant line set isolation: NOTE Insulate liquid line when it is routed through areas where the surrounding ambient temperature could become higher than the REFRIGERANT LINE SET TRANSITION...
  • Page 9 BRAZING NOTE − Use silver alloy brazing rods with five or six percent minimum silver alloy for copper−to−copper brazing, 45 percent alloy for copper−to−brass and copper−to−steel brazing. CONNECTIONS CAP AND CORE REMOVAL Remove service cap and core CUT AND DEBUR from both the vapor and liquid line service ports.
  • Page 10: Metering Devices And Flushing The System

    Metering Devices and Flushing the System TYPICAL CHECK EXPANSION VALVE FLUSHING REMOVAL AND REPLACEMENT PROCEDURE (Uncased Coil Shown) LINE SET AND INDOOR COIL (1 OF 2) STUB END TWO PIECE PATCH PLATE LIQUID LINE CHECK (UNCASED COIL ONLY) ORIFICE EXPANSION TYPICAL FIXED ORIFICE REMOVAL HOUSING VALVE...
  • Page 11: Testing For Leaks

    Leak Testing the System LEAK TEST LINE SET AND INDOOR COIL NOTE Normally, the high pressure hose is connected to the liquid line port. How- ever, connecting it to the vapor port better protects the manifold gauge set from high pressure damage.
  • Page 12: Evacuating The System

    Evacuating the System EVACUATING MANIFOLD GAUGE SET LINE SET AND INDOOR COIL CONNECT GAUGE HIGH NOTE Remove cores from service valves (if not al- ready done). Connect low side of manifold gauge set with 1/4 SAE in−line tee to vapor line service valve A34000 1/4 SAE TEE WITH Connect high side of manifold gauge...
  • Page 13: Electrical Connections

    defined as any gas that will not condense under IMPORTANT temperatures and pressures present during operation of an air conditioning system. Non−condensables and water Use a thermocouple or thermistor electronic vacuum suction combine with refrigerant to produce substances gauge that is calibrated in microns. Use an instrument that corrode copper piping and compressor parts.
  • Page 14 ROUTING HIGH VOLTAGE/ GROUND AND CONTROL WIRING HIGH VOLTAGE / GROUND WIRES Any excess high voltage field wiring should be trimmed and secured away from any low voltage field wiring. To facilitate a conduit, a cutout is located in the bottom of the control panel. Connect conduit to the control panel using a proper conduit fitting. TYPICAL CONTROL WIRING CONTROL WIRING Install low voltage wiring from outdoor to indoor unit and from...
  • Page 15 Figure 7. Typical 13HPX Unit Wiring Diagram Page 15 13HPX SERIES...
  • Page 16: Servicing Unit Delivered Void Of Charge

    GAUGE SET MANIFOLD GAUGE SET CONNECTIONS FOR TESTING AND CHARGING HIGH TRUE SUCTION PORT CONNECTION OUTDOOR UNIT REFRIGERANT TANK CHARGE IN LIQUID PHASE DIGITAL SCALE TEMPERATURE SENSOR (LIQUID LINE) LIQUID LINE TO LIQUID SERVICE LINE SERVICE PORT VALVE TEMPERATURE SENSOR Close manifold gauge set valves and connect the center hose to a cylinder of HFC−410A.
  • Page 17 ADDING OR REMOVING REFRIGERANT This system uses HFC−410A refrigerant which operates at much higher pressures than . The pre−installed liquid line filter drier is approved for use with HFC−410A only. Do not replace it with components designed for use with . This unit is NOT approved for use with coils which use capillary tubes or fixed orifices as a refrigerant metering device.
  • Page 18 WEIGH IN SUBCOOLING method for adding initial refrigerant charge, and then use method for verifying refrigerant charge. WEIGH IN CALCULATING SYSTEM CHARGE FOR OUTDOOR UNIT VOID OF CHARGE CHARGING METHOD If the system is void of refrigerant, first, locate and repair any leaks and then weigh in the refrigerant charge into the unit.
  • Page 19 1 Check the airflow as illustrated in figure 9 to be sure the indoor airflow is as SUBCOOLING required. (Make any air flow adjustments before continuing with the following procedure.) 2 Measure outdoor ambient temperature; determine whether to use cooling mode or heating mode to check charge.
  • Page 20 Table 6. 13HPX−036 Target *Add Subcooling charge Target INDOOR MATCHUPS (Continued) *Add Heat Heat Cool Cool Subcooling charge (+5ºF) (+1ºF) INDOOR MATCHUPS Heat Heat Cool Cool (+5ºF) (+1ºF) CX34−43C CBX26UH−036 CX34−49 CBX27UH−036−230 CX34−50/60C CBX27UH−042−230 Table 8. 13HPX−048 CBX32M−036, −042 Target *Add Subcooling CBX32MV−036−230...
  • Page 21 Table 10. Normal Operating Pressures − Liquid +10 and Vapor +5 PSIG* IMPORTANT Use table 10 as a general guide when performing maintenance checks. This is not a procedure for charging the unit (Refer to Charging / Checking Charge section). Minor variations in these pressures may be expected due to differences in installations.
  • Page 22: Removing And Installing Louvers

    Removing and Installing Louvers WARNING To prevent personal injury, or damage to panels, unit or structure, be sure to observe the following: While installing or servicing this unit, carefully stow all removed panels out of the way, so that the panels will not cause injury to personnel, nor cause damage to objects or structures nearby, nor will the panels be subjected to damage (e.g., being bent or scratched).
  • Page 23: System Operation

    adjusted to 30 (T1), 60 (T2), or 90 (T3) minutes. The System Operation defrost timing jumper is factory−installed to provide a The outdoor unit and indoor blower cycle on demand from 60−minute defrost interval. If the timing selector jumper the room thermostat. If the thermostat blower switch is in is not in place, the control defaults to a 90−minute defrost the ON position, the indoor blower operates continuously.
  • Page 24 TEST Placing the jumper on the field test pins allows the technician to: Clear short cycle lockout Clear five−strike fault lockout Cycle the unit in and out of defrost mode Place the unit in defrost mode to clear the coil When Y1 is energized and 24V power is being applied to the Control, a test cycle can be initiated by placing a jumper on the Control’s TEST pins for 2 to 5 seconds.
  • Page 25: Maintenance

    DS2 Green DS1 Red Condition Indoor Unit 1. Clean or change filters. Power problem 2. Lennox blower motors prelubricated Simultaneous Slow Flash Normal operation permanently sealed. No more lubrication is needed. Alternating Slow Flash 5−minute anti−short cycle delay...
  • Page 26 Prolonged exposure of the Heat Pump Operation unit to treated water (i.e., sprinkler systems, soakers, Your new Lennox heat pump has several characteristics waste water, etc.) will corrode the surface of steel and aluminum parts and diminish performance and longevity that you should be aware of: of the unit.
  • Page 27: Start−Up And Performance Checklist

    For update−to−date information, see any of the following publications: Verify that all electrical disconnect switches are ON. Check for any blown fuses or tripped circuit breakers. Lennox 13HPX Engineering Handbook Verify unit access panels are in place. Lennox Product Catalog Verify air filter is clean.

Table of Contents