Table of Contents

Subscribe to Our Youtube Channel
Related Manuals for Bull II Series


Summary of Contents for Bull II Series
- Page 1 PREMIUM OUTDOOR RATED STAINLESS STEEL REFRIGERATOR SERIES II OWNER’S MANUAL ITEM NO.13700 BEFORE USING, PLEASE READ AND FOLLOW ALL THE SAFETY RULES AND OPERATING INSTRUCTIONS. RETAIN THIS OWNER’S MANUAL FOR FUTURE REFERENCE. USA EDITION...
-
Page 2: Table Of Contents
PAGE TABLE OF CONTENTS APPLIANCE SAFETY IMPORTANT SAFEGUARDS LOCATION OF PARTS INSTALLATION INSTRUCTIONS DO THIS BEFORE USING YOUR APPLIANCE INSTALLATION (PREPARATION, GENERAL GUIDELINES, DOOR HANDLE INSTALLATION ELECTRICAL (EXTENSION CORD WARNING) REVERSING THE DOOR SWING 6-10 OPERATING YOUR REFRIGERATOR CONTROL PANEL INTERIOR LIGHT DEFROSTING TEMPERATURE ALARM/ DOOR ALARM... -
Page 3: Appliance Safety
APPLIANCE SAFETY We have provided many important safety messages in this manual and on your appliance. Always read and obey all safety messages. Your safety and the safety of others are very important. This is the Safety Alert Symbol. The symbol alert you to potential hazards that kill or injure you or others. All safety messages will follow the Safety Alert Symbol or be identified by either the DANGER or WARNING label that is shown and defined below. -
Page 4: Location Of Parts
FOLLOW WARNING CALLOUTS BELOW ONLY WHEN APPLICABLE TO YOUR MODEL. • Use two or more people to move and install t h i s appliance. Failure to do so can result in back or other injury. • To ensure proper ventilation of this appliance, the front of the unit must be completely unobstructed. •... -
Page 5: Installation Instructions
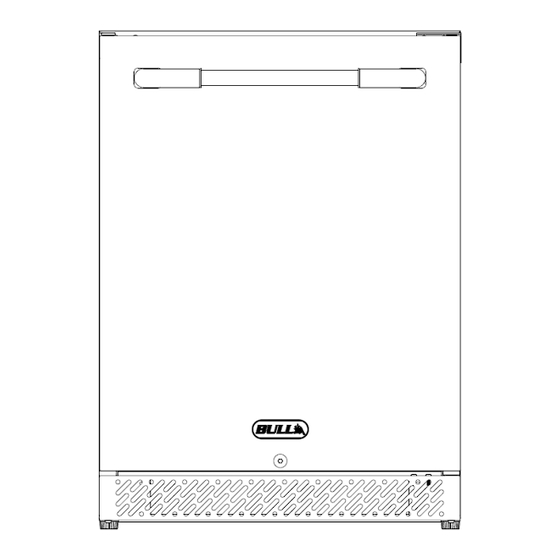
Door with Handle Digital Control Panel Temperature Sensing Wire Shelves (3) Head Cover Glass Shelf Security Lock for Door Kickplate Adjustable Legs (4) INSTALLATION INSTRUCTIONS BEFORE USING YOUR APPLIANCE 1) Remove the exterior and interior packing. 2) Before connecting the appliance to the power source, let it stand upright for approximately 24 hours. This will reduce the possibility of a malfunction in the cooling system from handling during transportation. -
Page 6: Electrical (Extension Cord Warning)
Improper use of the grounded plug can result in the risk of electrical shock. If the power cord is damaged, have it replaced by a qualified electrician or authorized service center. Plug the appliance into an exclusive properly grounded wall outside. This appliance should be properly grounded for your safety. - Page 7 INSTRUCTIONS FOR REVERSING THE DOOR SWING OF YOUR APPLIANCE (CONTINUED (Before you start, un-plug power cord and empty contents) STEP 2 Kickplate removal (Top 2 screws) CONTINUE ON TO NEXT PAGE...
- Page 8 INSTRUCTIONS FOR REVERSING THE DOOR SWING OF YOUR APPLIANCE (CONTINUED CONTINUE ON TO NEXT PAGE...
- Page 9 INSTRUCTIONS FOR REVERSING THE DOOR SWING OF YOUR APPLIANCE (CONTINUED CONTINUE ON TO NEXT PAGE...
- Page 10 INSTRUCTIONS FOR REVERSING THE DOOR SWING OF YOUR APPLIANCE (CONTINUED STEP 13 Insert the angle bracket pivot assembly into the spring tension plug (be sure the support bearings are still there). When fully inserted and the spring is engaged, rotate the assembly 90 degrees clockwise and screw the bracket to the bottom left of the refrigerator. Use two screws.
-
Page 11: Interior Light
OPERATING INSTRUCTIONS It is recommended that you install the refrigerator is place where the ambient temperature is 50 ℉ and 109.4 ℉ (10℃ − 43℃). If the ambient temperature is above or below recommended temperatures, the performance of the unit may be affected. For example, placing your refrigerator in extremely cold or hot conditions may cause interior temperatures to fluctuate. -
Page 12: Care And Maintenance
CARE AND MAINTENANCE Cleaning Your Appliance • Turn off the appliance. Unplug the power cord and remove all items including the shelves. FAILURE TO UNPLUG THE APPLIANCE DURING COULD RESULT IN ELECTRIC SHOCK OR OTHER PERSONAL INJURY. • Wash the inside surfaces with a solution of warm water and baking soda (about 2 tablespoons of baking soda per 1 gallon of water. -
Page 13: Troubleshooting
TROUBLESHOOTING You can solve many common problems easily, saving you the cost of a possible service call. Try the suggestions below to see if you can solve the problem before calling for service. TROUBLE SHOOTING GUIDE PROBLEM POSSIBLE CAUSE REMEDY The appliance is turned off. -
Page 14: Ordering Replacement Parts
REGISTERING YOUR REFRIGERATOR Thank you for purchasing your Bull Outdoor For Warranty Claims or Replacement Parts ordering, please fill Products Refrigerator. To validate your out the area provided below: Limited Warranty, you must submit the PRODUCT INFORMATION REFERENCE CARD completed the Warranty Registration Form within 90 days from the date of purchase. - Page 15 MODEL NO. 13700 REPLACEMENT PARTS LIST (WARRANTY PERIOD FOR ALL PARTS IS 1 YEAR) REF # USED ON BULL DESCRIPTION EXPLODED VIEW PART # 13726 LOWER DOOR HINGE 13727 LOWER DOOR HINGE DECORATIVE PANEL 13706 K-BAR 12103 CONTROL PANEL 13701 13716 FAN...
-
Page 16: Warranty Policy
TO YOU. WHO MAY USE THIS WARRANTY? BULL OUTDOOR PRODUCTS, INC. located at address 1011 East Pine St. Lodi, CA. 95240 ("we") extend this limited warranty only to the consumer who originally purchased the product ("you") at the original site of delivery or installation. It does not extend to any subsequent owner or other transferee of the product. - Page 17 Warranty Policy (Continued) Grilling/Pizza Accessories and Grill Covers DO NOT include a warranty period. The following parts are covered for 1 year on all our current gas grill models: Grill Warranty Periods • The lid, control panel, grease tray, bezels, knobs, temperature gauge, valves, regulator, flex tubes, rotisserie burner, transformer, and all components of the lighting system.
-
Page 18: V2024.06.04
• We will not pay for any accessory products or ancillary products purchased by you for use in connection with the product. HOW DO YOU NOTIFY BULL CUSTOMER SERVICE OF A POTENTIAL WARRANTY ISSUE? Our Customer Service is ready to help. Here’s how to reach us: By Phone (800) 521-2855 Monday through Friday from 8:00 a.m.
Need help?
Do you have a question about the II Series and is the answer not in the manual?
Questions and answers