Table of Contents
Advertisement
Quick Links
Advertisement
Table of Contents

Subscribe to Our Youtube Channel
Related Manuals for Bull 13700CE


Summary of Contents for Bull 13700CE
- Page 1 PREMIUM OUTDOOR FRIDGE #13700CE OWNER’S MANUAL...
-
Page 2: Table Of Contents
Contents Page # Safety Information Getting to know your Refrigerator Installing your Refrigerator 7-10 Installation Requirments/ Unpacking Reversing the Door Swing of your Appliance Levelling / Adjustable Feet/Door Lock/ Shelves Defrosting/Door alarms Operating your Appliance Care and Maintenance 12-13 Product Support 14-15 Parts List Exploaded View... - Page 3 Safety Information Important - Please read the instructions before installing or operating WARNING: Keep ventilation openings in the appliance enclosure or the inside unit, clear of obsrtuction. To esnure proper ventilation for your appliance, the front of the unit must be completely unobstructed. Leave at least 5cm clearance around the unit inside the structure.
- Page 4 Safety Information Important - Please read the instructions before installing or operating • Whilst carrying and positioning the appliance care must be taken not to damage the cooler gas circuit at the rear of the appliance. • The appliance should not be located next to ovens, grills or other sources of high heat. •...
- Page 5 Safety Information Important - Please read the instructions before installing or operating Before using your appliance: • Before switching on your appliance for the first time, ensure it is positioned in the desired final location and is in an upright position for at least 24 hours before plugging in and switching on the power, otherwise you may damage the compressor.
-
Page 6: Getting To Know Your Refrigerator
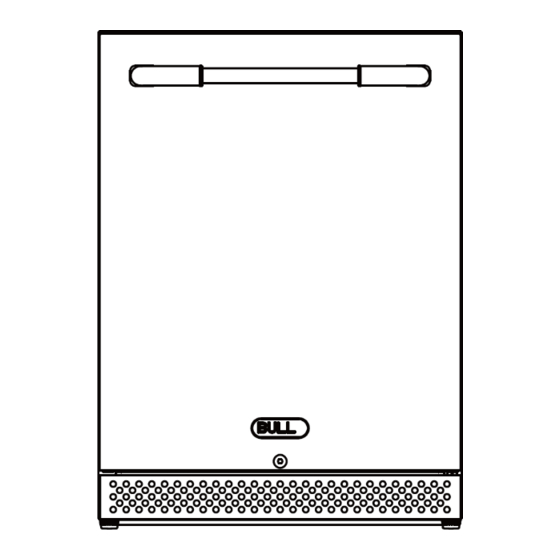
GETTING TO KNOW YOUR REFRIGERATOR YOU’LL BE UP AND RUNNING IN NO TIME Digital Control Panel LED Light Handle Temperature Probe Glass Shelve (1) Door Shelve (3) Bottom Grille Scurity Lock Adjustable Legs Technical Specification File Name: Model IronCAD General 13100CE OUTDOOR PREMIUM FRIDGE.icd 2D drawing... -
Page 7: Installing Your Refrigerator
INSTALLING YOUR REFRIGERATOR BRINGING IT ALL TOGETHER Installation requirements The appliance is designed for built-in recessed or free-standing installation. Note: This appliance may be used for storage of medicing and other medical products. Place your appliance Before starting to use your refrigerator, you should pay attention to the following points: •... -
Page 8: Reversing The Door Swing Of Your Appliance
INSTALLING YOUR REFRIGERATOR BRINGING IT ALL TOGETHER Reversing the Door Swing of your Appliance This unit has the capability of the door opening from either the left or the right side. The unit is delivered to y ou with the door opening from the left side. Should you desire to reverse the opening direction, please follow the reversal instructions shown below: NOTE: All parts removed must be saved to allow the door swing to be reversed. -
Page 9: Levelling / Adjustable Feet/Door Lock/ Shelves
INSTALLING YOUR REFRIGERATOR Levelling Feet BRINGING IT ALL TOGETHER • The appliance must be installed level in order to work peroperly. If the unit is not level, the doors and magnetic seal alignment will not be covered properly. • To level the unit, adjust one or both leveling feet at the base of the unit. Adjustable Feet This appliance comes with height adjustable feet which allows the appliance to be installed under bench and ensures the appliance is stable and level. -
Page 10: Defrosting/Door Alarms
INSTALLING YOUR REFRIGERATOR Defrosting BRINGING IT ALL TOGETHER The unit defrosts automatically in normal operating conditions. The evaporator behind the rear wall of the unit defrosts automatically. The condensate collects in the drainage channel behind the rear wall of the unit, and flows through the drainage hole into the drip tray by the compressor where it evaporates. -
Page 11: Operating Your Appliance
OPERATING YOUR REFRIGERATOR Help is Always at Hand It is reccommended that you install the appliance in a place where the ambient temperature is between 10°C and 42°C. If the ambient temperature is above or below recommenperatures, the performance of the unit may be affectyed. -
Page 12: Care And Maintenance
CARE AND MAINTENANCE LOOKING AFTER YOUR APPLIANCE Cleaning your appliance • Make sure you unplug the appliance or disconnect power before cleaning or servicing. Do not connect or disconnect the electic plug when your hands are wet.Failure to do so may result in electic shock or death. - Page 13 CARE AND MAINTENANCE LOOKING AFTER YOUR APPLIANCE Moving your Appliance • Remove all items. • Securely tape down all loose items (shelves) inside your appliance. • Turn the adjustable legs up to the base to avoid damage. • Tape the door shut. Be sure the appliance stays secure in the upright position during transportation.
-
Page 14: Product Support
Product Support Trouble Shooting Help is Always at Hand Problem Possible Cause Solution • Unable to close the door due objects in the way. • Ensure there are no obstructions preventing door closure. • The door and shelves are not placed in properly •... - Page 15 Product Support Trouble Shooting Help is Always at Hand Problem Possible Cause Solution • Appliance is not connected to a power supply. • Connect the appliance. • The appliance is turned off. • Switch on the appliace. Appliance does not Operate •...
-
Page 16: Parts List
Parts List Ref # Part Number Item Warranty 13117 Lower Door Axes 2 Years 13711 Door Gasket 2 Years 13115 Shelves 2 Years 13126 Fan Motor 2 Years 13132 Compressor 2 Years 13706 Shelf Ladder 2 Years 13704 Shelf Clips 2 Years 13106 Thermostat Sensor Cover... -
Page 17: Exploaded View
Exploded Illustrations 12 10... - Page 18 WHO MAY USE THIS WARRANTY? BULL OUTDOOR PRODUCTS, INC. located at address 1011 East Pine St. Lodi, CA. 95240 (“we”) extend this limited warranty only to the consumer who originally purchased the product (“you”) at the original site of delivery or installation.
- Page 19 Grill Accessories and Grill Covers do not include a warranty period. Registering your Grill Thank purchasing your Bull For Warranty Claims or Replacement Parts ordering, Outdoor Product. To validate your Limited please fill out the area provided below: Warranty, you must submit the completed...
Need help?
Do you have a question about the 13700CE and is the answer not in the manual?
Questions and answers