Table of Contents
Advertisement
Quick Links
Instruction Manual
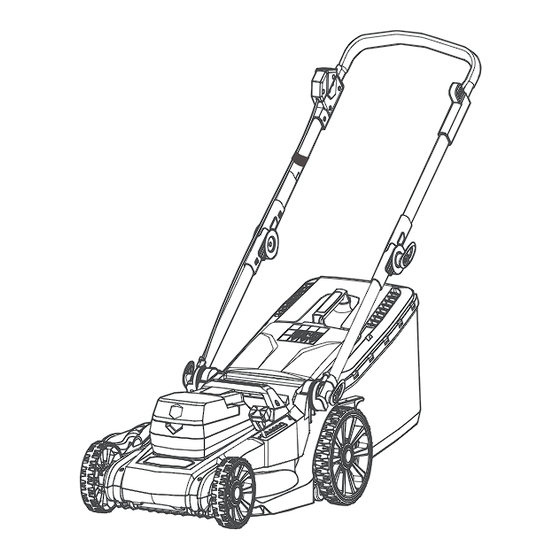
46cm 48V Lithium-Ion Cordless Mower CLMF4846A 01
CLMF4846A-01 (With Batteries and Charger)
CLMF4846A-BARE (Batteries and Charger Not Included)
Original Instructions
WARNING:
Read all safety instructions carefully before assembling and operating
this machine. Ensure the machine has been assembled correctly and safely. Keep the
instructions safe and pass them on to any subsequent user so that the information is always
available.
Advertisement
Table of Contents

Related Manuals for LawnMaster CLMF4846A-01


Summary of Contents for LawnMaster CLMF4846A-01
- Page 1 Instruction Manual 46cm 48V Lithium-Ion Cordless Mower CLMF4846A 01 CLMF4846A-01 (With Batteries and Charger) CLMF4846A-BARE (Batteries and Charger Not Included) Original Instructions WARNING: Read all safety instructions carefully before assembling and operating this machine. Ensure the machine has been assembled correctly and safely. Keep the instructions safe and pass them on to any subsequent user so that the information is always available.
- Page 3 22a 22b Not included with CLMF4846A-BARE...
-
Page 4: Table Of Contents
TABLE OF CONTENTS Section Page Symbols Safety Information 7-16 In the Box Assembly 17-20 Operation 21-26 Maintenance 27-29 Troubleshooting 30-31 Technical Data Recycling and Disposal... -
Page 5: Symbols
SYMBOLS The following warning symbols appear throughout this manual and indicate the appliance. SYMBOL DESIGNATION/EXPLANATION Caution Read instruction manual. Keep bystanders away. Beware of sharp blades. Blades may continue to rotate after the motor is switched the product unattended for any period. Wear eye and ear protection. - Page 6 SYMBOLS SYMBOL DESIGNATION/EXPLANATION Recycle electrical waste products in an environmentally safe way where facilities exist. WARNING understand completely the instruction manual. product.
-
Page 7: Safety Information
SAFETY INFORMATION IMPORTANT them. It is important to understand these instructions and to all safety requirements. available to the operator at all times. these operating instructions as well. from non-compliance with these instructions. they are supervised by a person responsible for safety or are being instructed to operate the appliance by such a person. - Page 8 SAFETY INFORMATION your view of a child or animal that may run into the path of the mower. accidents or hazards occurring to other people or their property. footwear and long trousers. Do not operate the mower when barefoot or wearing open toed sandals. Avoid cords or ties.
- Page 9 SAFETY INFORMATION slopes. towards you. Pay attention to what you are doing. alcohol or drugs. and when transporting the machine to and from areas to be mowed. necessary and tilt only the part which is furthest away from the operator. Always ensure that both hands are in the operating position on the handle before returning the machine to the ground.
- Page 10 SAFETY INFORMATION times. is dangerous and must be repaired. operating the mower. away from the mower while it is in operation. Stop the motor immediately if someone enters the mowing area.
- Page 11 SAFETY INFORMATION handle immediately. intended. Do not force the mower. while the motor is running. gases nearby. or roads. mower is in a safe condition for use. deterioration. parts of the machine. wait until the blade comes to a complete stop before removing the collection bag or carrying out maintenance.
- Page 12 SAFETY INFORMATION mower is not in use. This prevents accidental starting of the machine. genuine replacement parts and accessories. again. WARNING! Even if you are operating the machine in - Health defects resulting from vibration emission if the machine is being used over long periods of time or not adequately managed and properly maintained.
- Page 13 SAFETY INFORMATION Battery Safety Information manufacturer. A charger that is suitable for one type of battery. sources may cause an increased danger of explosion. explosion. Properly dispose of a dropped or damaged battery immediately. An exploded battery can propel debris and chemicals. If...
- Page 14 SAFETY INFORMATION connection from one terminal to another. Shorting the the event of discomfort. the charger. Charger Safety Information cool and well-ventilated environment. immediately discontinue use. Replace the charger with the...
- Page 15 SAFETY INFORMATION prevent hazards. not use a defective charger and do not disassemble the sharp blow. correspond to the voltage of the power source. Intended Use domestic and hobby gardens. and may not be used to mow wet or unusually high grass.
-
Page 16: In The Box
SAFETY INFORMATION not for any commercial trade use. It must not be used for any purposes other than those described. Any use of the machine that deviates from its intended use will invalidate the warranty. IN THE BOX 10. Front Wheel 21. -
Page 17: Assembly
ASSEMBLY Assembly Preparation includes suitable personal protective equipment. WARNING If any parts are damaged or missing do not operate this product until the parts are replaced. WARNING Do not attempt to modify this product or create accessories not recommended for use with this WARNING WARNING operate the mower with damaged safety devices. - Page 18 ASSEMBLY Assembling the Grass Collection Bag (See Figs. 3-4) Your mower comes with a tool free grass collection bag. Attaching/Removing the Grass Collection Bag (See Fig. 5) NOTE: collection chute of the mower. NOTE: NOTE: inspect the bag assembly and replace if there are any signs of wear or deterioration. Grass Collection Full Indicator (See Figs.
- Page 19 ASSEMBLY NOTE: nutrient for the lawn. To install the mulching plug: To remove the mulching plug: Installing the Side Discharge Chute (See Fig. 11) WARNING Installing/Removing the Battery Packs (See Fig. 12-13) WARNING NOTE: Both batteries should be installed into the compartments in order to start the mower.
- Page 20 ASSEMBLY To install the battery packs: Close the battery compartment cover. NOTE: starting operation. To remove the battery packs:...
-
Page 21: Operation
OPERATION WARNING WARNING Always wear safety goggles or safety glasses with side shields when operating this product. WARNING Do not use any attachments or accessories not recommended by the manufacturer of this product. Setting the Cutting Height (See Fig. 14) WARNING your lawn. - Page 22 OPERATION that is too low in longer grass will use more power and reduce battery run time. It is recommended to cut longer grass in 2 passes or more. This method will also cause less stress to your grass for a healthier lawn.
- Page 23 OPERATION LED Indicators on Battery Battery Capacity (Continuous lighting) Fully charged Charger Operation (See Fig. 15) WARNING power supply. NOTE: is operational. Always charge the battery before storage! The indicator lights on the charger show the charging status: Symbol Indicator lights Status instructions below.
- Page 24 OPERATION ensures maximum battery life. Charge the battery fully before storage. battery charger will automatically switch to charging. is normal and does not indicate a technical defect of the battery charger. Starting/Stopping the Mower (See Figs. 16-17) WARNING iPower Mode Indicator (See Fig. 18) Motor Power Output Level Runtime Mode Indicator on Panel...
- Page 25 OPERATION iPower Battery Indicator (See Fig. 18) WARNING LED on the battery indicates that the voltage is too low. In either case the motor will shut down automatically. The battery may be damaged. General Operation damaged. have full control over the product. Mowing (See Figs.
- Page 26 OPERATION and any other accumulated debris. direction on slopes. tripped over or thrown by the blade.
-
Page 27: Maintenance
MAINTENANCE WARNING any other parts may create a hazard or cause product damage. WARNING WARNING Do not use any attachments or accessories not recommended by the manufacturer of this product. General Maintenance solvents when cleaning plastic parts. Most plastics are susceptible to damage from various with a dry cloth occasionally. - Page 28 MAINTENANCE Replacing the Blade (See Figs. 21-22) NOTE: NOTE: recommended replacement blade. safe location. in place with the retaining clip. to 25 Nm to ensure the bolt is properly tightened. NOTE: Sharpening the Blade (See Fig. 23) be required. NOT attempt to sharpen the blade while it is attached to the mower. WARNING with a new blade.
- Page 29 MAINTENANCE To check the blade balance: NOTE: Storing the Mower (See Figs. 25-26) Battery and Charger Maintenance wet conditions. sunlight.
-
Page 30: Troubleshooting
TROUBLESHOOTING WARNING Gloves and appropriate protective clothing must be worn when performing these instructions. PROBLEM POSSIBLE CAUSE SOLUTION The batteries are not installed Ensure the batteries are correctly correctly. installed. The batteries are not fully Charge the batteries. charged. Possible clogging. Mower fails to operate. - Page 31 TROUBLESHOOTING Height of cut is too low. Increase the height of cut. Lawnmower leaves ragged cut. Cutting blade is blunt. Replace the blade. Wait until the grass dries before Mower does not mulch mowing. properly. Missing mulching plug. Install the mulching plug. Possible clogging.
-
Page 32: Technical Data
TECHNICAL DATA 48V Cordless Mower CLMF4846A 01 No Load Speed Cutting Width 46cm Grass Collection Box Capacity Functions Wheel Size Protection Type CHARGER Model No. 24LFC12 Charger Input Charger Output Weight of Charger Insulation Protection of Charger BATTERY Model No. 24LB4005-C Capacity of Battery 4.0Ah... -
Page 33: Recycling And Disposal
RECYCLING AND DISPOSAL materials and should be disposed of accordingly. This appliance contains Lithium-ion battery. Do not dispose of batteries in household where they will be recycled in an environmentally friendly manner. Li-ion... - Page 34 Fig.3 Fig.1 Fig.2 Fig.5 Fig.4 Fig.7 Fig.6 Fig.9 Fig.8 Fig.11 Fig.10 Fig.13 Fig.12...
- Page 35 Fig.14 Fig.15 Fig.16 Ⅱ Ⅰ Fig.18 Fig.17 Fig.20 Fig.19 Fig.22 Fig.21 Fig.24 Fig.23 Fig.26 Fig.25...
- Page 37 CLMF4846A 01 Suzhou Cleva Electric Appliance Co. Ltd No.8 Ting Rong Street www.cleva-europe.com Made in P.R.C...
Need help?
Do you have a question about the CLMF4846A-01 and is the answer not in the manual?
Questions and answers