Sign In
Upload
Download
Table of Contents
Contents
Add to my manuals
Delete from my manuals
Share
URL of this page:
HTML Link:
Bookmark this page
Add
Manual will be automatically added to "My Manuals"
Print this page
×
Bookmark added
×
Added to my manuals
Manuals
Brands
Dominator Manuals
Garage Door Opener
Smart Pro
Installation instructions manual
Dominator Smart Pro Installation Instructions Manual
Sectional door openers
Hide thumbs
1
Table Of Contents
2
3
4
5
6
7
8
9
10
11
12
13
14
15
16
17
18
19
20
21
22
23
24
25
26
27
28
29
page
of
29
Go
/
29
Contents
Table of Contents
Troubleshooting
Bookmarks
Table of Contents
Table of Contents
Safety Warnings
Before You Begin
Tools Required
Kit Contents
Position
Fit the Opener
Bracket Position
Perforated Angle
Mounting Brackets and Arms
Safety Beam Kit
Wiring the 2 Wire PE Beams
Assemble the Mounting Bracket
Mounting the Bracket
Aligning the Transmitter and Receiver
Specifications
Setting Limits
Set the Limit Positions & Adjust Drive Speed
Clearing the Door Limit Positions
Re-Profiling the Door
Controller Memory Reset
Safety Testing
Test the Close Cycle
Testing the Open Cycle
Test the Manual Door Operation
Test the Battery Backup
Auto-Close & Accessories
Auto-Close
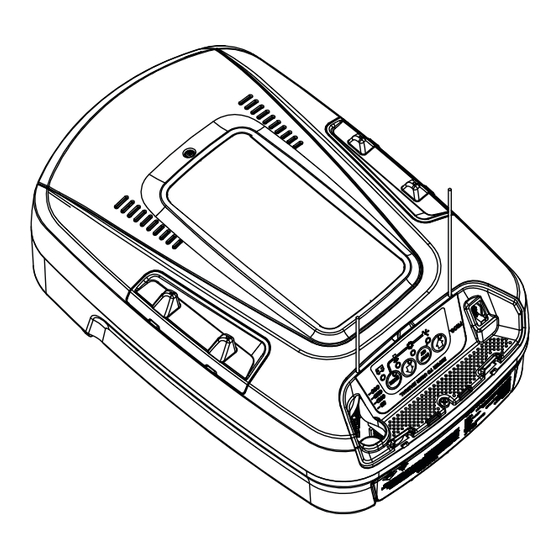
Terminal Block
Connecting or Disconnecting Accessories
Battery Backup (Optional)
Coding a Transmitter
Storing the Transmitter Code
Remotely Coding Transmitters
Erasing All Transmitter Codes
Vacation Mode
Installing the Wall Mounted Transmitter
Smart Phone Control
Opener Safety & Security
Your Door CAN NOT be Used When
Your Door CAN be Used When
To Disengage the Opener
To Re-Engage the Opener
Operating Your Opener
User Operating Controls
Troubleshooting
After Installation Care
Service Checklist
Battery Replacement
Battery Disposal
Warranty
Appendix
A - Status Indication During Operating Mode
B - Adjustment Mode Instructions
C - Adjusting Force Margins
D - Battery Functions
E - Setting the PET Mode Position
F - Setting Limits Via Transmitter
G - Setting up Tilt Door
Advertisement
Quick Links
1
Setting Limits
2
Terminal Block
Download this manual
Doc # 160469_01
Released 15/1222
Smart Pro, Smart
& Secure
Sectional Door Openers
Installation Instructions
Smart Pro, Smart & Secure
(DSO-4V3, DSO-3V3 & DSO-2V3)
These instructions are intended for professional garage door
installers. All references are taken from inside looking out.
Table of
Contents
Previous
Page
Next
Page
1
2
3
4
5
Advertisement
Table of Contents
Need help?
Do you have a question about the Smart Pro and is the answer not in the manual?
Ask a question
Questions and answers
Subscribe to Our Youtube Channel
Related Manuals for Dominator Smart Pro
Control Unit Dominator Smart Phone Control Kit Quick Setup Manual
(7 pages)
Garage Door Opener Dominator Select Quick Operation Manual
Sectional door openers (7 pages)
Garage Door Opener Dominator Secure Installation Instructions Manual
Sectional door openers (29 pages)
Garage Door Opener Dominator GDO-7v2 Installation Instructions Manual
Overhead garage door opener (32 pages)
Garage Door Opener Dominator RDO-1V4 EXCEL Instruction Manual
Rolling door opener (24 pages)
This manual is also suitable for:
Smart
Secure
Dso-4v3
Dso-3v3
Dso-2v3
Table of Contents
Print
Rename the bookmark
Delete bookmark?
Delete from my manuals?
Login
Sign In
OR
Sign in with Facebook
Sign in with Google
Upload manual
Upload from disk
Upload from URL


Need help?
Do you have a question about the Smart Pro and is the answer not in the manual?
Questions and answers