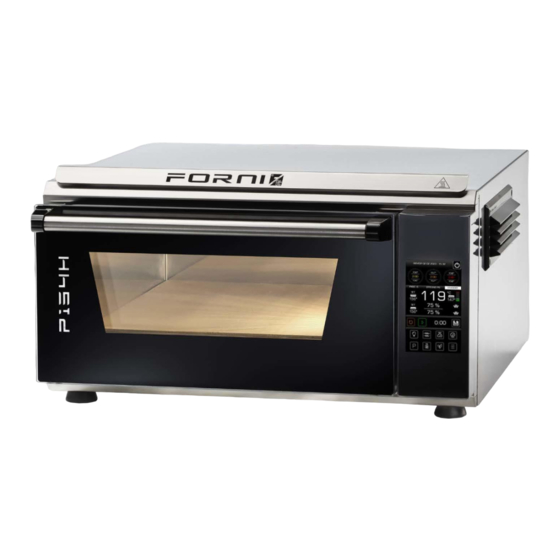
effeuno EVOLUTION P134H Use And Maintenance Manual
Hide thumbs
Also See for EVOLUTION P134H:
- Instruction manual (4 pages) ,
- Use and maintenance manual (68 pages) ,
- User manual

Related Manuals for effeuno EVOLUTION P134H


Summary of Contents for effeuno EVOLUTION P134H
- Page 1 MANUALE D'USO E MANUTENZIONE USE AND MAINTENANCE MANUAL MOD.: P134H • P134HA • P234H • P150H • P150HA • P250H...
- Page 3 3. PRIMA DELL'USO pag. 3 ........................... 4. COLLEGAMENTO ALLA RETE ELETTRICA pag. 4 ................5. ACCENSIONE DEL DISPLAY pag. 6 ………………………………..............6. RODAGGIO DELLA PIETRA BISCOTTO EFFEUNO pag. 7 ............. 7. SICUREZZA pag. 8 ............................8. PULIZIA DEL FORNO pag. 8 ........................
- Page 4 Effeuno non è responsabile di un eventuale modifica/sostituzione/impiego di componenti non originali che possono provocare anomalie nel funzionamento o danni permanenti al forno e possono compromettere la sua sicurezza.
- Page 5 Qualora si notasse una qualsiasi anomalia nel funzionamento del forno, contattare esclusivamente l’assistenza tecnica Effeuno (service@effeuno.biz). Il forno è destinato solamente all’uso per il quale è stato concepito, ogni altro utilizzo è da considerarsi improprio e quindi pericoloso. Il costruttore non può essere considerato responsabile per eventuali danni derivanti da usi impropri, erronei ed irragionevoli.
- Page 6 Si tratta di un collegamento monofase. Verificare che la spina non presenti difetti e avarie, in caso di qualsiasi dubbio non collegare il forno alla presa elettrica ma rivolgersi all’assistenza Effeuno. Se ha acquistato il seguente modello: P250H Si possono avere due tipologie di collegamenti, se...
- Page 7 L’installatore specializzato dovrà installare i seguenti componenti rispettando le normative vigenti del paese di utilizzo dell’apparecchiatura: Un cavo di alimentazione con presa e spina idonee; Interruttore/sezionatore di linea; Sganciatore termico ed interruttore differenziale con caratteristiche di sensibilità commisurata alla corrente di fuga delle resistenze.
- Page 8 5. ACCENSIONE DEL DISPLAY Una volta alimentato il forno collegandolo alla presa di corrente, va attivato il display premendo il pulsante situato sotto lo schermo touch. Una volta terminato l’utilizzo del forno, il display può essere spento tramite la pressione del pulsante (1). Se è attivo il ventilatore tangenziale, questo non verrà...
- Page 9 6. RODAGGIO DELLA PIETRA BISCOTTO EFFEUNO Procedura di Rodaggio: il corretto rodaggio della pietra biscotto Effeuno è essenziale per garantirne la massima resa e durata nel tempo. Si raccomanda di seguire attentamente le istruzioni riportate di seguito: 1.Posizionamento della Pietra: Inserire la pietra biscotto Effeuno all'interno della camera di cottura del forno.
- Page 10 Effeuno. temperatura ambiente di almeno 25 °C I forni EVOLUTION sono dotati di un ventilatore interno che si aziona automaticamente circa 20 minuti dopo l’accensione alla massima temperatura.
- Page 11 Come pulire la pietra refrattaria/biscotto? Dato il materiale “poroso” delle pietre, è del tutto normale che dopo alcuni utilizzi risultino delle macchie scure, non sono altro che condimenti della pizza caduti sulla pietra e anneriti dalla temperatura elevata di cottura. La pietra non è “vecchia” o “inutilizzabile”. Cosa non fare: ...
- Page 12 Le riparazioni vengono effettuate esclusivamente presso uno dei centri autorizzati da Effeuno. Qualora dovesse manifestarsi un difetto di conformità nel prodotto Effeuno dopo il sesto mese dalla consegna, l’utente finale che può usufruire della garanzia ai sensi della legge vigente dovrà rivolgersi al rivenditore o, in alternativa, ad un centro di assistenza autorizzato da Effeuno allegando la seguente documentazione: •...
- Page 13 11. CARATTERISTICHE TECNICHE Pagina 11 di 28...
- Page 14 12. CONTROLLO DIGITALE 12.1 PAGINA DI START-UP Per accendere il forno, premere in modo prolungato (per almeno 4 secondi) il tasto ON/OFF di accensione posto in alto a destra. In questo modo il forno entrerà in modalità di standby, quindi il forno è in funzionamento, ma in attesa di comandi e con luce spenta.
- Page 15 Il set-point di temperatura superiore impostato e quello inferiore • Le temperature rilevate in tempo reale dalla sonda superiore all’interno della camera . Mentre a dx viene evidenziata la temperatura inferiore rilevata sotto alla pietra. La temperatura del cielo/camera è quella principale che guida la cottura, pertanto la temperatura di set-point impostata viene letta direttamente dalla sonda della temperatura cielo/camera.
- Page 16 I pulsanti in basso permettono rispettivamente: Accendere/spegnere luce camera di cottura Attivare la modalità Preriscaldamento (PREHEAT) Attivare la modalità Mantenimento (MAINTAIN) Attivare la modalità Boost cielo (BOOST) Attivare la modalità Boost platea (BOOST) Accedere alla pagina di selezione programmi ...
- Page 17 Le impostazioni più rapide e facili da salvare sono le seguenti: 1. Percentuale potenza cielo e percentuale potenza platea, premendo sulle percentuali. 2. Set-point temperatura cielo/camera di cottura e platea, premendo sul set-point di Temperatura. 3. Timer di cottura (premendo sull’indicatore di fase). 12.2.1 SET-POINT TEMPERRATURA DI CIELO/CAMERA Dalla pagina principale è...
- Page 18 12.2.4 FUNZIONALITA’ MODALITA’ MANTENIMENTO (MAINTAIN) Premendo il rispettivo pulsante , il sistema varia le percentuali di cielo e platea con quelle di mantenimento impostate sul programma corrente. Alla disattivazione della modalità preriscaldamento (condizione che si verifica 5°C del raggiungimento del set- point impostato o premendo nuovamente il pulsante Preriscaldamento) il sistema si porta automaticamente in modalità...
- Page 19 12.2.4 LABEL DI STATO FORNO La label che appare alla destra della descrizione del programma corrente rappresenta lo stato attuale del forno. In particolare: STANDBY: il forno è in attesa di un comando da parte dell’utente affinché il controllo di temperatura inizi a seguire il set-point di temperatura assegnato.
- Page 20 12.3 PAGINA IMPOSTAZIONI Da questa pagina è possibile accedere alle diverse pagine di impostazioni premendo sul rispettivo pulsante. Programmi: vedi sezioni Programmi (Paragrafo 12.4) Impostazioni: vedi sezioni Impostazioni (Paragrafo 12.5) Log Allarmi: vedi Log Allarmi (Paragrafo 12.7) Parametri: possibilità di cambiare percentuale di Boost. Aggiornamento programmi: vedi (Paragrafo 12.8).
- Page 21 12.5 CREAZIONE PROGRAMMA DI COTTURA Dalla pagina principale, premere icona IMPOSTAZIONI per accedere alla pagina dedicata alle varie impostazioni. Premere icona PROGRAMMI per accedere alla pagina dedicata alla configurazione dei programmi. Premere icona P1-30 per selezionare il programma da creare/modificare. Inserire/modificare la STRUTTURA del programma: Nome programma selezionato...
- Page 22 12.6 PAGINA IMPOSTAZIONI DISPLAY Da questa pagina è possibile impostare: La lingua dell’interfaccia: le lingue disponibili sono italiano, inglese, tedesco, francese, spagnolo. Buzzer: l’abilitazione del segnale acustico alla pressione dei tasti. La data (anno, mese e giorno) e l’ora. ...
- Page 23 12.8 PAGINA AGGIORNAMENTO PROGRAMMI D a questa pagina, con una chiavetta USB formattata FAT32 inserita nel relativo connettore, è possibile effettuare: Importazione programmi: il sistema cerca un file denominato “PROGRAMS.CSV”ed importa i relativi parametri. Esportazione programmi: il sistema esporta un file denominato “PROGRAMS.CSV”...
- Page 24 Nel caso il programma caricato abbia più di una fase, tali fasi vengono visualizzate sulla parte superiore del display e vengono rappresentate da corone circolari le cui barre vengono colorate con lo scorrere del tempo. Sono indicati inoltre i tempi di cottura, percentuali di potenza e set-point di temperatura delle varie fasi (l’ordine delle fasi va da sinistra a destra).
- Page 25 12.9.2 CICLO PROGRAMMA DI COTTURA Accendere il controllo tenendo premuto il tasto [ON/OFF]. ACCENSIONE In questo modo il forno caricherà direttamente nel programma CONTROLLO MANUAL ed entrerà nello stato STANDBY. Premere icona [P] per visualizzare l'elenco programmi disponibili ...
- Page 26 13. TABELLA SINTETICA FUNZIONALITÀ DEL CONTROLLO ELETTRONICO PULSANTE ICONA FUNZIONE Permette di accendere il forno ed entrare nello stato iniziale ON/OFF (CONTROLLO SPENTO) di accensione STANDBY [tocco prolungato - 4 sec] Permette di spegnere il forno [tocco prolungato - 4 sec] Permette di staccare la potenza delle resistenze e di bloccare eventuali ON/OFF (CONTROLLO ACCESO) fasi di cottura e di ritornare allo stato iniziale (STANDBY) di accensione...
- Page 27 14. DOMANDE FREQUENTI Il mio forno non si accende E’ necessario premere con vigore il tasto di reset in corrispondenza del termostato di sicurezza (lo trova sul retro del forno) Devo contattare l’assistenza e vorrei sapere quali documenti mi verranno richiesti Per verificare la garanzia necessitiamo dei seguenti dati: - Fattura di acquisto.
- Page 28 La Effeuno S.r.l. si riserva diritto di apportare su questo apparecchio modifiche elettriche, tecniche ed estetiche e/o sostituire parti senza alcun preavviso, ove lo ritenesse più opportuno, per offrire sempre un prodotto affidabile, di lunga durata e con tecnologia avanzata.
- Page 29 Pagina 27 di 28...
- Page 30 Via Mozart 43, 35011 Campodarsego (PD) Tel. +39 049 5798415 P. IVA: 04216610289 info@effeuno.biz www.effeuno.biz I dati riportati sul presente documento sono da ritenersi non vincolanti. EffeUno S.r.l. si riserva di apportare modifiche tecniche ed estetiche in qualsiasi momento. Pagina 28 di 28...
-
Page 31: Table Of Contents
......................4. CONNECTION TO THE POWER SUPPLY OUTLET pag. 4 ..............5. SWITCHING ON THE DISPLAY …………………………….. pag. 6 ….…..…........... 6. BREAKING-IN THE EFFEUNO BISCOTTO STONE . pag. 7 ..............7. SAFETY pag. 8 …............................8. CLEANING THE OVEN pag. 9 ........................ -
Page 32: General Warnings
• Do not allow individuals who are not self-sufficient or children/minors to use the oven without proper supervision.. • Non utilizzare accessori non previsti da Effeuno, possono causare serio pericolo. • Never pull the cord or the oven to disconnect the plug from the socket, and do not leave the cord hanging. -
Page 33: Before Using The Oven
The use of adapters, multiple sockets, and extensions is not recommended. If used, ensure that the devices comply with current safety standards and do not exceed the current load limit marked on the adapter/extension. If you notice any anomaly in the operation of the oven, contact exclusively Effeuno's technical service department. Pagina 3 di 28... -
Page 34: Connection To The Power Supply Outlet
This is a single-phase connection. Ensure that the plug is free from defects and damages. If you have any doubts, do not connect the oven to the electrical outlet and instead, contact Effeuno assistance. If you have purchased the following model: P250H There can be two types of connections. - Page 35 The specialized installer must install the following components in accordance with the regulations of the country where the equipment is used: A power cable with suitable plug and socket. Line switch/disconnector. Thermal release and differential switch with sensitivity characteristics proportional to the leakage current of the resistors.
-
Page 36: Switching On The Display
5. SWITCHING ON THE DISPLAY Once the oven is powered by connecting it to the power outlet, activate the display by pressing button (1) located under the touch screen. Once the oven usage is complete, the display can be turned off by pressing button (1). If the tangential fan is active, it will not be turned off but will continue operating until the oven is completely cooled. -
Page 37: Breaking-In The Effeuno Biscotto Stone
6. BREAKING-IN THE EFFEUNO BISCOTTO STONE Breaking-in Procedure Proper breaking-in of the Effeuno biscotto stone is essential to ensure its maximum yield and longevity. It is recommended to carefully follow the instructions listed below: 1. Placement of the Stone: Insert the Effeuno biscotto stone inside the oven's cooking chamber. -
Page 38: Safety
Contact the nearest Effeuno service center. temperature of at least 25°C. The EVOLUTION ovens are equipped with an internal fan which is automatically activated about 20 minutes after the oven has been turned on at the maximum temperature. -
Page 39: Cleaning The Oven
8. CLEANING THE OVEN Cooking times may be longer if the inside of the oven is dirty. Frequent cleaning prevents the formation of smoke and bad odors during cooking. To clean the external surface, use a damp sponge or cloth. Do not use abrasive products that could damage the steel surface. -
Page 40: Warranty
Repairs are carried out exclusively at service centers authorized by Effeuno. . If a defect is found in the Effeuno product more than six months from delivery, the end user who has the right to make a warranty claim in accordance with the law in force must contact the retailer or, alternatively, an Effeuno authorized service center, attaching the following documentation: •... -
Page 41: Technical Characteristics
11. TECHNICAL CHARACTERISTICS Pagina 11 di 28... -
Page 42: Digital Control
12. DIGITAL CONTROL 12.1 START-UP SCREEN To turn the oven on, tap and hold the ON/OFF switch on the top right (for at least 4 seconds). In this way the oven will go into stadby mode: it is now in operation but waiting for commands and the light is off. - Page 43 The upper temperature set-point set and the down The temperatures detected in real time by the upper probe inside the room. While on the right the lower temperature detected under the stone is highlighted. The upper/lower temperature is the main one that guides cooking, therefore the set set-point temperature is read directly from the sky/chamber temperature probe.
- Page 44 The buttons at the bottom allow respectively : Turn the cooking chamber light on/off Activate the Preheat mode (PREHEAT) Attivare la modalità Mantenimento (MAINTAIN) Activate sky boost mode (BOOST) Activate the bottom Boost mode (BOOST) ...
- Page 45 The quikest and easier settings to save as follows: 1. Percentage of sky power and percentage of floor power, by pressing on the percentages 2. Top/cooking chamber and bottom temperature set-point, by pressing on the Temperature set-point 3. Cooking timer (by pressing the phase indicator). 12.2.1 SKY/ROOM TEMPERATURE SET-POINT From the main page it is possible to set the sky temperature set-point, even in the case of preloaded programs.
- Page 46 12.2.4 MAINTENANCE MODE FUNCTIONALITY (MAINTAIN) By pressing the button , the system varies the percentages of the top and bottom with those of maintenance set on the current program. When deactivating the preheating mode (condition that occurs 5°C before the set set-point is reached or by pressing the Preheating button again) the system automatically goes into maintenance mode.
- Page 47 12.2.4 OVEN STATUS LABEL The label that appears to the right of the description of the current program represents the current status of the oven. In particular: STANDBY: the oven is waiting for a command from the user so that the temperature control starts following the assigned temperature set-point.
-
Page 48: Settings Screen
12.3 SETTINGS SCREEN From this page it is possible to access the different settings pages by pressing the respective button. Programms: see Programs sections (Paragraph 12.4) Settings: see Settings sections (Paragraph 12.5) Alarm Log: see Alarm Log (Paragraph 12.7) Parameters: possibility to change Boost percentage. Program update: view (Paragraph 12.8). -
Page 49: Setting Of The Cooking Programs
12.5 SETTING OF THE COOKING PROGRAMS From the main page, press SETTINGS icon [1] to access the page dedicated to the various settings. Press PROGRAMS icon [2] to access the page dedicated to program configuration. Press icon P1-30 to select the program to create/modify. Insert/modify the STRUCTURE of the program: Selected program name... -
Page 50: Display Settings Page
12.6 DISPLAY SETTINGS PAGE From this page you can set: The interface language: the available languages are Italian, English, German, French, Spanish. Buzzer: enabling the acoustic signal when the keys are pressed. The date (year, month and day) and time. ... -
Page 51: Multimedia Screen
12.8 MULTIMEDIA SCREEN From this page, with a FAT32 formatted USB stick inserted in the relevant connector, it is possible to carry out: Importing programs: the system searches for a file called “PROGRAMS.CSV” and imports the related parameters. Program export: the system exports a file called “PROGRAMS.CSV”... - Page 52 If the loaded program has more than one phase, these phases are displayed on the upper part of the display and are represented by circular crowns whose bars are colored as time passes. The cooking times, power percentages and temperature set-points of the various phases are also indicated (the order of the phases goes from left to right).
- Page 53 12.9.2 COOKING PROGRAM CYCLE Turn on the control by holding down the [ON/OFF] key. POWER ON In this way the oven will load directly into the MANUAL program and enter CONTROL the STANDBY state. Press [P] icon to view the list of available programs ...
-
Page 54: Summary Table Of The Electronic Control Mode
13. SUMMARY TABLE OF THE ELECTRONIC CONTROL MODE BUTTON ICON FUNCTION Allows you to turn on the oven and enter the initial state ON/OFF (CONTROL OFF) STANDBY [long touch - 4 sec] Allows you to turn off the oven [long touch - 4 sec] It allows you to disconnect the power of the resistances and block any ON/OFF (CONTROL ON) cooking phases and return to cooking... -
Page 55: Frequent Questions
14. FREQUENT QUESTIONS My oven won't turn on It is necessary to press the reset button vigorously next to the safety thermostat (located on the back of the oven) I need to contact support and would like to know what documents will be requested from me To verify the warranty we need the following data: - Purchase invoice. - Page 56 Effeuno S.r.l. reserves the right to make electrical, technical and aesthetic modifications to this appliance and/or replace parts without notice, where it deems it more appropriate, to always offer a reliable, long-lasting product with advanced technology. DECLARATION OF CONFORMITY La Ditta EFFEUNO S.r.l.
- Page 57 Pagina 27 di 28...
- Page 58 Via Mozart 43, 35011 Campodarsego (PD) Tel. +39 049 5798415 P. IVA: 04216610289 info@effeuno.biz www.effeuno.biz The data reported in this document are to be considered non-binding. EffeUno S.r.l. reserves the right to make technical and aesthetic changes at any time. Pagina 28 di 28...
Need help?
Do you have a question about the EVOLUTION P134H and is the answer not in the manual?
Questions and answers