Advertisement
- 1 FUNCTION KEYS
- 2 TURNING THE AXIS ON/OFF
- 3 THE POWER BUTTON
- 4 VOLUME CONTROL
- 5 USING BATTERY POWER
- 6 USING AND CHARGING THE RECHARGABLE BATTERY
- 7 USING THE DC-IN (5v) USB CORD
- 8 LCD BACKLIGHT
- 9 SELECTING BANDS AND TUNING IN STATIONS
- 10 THE NOAA ALERT FEATURE
- 11 CHARGING CELL PHONES
- 12 SETTING THE TIME AND ALARM
- 13 TURNING THE ALARM ON AND OFF
- 14 USING THE FLASHLIGHt AND EMERGENCY LIGHT
- 15 EARPHONE JACK
- 16 AUDIO-IN SOCKET
- 17 RESETTING THE AXIS
- 18 Documents / Resources
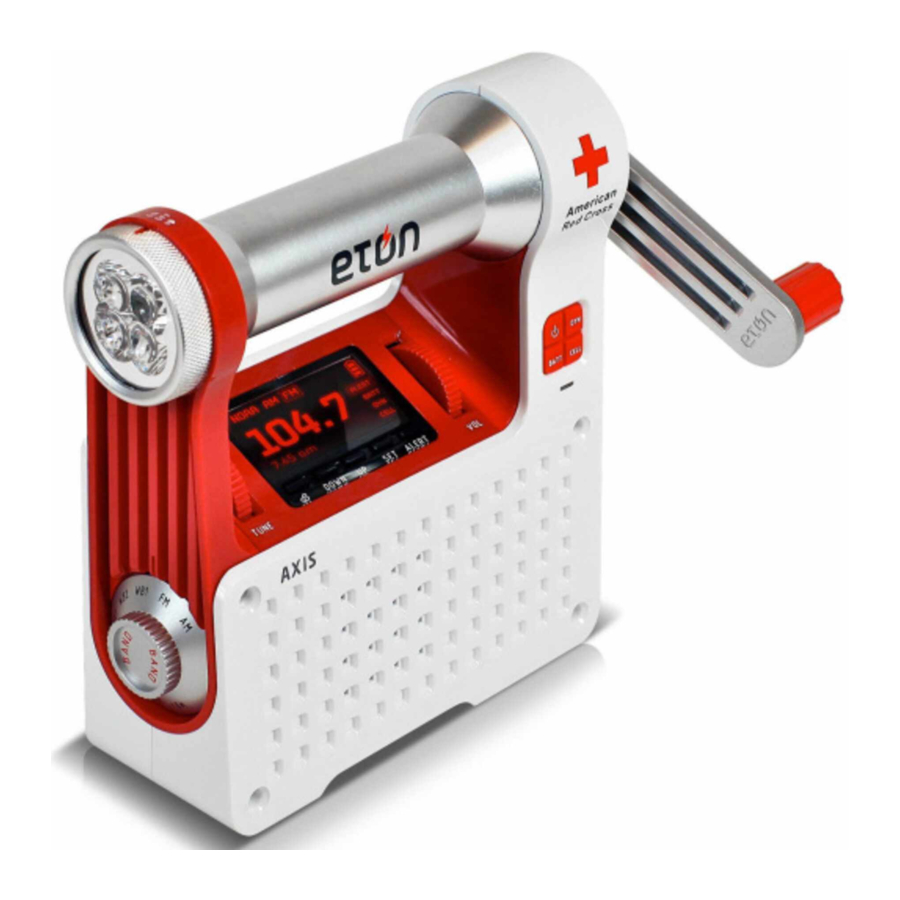
FUNCTION KEYS

TURNING THE AXIS ON/OFF
The AXIS is powered by 3 AAA batteries (BAtt) and the rechargeable battery (DYN) that plugs inside the battery compartment.
To turn the radio on, press the BATT button or the DYN button (front right side) and then press POWER (button with the circle and vertical line).
THE POWER BUTTON
The POWER button is located on the front right side of the radio and has a circle with the vertical line through it. Press this button to turn the radio on.
VOLUME CONTROL
Turn the control knob, labeled vOL, to control the volume. Scroll the knob up to raise the volume; scroll it down to lower volume. Always turn down the volume before using earphones.
USING BATTERY POWER
Insert 3 AAA batteries, press the BATT button (front right side of radio) and then press the POWER button to turn the radio on.
USING AND CHARGING THE RECHARGABLE BATTERY
The rechargeable Ni-MH (nickel-metal hydride) battery is located in the battery compartment. To use it, plug the battery into the socket adjacent to it, press the DYN button (front right side of radio) and then the POWER button. You may have to charge the battery. To do this, simply turn the crank for 90 seconds. You can also charge via mini USB located under DC-IN (5V) on the back of the radio. After charging, press DYN and then POWER. After a few years the rechargeable battery will eventually lose its ability to hold a charge. Contact Etón Corporation to order a replacement.


While crank charging the Ni-MH battery, the battery charge indicator (located on front right side of radio) turns red. While charging the battery with the USB cord, the charging light turns red while charging and turns green when fully charged.
A fully charged rechargeable Ni-MH battery will play for about 4 to 5 hours, at low volume. Crank charging for 1 minute will play the radio for about 5 minutes, at low volume.

If you have the rechargeable battery unplugged, do not turn the crank, as this can cause overload to internal components, and possibly damage them.
USING THE DC-IN (5v) USB CORD
A USB charging cord is included. Plug the large USB plug into your computer's USB socket (computer must be turned on) or into an AC adapter (not included) with a USB socket on it (must support 5V 500), available at most electronics retailers. Plug the mini-USB plug into the DC-IN socket (located under the top rubber cover on the back of the radio). To play the radio without charging the rechargeable battery, press BATT and then POWER (button with circle and vertical line). To play the radio and charge the rechargeable battery, press DYN and then press POWER. A full charge is acquired after about 8 hours of charging. The radio can be played while it's charging.
LCD BACKLIGHT
Each time a button is pressed, the LCD backlight turns on for about 10 seconds.
SELECTING BANDS AND TUNING IN STATIONS
The AXIS plays Am (520-1710 KHz), Fm (87.5-108 MHz) and seven NOAA Weather channels:
Select Am, Fm or WB1-WB7 with the band knob on the left side of the radio.
When listening to Fm and Weather channels, extend the telescopic antenna all the way up. When tuning Am stations the telescopic antenna is not needed and can be lowered.
Tune into stations by scrolling the tUNE knob.
The weather frequencies are on channels WB1 through WB7. Choose a station with the knob on the left side of the radio. Try all of them and find the one with the strongest signal; the strongest signal is your weather station. In most communities only one channel will be heard. The frequencies associated with them are:
WEATHER BAND CHANNELS
| Channel 1 | 162.400 Mhz |
| Channel 2 | 162.425 MHz |
| Channel 3 | 162.450 Mhz |
| Channel 4 | 162.475 MHz |
| Channel 5 | 162.500 Mhz |
| Channel 6 | 162.525 MHz |
| Channel 7 | 162.550 MHz |
THE NOAA ALERT FEATURE
After you have tuned into your local weather channel, the radio can be SET to the ALERT function by pressing the ALERT button (below and right of the LCD). When pressed, 'ALERT' flashes on the right of the display. This function turns off the sound, but continues to monitor the NOAA frequency. If an ALERT is broadcast, the sound turns back on automatically, enabling you to hear the ALERT broadcast. To turn ALERT off, press ALERT again and 'ALERt' disappears from the display.
NOTE: While ALERT is selected, no other stations (excluding FM) can be tuned in or received.
CHARGING CELL PHONES
If your cell phone has a USB charging cord, you can use it. If not, you can purchase one from www.iGo.com, or call 1-888-205-0093. To purchase a charging tip and cord for your cell phone, go to www.iGo.com, or call 1-888-205-0093. Purchase USB charging cable model# PS00271-0003 and have the brand and model of your cell phone ready to purchase the tip.
To use the cell phone's USB charging cord, connect it to the radio's large USB socket (located under the rubber cover on the back of the radio.) Press the CELL button and the battery power will directly dump charge to your cell phone. The Axis will only charge your cell phone if the battery indicator shows it at half full, or two bars. To charge your cell phone with a low battery, turn the crank for 7 minutes at 130 rpm to charge the cell phone enough to talk for about 5 minutes.
The Axis has a low voltage protection circuit to avoid the battery from dropping too low in voltage from cell phone charging. If the battery symbol on the LCD display shows three bars, it can support cell phone charging. When the battery symbol is blinking, it stops charging your cell phone and you are urged to re-charge the battery until the blinking stops so that cell phone charging can resume.
To charge your cell phone:
- PressDYN. Make sure that the battery symbol has three bars. If it doesn't or if it's blinking it must be charged by cranking or with an AC adapter until it stops blinking.
- Plug the USB cell phone charging cord into the PHONE CHARGER socket (under the rubber cover on the back of the radio).

- Plug the other end of the cord into the cell phone.
- Press the button labeledCELL and 'CELL' will appear in the lower right corner of the LCD display. The cell phone should start charging and show charging on its display.
After about 20 minutes of charging, the cell phone should have a talk time of 20 to 25 minutes.
If you don't have time to charge the radio's rechargeable battery you can still charge your cell phone by pressing DYN and turning the crank for 7 minutes. With your cell phone plugged in, press CELL and charge the cell phone for about 5 minutes, after which you can talk for about 6 minutes.

SETTING THE TIME AND ALARM
To SET the time:
- With the radio turned off, press the SET button (the fourth button from the left, under the display) for one second.
- While the hour flashes press the UP or DOWN buttons (the 3rd and 2nd button from the left, under the display) to SET the hour.
- Press SET again.
- While the minute flashes press the UP or DOWN buttons to SET the minutes.
- Press SET again.
- If you wish to change the clock mode from 12 to 24 hours or vice versa, press the UP or DOWN buttons to change it from the one displayed to the other.
- Press SET to finalize the time setting.
To SET the ALARM:
- With the radio turned off, press the ALARM button (to the far left side under the display) so that 'ALARM' appears at the top of the display.
- Press SET to make the hour flash.
- While the hour flashes, press the UP or DOWN buttons to SET the ALARM hour.
- Press SET to make the minutes flash.
- While the minute flashes, press the UP or DOWN buttons to SET the ALARM minutes.
- Press SET to finalize the ALARM setting.
- Press ALARM again to deactivate the ALARM.
TURNING THE ALARM ON AND OFF
With the radio on or off press the ALARM button. Notice that when it's on, 'ALARM' appears at the top of the display. When it's off, 'ALARM' disappears.
USING THE FLASHLIGHt AND EMERGENCY LIGHT
Use the ON/OFF/ " " switch on the top left of the radio to turn these lights on and off. The ON position turns on a flashlight. The " " position turns on a flashing red light. The OFF position turns the lights off.
EARPHONE JACK
The AUDIO-OUt socket is under the lower rubber cover on the back of the radio. Plug in any stereo earphones. Audio is heard in mono only. Always turn down the volume before plugging in earphone/headphones.
AUDIO-IN SOCKET
The AUDIO-IN socket is located under the lower rubber cover on the back of the radio. It enables you to listen to other devices, such as MP3 players, using a stereo 3.5 mm (1/8 inch) connector cord.
RESETTING THE AXIS
If the Axis ever stops working or won't turn on, just reset it. Remove your AAA batteries and unplug the rechargeable battery. Let the radio sit for 30 minutes, then put them back in. To play it from AAAs press BATT first, then POWER. To play it from the rechargeable batteries, first press DYN, turn the crank for at least one minute, then press POWER.
DO YOU NEED HELP?
If you need help, please contact us, Monday-Friday, 8:00 a.m.-4:30 p.m., North American Pacific Time. 1-800-872-2228 from the U.S; 1-800-637-1648 from Canada; 650-903-3866, worldwide; FAX: 650-903-3867; web site, www.etoncorp.com; Etón Corporation, 1015 Corporation Way, Palo Alto, CA 94303, USA
- Do not expose this appliance to rain or moisture.
- Do not submerge or expose for extended period to water.
- Protect from high humidity and rain.
- Unplug immediately if liquid has been spilled or if an object has fallen into the apparatus.
- Clean only with a dry cloth. Do not use detergents or chemical solvents as this might damage the finish.
- Unplug and disconnect external antennas (not included) during lightning storms.
- Do not remove cover [or back].
- Refer servicing to qualified service personnel.
Documents / Resources
References
![www.etoncorp.com]() Etón - The only American Red Cross approved radio manufacturer
Etón - The only American Red Cross approved radio manufacturer![www.igo.com]() Steel Partners Holdings L.P. | A Global Diversified Holding Company
Steel Partners Holdings L.P. | A Global Diversified Holding Company

Download manual
Here you can download full pdf version of manual, it may contain additional safety instructions, warranty information, FCC rules, etc.
Advertisement


Need help?
Do you have a question about the AXIS and is the answer not in the manual?
Questions and answers