Midland ER200 - Weather Radio Manual
- Owner's manual (19 pages) ,
- Instruction manual (33 pages)
Advertisement
- 1 Features
- 2 Controls and Functions
- 3 Powering Your Device
- 4 Charging External Devices
- 5 Operating the Radio
- 6 Using the Device
- 7 Device Settings Menu
- 8 LED Flashlight
- 9 SOS Morse Code Flashlight Beacon
- 10 Using the Headphone Jack
- 11 Limited Warranty
- 12 Service
- 13 Other Products
- 14 Accessories
- 15 Documents / Resources
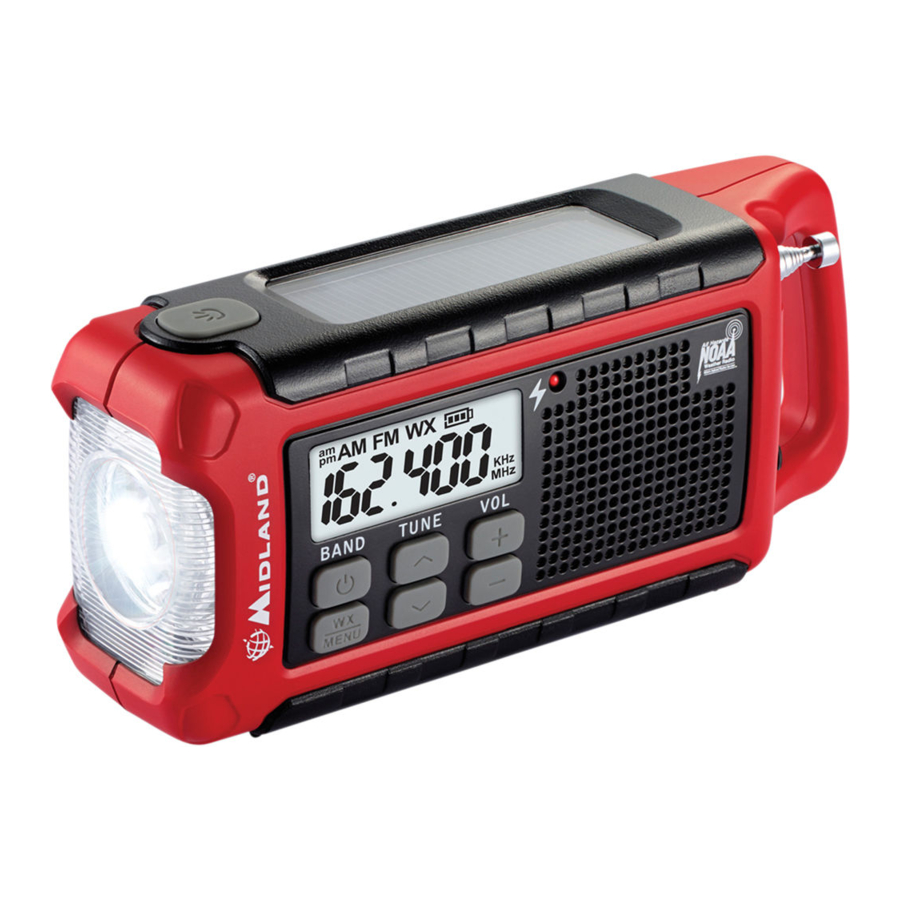
Features
- Charge battery 3 ways: hand crank, USB or solar panel
- 7 NOAA/NWS weather alert channels
- Rechargeable Lithium-ion battery
- Powerful flashlight uses a Cree LED
- SOS Morse code flashlight beacon
- Charge external electronic devices
- AM/FM radio
- Digital clock
- Headphone jack
- Rotatable telescopic antenna
- Bright, backlit LCD
Controls and Functions


Powering Your Device
USB Charge Cable: Before the ER200 is used, the internal rechargeable battery pack should be charged with the USB charge cable until the battery indicator icon indicates a full charge. To charge the ER200 with the USB cable, insert the USB charge cable into a USB power source and plug the mini USB connector into the port labeled "USB In" on the side of the radio. The CHARGE indicator light will be lit when the USB charge cable is plugged in. The battery icon on the LCD will flash as the battery charges. When the Li-ion battery has reached full charge, the battery icon will stop flashing and will have 3 bars. It will take approximately 5.5 hours to recharge a completely depleted battery pack using the USB charge cable.
Rechargeable Battery: The included rechargeable battery is located in the battery compartment and is charged by turning the hand crank, exposing the solar panel to sunlight, or by using the USB cable to attach to a USB power source. The battery is specified as 3.7 VDC, 2000 mAh, lithium ion (Li-ion).

- Only use Midland's Li-ion battery pack.
- Do not attempt to charge alkaline batteries or any battery packs other than the ones indicated in this manual. This could cause leakage and damage to the radio.
Dynamo Power: Turning the hand crank charges the built-in Li-ion battery pack. To charge the radio using the hand crank, start turning the crank. The CHARGE indicator light will be lit while the unit is being cranked. Speed of cranking and length of time cranked will determine the charge of the Li-ion battery. The battery icon on the LCD will flash as the battery charges. When the Li-ion battery has reached full charge, the battery icon will stop flashing and will have 3 bars.
Solar Panel Charge: Place the ER200 where the solar panel is exposed to direct sunlight. The battery icon on the LCD will flash as the battery charges. When the Li-ion battery has reached full charge, the battery icon will stop flashing and will have 3 bars. The CHARGE indicator light will be lit while the unit is charging.
Charging External Devices
Cell phones and USB-powered devices can be charged using the USB charge cable for that device. Connect the charge cable to the USB Outlet port on the side of the ER200 labeled "USB Out". If the radio is on it will automatically turn off and go into charge mode.
Operating the Radio
Turning the Device On/Off & Selecting a Band
- To turn the radio on, press the BAND button. To cycle through AM, FM, or Weather radio bands press the band button again.
- To turn the radio OFF, press and hold the BAND button for 3 seconds.
Adjusting the Volume
- To adjust the volume, press the PLUS/MINUS VOLUME control buttons to adjust the audio.
Tuning the Radio
- Press the BAND button to cycle through AM, FM, and Weather radio bands.
- Once you are on the desired radio band, you can tune to the desired station with the UP/DOWN TUNE buttons. For best FM and Weather reception, fully extend the telescopic antenna and rotate until reception is clear.
Using the Device
About NOAA/NWS
The National Oceanic Atmospheric Administration and the National Weather Service operates a system of weather and hazard alert broadcasts covering most of the United States. Typical broadcasts are within reception distance of 25-50 miles of the weather station. Fully extend the telescopic antenna and rotate until reception is clear. The ER200 can receive broadcasts up to 50 miles from the weather station depending on your location and conditions of weather, terrain, etc. If reception is not good, try a different location to find a spot of improved reception. If indoors, placement near a window usually improves reception. If a weather broadcast cannot be heard on any of the 7 channels, contact your local NOAA/NWS office and verify the closest station is on air. Their web site is http://www.nws.noaa.gov/nwr/.
Selecting a Weather Channel
The ER200 has 7 NOAA/NWS weather channels to choose from.
- Press the BAND button to select the weather band.
- Then use the TUNE buttons to select the strongest weather channel in your area.
| Ch. # | Frequency |
| 1 | 162.400 MHz |
| 2 | 162.425 MHz |
| 3 | 162.450 MHz |
| 4 | 162.475 MHz |
| 5 | 162.500 MHz |
| 6 | 162.525 MHz |
| 7 | 162.550 MHz |
Weather Alert Function
- To enable the NOAA Weather Alert function, press the WX ALERT button.
- When enabled, the "WX" icon on the LCD screen will flash.
- When a weather alert is received, the ER200 will sound an audible siren and the flashlight will flash on and off along with the LCD backlight for 1 minute.
- Pressing any button during an alert on the ER200 will stop the siren and flashlight and the radio will switch to your selected weather channel.
Device Settings Menu
Accessing and Using the Menu
- To access the ER200's settings menu, press and hold the WX ALERT / MENU button for 3 seconds.
- To adjust the settings use the UP/DOWN TUNE buttons.
- To go to the next menu option, press the WX ALERT / MENU button.
- To exit the menu, toggle through all the menu options or wait 30 seconds and the menu will time-out.
Setting the Clock
- To set the clock, press the WX ALERT / MENU button and select the 24 hour or 12 hour clock.
- Press the WX ALERT / MENU button to adjust the time and again to adjust the minutes.
Backlight Option
The ER200 has 3 backlight settings:
- OFF: The backlight will always be off.
- ON: The backlight will always be on.
- Default: The backlight will turn on for 5 seconds when a button is pressed then turn off.
Weather Channel Display Option
The ER200 has 2 weather channel display options:
- Default: Displays weather channel frequency.
- Channel: Displays channel numbers.
LED Flashlight
The ER200 has 2 flashlight brightness settings:
- Dim: The first press of the flashlight button will enable the dim setting.
- Bright: The second press of the flashlight button will enable the bright setting.
SOS Morse Code Flashlight Beacon
- To enable the SOS feature, press the flashlight button 3 times. The SOS Morse code is: 3 short flashes, 3 long flashes, and 3 short flashes.
- To turn off the SOS feature, press the flashlight button.
Using the Headphone Jack
Plug in a set of headphones (not included) that have a 1/8 inch mono or stereo plug.
Limited Warranty
For Product Purchased in the USA:
Performance of any obligation under this warranty may be obtained by returning the warranted product, prepaid freight, along with proof of purchase to:
Midland Radio Corporation
Warranty Service Department
5900 Parretta Drive
Kansas City, MO 64120

(816) 241-8500
mail@midlandradio.com
midlandusa.com
Service
If you have a problem which you believe requires service, please first check the FAQ section of the website, check your Owner's Manual, or call and speak with a service technician. Many problems can be remedied without returning the unit for service. If necessary, return as follows:
- Pack the unit in its original box and packing. Then pack the original box in a suitable shipping carton. Caution: Improper packing may result in damage during shipment.
- Include the following:
- Full description of any problems
- Daytime telephone number, name & address
- For warranty service include a photocopy of the bill of sale from an authorized dealer or other proof of purchase showing the date of sale.
You do not need to return accessory items (Charge Cable, Batteries, and Owners Guide) unless they might be directly related to the problem.
Repairs not covered by warranty or units that are over ONE year old are subject to a repair fee. Please call for a quote on repair service cost at 816-241-8500. Send only cashier's check, money order, Master Card or Visa card number.
Midland Radio Corporation
5900 Parretta Drive
Kansas City, Missouri 64120
Phone: (816) 241-8500
Fax: (816) 241-5713
mail@midlandradio.com
midlandusa.com
Other Products

Check out these and other great products at
midlandusa.com
MIDLAND RADIO CORPORATION
5900 Parretta Drive
Kansas City, MO 64120
816.241.8500
Visit us at midlandusa.com
Note: Features & Specifications are subject to change without notice. MIDLAND is not responsible for unintentional errors or omissions on its packaging.
Accessories
Accessories can be purchased at www.midlandusa.com or fill in the order form and mail it to our address.

Mail To:
Midland Radio Corporation
Consumer Dept.
5900 Parretta Drive
Kansas City, MO 64120
Or Call 816.241.8500
Documents / Resources
References
![www.nws.noaa.gov]() NOAA Weather Radio
NOAA Weather Radio![www.midlandusa.com]() Midland Radio | Two Way Radios and Weather Radios
Midland Radio | Two Way Radios and Weather Radios![midlandusa.com]() Midland Radio | Two Way Radios and Weather Radios
Midland Radio | Two Way Radios and Weather Radios

Download manual
Here you can download full pdf version of manual, it may contain additional safety instructions, warranty information, FCC rules, etc.
Advertisement


Need help?
Do you have a question about the ER200 and is the answer not in the manual?
Questions and answers