Advertisement
where inspiration flows
CAMEO
Installation Guide
Cloakroom Vanity Unit
CAM-F400WH
This instruction booklet covers these models:
CAM-F400WH
(All finish options)
CAM-F400WH
Vado
Wedmore Road, Cheddar, Somerset, England BS27 3EB
tel 01934 744466.
fax 01934 744345
aftersales @ vado.com
www.vado.com
Keep for future reference
Version 1, 1-1-24
Advertisement
Table of Contents

Related Manuals for VADO CAMEO CAM-F400WH


Summary of Contents for VADO CAMEO CAM-F400WH
- Page 1 Cloakroom Vanity Unit CAM-F400WH This instruction booklet covers these models: CAM-F400WH (All finish options) CAM-F400WH Vado Wedmore Road, Cheddar, Somerset, England BS27 3EB tel 01934 744466. fax 01934 744345 aftersales @ vado.com www.vado.com Keep for future reference Version 1, 1-1-24...
-
Page 2: Important - Please Read
Important - Please Read Contents of Packaging VADO reserves the right to make technical improvements and enhance the appearance Vanity unit of the products included in this instruction manual. Please read these instructions carefully before starting the installation and keep for future reference. -
Page 3: Installation
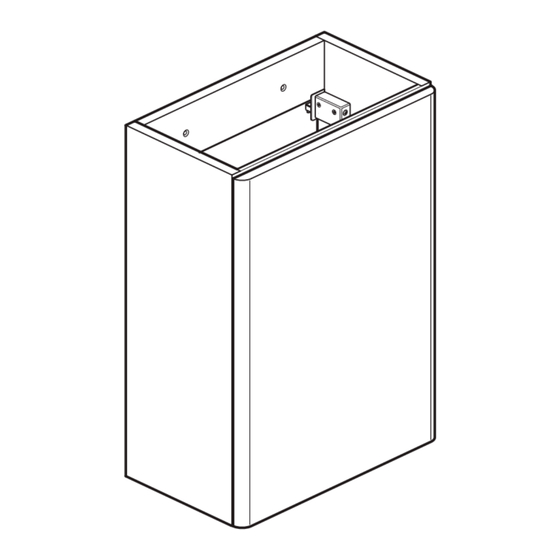
Dimensions - CAM-F400WH Installation 359mm 95 mm Outline of unit 393mm Bracket position Decide on the position and height of the unit. The recommended basin height is between 800 and 850mm from floor to top of basin. Mark the bracket fixing holes onto the wall. - Page 4 Installation Installation door and adjustment Latch Bracket Use the screws removed from Pre-drill two new holes and step 3 to re-attach the door. secure with the two new screws Reattach the door. It can either open to the left or the right based on your preference or handle type. Use the 4 screws taken off in step 3 as well as the 4 remaining screws to attach the hinges and door on your desired side.
- Page 5 Installation - door handle Installation- Basin CAM-HAN4R and CAM-HAN4L handles Apply silicone non-acidic to the side and For CAM-HAN4R the door hinge should front edges of the unit. Carefully position be on the left side of the unit. the basin down onto the unit ensuring CAM-HAN4L For CAM-HAN4L the door hinge should shown...
-
Page 6: Cleaning Instructions
In situations where like-for-like replacements are not possible, VADO will endeavour to provide the closest alternative. E&OE. NOTES: [1] Labour via our engineer network is only available in the UK. Attendance by a VADO engineer or sub-contract engineer will be under our standard terms and conditions. [2] Excludes any electrical components.
Need help?
Do you have a question about the CAMEO CAM-F400WH and is the answer not in the manual?
Questions and answers