Advertisement
Safety Information
READ ALL INSTRUCTIONS!

READ OPERATOR'S MANUAL
 Residual risk! People with electronic devices, such as pacemakers, should consult their physician(s) before using this product. Operation of electrical equipment in close proximity to a heart pacemaker could cause interference or failure of the pacemaker.

To ensure safety and reliability, all repairs should be performed by a qualified service technician.
SAFETY SYMBOLS
The purpose of safety symbols is to attract your attention to possible dangers. The safety symbols and the explanations with them deserve your careful attention and understanding. The symbol warnings do not by themselves eliminate any danger. The instructions and warnings they give are no substitutes for proper accident prevention measures.
Be sure to read and understand all safety instructions in this Operator's Manual, including all safety alert symbols such as "DANGER," "WARNING," and "CAUTION" before using this tool. Failure to follow all instructions listed below may result in electric shock, fire, and/or serious personal injury.
SYMBOL MEANING
This page depicts and describes safety symbols that may appear on this product. Read, understand, and follow all instructions on the machine before attempting to assemble and operate.
| Safety Alert |  | Wear Safety Footwear |
 | To reduce the risk of injury, user must read and understand operator's manual before using this product. |  | To prevent electrocution, do not operate within 15m of overhead electrical lines. Contact with or use near power lines may cause serious injury or electric shock resulting in death. |
 | Wear Eye Protection |  | Do Not Expose To Rain. |
 | Wear Head Protection |  | This product is in accordance with applicable EC directives. |
 | Wear Ear Protection |  | This product is in accordance with applicable UK legislation. |
 | Wear Protective Gloves |  | Waste electrical products should not be disposed of with household waste. Take to an authorized recycler. |
 | Guaranteed sound power level. Noise emission to the environment according to the European community's Directive. |  | Direct Current |
| IPX4 | Ingress Protection Degree | V | Voltage |
SPECIFICATIONS
| Rated Voltage | 56 V  | |
| Guide Bar Length | 25 cm | |
| Chain Pitch | 6.4 mm (1/4") | |
| Chain Gauge | 1.1 mm (0.043") | |
| Oil Tank Capacity | 80 ml | |
| Number of Drive Links | 56 | |
| Tool Length (without extension pole) | Max. 292 cm Min. 233 cm | |
| Recommended Operating Temperature | -15°C-40°C | |
| Recommended Storage Temperature | -20°C-70°C | |
| Recommended Charging Temperature | 5°C-40°C | |
| Weight (without battery pack, chain sheath) | 4.25 kg | |
| Measured sound power level LWA | 97 dB(A) K=2.5 dB(A) | |
| Sound pressure level at working position LPA | 82 dB(A) K=3 dB(A) | |
| Guaranteed sound power level LWA (according to 2000/14/EC) | 100 dB(A) | |
| Vibration ah | Front-assist Handle | 1.19 m/s2 K=1.5 m/s2 |
| Rear Handle | 1.01 m/s2 K=1.5 m/s2 | |
- The declared vibration total value has been measured in accordance with a standard test method and may be used for comparing one tool with another;
- The declared vibration total value may also be used in a preliminary assessment of exposure.
NOTICE: The vibration emission during actual use of the power tool can differ from the declared value in which the tool is used; In order to protect the operator, user should wear gloves and ear protectors in the actual conditions of use.
DESCRIPTION
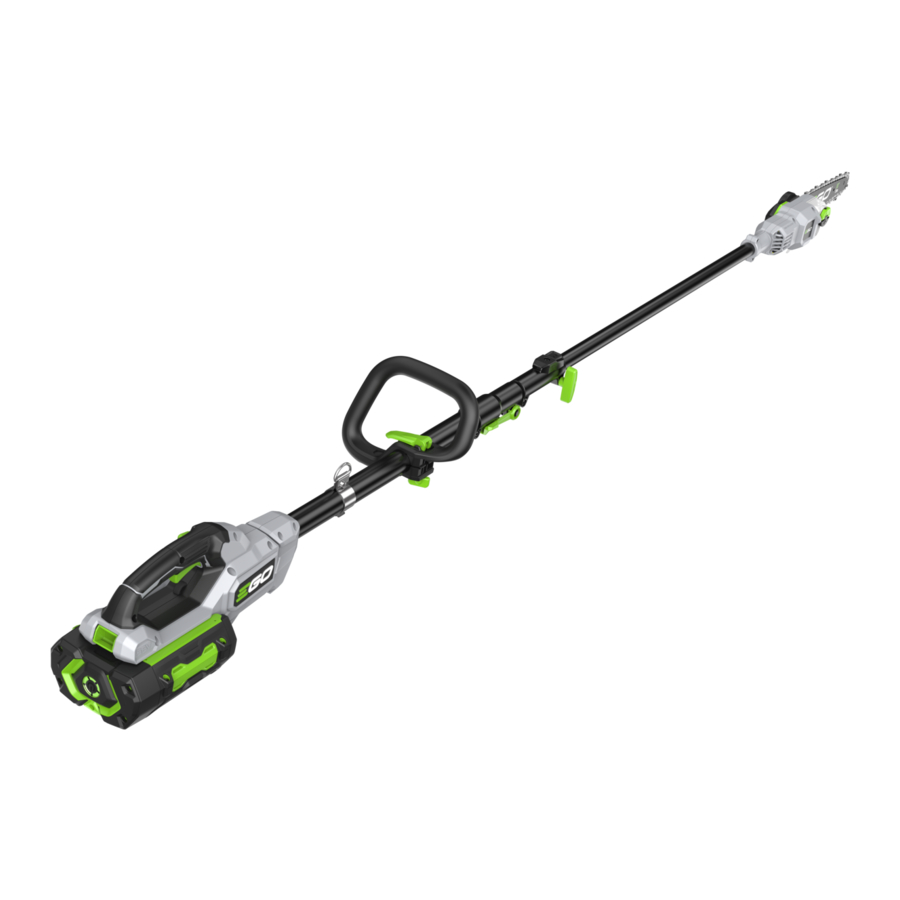
KNOW YOUR POLE SAW (Fig. A1)
PACKING LIST (Fig. A1)

- Quick Chain-tension Adjust Knob
- LED Work Light
- Side Cover
- Shoulder Strap Hanger
- Extension Pole
- Lock-off Button
- Trigger Switch
- Rear Handle
- Battery Release Button
- Front-assist Handle
- Quick Release Lever
- Telescopic Pole
- Shoulder Strap
- Oil Tank Cap
- Oil Tank
- Bucking Spikes
- Guide Bar
- Saw Chain
- Chain Sheath
Recommended Bar and Chain for this Pole Saw
| PART NAME | MODEL NUMBER |
| Guide Bar | AG1000Q, AG1200Q |
| Saw Chain | AC1000Q, AC1200Q |
ASSEMBLY
If any parts are damaged or missing, do not operate this product until the parts are replaced. Use of this product with damaged or missing parts could result in serious personal injury.
Do not attempt to modify this product or create accessories not recommended for use with this product. Any such alteration or modification is misuse and could result in a hazardous condition leading to possible serious personal injury.
Always remove the battery pack from the product when you are assembling parts, making adjustments, cleaning, or when the product is not in use.
ASSEMBLING THE GUIDE BAR AND CHAIN
- Lay the pole saw on a firm, flat surface, so that the side cover is facing upwards.
- Wear gloves. Remove the side cover (Fig. B).

- Lay the new saw chain in a loop on a flat surface and straighten any kinks.
- Place the chain drive links into the guide bar groove. Position the chain so there is a loop at the back of the guide bar (Fig. C).

C-1 Chain Drive Links C-2 Guide Bar Groove - Hold the chain in position on the guide bar and place the loop around the drive sprocket of the pole saw.
NOTICE: A small direction arrow and a cutter is engraved in the tool housing (Fig. D). When looping the saw chain onto the guide bar, make sure that, after mounting the guide bar, the direction of the saw chain will correspond to the rotation direction arrow on the tool housing and the shape of the cutters on the top of the guide bar are consistent with that of the cutter on the housing. If they face in opposite directions, reassemble the saw chain onto the guide bar with the arrows facing the same direction. The guide bar should be mounted with the adjustment plate facing away from the housing.

- Keep the bar and chain parallel to the mounting surface. Attach the side cover to the housing so that the holes/pins and fastening bolt /thread hole are aligned with each other properly (Fig. E). Press the side cover towards the housing, then fully tighten the quick chain-tension adjust knob clockwise. The eccentric gear inside the side cover is designed to ensure that the chain will not be over-tensioned.
NOTE: If the chain gets loose, turn the quick chaintension adjust knob counterclockwise at least one turn, then fully tighten the knob.

- Rotate the chain by hand to check whether the chain is properly assembled without binding. Otherwise, reassemble the chain and bar.


CONNECTING THE POLE SAW ATTACHMENT TO THE POWER HEAD
This pole saw works under the combination of the pole saw attachment and the power head (Fig. F).

| F-1 | Pole Saw Attachment |
| F-2 | Power Head |
Never attach or adjust the pole saw attachment while the power head is running or with the battery installed. Failure to stop the motor and remove the battery may cause serious personal injury.
The pole saw attachment connects to the power head by means of a coupler device.
- Stop the motor and remove the battery pack.
- Loosen the wing knob.
- Align the arrow on the pole saw shaft with the arrow on the coupler and push the pole saw shaft into the coupler until you hear a clear "click" sound which indicates the pole saw shaft is mounted into place (Fig. G).

G-1 Wing Knob G-3 Arrow on the Coupler G-2 Shaft Release Button G-4 Arrow on the Pole Saw Shaft - Pull the shaft of the attachment to verify it is securely locked into the coupler. If not, rotate the pole-saw shaft from side to side in the coupler until it snaps into place.
- Tighten the wing knob securely.

Be certain that the wing knob is fully tightened before operating the equipment; check it periodically for tightness during use to avoid serious personal injury.
CONNECTING THE EXTENSION POLE BETWEEN THE POWER HEAD AND THE POLE SAW ATTACHMENT (Model No. EP1000)
Never attach or adjust attachment while the power head is running or with the battery installed. Failure to stop the motor and remove the battery may cause serious personal injury.
This extension pole is designed for exclusive use with EGO PS1000E. Never use it with other EGO attachments. The extension pole increases the tool length by 100cm, extending the cutting range. It should be connected between the pole saw attachment and the power head. A maximum of two extension poles (available separately) can be used on one tool.
Follow the process in the section "CONNECTING THE POLE SAW ATTACHMENT TO THE POWER HEAD"
to install the extension pole between the pole saw attachment and power head (Fig. H).

| H-1 | Coupler on the Extension Pole |
| H-2 | Coupler on the Power Head |
NOTICE: Once assembled correctly, the pole saw attachment, extension pole and the power head should not separate when pulled. Always test the connection by pulling them. Repeat the steps above if the pieces can be separated.
Failure to secure the attachment and power head/extension pole as instructed above could result in serious injury or death.
REMOVING THE ATTACHMENT FROM THE POWER HEAD
- Stop the motor and remove the battery pack.
- Loosen the wing knob.
- Press the shaft release button and, with the button depressed, pull or twist the pole saw shaft out of the coupler to separate it from the power head or the extension pole (if used).
- Repeat the process to separate the extension pole from the power head (if extension pole is used).
MOUNTING AND ADJUSTING THE FRONT-ASSIST HANDLE
- Stop the motor and remove the battery pack.
- Loosen the wing nut and remove it with the clamp bolt from the front-assist handle (Fig. I1).

I-1 Front-assist Handle I-4 Wing Nut I-2 Lock Lever I-5 Clamp Block I-3 Clamp Bolt - Press the assist handle onto the power head shaft and turn it downward so that it points toward the saw chain (Fig. I2).

- Insert the clamp block and assemble the clamp bolt with the wing nut (Fig. I3).

- Do not fully tighten the wing nut. Adjust the frontassist handle position so that it is between the shoulder strap hanger and the telescopic pole sleeve (Fig. I4). The handle should be adjusted so that your arm is straight when using the pole saw.

- Press down the lock lever and tighten the wing nut so that the front-assist handle is secured from rotation or moving on the power head shaft.


OPERATION

Never cut near power lines, electric cords, or other electric sources. If the bar and chain jams on any electrical cord or line, DO NOT TOUCH THE BAR, CHAIN OR THE POLE! THEY CAN BECOME ELECTRICALLY LIVE AND MAY BE VERY DANGEROUS. Continue to hold the pole saw by the insulated rear handle or lay it down and away from you in a safe manner. Disconnect the electrical service to the damaged line or cord before attempting to free the bar and chain from the line or cord. Contact with the bar, chain, other conductive parts of the pole saw, or live electric cords or lines will result in death by electrocution or serious injury.
Do not allow familiarity with this product to make you careless. Remember that a careless fraction of a second is sufficient to inflict serious injury.
Always wear safety goggles or safety glasses with side shield. Failure to do so could result in objects being thrown into your eyes and other possible serious injuries.
Always remove the battery pack from the product when you are assembling parts, making adjustments, cleaning, transporting or when not in use. Removing the battery pack will prevent accidental starting that could cause serious personal injury.
Do not use any attachments or accessories not recommended by the manufacturer of this product. The use of attachments or accessories not recommended can result in serious personal injury.
Before each use, inspect the entire product for damaged, missing, or loose parts such as screws, nuts, bolts, caps, etc. Tighten securely all fasteners and caps and do not operate this product until all missing or damaged parts are replaced.
APPLICATIONS
You may use this product for the purposes listed below:
- Limbing
- Pruning
NOTICE: The tool is to be used only for its prescribed purpose. Any other use is deemed to be a case of misuse.
FILLING OILTANK WITH BAR AND CHAIN LUBRICANT
Do not smoke or bring any fire or flame near the oil or the pole saw. Oil may spill and cause a fire.
NOTICE: The pole saw is not filled with oil at the time of purchase. It is essential to fill the tank with chain oil before use. Operating the pole saw without chain oil or when the oil level is below a certain amount will result in damage to the pole saw. Chain life and cutting capacity depend on optimum lubrication. The chain is automatically lubricated with chain oil during operation, if there is sufficient oil in the reservoir. Oil level should also be checked after every 20 minutes of use and refilled as needed.
- Remove the battery pack from the power head.
- Clean the oil-tank cap and the area around it to ensure that no dirt falls into the oil tank.
- Lay the pole saw on a firm, flat surface, so that the oil tank cap is facing upwards, then remove the cap (Fig. J).

- Carefully pour the bar and chain oil into the tank until it fills to the tank neck. Be careful not to let the oil spill from the opening. Wipe off any excess oil.

NOTICE:
- Never use oil or other lubricants not specifically designed for use on the bar and chain. This can lead to a clogged oil system, which may cause premature wear of the bar and chain.
- Check the oil level frequently and refill as needed.
- Do not use dirty, used or other contaminated oil. Damage may occur to the bar or chain.
- It is normal for oil to seep from the saw when it is not in use. To prevent seepage, empty the oil tank after each use, and then run the saw for one minute. When storing the tool for a long period of time, be sure the chain is lightly lubricated; this will prevent rust on the chain and bar sprocket.
- To preserve natural resources, please recycle or dispose of oil properly. Consult your local waste authority for information regarding available recycling and disposal options.
ADJUSTING THE TELESCOPIC POLE (Fig. K)

- Lift the quick release lever to unlock the telescopic pole.
- Extend the telescopic pole to the required length.
- Press the quick release lever down to lock the telescopic pole securely.
ASSEMBLING THE SHOULDER STRAP
Depress the strap hook to open it and attach it onto shoulder strap hanger on the saw (Fig. L). Adjust the shoulder strap to a comfortable operating position.
When emergency occurs, take the strap off from your shoulder immediately to avoid injury.

INSTALLING/REMOVING THE BATTERY PACK
NOTE: Fully charge the battery pack before first use.
Use only with battery packs and chargers listed in fig. A2.

To Attach
Align the battery ribs with the mounting slots and press the battery pack down until you hear a "click" (Fig. M).
Make sure the battery pack is locked in place before operation. Failure to securely seat the battery pack could cause the battery pack to fall out, resulting in serious personal injury.
Always be aware of the location of your feet and children or pets around you when pressing the battery-release button. Serious injury could result if the battery pack falls. NEVER remove the battery pack at a high location.

To Detach
Depress the battery-release button and pull the battery pack out (Fig. N).

LED WORK LIGHT (Fig. O)
The LED work light is at the front of the pole saw attachment, in line with the saw chain. This feature provides extra light for users to see where the saw chain is when cutting branches high up in the tree. The work light will automatically turn on when squeezing the trigger switch and it will be off about 10 secs after releasing the trigger switch.

STARTING/STOPPING THE TOOL
Before Starting the Pole Saw
NEVER OPARATE THE POWER HEAD WITHOUT AN ATTACHMENT. Do not attempt to start the power head before connecting the pole saw attachment.
NOTICE: Before starting the pole saw, check for the quick chain-tension adjustment, oil level and chain and teeth sharpness. As well as, gripping method, balanced footing and proper distance away from the ground are needed (Fig. Q).

To Start (Fig. P)

- Install the battery pack.
- Make sure that no objects or obstructions that could come in contact with the bar and chain are in the immediate vicinity.
- Grasp the assist handle and the rear handle firmly, using both hands.
- Press and hold the lock-off button, then squeeze the trigger switch to start the saw. Release the lock-off button and continue to squeeze the trigger switch for continued operation.
![]()
Do not attempt to start the saw when the saw chain is in a cut or in contact with any surface.
To Stop
Move the pole saw away from cutting area, and then release the trigger switch to stop the pole saw.
Always remove the battery pack from the pole saw during work breaks and after finishing work.
BASIC CUTTING PROCEDURE (Fig. R)
Follow the steps below to prevent damage to tree or shrub bark. Do not use a back-and-forth sawing motion.

- Make a shallow first cut (1/4 of the limb diameter) on the underside of the limb, close to the main limb or trunk.
- Make a second cut from the top side of the limb, outboard from the first cut. Continue the cut through the limb until the limb separates from the tree. Be prepared to balance the weight of the tool when the limb falls.
- Make a final cut close to trunk.
NOTICE: For second and final cuts (from the top of the limb or branch), hold the bucking spikes against the limb being cut (Fig. S).
This will help to steady the limb and make it easier to cut. Allow the chain to cut for you; only exert light downward pressure. If you force the cut, damage to the bar, chain, or motor can result.

S-1 Bucking Spikes - Release the trigger switch as soon as the cut is completed.

NOTICE: Failure to follow proper cutting procedures will result in the bar and chain binding and becoming pinched or trapped in the limb. If this should happen:
- Stop the motor and remove the battery pack.
- If the limb can be reached from the ground, lift the limb while holding the saw. This should release the "pinch" and free the saw.
- If the saw is still trapped, call a professional for assistance.
LIMBING AND PRUNING
This pole saw is designed for trimming small branches and limbs up to 20cm (for tool with 25cm guide bar) or 25cm (for tool with 30cm guide bar) in diameter. For best results, observe the following precautions:
- Plan the cut carefully. Be aware of the direction in which the branch will fall.
![]()
Branches may fall in unexpected directions. Do not stand directly under the branch being cut. - The most typical cutting application is to position the unit at an angle of 60° or less, depending on the specific situation, as shown in Fig. T. As the angle of the pole saw shaft to the ground increases, the difficulty of making the first cut (from the underside of limb) increases.
- Remove long branches in several stages.
- Cut lower branches first to allow the top branches more room to fall.
- Work slowly, keeping both hands on the saw with a firm grip. Maintain secure footing and balance.
- Keep the tree between you and the chain while limbing. Cut from the side of the tree opposite the branch you are cutting.
- Do not cut from a ladder; this is extremely dangerous. Leave such operations for professionals.
- Do not make the flush cut next to the main limb or trunk until you have cut off much of limb to reduce the weight. Following proper cutting procedures will prevent stripping the bark from the main member.
- Do not use the pole saw for felling or bucking.
- To prevent electrocution, do not operate within 15m of overhead electrical lines (Fig. T).

- Keep bystanders at least 15m away (Fig. T).

MAINTENANCE
Before inspecting, cleaning or servicing the unit, stop the motor, wait for all moving parts to stop, and remove the battery pack. Failure to follow these instructions can result in serious personal injury or property damage.
When servicing, use only identical replacement parts. Use of any other parts can create a hazard or cause product damage. To ensure safety and reliability, all repairs, other than the items listed in these maintenance instructions, should be performed by a qualified service technician.
Always wear gloves when handling the saw chain. The chain is sharp and may contain burrs.
GENERAL MAINTENANCE
Avoid using solvents when cleaning plastic parts. Most plastics are susceptible to damage from various types of commercial solvents and may be damaged by their use. Use clean cloths to remove dirt, dust, oil, grease, etc.
CLEANING
- After each use, clean debris from the chain and guide bar with a soft brush. Wipe the pole saw surface with a clean cloth moistened with a mild soap solution.
- Remove the side cover, and then use a soft brush to remove debris from the guide bar, saw chain, sprocket and side cover.
- Always clean out wood chips, saw dust, and dirt from the guide bar groove when replacing the saw chain.
All pole saw service, other than the items listed in these maintenance instructions, should be performed by competent pole saw service personnel.
REPLACING THE BAR AND CHAIN
When replacing the guide bar and chain, always use the specified bar and chain combination listed in the "Recommended Bar and Chain for this Pole Saw" section.
- Remove the battery and allow the saw to cool. Make sure the oil-tank cap is snag to prevent oil leakage.
- Position the pole saw on its side on a firm, flat surface, so that the side cover is facing upwards.
- Wear gloves. Remove the side cover (Fig. U). Clean the side cover with a dry cloth.

- Remove the worn bar and chain from the mounting surface.
- Install new guide bar and saw chain, following the "ASSEMBLING THE GUIDE BAR AND CHAIN" instructions in section "ASSEMBLY".

NOTICE: This is a good time to inspect the drive sprocket for excessive wear or damage.
GUIDE BAR MAINTENANCE
When the guide bar shows signs of wear, disassemble it from the saw. Remove the set screw and adjustment plate, reverse the guide bar (Fig. V) and reinstall the adjustment plate on the new side of the guide bar (Fig. W) to distribute the wear for maximum bar life. The bar should be cleaned every day after use and be checked for wear and damage. Feathering or burring of the bar rails is a normal process of bar wear. Such faults should be smoothed with a file as soon as they occur. A bar with any of the following faults should be replaced.


- Wear inside the bar rails which permits the chain to lay over sideways.
- Bent guide bar.
- Cracked or broken rails.
- Spread rails.
In addition, the guide bar has a sprocket at its tip. The sprocket must be lubricated weekly with a grease syringe to extend the guide bar life. Use a grease syringe to lubricate weekly with chain oil by means of the lubricating hole (Fig. X). Turn the guide bar and check that the lubrication holes and chain groove are free from impurities.

| X-1 | Sprocket in Guide-bar Tip |
| X-2 | Lubricating Hole |
CHAIN MAINTENANCE
Only use low-kickback chains on this saw. This fastcutting chain will provide kickback reduction when properly maintained.
A properly sharpened saw chain cuts through wood effortlessly, even with very little pressure.
Never use a dull or damaged saw chain. A dull saw chain cutter leads to increased physical strain, increased vibration load, unsatisfactory cutting results and increased wear.
For smooth and fast cutting, the saw chain needs to be maintained properly. When the wood chips are small and powdery, the chain must be forced through the wood during cutting, or the chain cuts to one side are the indicators that the chain requires sharpening. During maintenance of your saw chain, consider the following:
- Improper filing angle of the side plate can increase the risk of a severe kickback.
- Raker (depth gauge) clearance. Too low increases the potential for kickback. Not low enough decreases cutting ability.
- If cutter teeth have hit hard objects, such as nails and stones, or have been abraded by mud or sand on the wood, have the chain sharpened by a qualified service technician.
TRANSPORTING AND STORING
- Do not store or transport the pole saw attachment when it is running. Always remove the battery pack before storing or transporting.
- Always place the guide bar sheath on the guide bar and chain before storing or transporting the pole saw attachment. Use caution to avoid the sharp teeth of the chain.
- Clean the pole saw thoroughly before storing. Store the pole saw indoors, in a dry place that is locked and/or inaccessible to children and keep away from corrosive agents such as garden chemicals and deicing salts.
TROUBLESHOOTING
| PROBLEM | CAUSE | SOLUTION |
MOTOR DOES NOT RUN |
|
|
Motor runs, but chain does not rotate |
|
|
Bar and chain running hot and smoking |
|
|
Documents / ResourcesDownload manual
Here you can download full pdf version of manual, it may contain additional safety instructions, warranty information, FCC rules, etc.
Advertisement


Need help?
Do you have a question about the PS1000E and is the answer not in the manual?
Questions and answers