Table of Contents
Advertisement
Quick Links
Advertisement
Table of Contents

Related Manuals for Inventis CLARINET


Summary of Contents for Inventis CLARINET
- Page 1 CLARINET IDDLE NALYZER ANUAL...
- Page 3 Copyright: Inventis s.r.l. the copyright on this manual. forbidden to copy, reproduce or alter the manual, in its entirety or in part, without the express written authorization of Inventis s.r.l Inventis ® is a trademark of Inventis s.r.l. Document title:...
-
Page 5: Table Of Contents
Summary Foreword ....................vii CHAPTER 1: Safety: warnings and information ........1 Operator Manual ................... 1 Operator responsibilities ............... 1 Intended use .................... 2 Precautions ..................... 2 Disposal ....................4 Conformity ..................... 5 Symbols on labels ................... 7 CHAPTER 2: Introduction................. 9 Main features .................. - Page 6 Acoustic Reflex Test window............... 27 Modes of conducting the examination ..........29 Manual pressure adjustment .............. 32 Reflex Decay test .................. 33 ARLT ....................34 Quick test A and Quick test B ............. 36 CHAPTER 7: Eustachian Tube Function test (ETF) ......37 ETF test with intact eardrum..............
-
Page 7: Foreword
Foreword Thank you for purchasing an Inventis audiology device. The Clarinet middle ear analyzer is a clinical instrument offering a set of features and functionalities that place it at the top of its category. The Inventis company has always considered the use of its devices in conjunction with computers to be a factor of key importance. -
Page 9: Chapter 1: Safety: Warnings And Information
When defective or failed parts must be renewed, accept only original replacement parts supplied by Inventis s.r.l. Any repairs must be entrusted exclusively to Inventis or to service technicians approved by Inventis. No parts of the device must be modified or replaced without authorization from Inventis. -
Page 10: Intended Use
These tests must be conducted in a particularly quiet environment in order to avoid artifacts that could give false measurements. The Clarinet middle ear analyzer is intended for use by persons who have a detailed knowledge of the procedures associated with the tests supported by these instruments;... - Page 11 Technical Specifications”. The Clarinet middle ear analyzer will not be protected if exposed during use to flammable anesthetic gases or similar products. Risk of explosion. Avoid installing and using the middle ear analyzer close to any sources of strong electromagnetic fields: these could interfere with the operation of the instrument.
-
Page 12: Disposal
In each test window, when you select a not-calibrated transducer, the background of the ‘output’ area will be displayed in red color. Moreover, you will not be able to send any stimulus through not- calibrated transducers. Take note of the calibration interval indicated. Use of the instrument beyond the calibration interval expiry date can lead to unreliable diagnoses. -
Page 13: Conformity
ONFORMITY Clarinet middle ear analyzers are class IIa medical devices, according to Annex IX of Medical Device Directive (MDD) 93/42/EEC, as amended by directive 2007/47/EC. The Inventis Quality Management System has been certified by TÜV as compliant with ISO 9001 and ISO 13485 standards. -
Page 15: Symbols On Labels
In particular, the number comprises these segments: first 5 characters: Inventis product code characters 6 and 7: year of manufacture (“14” denotes 2014) character 8: model series characters 9… 13: serial number... -
Page 17: Chapter 2: Introduction
Inventis offers the specifications of a device second to none in its class. Given the number of tests it can perform and the accuracy it provides, the Clarinet is the ideal option for clinics and hospitals, and indeed any users who expect the very best from their instruments. -
Page 18: Accessories
Exam Mode Automatic TYMPANOMETRY Manual Fixed intensity Automatic threshold ACOUSTIC REFLEX Growing intensity Manual REFLEX DECAY Manual REFLEX LATENCY Manual Eardrum intact EUSTACHIAN TUBE FUNCTION Eardrum perforated Tympanometry + acoustic reflex (fixed QUICK A intensity or automatic threshold mode) Tympanometry + acoustic reflex (fixed QUICK B intensity or automatic threshold mode) CCESSORIES... - Page 19 • Assorted ear tips box Integrated thermal printer opt. 3pcs heat-sensitive paper rolls opt. • Plastic cover sheet Carrying case opt. • Inventis Software Suite • USB cable • Medical grade power supply (6V) • User manual...
-
Page 21: Chapter 3: Installation And Power-Up
CHAPTER 3: Installation and power-up Whilst the installation of a Clarinet middle ear analyzer is a relatively simple procedure, it should be entrusted to a person with the requisite skills. If the installation is not performed correctly, the system could be affected by safety problems when in use. -
Page 22: Connections
ONNECTIONS All connection points for accessories are located on the rear panel, as also is the power switch. Plug all transducers and accessories into the respective sockets as indicated in the following table: Connector Accessory PROBE Control box Air tube USB cable for connection to personal computer Connect the power adapter to the input and to the relative power... - Page 23 The top part of the display shows the date, the current time and the Inventis logo. The bottom part of the display indicates the calibration interval expiry date...
-
Page 24: Chapter 4: Controls And Probe
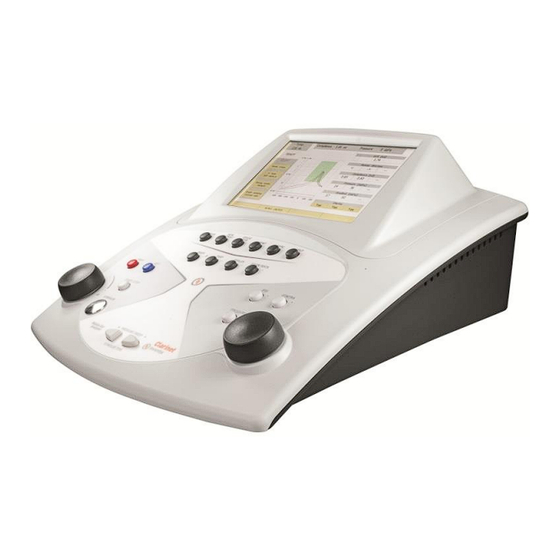
Clarinet middle ear analyzers. HE TOUCH SCREEN The Clarinet middle ear analyzer has a generously sized touch screen color graphic display. The touch screen is an essential medium for controlling certain functions of the instrument; in particular, touch screen input is used: to control certain test parameters;... -
Page 25: Controls For Conducting Examinations
The OTHER TESTS button can be used to access those tests for which there is no dedicated button. On pressing OTHER TESTS, the required function can be selected with the left hand knob of the instrument and confirmed by pressing the STIMULUS button. Quick tests are accessed by way of a single button. -
Page 26: Function Buttons
HE PROBE Clarinet middle ear analyzers feature a miniature probe, connected by a signal lead and a small-bore air tube to the compact Control Box (CB), which in turn is connected to the instrument. Despite being very small and... - Page 27 relative to the current status of the probe (when there is no test in progress) or to the test in progress. The items that can be displayed are indicated below. Indication in display Explanation READY The examination is ready to start Probe open: the compliance measured is OPEN above...
- Page 28 It will be noted that you may even start the test in the OPEN and CLOSED situation. The PRESSURE LEAKAGE status is displayed on an orange background and it terminates the examination in progress. Control Box (CB) There are two buttons on the CB. The first has the same function as the START/STOP button on the keyboard of the analyzer, described previously, which starts and stops the examination.
-
Page 29: Chapter 5: Tympanometry
CHAPTER 5: Tympanometry This chapter describes the tympanometry test. HE TYMPANOMETRY WINDOW To conduct the tympanometry test, the operator simply presses the relative button on the keyboard. The graphic interface of the tympanometry window is illustrated below. 226 Hz tympanometry test window... - Page 30 678 Hz tympanometry test window The name of the current test is indicated at the top left of the screen, and immediately below, items of information relating both to the status of the probe and to the progress of the test, as described in the previous chapter. Lower down, the screen shows information specific to this particular test, namely: the stimulation side;...
-
Page 31: Test Parameters
EST PARAMETERS The default probe tone frequency is always 226 Hz but, on Clarinet Plus only, it can be switched to 678, 800 or 1000 Hz. Values can be changed by pressing on the relative area with yellow background on the top left part of the screen. -
Page 32: Test Results
All the parameters mentioned above are saved automatically by the instrument, and maintained at each successive power-up. The Clarinet middle ear analyzer can also display the results of the tympanometry test at 226Hz together with those of the acoustic reflex test. -
Page 33: How The Examination Is Conducted
Gradient This is the gradient of the tympanogram. It can be calculated by two different methods, the selection of which is made from the settings screen (see Chapter 9). The two calculation criteria are indicated below. Letter a indicates the peak amplitude of the tympanogram, and b the difference between a and ECV: width of the tympanogram at 50% of b (expressed in daPa);... - Page 34 Manual mode Having selected Left or Right and set the scan mode, simply press the PRESSURE button to prime the system and start the test. Once maximum pressure has been established as indicated in the settings (see chapter 9), the actual value can be adjusted by turning the right hand knob on the instrument.
-
Page 35: Chapter 6: Acoustic Reflex, Reflex Decay, Arlt And Quick Tests
CHAPTER 6: Acoustic Reflex, Reflex Decay, ARLT and Quick tests This chapter describes the Acoustic Reflex Test, the Reflex Decay Test and the Reflex Latency Test . COUSTIC EFLEX EST WINDOW To conduct the acoustic reflex test, the operator simply presses the relative button on the keyboard or touches the part of the display dedicated to the main screen. - Page 36 (see Chapter 9). If no tympanometry test has been conducted, the pressure is set in any event to 0 daPa. When performing the reflex test with the Clarinet model, the pressure at which the test is conducted can be adjusted manually (the caption “Man.”...
-
Page 37: Modes Of Conducting The Examination
ODES OF CONDUCTING THE EXAMINATION As mentioned in the previous section, the acoustic reflex test can be conducted in various ways. Remember that the instrument will always default to the configuration of the last test mode selected, for each ear. Listed below are the different test modes that can be selected, which vary according to the model and version of the instrument. - Page 38 The reflex test is started in the same way as other examinations, by pressing the START/STOP on the instrument, or the relative button of the control box. Once the pressure reaches the target value, all of the enabled boxes will be examined, starting from the first. The test is terminated automatically once all the boxes have been examined.
- Page 39 selected sensitivity (see Chapter 9). If there has been a significant variation, a further check is made on the stability of the measurements in order to limit the identification of false positives (artifacts). When both these conditions are established, the ART has been found and the test ends automatically.
-
Page 40: Manual Pressure Adjustment
In this mode it is possible to perform the exam without sending any stimulus (“NO STIM.”). Pressing the START/STOP button the test will begin, or rather, a pressure equal to that indicated in the display is established in the ear canal. The characteristics of the current stimulus are displayed as captions over the active box. -
Page 41: Reflex Decay Test
If a tympanometry test was conducted beforehand, the peak value of the tympanogram will be indicated above the compliance bar. To set the pressure at a desired value, the operator turns the right hand knob. Also, if the operator wishes to set the pressure value swiftly to atmospheric, this can be done by pressing the 0 daPa function button. -
Page 42: Arlt
As regards conducting the examination, the method applied is the same as that used for the acoustic reflex test in manual mode. In addition, the test can also be conducted without any stimulus (“NO STIM.”). Once the test is under way, the following information will be superimposed on the current graph: number of test, threshold intensity (ART) associated with the current stimulus (obtained during the course of reflex test), and the characteristics of the stimulus. - Page 43 As regards conducting the examination, the method applied is the same as that used for the acoustic reflex test in manual mode. Once the test is under way, the following information will be superimposed on the current graph: number of test, threshold (ART) intensity associated with the current stimulus (obtained during the course of reflex test), and the characteristics of the stimulus.
-
Page 44: Quick Test Aand Quick Testb
Certain settings for the reflex latency test can be accessed directly from the interface using the relative function button. The operator can set the number of acquisitions on which to calculate the average used to process results, and choose whether or not to display the percentage indicators measured. Each of the parameters in question can be selected with the right hand knob and adjusted by turning the left hand knob. -
Page 45: Chapter 7: Eustachian Tube Function Test (Etf)
CHAPTER 7: Eustachian Tube Function test (ETF) This chapter describes the Eustachian Tube Function (ETF) tests. The test can be conducted both on patients whose eardrums are intact, and on patients having a perforated eardrum. TEST WITH INTACT EARDRUM To access the ETF test, simply press OTHER TESTS on the keyboard of the instrument, then select the option with the left hand knob. - Page 46 The central area of the screen is occupied by the graph relating to the ear currently selected. Pressure values indicated at the ends of the horizontal scale correspond to the initial positive value and the final negative value of the sweep (selected via the instrument settings, see Chapter 9). As in the case of the tympanometry test, when the tympanogram is represented in absolute mode, a dash appears on the right of the graph, indicating the current compliance measurement.
- Page 47 Second tympanogram On completion of the first tympanometry test, the pressure in the ear canal is raised automatically to +400 daPa. Once the higher pressure has been established, the patient is asked to swallow several times, thereby forcing open the Eustachian tube. Once the patient has complied with the instruction, simply press and hold the CONTINUE function button to record the second tympanogram.
-
Page 48: Etf Test With Perforated Eardrum
In the event that it is not possible to determine one of the tympanogram pressure peaks, the letters “N.F.” (NOT FOUND) will be displayed in place of the value. TEST WITH PERFORATED EARDRUM The graphic interface of the ETF perforated eardrum window is illustrated below. - Page 49 To adjust the duration of the test, simply press the DURATION function button . Selectable values are 20, 30, 40 or 50 seconds. As indicated previously, the user can switch to the window for ETF testing with intact eardrum by pressing the TM INTACT function button. How the examination is conducted Having selected the ear tip best suited to the patient being examined, and introduced the probe together with the ear tip into the patient's ear canal,...
-
Page 51: Chapter 8: Interface With The Computer
Clarinet. ONNECTION TO The Clarinet middle ear analyzer is connected to one of the USB ports on the computer using the cable supplied (standard USB A/B cable). The connection is plug-and-play, with no special drivers required for installation purposes: a few seconds after plugging in, the operating system will recognize the devices and install the drivers automatically. -
Page 52: Chapter 9: Settings
CHAPTER 9: Settings Clarinet middle ear analyzers have a number of configuration parameters that can be changed in the settings window. This chapter describes the parameters available, and how to change them. ETTINGS WINDOW To access the settings window, simply press the SETTINGS function button shown on the main screen of the instrument. - Page 53 Language Selection of the interface language used by the instrument. Default value: English Contralateral transducer Selection of the transducer used to present the stimulus via the contralateral output. The operator can choose between the TDH 39 supra-aural headphone and the IME-100 insert earphone. Default value: TDH 39 headphone Enable live view feature If enabled, allows the operator to follow the progress of the test on the...
- Page 54 Gradient Method of calculating the tympanogram gradient. This can be calculated as the width of the peak (in daPa) or as a ratio between compliance values, as described in detail in the chapter on tympanometry. Default value: Peak width Show normal range Enables / disables display of the tympanometry normality range (ASHA, 32, Suppl.
- Page 55 Stimulus Off-Time The interval of time, after the end of the stimulus on-time, during which data acquisition continues, expressed in ms. The setting can be selected between 500 and 2500 ms, with a resolution of 500 ms. Default value: 500 Recognition sensitivity Sets the level of sensitivity when identifying the reflex, used in threshold mode.
- Page 56 ARLT settings This screen presents the parameters for the acoustic reflex latency test, namely: Stimulus On-Time The length of time for which the stimulus is presented during each test, expressed in ms. Values can be selected in the range 300ms … 1700ms. Default value: 500 Stimulus Off-Time The interval of time, after the end of the stimulus on-time, during which...
- Page 57 Printer menu This window shows the settings for the print function, namely: Print patient data header Enables / disables printout of the heading with details of the patient. Default value: Yes Clinic data menu Access to a window in which the user can enter details of the clinic, for inclusion in the header of the printed document.
- Page 58 Service tests Access to the window from which service tests are run on the instrument. For maintenance purposes only.
-
Page 59: Chapter 10: Maintenance
CHAPTER 10: Maintenance Clarinet middle ear analyzers do not require any special periodic maintenance other than calibration and normal cleaning, both of which are described in this chapter. The instrument must be switched off before commencing any kind of cleaning operation. -
Page 60: Periodic Checks
BACK and HELP function keys during the ignition phase, before the Inventis logo is displayed on the screen. -
Page 61: Calibration Of Compliance Measured By The Probe
ALIBRATION OF COMPLIANCE MEASURED BY THE PROBE The procedure described below is carried out whenever the needs arises to recalibrate the measurement of compliance by the probe. Access the main “Settings” menu by pressing the relative function button. Now select the item "Calibration Menu", and thereafter “Compliance calibration”. - Page 62 The procedure for cleaning the probe will now be described. First of all, remove the ear tip, loosen the screw collar and separate the tip of the probe from the main body. The three channels in the tip of the probe can be cleaned using thin nylon threads.
-
Page 63: Cleaning The Instrument
In the event of the probe being broken or malfunctioning, contact an Inventis service technician. The replacement of the probe must be done exclusively by Inventis or by a service technician authorized by Inventis. If the probe is replaced, it must be calibrated before being used with the instrument. -
Page 64: Loading The Printer Paper
All the parts being returned to the manufacturer for repair and service shall be cleaned and sanitized. Transducers should be sealed in a transparent bag. Important: should the instrument need to be sent to the Inventis service department or returned to the dealer, make certain that the original packing... -
Page 65: Appendix A: Technical Specifications
APPENDIX A: Technical specifications Classification Clarinet Type 1 middle ear analyzer (EN 60645-5 / ANSI S3.39) ADMITTANCE MEASUREMENT SYSTEM Probe Tone Frequency 226 Hz ± 1% 678 Hz ± 1% 800 Hz ± 1% 1000 Hz ± 1% 85 ± 1.5 80 ±... - Page 66 Influence of atmospheric -0.0002 ml/daPa pressure Note: Under standard reference conditions using a probe tone of 226 Hz, the volume of trapped air in a hard-walled cavity is equal to the acoustic volume of that same cavity. In other words, 1 cubic centimeter (cc) or milliliter (ml) of trapped air equals the acoustic admittance of 1 mmho in a hard-walled cavity.
- Page 67 IMPEDANCE – AVAILABLE SIGNALS Stimuli Pure tones and noises 500, 1000, Ipsilateral 2000, 3000, 4000, 6000 Hz Pure tone frequencies 250, 500, 1000, 2000, Contralateral 3000, 4000, 6000, 8000 Hz Broadband Noise (BBN), Types of noise Low Pass Noise (LPN), High Pass Noise (HPN) IMPEDANCE - SIGNAL SPECIFICATIONS Attenuators step...
- Page 68 -600 daPa ÷ +400 daPa selectable Maximum pressure by 100daPa increments Duration of test. 20, 30, 40, 50 s selectable IMPEDANCE – AVAILABLE OUTPUTS Output Clarinet • Ipsilateral Contralateral • (TDH 39 headphone or IME-100 insert earphone) IMPEDANCE STIMULUS: AVAILABLE FREQUENCIES AND MAXIMUM LEVELS...
- Page 69 Telephonics Corp. TDH39 10 ohm (1 kHz) stimulation Insert earphone for 100 ohm (1 Inventis s.r.l. IME-100 contralateral stimulation kHz) AVAILABLE TESTS Clarinet Basic Clarinet Plus Tympanometry • • 226 Hz • 678 Hz • 800 Hz • 1000 Hz •...
- Page 70 DATA MANAGEMENT Integrated thermal printer (paper size: Optional 112 mm) Communication to the computer Maestro installed with or without Management software proprietary database or as Noah module DISPLAY Type TFT LCD color graphics Touch screen type Resistive diagonal 7”, 150 mm x 90 mm Size Resolution 800 x 480...
- Page 71 MECHANICAL SPECIFICATIONS Model without printer Size (LxDxH) 32 x 32 x 15 cm Weight (instrument only) 2.0 Kg Weight (including transducers and 4.4 Kg package) Model with printer Size (LxDxH) 32 x 39 x 15 cm Weight (instrument only) 2.5 Kg Weight (including transducers and 4.9 Kg packaging)
- Page 72 2000 3000 4000 6000 15.5 8000 13.0 APPLICABLE STANDARDS Clarinet Basic/Plus EN 60645-5 / ANSI S3.39 Type 1 IPSI: EN ISO 389-2, Calibration CONTRA: EN ISO 389-1 (TDH 39), EN ISO 389-2 (IME-100) Electrical safety EN 60601-1, Class I, Type BF...
-
Page 73: Appendix B: Troubleshooting
Change the USB cable be established USB cable damaged (standard USB A/B cable) Date and time Contact Inventis service prompt appears Internal battery department or dealer to have when instrument failure the battery replaced is powered up... - Page 74 Instrument not Check the connection to the powered up power supply and make certain the switch is in position “I” correctly Display remains blank Contact Inventis service Adapter damaged department or dealer...
-
Page 75: Appendix C: Electromagnetic Emissions
APPENDIX C: Electromagnetic emissions Clarinet has been thoroughly tested and respects the limits for electro- medical devices specified by IEC 60601-1-2 standards. These limits ensure reasonable protection against hazardous interference in typical medical installations. The instrument generates, uses and radiates radio frequency energy. If not installed and used according to the instructions in this manual, it may interfere with other nearby devices. - Page 76 IEC 60601-1-2 standard. Guidance and manufacturer’s declaration – electromagnetic emissions Clarinet is intended for use in the electromagnetic environment specified below. The customer or the user of Clarinet should assure that it is used in such an environment. Emissions test Compliance...
- Page 77 0,5 cycle. for 0,5 cycle. or hospital environment. If the Voltage dips, short 40% U 40% U user of Clarinet interruptions and (60% dip in U (60% dip in U requires continued voltage variations for 5 cycles. for 5 cycles.
- Page 78 Guidance and manufacturer’s declaration – electromagnetic immunity Clarinet is intended for use in the electromagnetic environment specified below. The customer or the user of Clarinet should assure that it is used in such an environment. Immunity Test IEC 60601 Compl.
- Page 79 Clarinet. Over the frequency range 150 kHz to 80 MHz, field strengths should be less than 3 V/m. Recommended separation distances between portable and mobile RF communications equipment and Clarinet Clarinet is intended for use in an electromagnetic environment in which radiated RF disturbances are controlled.
-
Page 81: Appendix D: Bibliography
APPENDIX D: Bibliography Cynthia G. Flower and Janet E. Shank, Tympanometry, Handbook of Clinical Audiology, 175-202, Katz J. Editor, Williams & Wilkins (2002). Stanley A. Gelfand, The Acoustic Reflex, Handbook of Clinical Audiology, 205-229, Katz J. Editor, Williams & Wilkins (2002). Jackie L.
Need help?
Do you have a question about the CLARINET and is the answer not in the manual?
Questions and answers