
Related Manuals for The Singing Machine ISM9015


Summary of Contents for The Singing Machine ISM9015
- Page 1 ISM9015 INSTRUCTION MANUAL www.singingmachine.com The Singing Machine® is a registered trademark of The Singing Machine Co., Inc.
-
Page 2: Important Safety Information
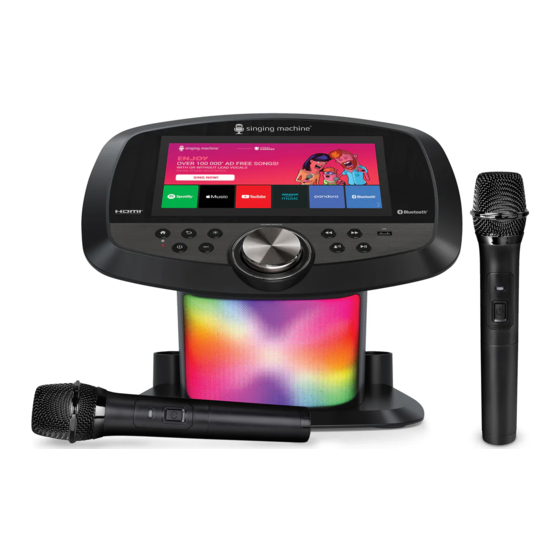
Warnings Product Disposal Instructions CAUTION RISK OF ELECTRIC SHOCK DO NOT OPEN CAUTION: TO REDUCE THE RISK OF ELECTRIC SHOCK, DO NOT REMOVE COVER (OR BACK). NO USER-SERVICEABLE PARTS INSIDE. REFER SERVICING TO QUALIFIED SERVICE PERSONNEL. The symbol shown here and on the product means that the product is DANGEROUS VOLTAGE: The lightning flash with arrowhead classed as Electrical or Electronic Equipment and should not be disposed symbol within an equilateral triangle is intended to alert the... - Page 3 Included Please make sure that the following items are included. Main Unit Wireless Microphone x2 AC Adapter AA batteries x4 — E2 —...
-
Page 4: Location Of Controls (Top)
Location of Controls (Top) 1. Touch Screen 9. SKIP Button (LIGHTS) Button 10. SKIP Button (BACK) Button 11. USB Port (HOME) Button (PLAY/PAUSE/ENTER) button 5. Bluetooth indicator (VOICE EFFECTS) Button (ON/STANDBY) Button 14. VOLUME/ EFFECTS Control 7. RECORD Button 8. Speaker —... -
Page 5: Location Of Controls
Location of Controls 1. Mic 1 Jack 2. Mic 2 Jack 3. Aux In Jack 4. Line Out Jack 5. * Reset hole 6. HDMI Jack (Video only) 7. DC IN Jack 8. Wireless Mic holders 9. Handles 10. Power indicator 11. - Page 6 Connections Connecting to AC Power Insert the DC plug of the adapter into the DC IN Jack located on the main unit. Insert the AC adapter into a conveniently located AC outlet having 230-240V AC, 50Hz. NOTE: • Make all connections prior to plugging the AC adaptor into a power outlet. Connecting the Unit to a TV The video and lyrics will be displayed on the built-in screen.
- Page 7 Connections To change the wireless microphone's battery: Unscrew the bottom of the wireless microphone. Replace the existing batteries with 2 x "AA" size/LR6 batteries. Screw the bottom of the wireless microphone back on securely. BATTERY PRECAUTIONS The precautions below should be followed when using batteries in this device: 1.
- Page 8 Connections Connecting the Microphone(s) Connect the wired microphone (not included) into Mic jack u or v (when desired). Connecting to Line Out Jack This unit can be connected to another audio system for greater audio output via 3.5mm AUX cord (not included). Plug one end of AUX cord into the LINE OUT jack located on the rear of the machine.
-
Page 9: Operation
Operation Wi-Fi & Settings Connect the unit as described previously. Press the button to turn the unit on. The set up Wi-Fi connection window will pop up. Select CONTINUE on the touch screen. Select your Wi-Fi network using the touch screen. Use the keyboard on the touch screen to enter your Wi-Fi password and press the ENTER... - Page 10 Operation Accessing the Singing Machine Karaoke Catalog Select Singing Machine Karaoke to enter Singing Machine Karaoke Store page. Select “Subscribe Now” and follow the on screen instructions to register your machine. After signing up, select "Log In" to log into your account. Select...
- Page 11 Operation Icons on the touch screen Added Youtube, Spotify and Apple Music apps to the main menu for easy opening of these apps. Select BLUETOOTH to enter the bluetooth mode. NOTE: The unit automatically searches for and pairs a previously paired Bluetooth device (if previously paired).
- Page 12 Operation Icons on the touch screen (Continued) You can always change the Wi-Fi network, by selecting the SETTINGS icon on the touch screen to enter Wi-Fi settings mode. Select WiFi and connect as previously described, if you want to connect to another network. Select Display to setting the brightness, Level and HDMI.
- Page 13 Operation Control Keys Connect the unit as described previously. Press the button to turn the unit on. The touch screen will turn on. NOTE: If the Wi-Fi network is not connected in this unit, the Wi-Fi connection window will pop up. RECORD YOUR SINGING...
- Page 14 Operation Control Keys (Continued) Press the button to play the song or enter the mode/folder. Press the button during playback to pause the song. Go back or advance one track by pressing the button. Press button to go to the menu screen while in any mode or screen.
- Page 15 Operation Sound Effects Name Effect Description Basic Pitch Silky smooth & balanced reverb & echo; a great all around go-to vocal enhancer Alt-Rock Queue up your fav alternative & rock tunes with this crowd- pleasing vocal effect Reggae-Tone Enhanced echo makes voices shine especially while singing reggae and reggaeton Grunge Unmistakably gritty, great for rock, alt, pop and just making your...
- Page 16 Operation Record songs During music playback, press the REC button to record your singing and the music. A timer will appear on the screen. Press the REC button again to stop recording. A box will pop up to choose Delete or Save. If Save is selected, a save location box will pop up to select Internal or USB to save the recording file.
- Page 17 Operation Using a Bluetooth Device Connect the unit as described previously. Press the button to turn the unit on. Select BLUETOOTH to enter the bluetooth mode. Turn on your device’s Bluetooth option in settings to search for a discoverable device with a Bluetooth signal.
- Page 18 Operation Using a Bluetooth Device (Continued) To control your Bluetooth device from this unit, press the button to start playback (music app must be open). Press the button during playback to pause the song. SKIP: Go back or advance one track by pressing the button.
- Page 19 Operation Using the AUX IN Jack Connect the unit as described previously. Press the button to turn the unit on. Connect the external device by using an appropriate cable (3.5mm audio cable not included) to the AUX IN Jack on the rear of this unit as previously described.
- Page 20 Operation Playing Songs from the Recorded Files Connect the unit as described previously. Press the button to turn the unit on. Select MEDIA to enter. Press USB or RECORDINGS to choose your desired playlist. NOTE: If the audio file (support MP3 and MP4) to be played is recorded on a USB flash drive, please insert the USB flash drive into the USB port of this unit.
-
Page 21: Troubleshooting Guide
Troubleshooting Guide Should this unit exhibit a problem, check the following before seeking service: No Power • Power is not on; press the button to turn power on. • Confirm that the AC adapter is connected securely to the rear of the unit. •... - Page 22 Troubleshooting Guide (Continued) No Internet connection • Ensure the unit is not too far from your router (recommended maximum of 10 meters). If the Wi-Fi signal strength is weak, the password might not be verified as correct. • The unit Date and Time have been set to synchronise to internet time by default. In the event that "Automatic date &...
-
Page 23: Specifications
The Bluetooth® word mark and logos are registered trademarks owned by Bluetooth SIG, Inc. and any use of such marks and logos by The Singing Machine Company, Inc. is under license. Other trademarks and trade names are those of their respective owners. - Page 24 Visit Our Website: www.singingmachine.com Copyright © 2024 All Rights Reserved. U.S. Representative Company Name : The Singing Machine Company, Inc. Address : 6301 NW 5th Way, Suite 2900, Fort Lauderdale, FL33309, USA Telephone : 1-866-670-6888 PRINTED IN CHINA Website : www.singingmachine.com...
- Page 25 This device complies with Part 15 of the FCC Rules. Operation is subject to the following two conditions: (1) this device may not cause harmful interference, and (2) this device must accept any interference received, including interference that may cause undesired operation. Changes or modifications to this unit not expressly approved by the party responsible for compliance could void the user’s authority to operate the equipment.
Need help?
Do you have a question about the ISM9015 and is the answer not in the manual?
Questions and answers