Table of Contents

Related Manuals for Viewtron LPR-IP7


Summary of Contents for Viewtron LPR-IP7
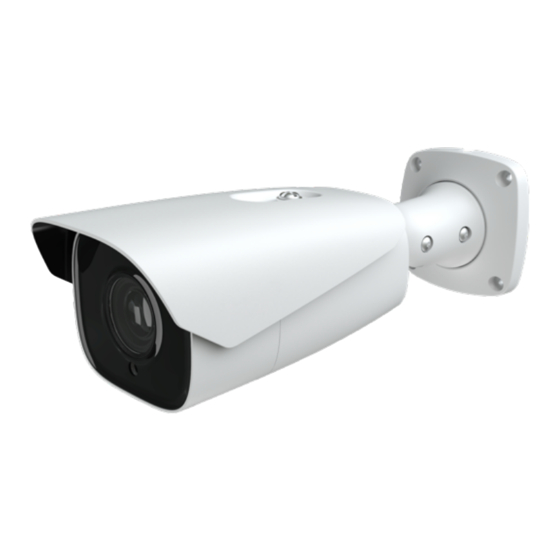
- Page 1 Viewtron LPR-IP7 Automatic License Plate Recognition Camera User Manual The is the user manual / user guide for the Viewtron LPR-IP7 IP camera. The LPR-IP7 is an automatic license plate recognition camera with built-in AI software.
- Page 2 Notes on Safety This product is intended to be supplied by a Listed Power Unit, marked with 'Limited Power Source', 'LPS' on unit, output rated minimum 12V/2 A or POE 48V/ 350mA or AC24V (depending on models), no more than 2000m altitude of operation and Tma=60 Deg.C.
- Page 3 Disclaimer With regard to the product with internet access, the use of product shall be wholly at your own risks. Our company shall be irresponsible for abnormal operation, privacy leakage or other damages resulting from cyber attack, hacker attack, virus inspection, or other internet security risks;...
- Page 4 Regulatory Information FCC Information Please take attention that changes or modification not expressly approved by the party responsible for compliance could void the user’s authority to operate the equipment. FCC compliance This equipment has been tested and found to comply with the limits for a Class B digital device, pursuant to Part 15 of the FCC Rules.
- Page 5 2012/19/EU (WEEE directive): The Directive on waste electrical and electronic equipment (WEEE Directive). To improve the environmental management of WEEE, the improvement of collection, treatment and recycling of electronics at the end of their life is essential. Therefore, the product marked with this symbol must be disposed of in a responsible manner.
-
Page 6: Table Of Contents
Table of Contents Introduction ........................1 Network Connection ....................... 2 LAN ........................2 2.1.1 Access through IP-Tool ................2 2.1.2 Directly Access through IE ................ 4 WAN ........................5 Live View .......................... 9 Network Camera Configuration .................. 11 System Configuration ..................11 4.1.1 Basic Information .................. - Page 7 LPR-IP7 Automatic License Plate Recognition Camera 4.6.10 UPNP ....................43 4.6.11 Email ....................44 4.6.12 FTP ...................... 45 4.6.13 HTTP POST ..................46 4.6.14 HTTPS ....................47 4.6.15 QoS ..................... 48 Security Configuration ..................49 4.7.1 User Configuration .................. 49 4.7.2...
-
Page 8: Introduction
LPR-IP7 Automatic License Plate Recognition Camera 1 Introduction Main Features l ICR auto switch, true day/night l 3D DNR, WDR l BLC, Defog, Anti-flicker, etc. l ROI coding l Abnormal video signal detection (scene change, video blur detection, video cast... -
Page 9: Network Connection
LPR-IP7 Automatic License Plate Recognition Camera 2 Network Connection Available web browser: IE (plug-in required)/ Firefox/Edge/Safari/Google Chrome It is recommended to use the latest version of these web browsers. The menu display and operation of the camera may be slightly different by using the browser with plug-in or without plug-in. - Page 10 LPR-IP7 Automatic License Plate Recognition Camera ③ Double click the IP address and then the system will pop up the IE browser to connect IP-CAM. After you read the privacy statement, check and click “Already Read”. Then activate the device.
-
Page 11: Directly Access Through Ie
LPR-IP7 Automatic License Plate Recognition Camera If you forget the admin password, you can reset the password by clicking Forget Password on the login page. Then you can reset the password by the safety questions and answers you set. You can set the account safety question during the activation, or you can go to ConfigàSecurityàUser, click Safety Question, select the safety questions and input your... -
Page 12: Wan
LPR-IP7 Automatic License Plate Recognition Camera Select “Properties” and then select internet protocol according to the actual situation (for example: IPv4). Next, click the “Properties” button to set the network of the PC. ② Open the IE browser and enter the default address of IP-CAM and confirm. - Page 13 LPR-IP7 Automatic License Plate Recognition Camera ① Make sure the camera is connected to the local network and then log in the camera via LAN and go to ConfigàNetworkàPort menu to set the port number. Port Setup ② Go to Config àNetworkàTCP/IP menu to modify the IP address.
- Page 14 LPR-IP7 Automatic License Plate Recognition Camera Router Setup ④ Open the IE browser and enter its WAN IP and http port to access. (For example, if the http port is changed to 81, please enter “192.198.1.201:81” in the address bar of web browser to access).
- Page 15 LPR-IP7 Automatic License Plate Recognition Camera Network connection The setup steps are as follow: ① Go to ConfigàNetworkàPort menu to set the port number. ② Go to Config àNetworkàTCP/IP menu to set the IP address. Check “Use the following IP address” and then enter the static IP address and other parameters.
-
Page 16: Live View
LPR-IP7 Automatic License Plate Recognition Camera 3 Live View After logging in, the following window will be shown. The following table is the instructions of the icons on the live view interface. Icon Description Icon Description Original size Zoom out... - Page 17 LPR-IP7 Automatic License Plate Recognition Camera In full screen mode, double click on the mouse to exit or press the ESC key on the keyboard. Click AZ control button to show AZ control panel. The descriptions of the control panel are as...
-
Page 18: Network Camera Configuration
LPR-IP7 Automatic License Plate Recognition Camera 4 Network Camera Configuration In the Webcam client, choose “Config” to go to the configuration interface. Note: Wherever applicable, click the “Save” button to save the settings. 4.1 System Configuration 4.1.1 Basic Information In the “Basic Information” interface, the system information of the device is listed. -
Page 19: Local Config
LPR-IP7 Automatic License Plate Recognition Camera 4.1.3 Local Config Go to ConfigàSystemàLocal Config to set up the storage path of captured pictures and recorded videos on the local PC. There is also an option to enable or disable the bitrate display in the recorded files. - Page 20 LPR-IP7 Automatic License Plate Recognition Camera l SD Card Management Click the “Format” button to format the SD card. All data will be cleared by clicking this button. Click the “Eject” button to stop writing data to SD card. Then the SD card can be ejected safely.
- Page 21 LPR-IP7 Automatic License Plate Recognition Camera Weekly schedule Set the alarm time from Monday to Sunday for a single week. Each day is divided in one hour increments. Green means scheduled. Blank means unscheduled. “Add”: Add the schedule for a special day. Drag the mouse to set the time on the timeline.
-
Page 22: Image Configuration
LPR-IP7 Automatic License Plate Recognition Camera Set the format, resolution and quality of the image saved on the SD card and the snapshot interval and quantity and the timing snapshot here. Snapshot Quantity: The number you set here is the maximum quantity of snapshots. The actual quantity of snapshots may be less than this number. - Page 23 LPR-IP7 Automatic License Plate Recognition Camera Brightness: Set the brightness level of the camera’s image. Contrast: Set the color difference between the brightest and darkest parts. Hue: Set the total color degree of the image. Saturation: Set the degree of color purity. The purer the color, the brighter the image is.
- Page 24 LPR-IP7 Automatic License Plate Recognition Camera of the image in the darkest area will be seen clearly. Antiflicker: Off: disables the anti-flicker function. This is used mostly in outdoor installations. 50Hz: reduces flicker in 50Hz lighting conditions. 60Hz: reduces flicker in 60Hz lighting conditions.
-
Page 25: Video / Audio Configuration
LPR-IP7 Automatic License Plate Recognition Camera mode will automatically switch between day and night according to the schedule. 4.2.2 Video / Audio Configuration Go to ImageàVideo / Audio interface as shown below. In this interface, set the resolution, frame rate, bitrate type, video quality and so on subject to the actual network condition. -
Page 26: Osd Configuration
LPR-IP7 Automatic License Plate Recognition Camera same resolution, frame rate and image quality. Profile: For H.264. Baseline, main and high profiles are selectable. Send Snapshot: Set thee snapshot stream. Video encode slice split: If this function is enabled, smooth image can be gotten even though using the low-performance PC. -
Page 27: Video Mask
LPR-IP7 Automatic License Plate Recognition Camera Picture Overlap Settings: Check “OSD Content1”, choose “Picture Overlay” and click “Browse” to select the overlap picture. Then click “Upload” to upload the overlap picture. The pixel of the image shall not exceed 200*200, or it cannot be uploaded. -
Page 28: Roi Configuration
LPR-IP7 Automatic License Plate Recognition Camera To clear the video mask: Click the “Clear” button to delete the current video mask area. 4.2.5 ROI Configuration Go to ImageàROI Config interface as shown below. An area in the image can be set as a region of interest. -
Page 29: Lens Control
LPR-IP7 Automatic License Plate Recognition Camera 4.2.6 Lens Control This function is only available for the model with motorized zoom lens. Within this section, zoom and focus can be controlled. If the image is out of focus after a manual adjustment, one key focus can be used to set the focus automatically. -
Page 30: Alarm Configuration
LPR-IP7 Automatic License Plate Recognition Camera 4.4 Alarm Configuration 4.4.1 Motion Detection Go to AlarmàMotion Detection to set motion detection alarm. 1. Check “Enable” check box to activate motion based alarms. If unchecked, the camera will not send out any signals to trigger motion-based recording to the NVR or CMS, even if there is motion in the video. -
Page 31: Other Alarms
LPR-IP7 Automatic License Plate Recognition Camera sent into those addresses. Trigger FTP: If “Trigger FTP” and “Attach Picture” are checked, the captured pictures will be sent into FTP server address. Please refer to FTP configuration chapter for more details. 2. Set motion detection area and sensitivity. Click the “Area and Sensitivity” tab to go to the interface as shown below. - Page 32 LPR-IP7 Automatic License Plate Recognition Camera motion detection chapter for details. l SD Card Error When there are some errors in writing SD card, the corresponding alarms will be triggered. 1. Go to ConfigàAlarmàAnomalyàSD Card Error as shown below. 2. Click “Enable” and set the alarm holding time.
-
Page 33: Alarm In
LPR-IP7 Automatic License Plate Recognition Camera 2. Click “Enable” and set the alarm holding time. 3. Trigger alarm out. When the camera is disconnected, the system will trigger the alarm out. 4.4.3 Alarm In To set sensor alarm (alarm in): Go to ConfigàAlarmàAlarm In interface as shown below. -
Page 34: Alarm Out
LPR-IP7 Automatic License Plate Recognition Camera the relevant trigger items. Click “Apply settings to” to quickly apply the settings to the other alarm input. 4.4.4 Alarm Out This function is only available for some models. Go to ConfigàAlarmàAlarm Out. Alarm Out ID: For the model with two alarm output interfaces, please select the alarm out ID first as shown in the above left picture. -
Page 35: Alarm Server
LPR-IP7 Automatic License Plate Recognition Camera Day/Night Switch Linkage: Having selected this mode, select the alarm type and then choose to open or close alarm out when the camera switches to day mode or night mode. Timing: Select the alarm type. Then click “Add” and drag the mouse on the timeline to set the schedule of alarm out;... -
Page 36: Event Configuration
LPR-IP7 Automatic License Plate Recognition Camera 4.5 Event Configuration For more accuracy, here are some recommendations for installation. Cameras should be installed on stable surfaces, as vibrations can affect the accuracy of detection. Avoid pointing the camera at the reflective surfaces (like shiny floors, mirrors, glass, lake surfaces and so on). -
Page 37: Anpr Settings
LPR-IP7 Automatic License Plate Recognition Camera 2. Set the alarm holding time and alarm trigger options. The setup steps are the same as motion detection. Please refer to motion detection chapter for details. 3. Click “Save” button to save the settings. - Page 38 LPR-IP7 Automatic License Plate Recognition Camera 2. Enable ANPR. Select Save Panoramic Picture/Target Cutout to SD Card, License Plate Detection Area, and Capture Plate Absence Vehicle as needed. 3. Set alarm holding time and alarm trigger options. The alarm trigger setup steps are the same as motion detection setup.
- Page 39 LPR-IP7 Automatic License Plate Recognition Camera l Add vehicles Click “Add” to extend a vehicle adding box as shown in the above figure. Enter the license plate number, select list type, start and end time, enter owner, license plate type, phone number and so on.
- Page 40 LPR-IP7 Automatic License Plate Recognition Camera tab to go to the following interface. Set the fault tolerance, alarm list and check “alarm out”. Finally, click “Save” to save all the settings. Allow fault character(s) of the plate number: up to 2 characters are allowed. For example, if “2”...
- Page 41 LPR-IP7 Automatic License Plate Recognition Camera Multiple tolerant digital pairs can be set as needed. After all above information are set, go to the live interface and click to see the captured pictures as shown below. When the captured license plate is matched with the license plate of the vehicle database, the list type will be displayed under the license plate number.
- Page 42 LPR-IP7 Automatic License Plate Recognition Camera Try to avoid the objects that will block the camera, such as pillars, obstacles, doors, etc. Avoid the scenes with many trees or other moving objects (like humans, non-motor vehicles). The monitoring road shall be straight within 50 meters in front of/behind the location of the camera installation and make sure the camera points at the front or rear of the vehicle.
-
Page 43: Network Configuration
LPR-IP7 Automatic License Plate Recognition Camera shall range 2.5m to 3m. The distance of the captured area (L) shall be from 1.5m to 2m. The depression angle of the camera shall range from 0° to 5°. The pan angle of the camera shall range from 5° to 20°. - Page 44 LPR-IP7 Automatic License Plate Recognition Camera Use IP address (take IPv4 for example)-There are two options for IP setup: obtain an IP address automatically by DHCP and use the following IP address. Please choose one of the options as needed.
-
Page 45: Port
LPR-IP7 Automatic License Plate Recognition Camera 4.6.2 Port Go to ConfigàNetworkàPort interface as shown below. HTTP port, Data port and RTSP port can be set. HTTP Port: The default HTTP port is 80. It can be changed to any port which is not occupied. -
Page 46: Onvif
LPR-IP7 Automatic License Plate Recognition Camera 4.6.4 Onvif The camera can be searched and connected to the third-party platform via ONVIF/RTSP protocol. If “Activate Onvif User” is enabled in the device activation interface, the ONVIF user can be activated simultanously. When you connect the camera through the ONVIF protocol in the third-party platform, you can use this onvif user to connect. -
Page 47: Snmp
LPR-IP7 Automatic License Plate Recognition Camera 2. Apply for a domain name. Take www.dvrdyndns.com for example. Enter www.dvrdydns.com in the IE address bar to visit its website. Then Click the “Registration” button. Create domain name. After the domain name is successfully applied for, the domain name will be listed as below. -
Page 48: 802.1X
LPR-IP7 Automatic License Plate Recognition Camera 2. Check the corresponding version checkbox (Enable SNMPv1, Enable SNMPv2, Enable SNMPv3) according to the version of the SNMP software that will be used. 3. Set the values for “Read SNMP Community”, “Write SNMP Community”, “Trap Address”, “Trap Port”... -
Page 49: Rtsp
LPR-IP7 Automatic License Plate Recognition Camera To use this function, the camera shall be connected to a switch supporting 802.1x protocol. The switch can be reckoned as an authentication system to identify the device in a local network. If the camera connected to the network interface of the switch has passed the authentication of the switch, it can be accessed via the local network. -
Page 50: Rtmp
LPR-IP7 Automatic License Plate Recognition Camera “rtsp://IP address: rtsp port/profile3?transportmode=mcast”. Audio: Having entered the main/sub stream in a VLC player, the video and audio will play automatically. If “Allow anonymous login…” is checked, there is no need to enter the username and password to view the video. -
Page 51: Email
LPR-IP7 Automatic License Plate Recognition Camera 4.6.11 Email If you need to trigger Email when an alarm happens or IP address is changed, please set the Email here first. Go to ConfigàNetwork àEmail. Sender Address: sender’s e-mail address. User name and password: sender’s user name and password (you don’t have to enter the username and password if “Anonymous Login”... -
Page 52: Ftp
LPR-IP7 Automatic License Plate Recognition Camera Click the “Test” button to test the connection of the account. Recipient Address: receiver’s e-mail address. 4.6.12 FTP After an FTP server is set up, captured pictures from events will be uploaded to the FTP server. -
Page 53: Http Post
LPR-IP7 Automatic License Plate Recognition Camera Please refer to 4.1.4 Storage-Snapshot Setting for the parameter settings of the sending snapshots. Rule of FTP storage path: /device MAC address/event type/date/time/ For example: a license plate detection alarm occurs FTP file path:\00-18-ae-a8-da-2a\VEHICE\2021-01-09\14\... -
Page 54: Https
LPR-IP7 Automatic License Plate Recognition Camera Server address: the IP address/domain name of the third-party platform. Server port: the server port of the third-party platform. After the above parameters are set, click “Save” to save the settings. Then the camera will automatically connect the third-party platform. -
Page 55: Qos
LPR-IP7 Automatic License Plate Recognition Camera * If there is a signed certificate, click “Browse” to select it and then click “Install” to install it. * Click “Create a private certificate” to enter the following creation interface. Click the “Create” button to create a private certificate. Enter the country (only two letters available), domain (camera’s IP address/domain), validity date, password, province/state,... -
Page 56: Security Configuration
LPR-IP7 Automatic License Plate Recognition Camera 4.7 Security Configuration 4.7.1 User Configuration Go to ConfigàSecurityàUser interface as shown below. Add user: 1. Click the “Add” button to pop up the following textbox. 2. Enter user name in “User Name” textbox. -
Page 57: Online User
LPR-IP7 Automatic License Plate Recognition Camera 2. The “Edit user” dialog box pops up by clicking the “Modify” button. Admin can modify its password and change the user type and permission of other users here. Other users only can modify their password in this interface. -
Page 58: Block And Allow Lists
LPR-IP7 Automatic License Plate Recognition Camera 4.7.3 Block and Allow Lists Go to ConfigàSecurityàBlock and Allow Lists as shown below. The setup steps are as follows: Check the “Enable address filtering” check box. Select “Block/Allow the following address”, IPv4/IPv6 and then enter IP address in the address box and click the “Add”... -
Page 59: Maintenance Configuration
LPR-IP7 Automatic License Plate Recognition Camera Please set the password level and expiration time as needed. Password Level: Weak, Medium or Strong. Weak level: Numbers, special characters, upper or lower case letters can be used. You can choose one of them or any combination of them when setting the password. - Page 60 LPR-IP7 Automatic License Plate Recognition Camera Import & Export Settings Configuration settings of the camera can be exported form a camera into another camera. 1. Click “Browse” to select the save path for import or export information on the PC.
-
Page 61: Reboot
LPR-IP7 Automatic License Plate Recognition Camera 4.8.2 Reboot Go to ConfigàMaintenanceàReboot. Click the “Reboot” button to reboot the device. Timed Reboot Setting: If necessary, the camera can be set up to reboot on a time interval. Enable “Time Settings”, set the date and time and then click the “Save” button to save the settings. -
Page 62: Search
LPR-IP7 Automatic License Plate Recognition Camera 5 Search 5.1 Image Search Click Search to go to the interface as shown below. Images that are saved on the SD card can be found here. l Local Image Search Choose “Picture”—“Local”. Set time: Select date and choose the start and end time. - Page 63 LPR-IP7 Automatic License Plate Recognition Camera l SD Card Image Search Choose “Picture”—“SD Card”. Set time: Select date and choose the start and end time. Choose the alarm events at the bottom of the interface. Click to search the images.
-
Page 64: Video Search
LPR-IP7 Automatic License Plate Recognition Camera 5.2 Video Search 5.2.1 Local Video Search Click Search to go to the interface as shown below. Videos were recorded locally to the PC can be played in this interface. Choose “Record”—“Local”. Set search time: Select the date and choose the start and end time. -
Page 65: Sd Card Video Search
LPR-IP7 Automatic License Plate Recognition Camera Icon Description Icon Description Play button. After pausing video, Pause button click this button to continue playing. Stop button Speed down Speed up Watermark display Enable / disable audio; drag the slider to adjust the volume after enabling audio. - Page 66 LPR-IP7 Automatic License Plate Recognition Camera The time table can be shown in 24H/12H/2H/1H format by clicking the corresponding buttons. Video clip and downloading Search the video files according to the above mentioned steps. Select the start time by clicking on the time table.
-
Page 67: License Plate Recognition Result Search
LPR-IP7 Automatic License Plate Recognition Camera 6 License Plate Recognition Result Search Click Data RecordàVehicle Log tab to go to the license plate recognition result search interface. Set the start time and end time and click “Search” to view the license plate recognition result. - Page 68 LPR-IP7 Automatic License Plate Recognition Camera...
-
Page 69: Appendix
LPR-IP7 Automatic License Plate Recognition Camera Appendix Appendix 1 Troubleshooting How to find the password? A:Click “Forget Password” and then answer the security questions to reset the password. Fail to connect devices through IE browser. A: Network is not well connected. Check the connection and make sure it is connected well. - Page 70 LPR-IP7 Automatic License Plate Recognition Camera No sound can be heard. A:Audio input device is not connected. Please connect and try again. B: Audio function is not enabled at the corresponding channel. Please enable this function.
-
Page 71: Appendix 2 Specifications
LPR-IP7 Automatic License Plate Recognition Camera Appendix 2 Specifications Specification /Model 2MP ANPR Box Network Camera Image Sensor 1/2.8"CMOS Image Size 1920×1080 Electronic Shutter 1/3s~1/10000s Iris Type DC Iris Camera Min. llumination Color: 0.0026 lux@F1.2, AGC ON Lens Mount Day&Night... - Page 72 LPR-IP7 Automatic License Plate Recognition Camera Specification /Model 2MP ANPR Bullet Network Camera Image Sensor 1/2.8"CMOS Image Size 1920×1080 Electronic Shutter 1/3s~1/10000s Iris Type DC Iris 0.0026lux@F1.2, AGC ON; 0 lux with IR; Min. llumination 0.005 lux@F1.4, AGC ON; 0 lux with IR 2.8~12mm@F1.4, (motorized), horizontal field of view:103.4°~32.4°...
Need help?
Do you have a question about the LPR-IP7 and is the answer not in the manual?
Questions and answers