
Related Manuals for Rockford Fosgate Braga 200


Summary of Contents for Rockford Fosgate Braga 200
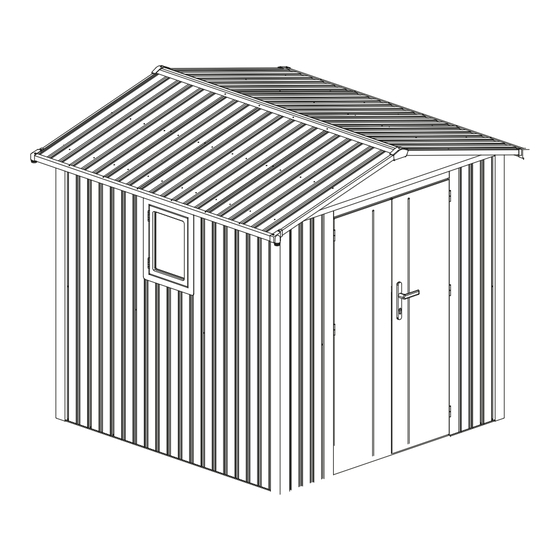
- Page 1 Garden Shed: Braga 200 RF2243360 + RF2244670 Instruction manual Montage handleiding Montageanleitung Manuel d’instruction V1.3.0...
- Page 2 Important Information: Prior to assembling your garden shed, please be aware that assembly may require building permits, depending on the location and surface area. It is crucial to consult with your local authorities to obtain the necessary information before proceeding with the assembly. Weather Conditions: We advise you not to use this product as a shelter in extreme weather conditions.
- Page 3 Product Assembly Guidelines: - We advise you to read the instructions very carefully before proceeding to assemble the garden shed. - Carefully select the location, avoiding rainy days, prevailing winds, and overhanging trees. We recommend you also check the surrounding area for any possible obstructions which may be near or within the product placement. - Mount on a flat and level foundation, preferably on concrete slab or concrete supports along the whole width and length of the flooring profiles.
- Page 4 Maintenance Recommendations: To ensure longevity and aesthetic appeal, regular maintenance is essential. We recommend: - Cleaning with fresh water using a soft sponge or cloth once or twice a year (or more). - Avoid using detergents or abrasive materials during cleaning. - Regularly checking the tightness of screws (at least once a year).
- Page 5 Belangrijke informatie: Voordat u uw tuinhuis monteert, dient u zich ervan bewust te zijn dat de bouw mogelijk een bouwvergunning vereist, afhankelijk van de locatie en oppervlakte. Het is cruciaal om voorafgaand aan de montage contact op te nemen met de lokale autoriteiten om de benodigde informatie te verkrijgen. Weersomstandigheden: Wij adviseren u om dit product niet als schuilplaats te gebruiken bij extreme weersomstandigheden.
- Page 6 Product Assemblage Richtlijnen: - Wij adviseren u om de instructies zeer zorgvuldig te lezen voordat u overgaat tot het monteren van de tuinhuis. - Selecteer de locatie zorgvuldig, vermijd regenachtige dagen, overheersende winden en overhangende bomen. We raden u ook aan om de omliggende omgeving te controleren op mogelijke obstakels die zich in de buurt van of binnen de plaatsing van het product kunnen bevinden.
- Page 7 Onderhoudsadviezen: Om de levensduur en esthetische aantrekkingskracht te waarborgen, is regelmatig onderhoud essentieel. Wij raden aan: - Schoon te maken met schoon water, met een zachte spons of doek een- of tweemaal per jaar (of vaker). - Vermijd het gebruik van reinigingsmiddelen of schurende materialen tijdens het reinigen. - Controleer regelmatig de stevigheid van schroeven (minstens eenmaal per jaar).
- Page 8 Wichtige Informationen: Bevor Sie Ihre Gerätehaus zusammenbauen, beachten Sie bitte, dass je nach Standort und Fläche möglicherweise Bauge- nehmigungen erforderlich sind. Es ist entscheidend, sich vor dem Zusammenbau mit den örtlichen Behörden zu beraten, um die erforderlichen Informationen zu erhalten. Wetterbedingungen: Wir raten Ihnen, dieses Produkt bei extremen Wetterbedingungen nicht als Unterschlupf zu verwenden.
- Page 9 Montagerichtlinien für das Produkt: - Wir empfehlen Ihnen, die Anleitung sorgfältig zu lesen, bevor Sie mit dem Aufbau des Gerätehaus beginnen. - Wählen Sie den Standort sorgfältig aus und vermeiden Sie Regentage, vorherrschende Winde und überhängende Bäume. Wir empfehlen Ihnen außerdem, die Umgebung auf mögliche Hindernisse in der Nähe oder innerhalb der Produktplatzierung zu überprüfen.
- Page 10 Wartungsempfehlungen: Um Langlebigkeit und ästhetischen Reiz sicherzustellen, ist regelmäßige Wartung unerlässlich. Wir empfehlen: - Ein- oder zweimal im Jahr (oder öfter) mit klarem Wasser und einem weichen Schwamm oder Tuch zu reinigen. - Verwenden Sie während der Reinigung keine Reinigungsmittel oder abrasive Materialien. - Überprüfen Sie regelmäßig die Festigkeit der Schrauben (mindestens einmal im Jahr).
- Page 11 Informations importantes: Avant d'assembler votre abri de jardin, sachez que la construction peut nécessiter des permis de construire, en fonction de l'endroit et de la surface. Il est essentiel de consulter les autorités locales pour obtenir les informations nécessaires avant de procéder à l'assemblage. Conditions météorologiques: Nous vous déconseillons d'utiliser ce produit comme abri dans des conditions climatiques extrêmes.
- Page 12 Directives d'assemblage du produit: - Nous vous conseillons de lire très attentivement les instructions avant de procéder au montage de l'abri de jardin. - Choisissez soigneusement l'emplacement, en évitant les jours de pluie, les vents dominants et les arbres en surplomb. Nous vous recommandons également de vérifier la zone environnante pour voir s'il n'y a pas d'obstacles qui pourrai- ent se trouver à...
- Page 13 Recommandations d'entretien: Pour garantir la longévité et l'attrait esthétique, un entretien régulier est essentiel. Nous recommandons : - Nettoyer à l'eau claire, à l'aide d'une éponge ou d'un chiffon doux, une à deux fois par an (ou plus souvent). - Éviter d'utiliser des détergents ou des matériaux abrasifs lors du nettoyage. - Vérifier régulièrement le serrage des vis (au moins une fois par an).
- Page 14 Required equipment/ Benodigde materialen/ Benötigte Ausrüstung/ Équipement requis Tools/ Gereedschap/ Werkzeug/ Outils: PPE/ PB/ PSA/ EPI:...
- Page 15 Area of installation requirement: 240cm 240cm...
- Page 16 Ac-P2 Amy-B: Anj-A27 T-P4 Anj-A25 Ac-A26 Anj-A27a Anj-B25 Anj-B28 Anj-A24 Anj-A25a Ac-P1 Anj-A25a Anj-A24 Ac-P1 Anj-A27a Anj-A21 Anj-B25 Anj-A22a T-P4 Anj-A25 Ac-A26 Anj-A27 Anj-A22 Ac-A18 Anj-A22a Anj-B23a Anj-A18 Anj-B23 Ac-P2 Anj-B23a Anj-A22a Anj-A22 Ac-A18 Anj-A18 Anj-A22a Anj-A21 Ab-4 Ab-4 Anj-B14 Anj-A12 Ab-4 Ana-B10...
-
Page 17: Table Of Contents
IMAGE IMAGE UNDER Anj-A24 Ac-A1 2064 1222 Anj-A25 Ana-A2 2064 1222 Anj-A25a Ana-B3 2064 1222 Anj-B25 Ana-A4 1130 1222 Ac-A26 2256.5 MIDDLE Anj-A5 Anj-A27 1925 1158.5 Anj-A5a Anj-A27a 1925 1158.5 Anj-B28 Ac-A6 1900 2256.5 ANNEX Ac-A7 1900 Ac-A8 1900 Ab-4 Anj-A37 Ac-A9 2024... -
Page 18: Ac-A1
EN: For anchoring instructions, please see steps 42 & 43. NL: Voor verankeringsinstructies, zie stappen 42 en 43. DE: Anweisungen zur Verankerung finden Sie in den Schritten 42 und 43 FR: Pour les instructions d'ancrage, veuillez consulter les étapes 42 et 43. Ac-A1 Ana-A2 Ana-B3... - Page 19 √ √...
- Page 20 √ √ √ √ √ √...
-
Page 21: Anj-A5
Anj-B40 Ac-A6 Anj-A5 Ana-B10 Anj-B41 ! Ac-A6 Anj-A5 Anj-A5 Anj-B40 Ac-A8 Ac-A11 Anj-B41... -
Page 22: Ac-A7
Anj-B40 Ac-A7 Anj-B41 Anj-B40 Ac-A6 Anj-A5a Anj-B41 Anj-A5a... -
Page 23: Ac-A9
Anj-B40 Ac-A6 Ac-A9 Anj-B41 Anj-B40 Ac-A6 Anj-B41... -
Page 24: Ana-B10
Anj-B40 Ac-A6 Anj-A5 Anj-B41 Ana-A40 Ac-A6 Ana-B10 Anj-B41... - Page 25 Anj-B40 Ac-A6 Anj-B41 Anj-B40 Ac-A6 Anj-A5a Anj-B41...
-
Page 26: Ac-A11
Anj-B40 Ac-A8 Ac-A11 Anj-B41 Ab-4 Anj-B41 Ab-4 Ab-4... -
Page 27: Anj-A12
Anj-B40 Anj-A13 Anj-B14 Anj-B41 Anj-B40 Anj-A12 Anj-B14 Anj-B41... - Page 28 Ab-4 Anj-B41 Ab-4 Ab-4 Ana-A4 Anj-B41 ! Ana-A2 Ana-A4...
-
Page 29: Ana-A15
Ana-A15 Ana-A15a Anj-B41 ! Anj-B40 Ana-A16 Ana-A16a Anj-B41 ! Ana-A4... -
Page 30: Ana-A17
Ana-A17 Anj-A44 ! Ana-A17 Ana-A17 Anj-A18 ! Anj-A18 Anj-A18 Anj-A12/13 Anj-A12/13 Ac-A6/8 Ac-A6/8... -
Page 31: Anj-A22A
Ac-A18 Anj-B41 ! Ac-A18 Ac-A18 Ac-A6/7 Anj-B14 Anj-B14 Ac-A6/7 Anj-A22 Anj-A22a Anj-B41 Anj-A22 Anj-A22a Anj-A22a Anj-A22a Anj-A22 Anj-A22a... -
Page 32: Anj-B23
EN: For instructions on placing window rubber, please see step 41. NL: Voor instructies over het plaatsen van raamrubber, zie stap 41. DE: Anweisungen zum Anbringen von Fenstergummi finden Sie am Schritt 41. FR: Pour obtenir des instructions sur la mise en place du caoutchouc de fenêtre, veuillez consulter l'étape 41. -
Page 33: Anj-A24
Anj-B40 Anj-A25 Anj-A25a Anj-B41 Anj-B40 Anj-B25 Anj-A24 Anj-B41 ! Anj-B25 Anj-A25a Anj-A24 Anj-A25... -
Page 34: Anj-A25A Anj-B25
Anj-B40 Anj-B25 Anj-A24 Anj-B41 ! Anj-A24 Anj-A24 Anj-B25 Anj-B25 Anj-B40 Anj-A25 Anj-A25a Anj-B41 ! Anj-A25a Anj-B25 Anj-A25 Anj-A24... -
Page 35: Anj-B28
Anj-B28 Anj-B40 Anj-B46 Anj-B40 Anj-B41... - Page 36 T-P4 Anj-B41 Anj-B40 Anj-B41 !...
-
Page 37: Ac-P1
EN: Use a sealant for all surfaces that is also waterproof. (Not included) NL: Gebruik siliconenkit die toepasbaar is voor alle oppervlakten en waterdicht is. (Niet inbegrepen) DE: Verwenden Sie einen Silikondichtstoff geeignet für alle Oberflächen und wasserfest ist. (Nicht im Lieferumfang enthalten) FR: Utilisez un mastic silicone adapté... -
Page 38: Anj-B41
Ac-A29 Ac-A29a Ana-54 Ana-55 Ana-56 Ana-57 Ana-58 Ab-50 Ana-P6 Anj-B41 ! Ana-P6... -
Page 39: Ana-A42 St4X10 X2
Ana-P7 Anj-B41 ! Ac-A7 Ana-P8 Ana-A42 Ana-P6 Ana-P8... - Page 40 Anj-A37 Anj-A21 Anj-A37 Anj-A37 Anj-A18 ! Ø6 30mm...
-
Page 41: Anj-B45
Anj-B45... - Page 42 De40 De8(X) De40 De41 De8(Y) De41 De41 De40...
- Page 43 De40 De40 De40 De40 De40...
- Page 44 De40...
- Page 45 De40 De40 Measure the desired pipe length...
- Page 46 De41 De43 De43 De44...
- Page 47 De40 De40 De41 De41 De40...
- Page 48 Witvrouwenbergweg 13B 5711 CN, Someren Nederland...
Need help?
Do you have a question about the Braga 200 and is the answer not in the manual?
Questions and answers