Table of Contents
Advertisement
Quick Links
Advertisement
Table of Contents

Related Manuals for AEG ORK6D391EW


Summary of Contents for AEG ORK6D391EW
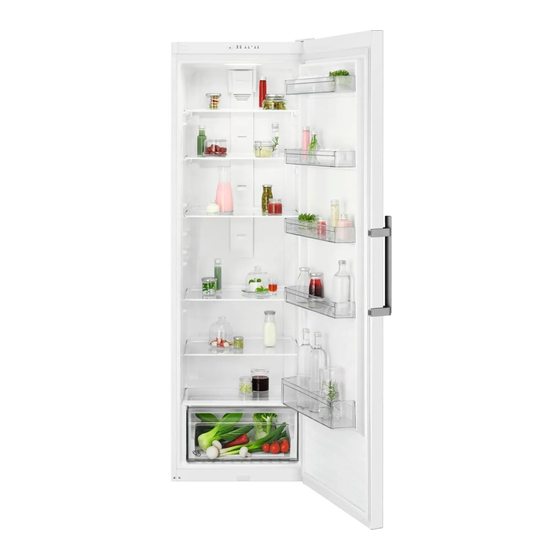
- Page 1 EN User Manual | Refrigerator ORK6D391EW aeg.com\register...
-
Page 2: Table Of Contents
Welcome to AEG! Thank you for choosing our appliance. Get usage advice, brochures, trouble shooter, service and repair information: www.aeg.com/support Subject to change without notice. CONTENTS 1. SAFETY INFORMATION................2 2. SAFETY INSTRUCTIONS................4 3. INSTALLATION....................6 4. OPERATION....................9 5. DAILY USE....................10 6. - Page 3 of age should be kept away from the appliance unless continuously supervised. • Children should be supervised to ensure that they do not play with the appliance. • Children shall not carry out cleaning and user maintenance of the appliance without supervision. •...
-
Page 4: Safety Instructions
• Clean the appliance with a moist soft cloth. Only use neutral detergents. Do not use abrasive products, abrasive cleaning pads, solvents or metal objects. • When the appliance is empty for long period, switch it off, defrost, clean, dry and leave the door open to prevent mould from developing within the appliance. - Page 5 • Connect the mains plug to the mains extreme physical conditions in household socket only at the end of the installation. appliances, such as temperature, Make sure that there is access to the vibration, humidity, or are intended to mains plug after the installation. signal information about the operational •...
-
Page 6: Installation
• Disconnect the appliance from the mains • The insulation foam contains flammable supply. gas. Contact your municipal authority for • Cut off the mains cable and discard it. information on how to discard the • Remove the door to prevent children and appliance correctly. - Page 7 CAUTION! Space required in use ² If you position the appliance against the 1900 wall, use back spacers provided or keep the minimum distance indicated in the installation instructions. CAUTION! ² the height, width and depth of the appliance including the handle, plus the space If you install the appliance next to a wall, necessary for free circulation of the cooling refer to the installation instructions to...
- Page 8 in the plug supplied, a 13 amp ASTA WARNING! approved (BS 1362) fuse must be used. This appliance must be earthed. WARNING! The manufacturer declines any liability should these safety measures not be A cut off plug inserted into a 13 amp observed.
-
Page 9: Operation
1. Peel off the liner from the back of the overlay. 2. Stick the overlay on the frame at the Keep the overlay away from children. bottom of the appliance, at a distance of Hazard of swallowing. min. 60 mm to 100 mm from the hinge. 60-100 mm 4. -
Page 10: Daily Use
Refer to the "Troubleshooting" chapter for more possible causes of triggering the alarm, and solutions on how to deactivate it. The set temperature will be reached within 24 hours. 4.6 Standby mode 4.4 Super Cool function Activate the Standby mode to switch off the cooling function and therefore lower the If you need to insert a large amount of food at energy consumption of the appliance. -
Page 11: Hints And Tips
To put the shelf back in: 1. Place the shelf flat on the door. 2. Push two sides of the shelf downwards at the same time so that the shelf fits both fasteners. 5.2 Movable shelves The walls of the refrigerator compartment are equipped with a series of runners so that the shelves can be positioned as desired. -
Page 12: Care And Cleaning
• Do not set too high temperature to save • To prevent food waste the new stock of energy unless it is required by the food should always be placed behind the characteristics of the food. old one. • Ensure a good ventilation. Do not cover 6.3 Hints for food refrigeration the ventilation grilles or holes. -
Page 13: Troubleshooting
7.3 Defrosting of the appliance 1. Disconnect the appliance from electricity supply. Frost is automatically eliminated from the 2. Remove all food. evaporator of the refrigerator compartment 3. Clean the appliance and all accessories. every time the motor compressor stops, 4. - Page 14 Problem Possible cause Solution The lamp is defective. Contact the nearest Authorized Service Centre. There is too much frost and ice. The door is not closed correctly. Refer to the "Closing the door" sec‐ tion. The gasket is deformed or dirty. Refer to the "Closing the door"...
-
Page 15: Noises
Only service is allowed to replace the lighting 2. If necessary, adjust the door. Refer to the device. Contact your Authorised Service "Installation" chapter. Centre. 3. If necessary, replace the defective door gaskets. Contact the Authorised Service 8.3 Closing the door Centre. -
Page 16: Environmental Concerns
minimum rear clearances shall be as stated contact the manufacturer for any other further in this User Manual at Chapter 3. Please information, including loading plans. 12. ENVIRONMENTAL CONCERNS appliances marked with the symbol with Recycle materials with the symbol . - Page 20 212003321-B-472023...
Need help?
Do you have a question about the ORK6D391EW and is the answer not in the manual?
Questions and answers