
Related Manuals for Russell Hobbs RHMT2513B


Summary of Contents for Russell Hobbs RHMT2513B
- Page 1 25L FAMILY SIZE MICROWAVE 1 YEAR WARRANTY RHMT2513B INSTRUCTIONS & WARRANTY INSTRUCTIONS & WARRANTY...
-
Page 2: Table Of Contents
Contents Safety Instructions ......3-10 Materials you can use in the microwave ......Materials to be avoided in the microwave ......oven Unpacking the microwave ......Product Overview ......Installation ......15-16 Control Panel & Features ......How to use the Microwave ...... - Page 3 IMPORTANT SAFEGUARDS General Safeguards • T o protect against electrical hazards do not immerse the power cord, plug, or microwave oven in water or any other liquid. • T his appliance is not intended for use by persons (including children) with reduced physical, sensory or mental capabilities, or lack of experience and knowledge, unless they have been given supervision or instruction concerning use of the appliance by a person responsible for their safety.
- Page 4 • D o not use the microwave oven cavity for storage purposes. Do not store combustible items such as bread, cookies, paper products etc. inside the oven • D o not use the microwave oven for the purpose of dehumidification. Do no dry clothes, newspapers or other materials in the microwave oven.
- Page 5 • D o not use in the bathroom or near any source of water • P lug into a wall socket that is properly installed and grounded. • D o not use on an inclined plane or unstable surface. • D o not use the microwave oven near or below any curtains or other combustible materials.
- Page 6 • T he turntable and turntable ring assembly must be in the oven during cooking in all cooking modes. Place the cookware gently on the turntable and handle it carefully to avoid possible breakage. • D o not operate the microwave oven unless there is food or liquid content inside.
- Page 7 • SCALDING HAZARD! Liquids, such as water, coffee or tea are able to be overheated beyond the boiling point without appearing to be boiling. Visible bubbling or boiling when the container is removed from the microwave oven is not always present.
-
Page 8: Safety Instructions
IMPORTANT SAFETY INSTRUCTIONS READ CAREFULLY AND KEEP FOR FUTURE REFERENCE PRECAUTIONS TO AVOID POSSIBLE EXPOSURE TO EXCESSIVE MICROWAVE ENERGY • D o not attempt to operate this microwave oven with the door open as this can result in harmful exposure to microwave energy. The door is fitted with safety interlock switches that prevent the microwave oven from operating with the door open. - Page 9 Please ensure cooking times are correctly set as overcooking may result in the FOOD catching fire and subsequent damage to your microwave oven. ead these instructions before using your microwave oven. Keep this booklet in a safe place for future reference. When using electrical appliances, basic safety precautions should always be followed.
- Page 10 Cookware Microwave Glass plate, Turntable ring assembly and Turntable shaft (provided) Yes Heat–Resistant Glass Non Heat–Resistant Glass Heat–Resistant Ceramics Microwave–Safe Plastic Dish Kitchen Paper/Paper towel Metal Tray/Tin Metal Rack Aluminium Foil & Foil Container ** CAUTION: Microwaving with the metal rack, tray, foil, etc. may cause arcing / sparks.
- Page 11 MATERIALS YOU CAN USE IN THIS MICROWAVE OVEN NOTE: Always try to use items labelled as microwave safe to minimise any uncertainty. Browning dish Follow browning dish manufacturer’s instructions. NOTE: An overly hot browning dish sitting directly on the glass turntable could cause the turntable to break! Dinnerware Microwave-safe only.
- Page 12 MATERIALS TO BE AVOIDED IN MICROWAVE OVEN Aluminium tray May cause arcing. Transfer food into microwave-safe dish. Food carton with metal handle May cause arcing. Transfer food into microwave-safe dish. Metal or metal trimmed utensils Metal shields the food from microwave energy. Metal trim may cause arcing. Metal twist ties May cause arcing and could cause a fire in the microwave oven.
-
Page 13: Unpacking The Microwave
UNPACKING THE MICROWAVE NAMES OF MICROWAVE OVEN PARTS AND ACCESSORIES Remove the microwave oven and all materials from the carton and oven cavity. BEFORE YOU USE YOUR MICROWAVE OVEN Remove all the packaging. Do not remove the large piece of cardboard from the right hand side of the cavity wall (Refer to the below image). -
Page 14: Product Overview
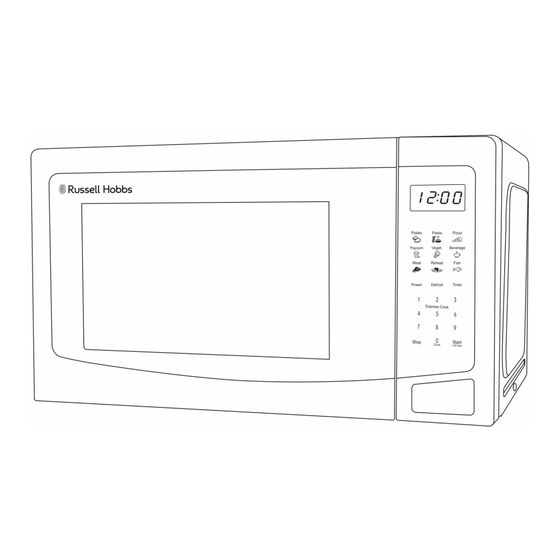
PRODUCT OVERVIEW Safety interlock latches Screen display Door assembly and Control panel window Wave guide cover (do Roller ring not remove) Coupling Glass Turntable... -
Page 15: Installation
INSTALLATION Remove all packing material and accessories. 30cm Examine the microwave oven for any damage 7.5cm such as dents or a broken door. Do not install if 20cm microwave oven is damaged in any way. 20cm Cabinet: Remove any protective film found on the microwave oven cabinet and control panel surfaces. - Page 16 To assemble the turntable, follow the steps below in number order. STEP 1 The turntable coupling should slot into the centre of microwave STEP 2 The turntable ring slots into the indents in the microwave base. STEP 3 The glass tray should align with the turntable coupling.
-
Page 17: Control Panel & Features
CONTROL PANEL & FEATURES DISPLAY Cooking time, power, indicators and clock time are displayed. AUTO COOK MENUS Press to select which type of food you want to cook from the 8 auto cook menus, including potatoes, pasta, pizza, popcorn, vegetables, beverage, meat and fish. Confirm using the ‘START+30 Sec.’... - Page 18 Reheat function Repeatly press the REHEAT button till the screen displays the required weight, the lowest is at 200g, 400g, 600g, 800g and up to 1000g. After you have selected the weight, press the START +30 Sec. button to start reheating the food on full power. When reheating has finished, the microwave will beep 3 times and the screen display will flash, ‘End’...
- Page 19 Express cooking For quick and easy microwave cooking, you can either press the number buttons or the START +30 Sec. button to set the time and start the cooking on full power. • Method 1: press the 1-6 number buttons to select cooking time. Press 1 for 1 minute, press 2 for 2 minutes, and so on.
- Page 20 Auto cooking function There are 8 auto cook menus to choose from, these are potatoes, pasta, pizza, popcorn, vegetables, beverage, meat and fish. You will need to use your discretion regarding food type, temperature and weight as times may vary – below is a guideline for each auto cooking setting: Auto Cook Method...
- Page 21 COOKING TIME If you are unsure of cooking times it is advisable to start with a short cooking time and monitor cooking progress before adding further time. Overcooking could lead to a risk of fire. Ensure food is cooked thoroughly before consuming. COOKING FOOD EVENLY Foods such as meat should be turned frequently to ensure more even cooking results.
-
Page 22: Problem Solving
PROBLEM SOLVING WARNING: To reduce the risk of personal injury, always unplug the microwave before performing maintenance or trouble shooting checks. The microwave oven may cause interference to your radio, TV or similar equipment. If this happens, you can stop the interference by moving the radio, TV or equipment as far away from your microwave oven as possible. -
Page 23: Warranty
Problem Potential reason Potential solution Burnt on food debris in the microwave, on the waveguide and behind the waveguide 1. Burnt on food debris can cause the microwave to ‘spark’. This is because burnt on debris can be focused on by the microwaves and spark. - Page 24 Problem Potential reason Potential solution Small amounts of condensation can be expected when using the microwave. As the 1. Food that is being food/beverage inside the microwave is heated it cooked will produce steam, some of which will form condensation inside the microwave cavity. Condensation or excess water Cooling vents allow the heat and steam to...
- Page 25 Problem Potential reason Potential solution Check that the glass turntable has been 1. Glass turntable placed correctly on the turntable and is not fitted hitting the walls/doors of the microwave incorrectly during operation. Too noisy 2. Dishes/plates are Check that the dishes/plates are the correct size for the microwave and that they are not large for the hitting the walls/door of microwave during...
- Page 26 Spectrum Brands Australia Pty Ltd Spectrum Brands New Zealand Ltd Locked Bag 3004 Braeside PO Box 9817 Newmarket Victoria 3195 Australia Auckland 1149 New Zealand Customer Service in Australia Customer Service in New Zealand TollFree: 1800 623 118 TollFree: 0800 736 776 Email: info@spectrumbrands.com.au Email: service@spectrumbrands.co.nz Website: www.spectrumbrands.com.au...
- Page 27 Warranty Conditions 4. The Goods must be used in accordance with the manufacturer’s instructions. This Warranty does not apply should the defect in or failure of the Goods be attributable to misuse, abuse, accident or non-observance of manufacturer’s instructions on the part of the user.
- Page 28 R1.6 RUSSELL HOBBS® and logo are Trade Marks of Spectrum Brands, Inc., or one of its subsidiaries. Manufactured in China to Spectrum Brands specifications. © 2021 Spectrum Brands, Inc.
Need help?
Do you have a question about the RHMT2513B and is the answer not in the manual?
Questions and answers
pressing the O button beeps three time and wont set the clock
If the 0/CLOCK button on the Russell Hobbs RHMT2513B beeps three times and won't set the clock, it likely means the clock-setting process is being done incorrectly. To set the clock, you must press the 0/CLOCK button until the microwave beeps once and displays 1:00, then use the number buttons to enter the correct time. Three beeps typically indicate an invalid input or error.
This answer is automatically generated