Table of Contents
Advertisement
Advertisement
Table of Contents

Related Manuals for Russell Hobbs RHMD702


Summary of Contents for Russell Hobbs RHMD702
- Page 1 Compact Digital Microwave User Guide Model Number: RHMD702 For Customer Services & Spare Parts please call 0345 209 7461 Opening times: Monday - Friday 8am – 8pm & Saturday 9am – 1pm Or visit us at www.productcareuk.com PLEASE RETAIN FOR FUTURE...
-
Page 2: Table Of Contents
CONTENTS Page(s) Safety instructions About your microwave 10-11 Product information Unpacking the microwave Product overview Microwave oven installation 15-16 Turntable installation 17-18 Control panel How to use the microwave 20-26 Cooking tips Cleaning the microwave Problem solving 29-32 Guarantee & customer services Spare parts Connection to the mains supply 35-36... -
Page 3: Safety Instructions
SAFETY INSTRUCTIONS IMPORTANT SAFETY INSTRUCTIONS READ CAREFULLY AND KEEP FOR FUTURE REFERENCE WARNING: • If the door or door seals are damaged, the oven must not be operated until it has been repaired by a competent person. • It is hazardous for anyone other than a competent person to carry out any service or repair operation that involves the removal of a cover which gives protection against exposure to microwave energy. - Page 4 SAFETY INSTRUCTIONS READ CAREFULLY AND KEEP FOR FUTURE REFERENCE WARNING: • This microwave is intended for heating food and beverages only. The drying of food or clothing and heating of warming pads, wheat bags, slippers, sponges, damp cloth and similar is extremely dangerous and may lead to risk of injury, ignition or fire.
- Page 5 SAFETY INSTRUCTIONS READ CAREFULLY AND KEEP FOR FUTURE REFERENCE WARNING: • When heating or cooking food or liquid, remember that there are certain foods (such as, jam, Christmas pudding, and mincemeat) which heat up very quickly. • Microwave heating of beverages can result in delayed eruptive boiling, therefore care must be taken when handling the container.
- Page 6 SAFETY INSTRUCTIONS READ CAREFULLY AND KEEP FOR FUTURE REFERENCE WARNING: • If materials inside the oven smoke or catch fire, keep the oven door closed to stifle the flames, turn the oven off at the wall switch, or shut the power off at the fuse or circuit-breaker panel.
- Page 7 SAFETY INSTRUCTIONS READ CAREFULLY AND KEEP FOR FUTURE REFERENCE WARNING: • Do not use melamine dishes as they contain a material which will absorb microwave energy. This may cause the dishes to crack or burn, and will slow down the cooking speed. •...
- Page 8 SAFETY INSTRUCTIONS READ CAREFULLY AND KEEP FOR FUTURE REFERENCE WARNING: • On the right hand wall of the cavity is the wave guide cover, microwaves are passed through this to enable your food to cook. It is important that this wave guide cover is kept clean at all times.
- Page 9 SAFETY INSTRUCTIONS READ CAREFULLY AND KEEP FOR FUTURE REFERENCE WARNING: • Regularly remove the glass turntable to clean it, wash it in warm soapy water or a dishwasher. Regularly clean the turntable support and oven floor. Simply wipe the bottom surface of the oven with mild detergent and water, then dry.
-
Page 10: About Your Microwave
For added peace of mind, the RHMD702 enables a child lock to be set, meaning cooking cannot be started or interrupted. Cleaning is straight forward, simply wipe the exterior, interior and wave guide cover with a damp soft cloth to maintain peak performance. -
Page 11: About Your Microwave
ABOUT YOUR MICROWAVE How do microwaves work? Microwaves are high-frequency electromagnetic waves similar to radio waves. While radio waves may vary in length from one metre to many kilometres, microwaves are very short (less than 12.5 centimetres.) Microwaves do not make any heat themselves but cause water molecules in food to vibrate. -
Page 12: Product Information
PRODUCT INFORMATION Rated Voltage 220-240V/50Hz Rated Input Power (Microwave) 1150W Rated Output Power (Microwave) 700W Oven Capacity Turntable Diameter 24.5cm External Dimensions (HxWxD) 25.6 x 45.1 x 32.6cm Net Weight; Approx 10.4Kg Number of Power Levels 5 + Defrost Turntable coupling, Turntable Accessories Included ring, Glass turntable and Wave guide cover. -
Page 13: Unpacking The Microwave
UNPACKING THE MICROWAVE Before you use your microwave oven 1. Remove all the packaging. Do not remove the small piece of card from the right hand side of the cavity wall (Refer to the below image). This is called a wave-guide cover and allows the microwaves to pass through to cook the food. -
Page 14: Product Overview
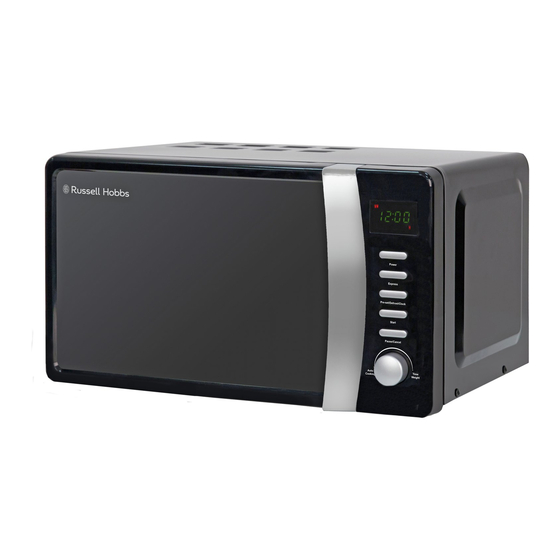
PRODUCT OVERVIEW 1. Safety interlock latches 2. Door assembly and window 3. Glass turntable 4. Microwave top 5. Screen display 6. Turntable coupling 7. Turntable ring 8. Control panel - buttons and dial 9. Waveguide cover (do not remove) For Customer Services & Spare Parts please call 0345 209 7461 Opening times: Monday - Friday 8am –... -
Page 15: Microwave Oven Installation
MICROWAVE OVEN INSTALLATION • Place the oven as far away from radios and televisions as possible. Using the oven may cause interference with the reception. • Plug the oven into a suitable 13 amp mains socket, make sure the voltage is the same as on the rating label (do not use extension cables or mains socket adaptors.) •... -
Page 16: Microwave Oven Installation
MICROWAVE OVEN INSTALLATION The minimum installation height is 85cm. A minimum clearance of 7.5cm is required between the oven and any adjacent walls. Leave a minimum clearance of 30cm above the oven. WARNING: DO NOT install the oven over a cooker or other heat or steam producing appliance as this will damage the microwave oven. -
Page 17: Turntable Installation
TURNTABLE INSTALLATION • Before first use, check that any securing tape and all packaging has been removed from the glass tray and turntable ring assembly. • These parts must never be restricted from rotating. • Never place the glass tray upside down. •... - Page 18 TURNTABLE INSTALLATION The glass tray, turntable ring, and turntable coupling assembly must always be used during cooking (as shown below). • Do not place the food directly onto the glass tray, always place on or in suitable microwaveable cookware. Please check that crockery is microwave safe before using. •...
-
Page 19: Control Panel
CONTROL PANEL Screen Display Cooking time, power, action indicators, and clock time are displayed. 1. Power Press this button a number of times to set a cooking power level. 2. Express Press to automatically add 30 seconds to the cooking time, up to 10 minutes. -
Page 20: How To Use The Microwave
HOW TO USE THE MICROWAVE Turn on the power Connect the main plug into a suitable 13amp mains socket. Note: Make sure the voltage is the same as on the rating label located on the back of the microwave (do not use extension cables or mains socket adaptors.) The microwave oven will flash and beep once. - Page 21 HOW TO USE THE MICROWAVE Microwave cooking Once you have correctly installed the unit, turned on the power and set the clock, you are ready to start cooking. Your microwave has 5 power levels, the lowest at 20%, then 40%, 60%, 80%, up to 100% (or full power.) Most recipes are cooked on full power –...
- Page 22 HOW TO USE THE MICROWAVE Auto reminder When cooking has finished the microwave will beep three times and the screen display will flash. ‘End’ will be displayed to indicate that the microwave has stopped operating and prompt you to take out your food. If you do not press the ‘Pause/Cancel’...
- Page 23 Auto cooking function As a digital microwave, the RHMD702 features a default cooking menu, convenient for simple cooking. If the colon on the display is flashing you are able to activate the auto menu by turning the 'Auto Cooking, Time/Weight' dial clockwise.
- Page 24 HOW TO USE THE MICROWAVE Display Setting Food Type Method Heat a cup of approx. 500ml liquid. Beverage Make sure to use a wide top cup. To cook potato slices, cut into approx. 5mm width and length, to total weight Potato of approx.
- Page 25 HOW TO USE THE MICROWAVE 3. Turn the 'Auto Cooking, Time/Weight' dial clockwise until the display shows ‘12:'. Press the ‘Pre-Set/Defrost/Clock’ dial to confirm. 4. The display will show ‘12:00' and the clock symbol will continue to flash. 5. Set the minutes by turning the 'Auto Cooking, Time/Weight’ dial clockwise until the display shows ‘12:30'.
-
Page 26: How To Use The Microwave
HOW TO USE THE MICROWAVE Child lock function The child lock function is ideal to stop children from altering cooking times if unsupervised. No buttons will function in this mode. To set the lock, press and hold the ‘Pause/Cancel’ button for 3 seconds. The lock is now functional. -
Page 27: Cooking Tips
COOKING TIPS Defrosting tips Microwaves penetrate around 4cm into most food. To maximize defrosting effectiveness follow the below guidelines. 1. For thick foods, turn regularly during operation in order to defrost evenly. 2. If food weighs over 500g, it is advised to turn at least 2 times. 3. -
Page 28: Cleaning The Microwave
CLEANING THE MICROWAVE • Before you clean the oven, turn it off and unplug it. • Keep the inside of the oven clean. When food or liquids stick to the oven walls, wipe with a damp cloth. We recommend that you do not use harsh detergent or abrasives. -
Page 29: Problem Solving
PROBLEM SOLVING WARNING: To reduce the risk of personal injury, always unplug the microwave before performing maintenance or trouble shooting checks. The microwave oven may cause interference to your radio, TV or similar equipment. If this happens, you can stop the interference by moving the radio, TV or equipment as far away from your microwave oven as possible. - Page 30 PROBLEM SOLVING Problem Potential reason Potential solution Spillages or splashes can burn and catch fire, all food that is put into the microwave should be appropriately covered. All spillages or splashes must be cleaned, and all areas of microwave cleaned after each use. Burnt on food debris in the microwave, on the wave guide and the behind the wave guide can cause the microwave to 'spark'.
- Page 31 PROBLEM SOLVING Problem Potential reason Potential solution By the very nature of how a microwave works, it ‘excites’ the water molecules in the food it is heating, causing them to move about and generate heat from within the food. Often when the food heats up it reaches the point where steam is released.
- Page 32 PROBLEM SOLVING Problem Potential reason Potential solution Check that the glass turntable has been placed correctly on 1. Glass turntable fitted the turntable and is not stopping the door from shutting incorrectly Door not correctly. shutting/ If the microwave is within its warranty period, please locking 2.
-
Page 33: Guarantee & Customer Services
GUARANTEE & CUSTOMER SERVICES At Russell Hobbs, we take all our customer feedback seriously. Feel free to contact our Product Care Team, on 0345 209 7461 Monday – Friday: 8am-8pm & Saturday: 9am – 1pm, who will be more than happy to assist you. -
Page 34: Spare Parts
SPARE PARTS To check the availability of the following spare parts, simply contact our friendly Customer Services team using the details provided at the bottom of this page. Turntable coupling Turntable ring Wave Guide cover Glass turntable For Customer Services & Spare Parts please call 0345 209 7461 Opening times: Monday - Friday 8am –... -
Page 35: Connection To The Mains Supply
CONNECTION TO THE MAINS SUPPLY WARNING- THIS APPLIANCE MUST BE EARTHED This appliance is designed to operate from a mains supply of 220-240V~ 50Hz. Check that the voltage marked on the product corresponds with your supply voltage. This product is fitted with a 13A plug complying with BS1363. If this plug is unsuitable or needs to be replaced, refer to customer services. -
Page 36: Connection To The Mains Supply
CONNECTION TO THE MAINS SUPPLY For UK use only – PLUG • As the colours of the wires in the mains lead of this appliance may not correspond with the coloured markings identifying the terminals in your plug, proceed as follows: •... -
Page 37: Notes
NOTES... - Page 38 NOTES...
- Page 39 NOTES...
-
Page 40: Disposal Information
Or visit us at www.productcareuk.com Revision 1b Model: RHMD702 This symbol is known as the 'Crossed-out wheelie bin Symbol'. When this symbol is marked on a product/batteries, it means that the product/batteries should not be disposed of with your general household waste. Only discard electrical/electronic/battery items in separate collection schemes, which cater for the recovery and recycling of materials contained within.
Need help?
Do you have a question about the RHMD702 and is the answer not in the manual?
Questions and answers
Turntable has stopped going round
The turntable on the Russell Hobbs RHMD702 microwave may have stopped rotating due to a problem with the turntable coupling, turntable ring, or motor. These parts are essential for rotation, and if any are damaged or not properly in place, the turntable will not rotate.
This answer is automatically generated