Advertisement
Advertisement
Table of Contents

Subscribe to Our Youtube Channel
Related Manuals for Cielo Smart Thermostat Eco

Summary of Contents for Cielo Smart Thermostat Eco
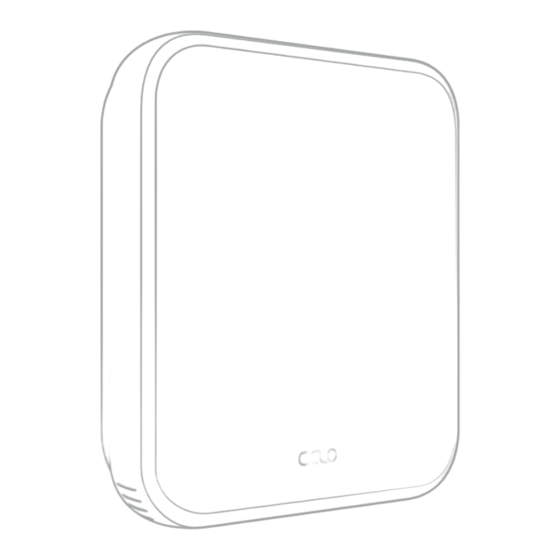
- Page 1 Cielo Smart Thermostat User Manual...
-
Page 2: Let's Start
Thanks for choosing Cielo for your home climate control! Cielo Smart Thermostat Eco is designed and optimized to save energy while prioritizing comfort. Simple to Install Easy to Use Saves You Energy Let’s Start! -
Page 3: Tools You Need
Tools you need: Drill for mounting anchors (3/16” drill bit) Small flathead screwdriver Phillips screwdriver Wire stripper (optional) Hammer (optional) Pencil (optional) -
Page 4: Included In The Box
Included in the box: Cielo Smart Thermostat Eco Thermostat Backplate C-Wire Adapter User Manual and Wire Labels Thermostat Wall Plate Mounting Screws With Drywall Anchors... -
Page 5: Getting Help
Getting Help No long queues, no bots, no delays. We answer 98% calls in less than 2 minutes and guarantee that you will talk to a REAL person. Visit our website: cielowigle.com and select support to access user guides. Email us at: support@cielowigle.com Call us at: +1 (425) 529-5775 9 AM - 9 PM ET, Mon-Fri... - Page 6 Let’s Install Your Thermostat...
- Page 7 Step 1: - Power off your HVAC system using: Safety First The master switch The circuit breaker...
- Page 8 Step 2: To be on the safe side, ensure that your system is completely switched off. Double-check that: No air is coming out of the air vents. Main flame is extinguished in the case of a boiler.
- Page 9 Step 3: Go to your already installed thermostat and remove it from the wall.
- Page 10 V AC If you find any of the above indicators, please contact Cielo Support for assistance (visit page 5 for contact details). In case of no such indicators, go to the next page. WARNING: Cielo Smart Thermostat Eco only works with 24V AC.
- Page 11 Step 5: Grab your smartphone and take a picture of your old thermostat wiring.
- Page 12 Step 6: Does your old thermostat have a C-Wire connection? G Y W C G Y W C Continue to Section 1 Continue to on page 15 the next page...
- Page 13 If your system has any of the following wires, it should work with the C-Wire Adapter. 4/5 Wires 3/4 Wires Y/Y1 Y/Y1 W/W1 Y W C Y W C 3/4 Wires G Y W C Please continue to Section 2 on page 25...
- Page 14 If your system has these wires: G Y W C Contact Cielo Support; we will help you with the installation. Email us at: support@cielowigle.com Call us at: +1 (425) 529-5775 9 AM - 9 PM ET, Mon-Fri...
- Page 15 Section 1 G Y W C Installing Your Cielo Smart Thermostat Eco With a C-Wire...
- Page 16 Section 1 Step 7: Disconnect the old thermostat wires one by one and mark them using the wire labels (included in the box). Jumper wire is not required with your new thermostat. Remove the mounting plate of your old thermostat.
- Page 17 Section 1 Step 8: Optional: You may use the provided wall plate to hide any marks or holes on the wall left by your old thermostat installation.
- Page 18 Section 1 Step 9: Take out the labeled wires through the hole in the middle of the Cielo Smart Thermostat Eco backplate. Screw in the backplate using the provided pair of drywall anchors and screws.
- Page 19 Step 10: Do you have more than one R-Wire? (That includes R, R , and R Insert your wires: Insert your single R, R , or R wire into R or R the R terminal.
- Page 20 Section 1 Step 11: Insert the remaining wires into their corresponding terminals from the side (press terminal block buttons for ease of insertion).
- Page 21 Section 1 Step 12: Gently push the excessive wires back into the wall hole to ensure that no drafts are coming from it. Take a picture of the backplate. You may need it at the time of registration.
- Page 22 Section 1 Step 13: Align your Cielo Smart Thermostat Eco with the backplate and press gently to fix it properly.
- Page 23 Section 1 Step 14: Go to your HVAC system and turn on the power from the master switch or circuit breaker.
-
Page 24: Installation Complete
Installation Complete! Go to page 42 for steps to register your thermostat. - Page 25 Section 2 G Y W C Installing Your Cielo Smart Thermostat Eco Without a C-Wire...
- Page 26 Section 2 Step 7: Take out the C-Wire Adapter (CWA) from the Cielo Smart Thermostat Eco box. (Ensure that you have already completed steps 1-5 of this guide)
- Page 27 Section 2 Step 8: Grab the C-Wire Adapter, wire labels, tools, your smartphone, and go to your HVAC system.
- Page 28 Section 2 Step 9: Take off your HVAC system’s cover to access the control board and take a picture of the connected wires. You may need it at a later stage. Control board WARNING: Proceed with caution, as HVAC systems contain high-voltage wires.
- Page 29 Ignore any extra wires going into the terminals. Note: In the case of a two-transformer system (wires connected to both R and R terminals at the control board), please contact Cielo support to help you with the installation. Call: +1 (425) 529-5775 Email: support@cielowigle.com...
- Page 30 Section 2 Step 11: Disconnect the labeled R, Y, G, and W wires from the control board.
- Page 31 Section 2 Step 12: Securely connect the wires from the control board to their matching terminals on the CWA.
- Page 32 Section 2 Step 13: Securely connect all the wires coming out of the C-Wire Adapter to the corresponding terminals on the control board of your HVAC system.
- Page 33 Section 2 Step 14: Place/mount the CWA at a suitable location inside your HVAC system. Close the HVAC cover panel securely and return to your old thermostat.
- Page 34 Section 2 Step 15: Disconnect the old thermostat wires one by one and mark them using the wire labels (included in the box). Jumper wire is not required with your new thermostat. Remove the mounting plate of your old thermostat.
- Page 35 Section 2 Step 16: Optional: You may use the provided wall plate to hide any marks or holes on the wall left by your old thermostat installation.
- Page 36 Section 2 Step 17: Take out the labeled wires through the hole in the middle of the Cielo Smart Thermostat Eco backplate. Screw in the backplate using the provided pair of drywall anchors and screws.
- Page 37 Section 2 Step 18: First, connect these 3 wires as shown: Y/Y1 Then, connect the remaining wires to their corresponding terminals (press terminal block buttons for ease of insertion).
- Page 38 Section 2 Step 19: Gently push the excessive wires back into the wall hole to ensure that no drafts are coming from it. Take a picture of the backplate. You may need it at the time of registration.
- Page 39 Section 2 Step 20: Align your Cielo Smart Thermostat Eco with the backplate and press gently to fix it properly.
- Page 40 Section 2 Step 21: Go to your HVAC system and turn on the power from the master switch or circuit breaker.
- Page 41 Installation Complete! Continue to the next page for steps to register your thermostat.
- Page 42 Registering Your Thermostat via the Cielo Home App...
- Page 43 Prior to Registration 13:37 Bluetooth Icon Cool Auto Heat Following Schedule Permanent Hold Circ Temporary Hold Auto Cancel Hold Quiet Sensor Linked Heating to Cooling to Aux Heat On Fan On Reset First, check that your thermostat set points are 00. If not, press and hold the Temperature Up and Presets buttons simultaneously until all the buttons vanish.
- Page 44 Prior to App Installation Make sure your smartphone’s Bluetooth is turned ON. ○ Make sure your smartphone’s Wi-Fi is turned ON. ○ Make sure your smartphone has internet access. ○ Make sure you have a working internet ○ connection on your Wi-Fi router. Make sure there is no proxy server or ○...
- Page 45 App Installation & Registration iOS / Android Install the ‘Cielo Home’ app from the App Store/Play Store. Search for the Cielo Home app or scan the QR code provided below. Log in to the app if you already have an account;...
- Page 46 Note for iOS users: For iOS 13.0 & above, location permission is required to ○ complete the registration process. You may disable it later. Note for Android users: For Android OS 8.1 & above, location permission is required to ○ complete the registration process.
-
Page 47: Device Registration
Section 3 Device Registration iOS / Android Open the Cielo Home app, tap ‘Add Device’ on the home screen, and select Thermostat Eco from the list of devices. If you are already using a Cielo device, tap ‘+’ on the home screen to... - Page 48 Section 3 Tap ‘Continue’ to start the registration process.
- Page 49 Section 3 Please give necessary permissions and tap 'Continue', your thermostat will appear on the screen. Follow the on-screen instructions to link your Thermostat Eco with the Cielo Home app.
- Page 50 Section 3 After the registration process is complete, tap 'Done', and your Thermostat Eco will appear on the Home Screen.
- Page 51 Section 3 Enjoy Unlimited Functionalities Settings Mode Settings Presets Fan Settings Cool Set Point (slide to adjust) Heat Set Point Indoor Temperature (slide to adjust) Indicator Indoor Temperature Indoor Humidity Heat Set Point Cool Set Point (tap to adjust) (tap to adjust) Hold Settings Navigation Bar...
-
Page 52: Troubleshooting
Troubleshooting If your Cielo Smart Thermostat Eco doesn’t turn on, please try these steps: Close your HVAC panel properly, as some systems may not work if the panel isn’t fully closed. Check the backplate wire connections and ensure they are inserted properly into the terminals. - Page 53 On-Device Display 1. Menu Button 8. Schedule Set Indicator 14. Indoor Temperature 2. Temperature Up & Down Buttons 9. Wake Up/Hold Settings 15. Fan Settings 3. Set Point Temperatures Button 16. No Internet Access 4. Hold Status 10. Presets Button 17.
- Page 54 Touch and hold the Temperature Up and Down buttons simultaneously until the lock icon on the top right of the screen turns solid or disappears. Resetting the Wi-Fi of Smart Thermostat Eco: Touch and hold the Temperature Up and Hold Settings buttons simultaneously until the Wi-Fi icon disappears, and the Bluetooth icon starts blinking.
- Page 55 1. WHAT IS COVERED? Cielo WiGle, Inc. (“Cielo”), warrants to the owner of the Cielo product contained in this box (the “Product”) that the Product will be free from defects in materials and workmanship for a period of three years from the date of delivery following the original retail purchase (the “Warranty Period”). If the Product fails to conform to this Limited Warranty during the Warranty Period, Cielo will, at its sole discretion, either (a) repair or replace the defective Product or component;...
- Page 56 For any queries, visit: cielowigle.com Call: +1 (425) 529-5775 Email: support@cielowigle.com Cielo WiGle, Inc. Redmond, WA, USA All rights reserved.
Need help?
Do you have a question about the Smart Thermostat Eco and is the answer not in the manual?
Questions and answers